Things practiced: going on, making a life the only way anyone can, step by step
I shoudn’t be but I’m dazed by how much fits into ten years and how little, how much has changed and how everything is just the same.
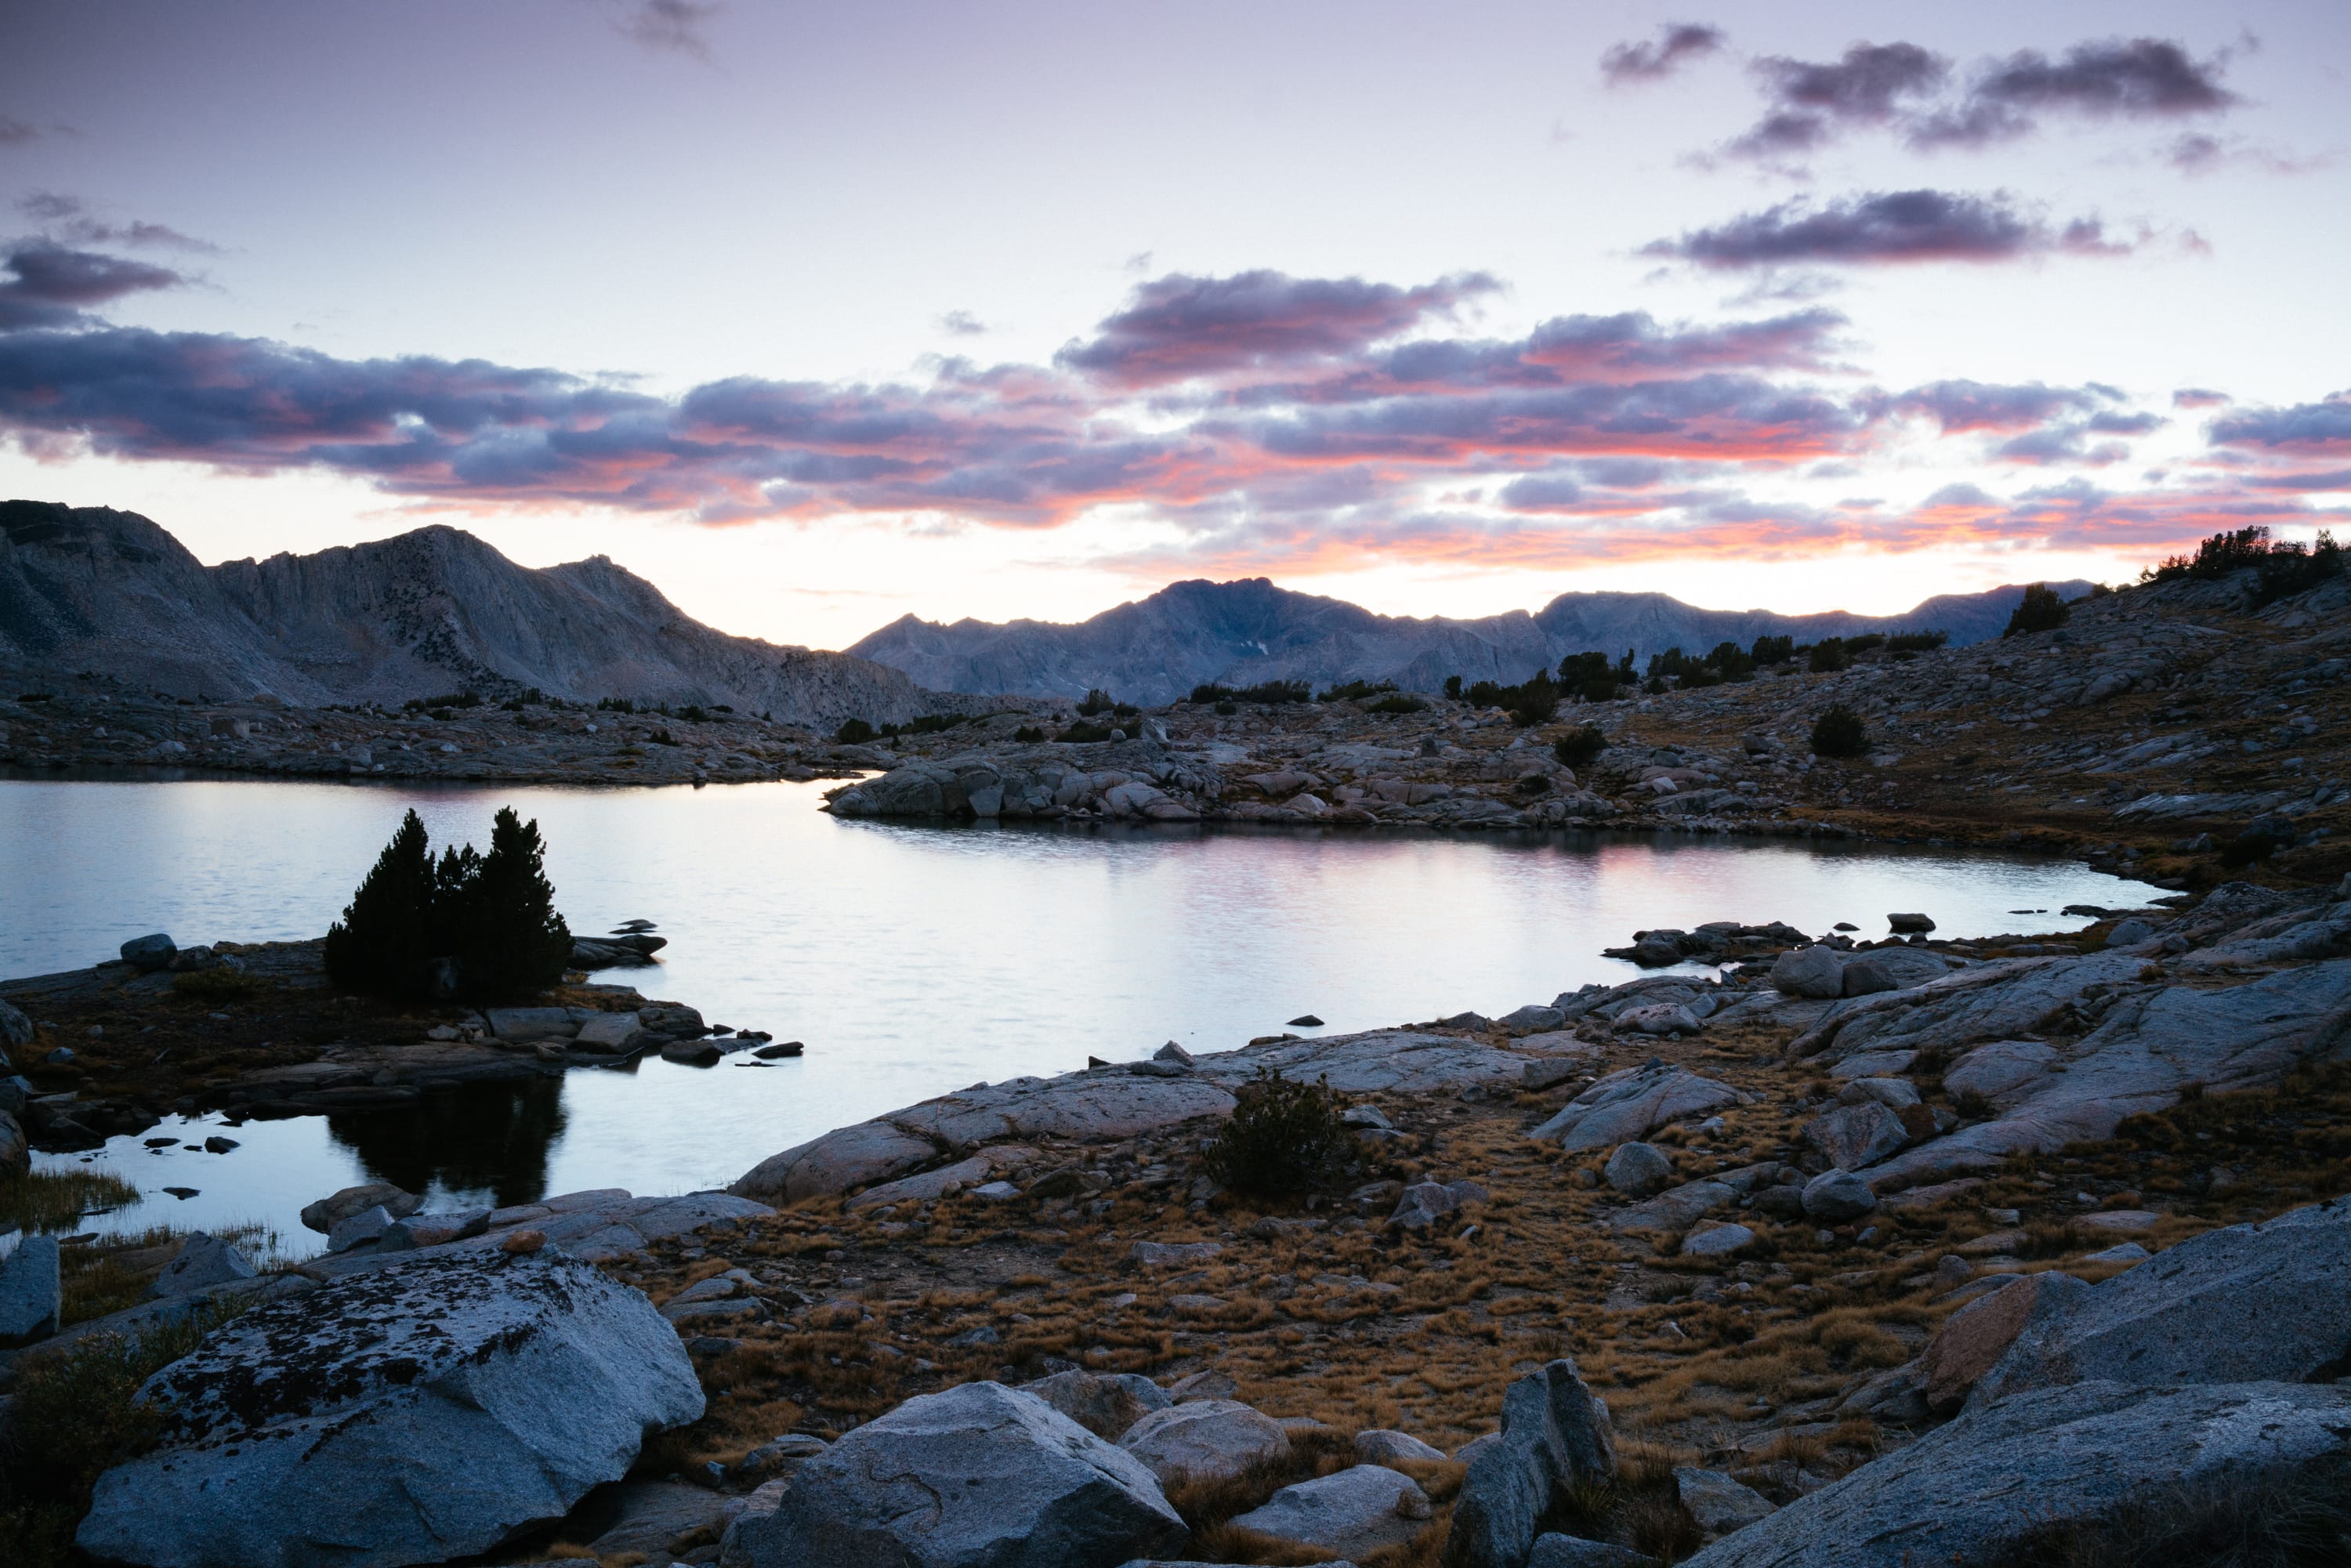
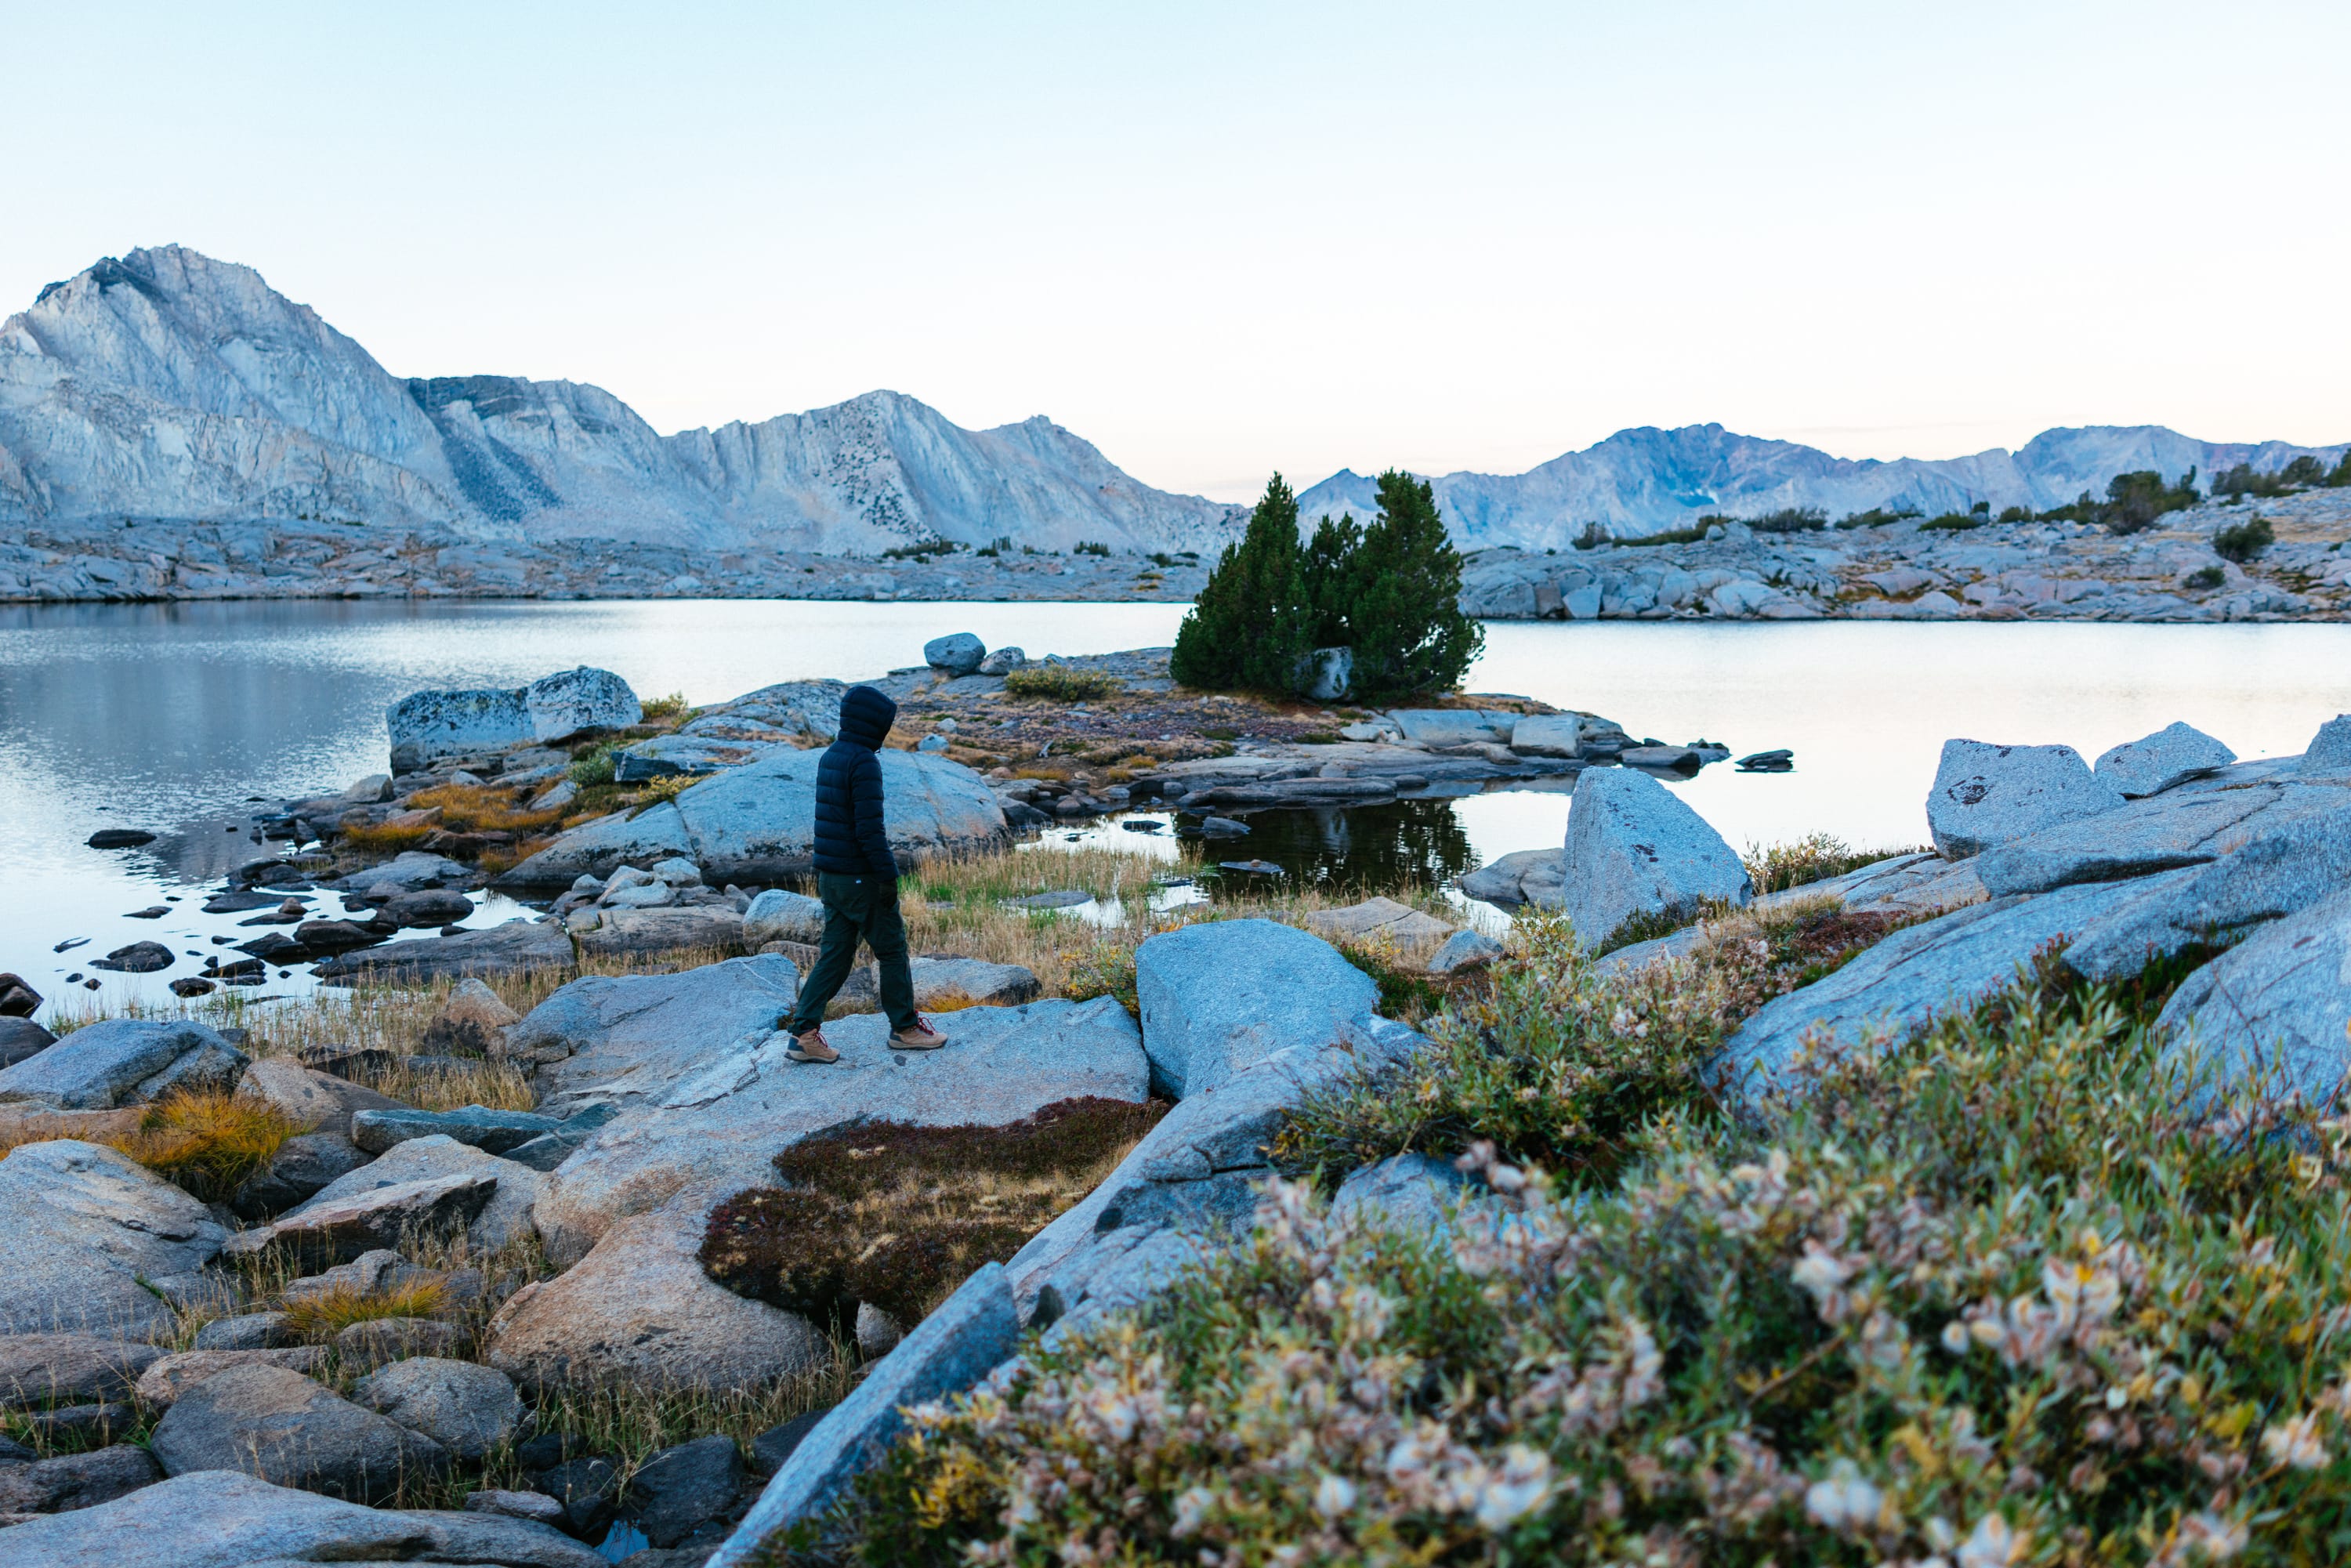
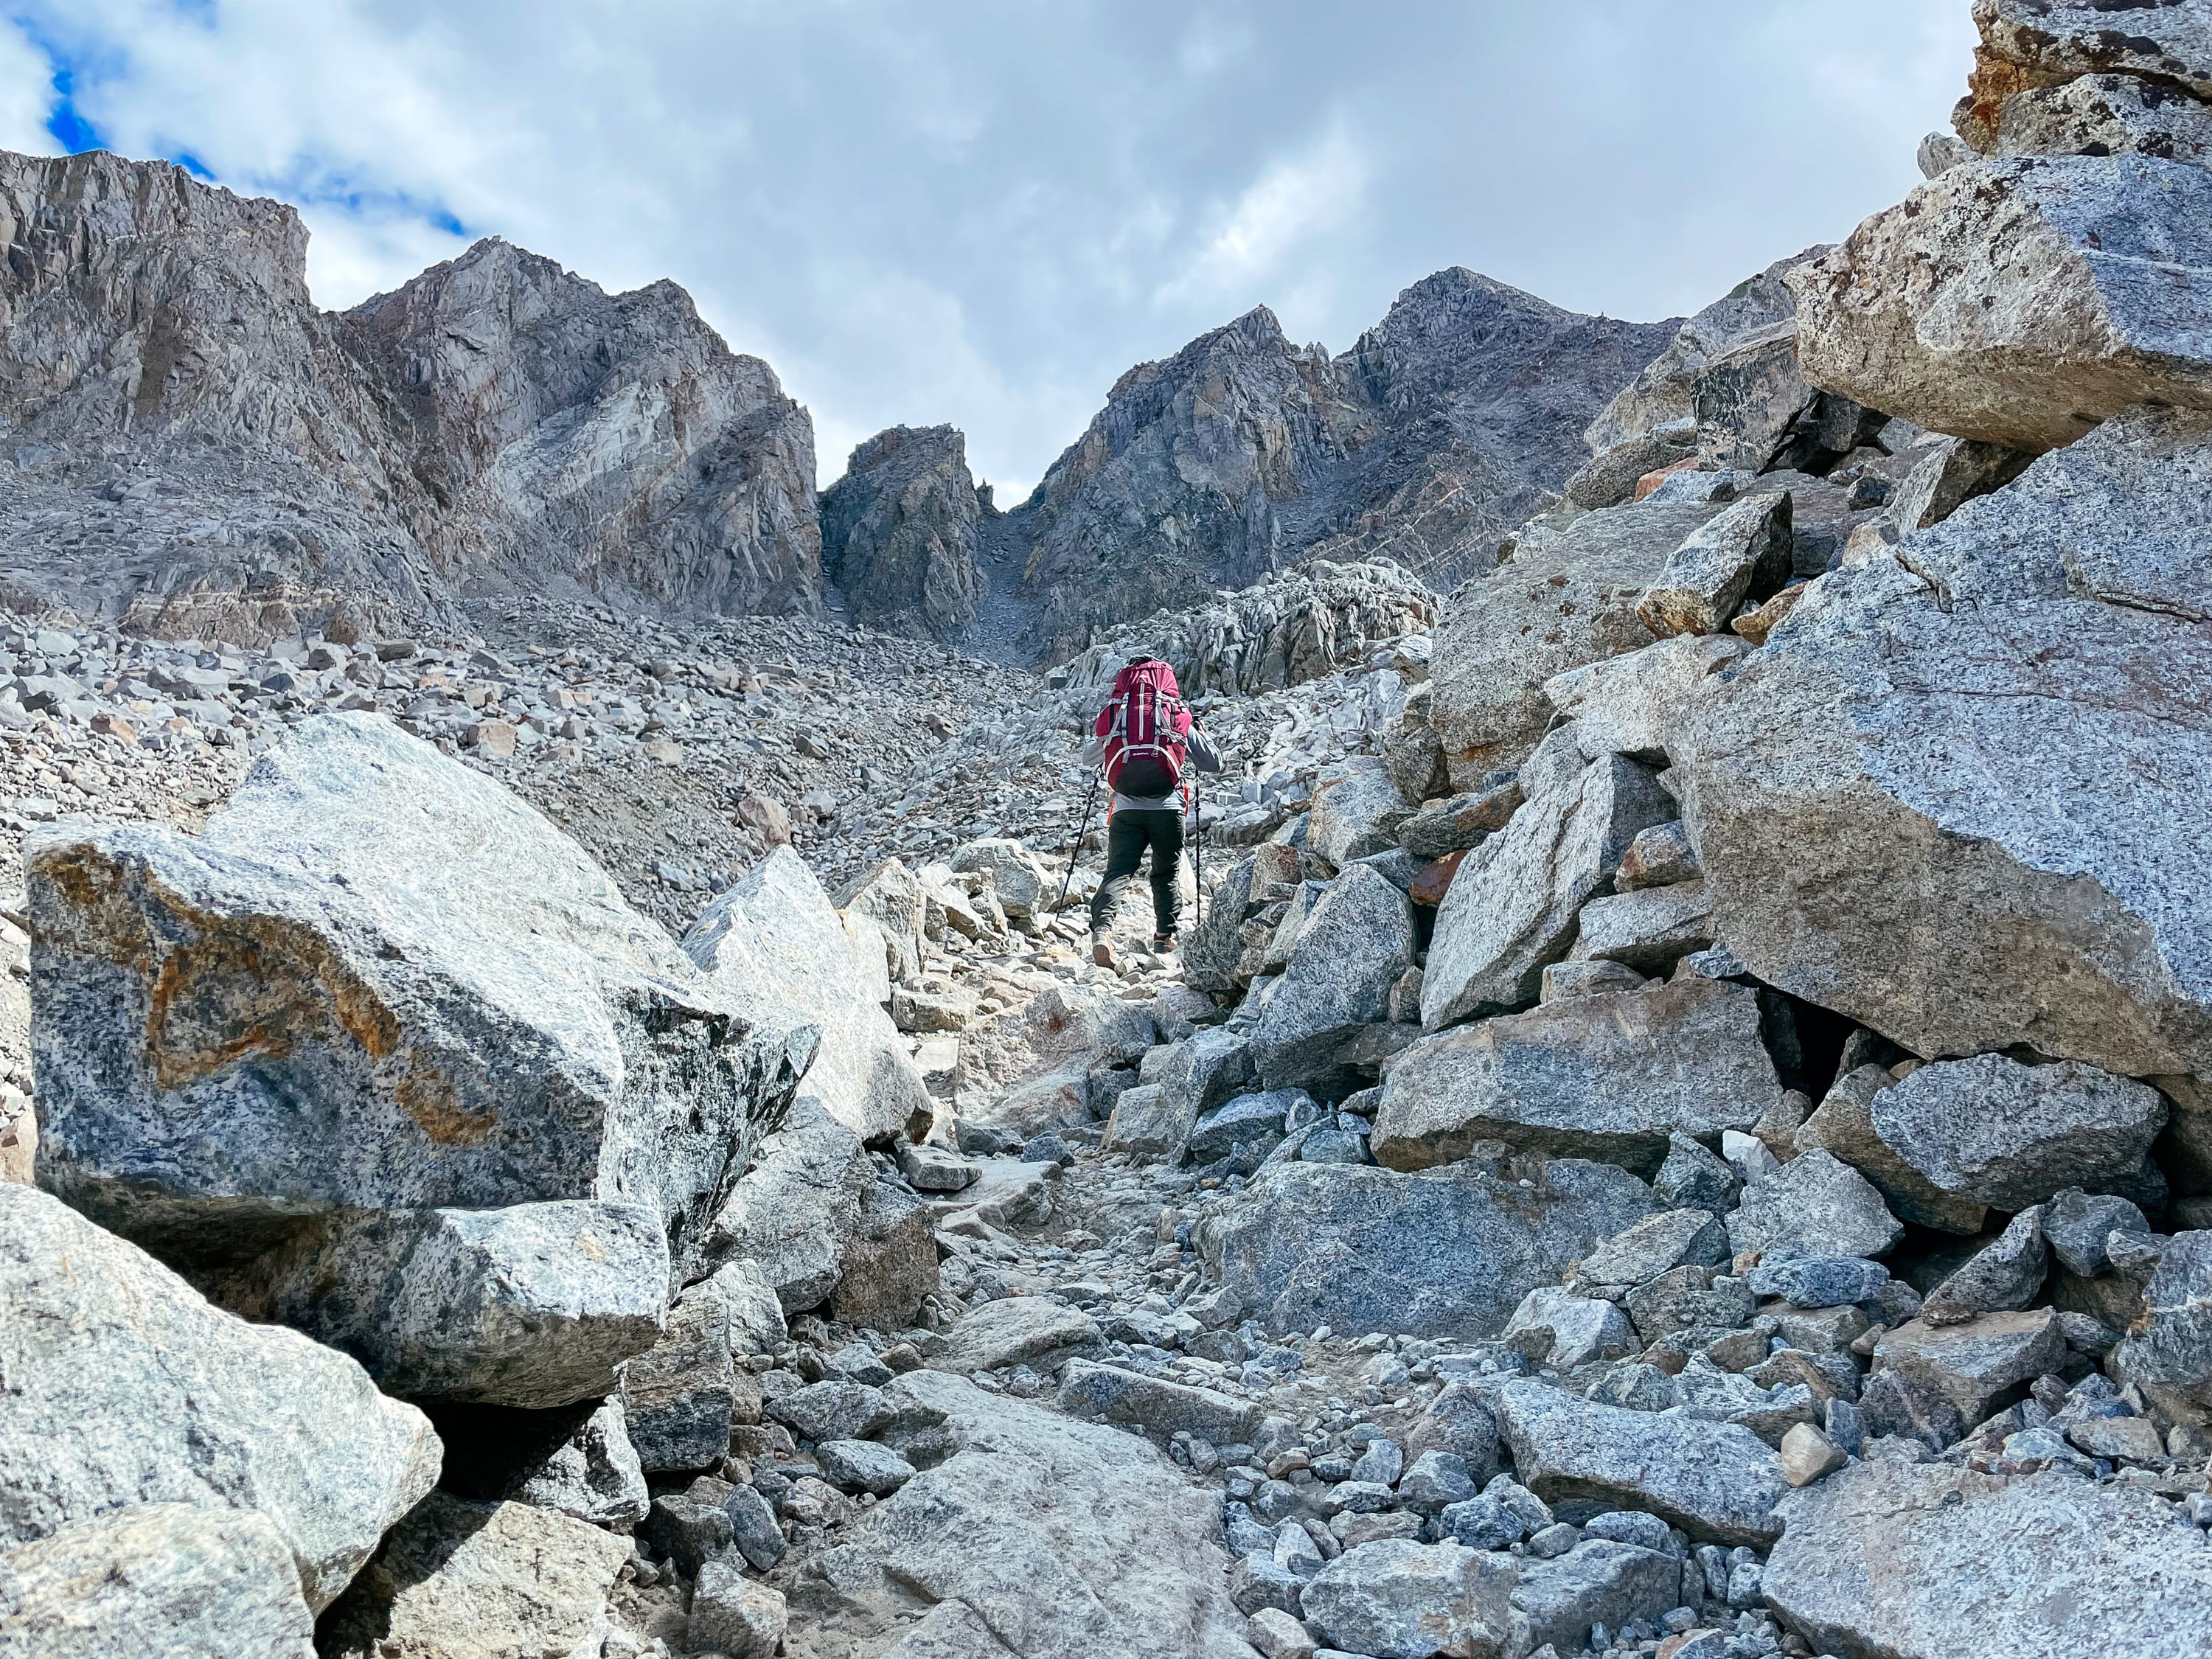
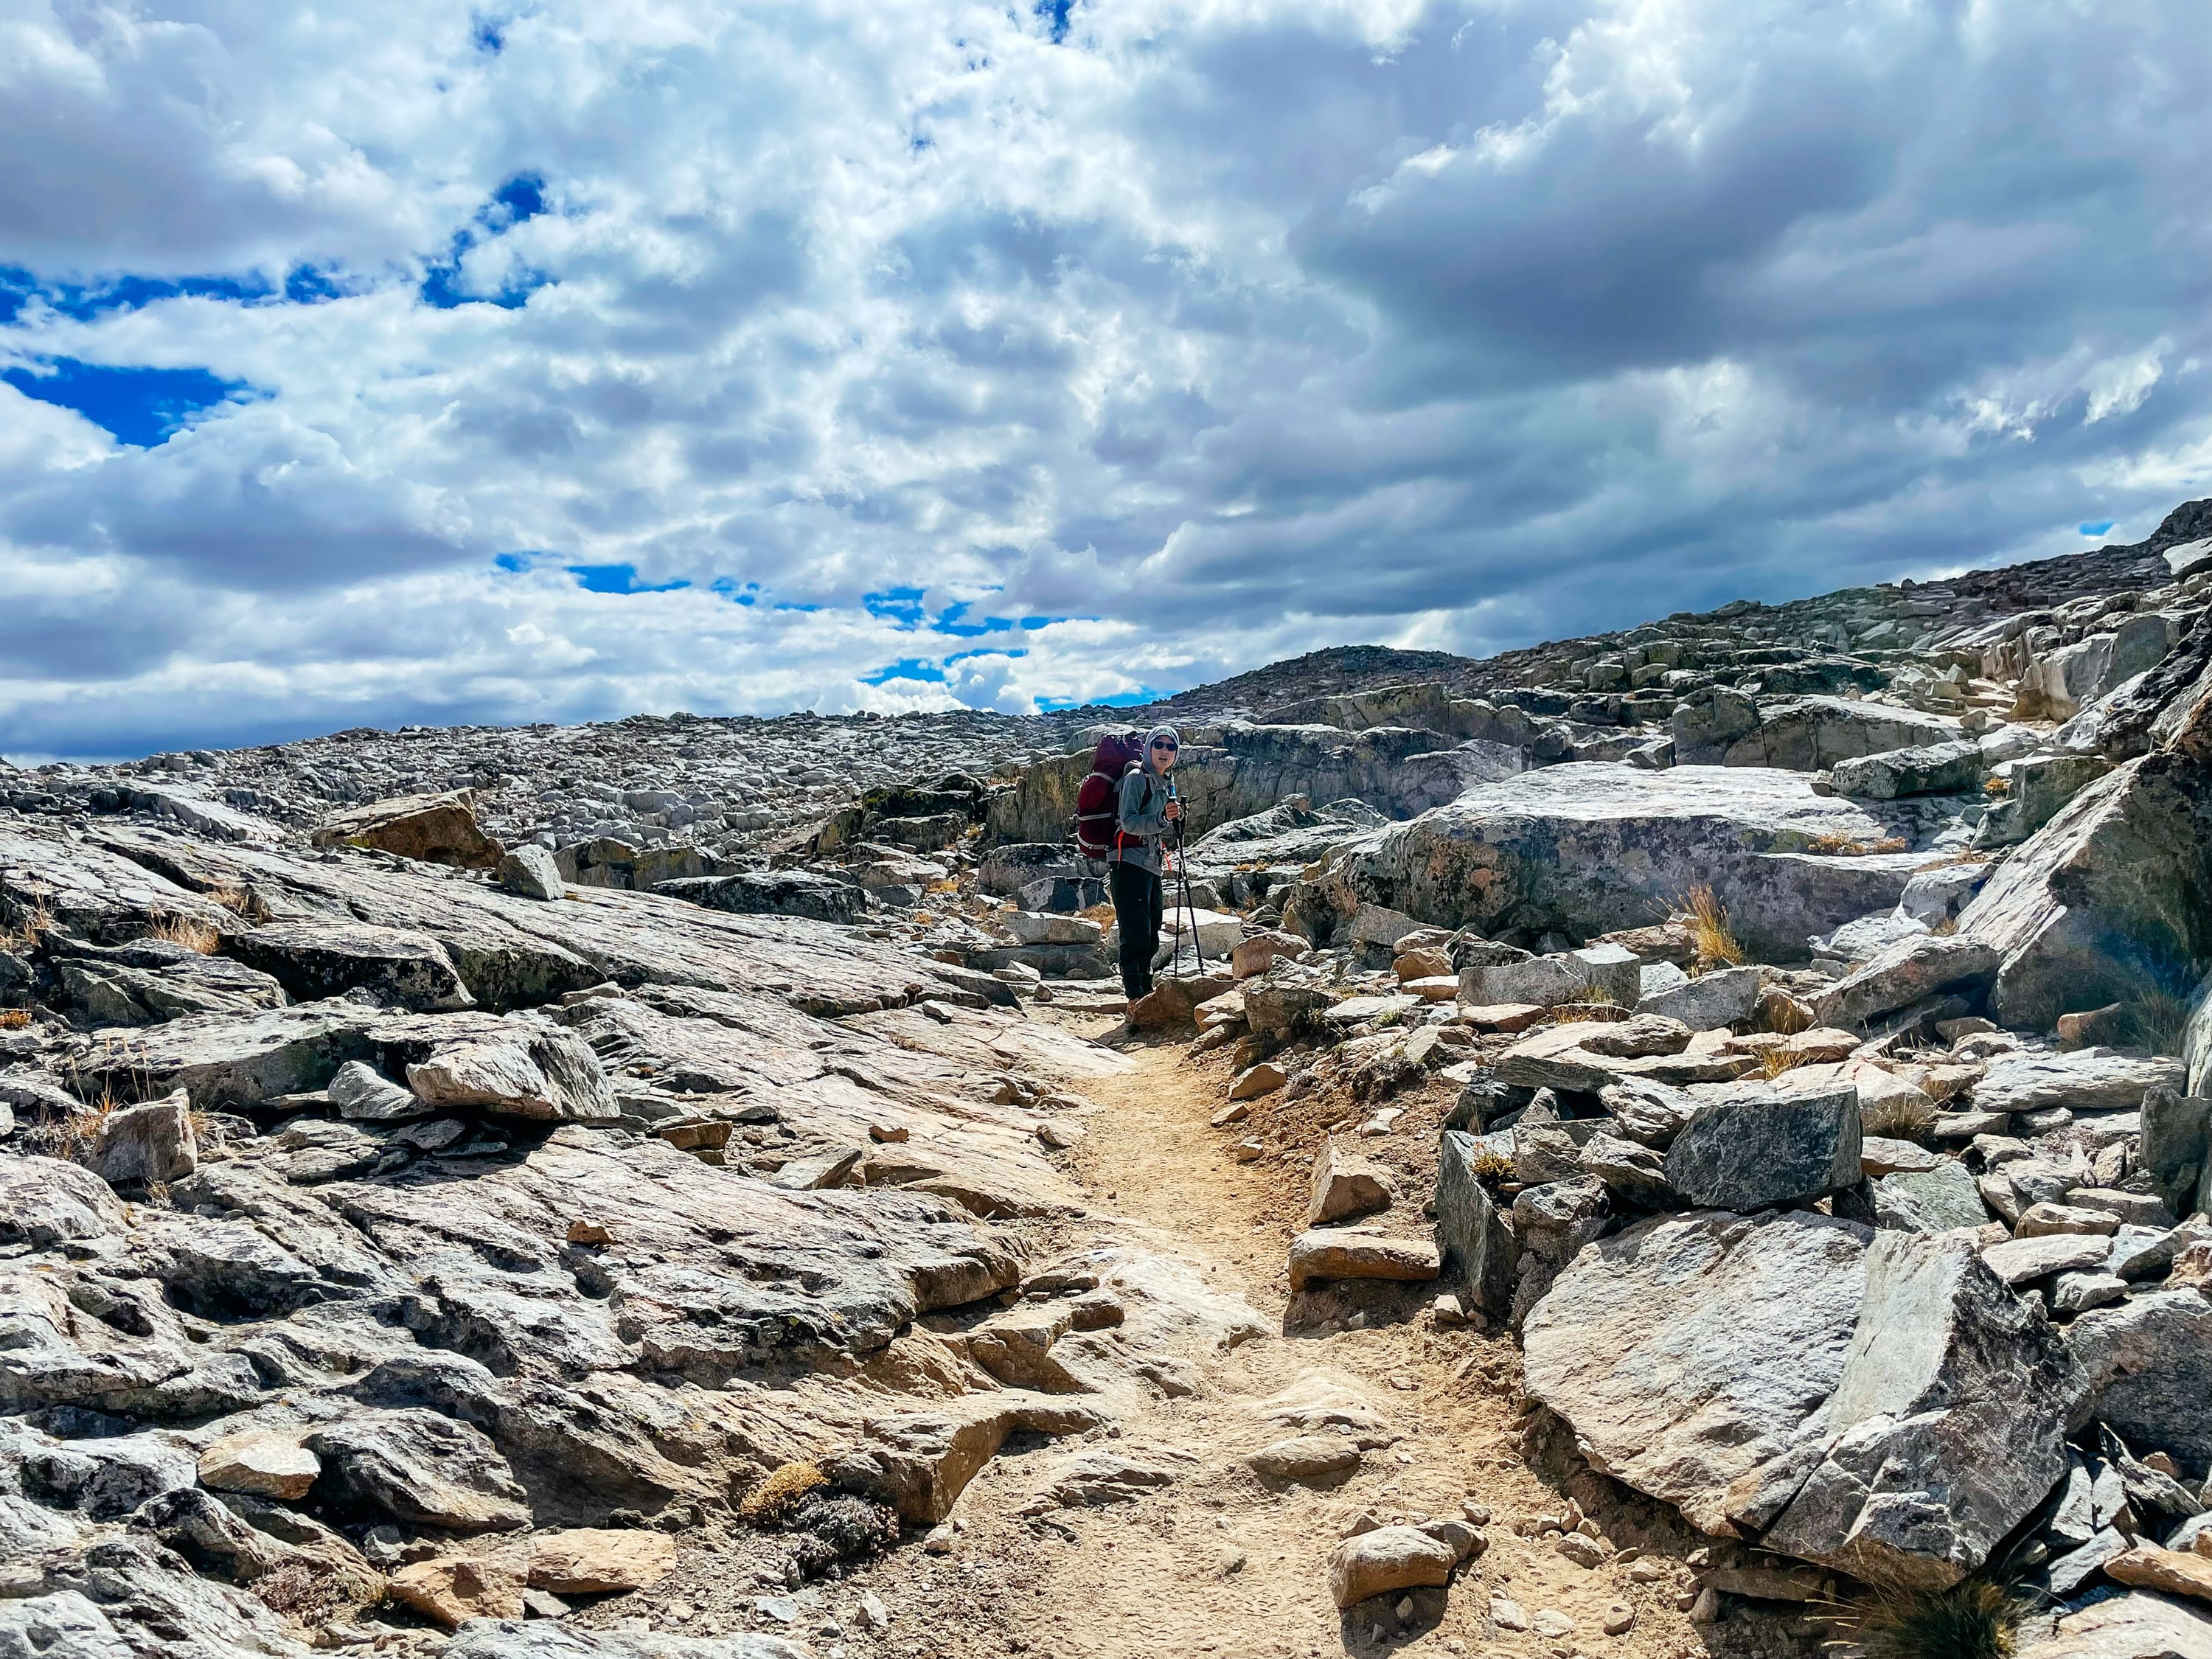
The Black Divide from Dusy Basin 11388′
How I get used to it kills me. The way it’s night and then suddenly it’s not and I’m in the full sun of a new day, and I just… stop noticing it. Against all reason, I plan for a future I assume will come, I believe the person I love is always coming back.
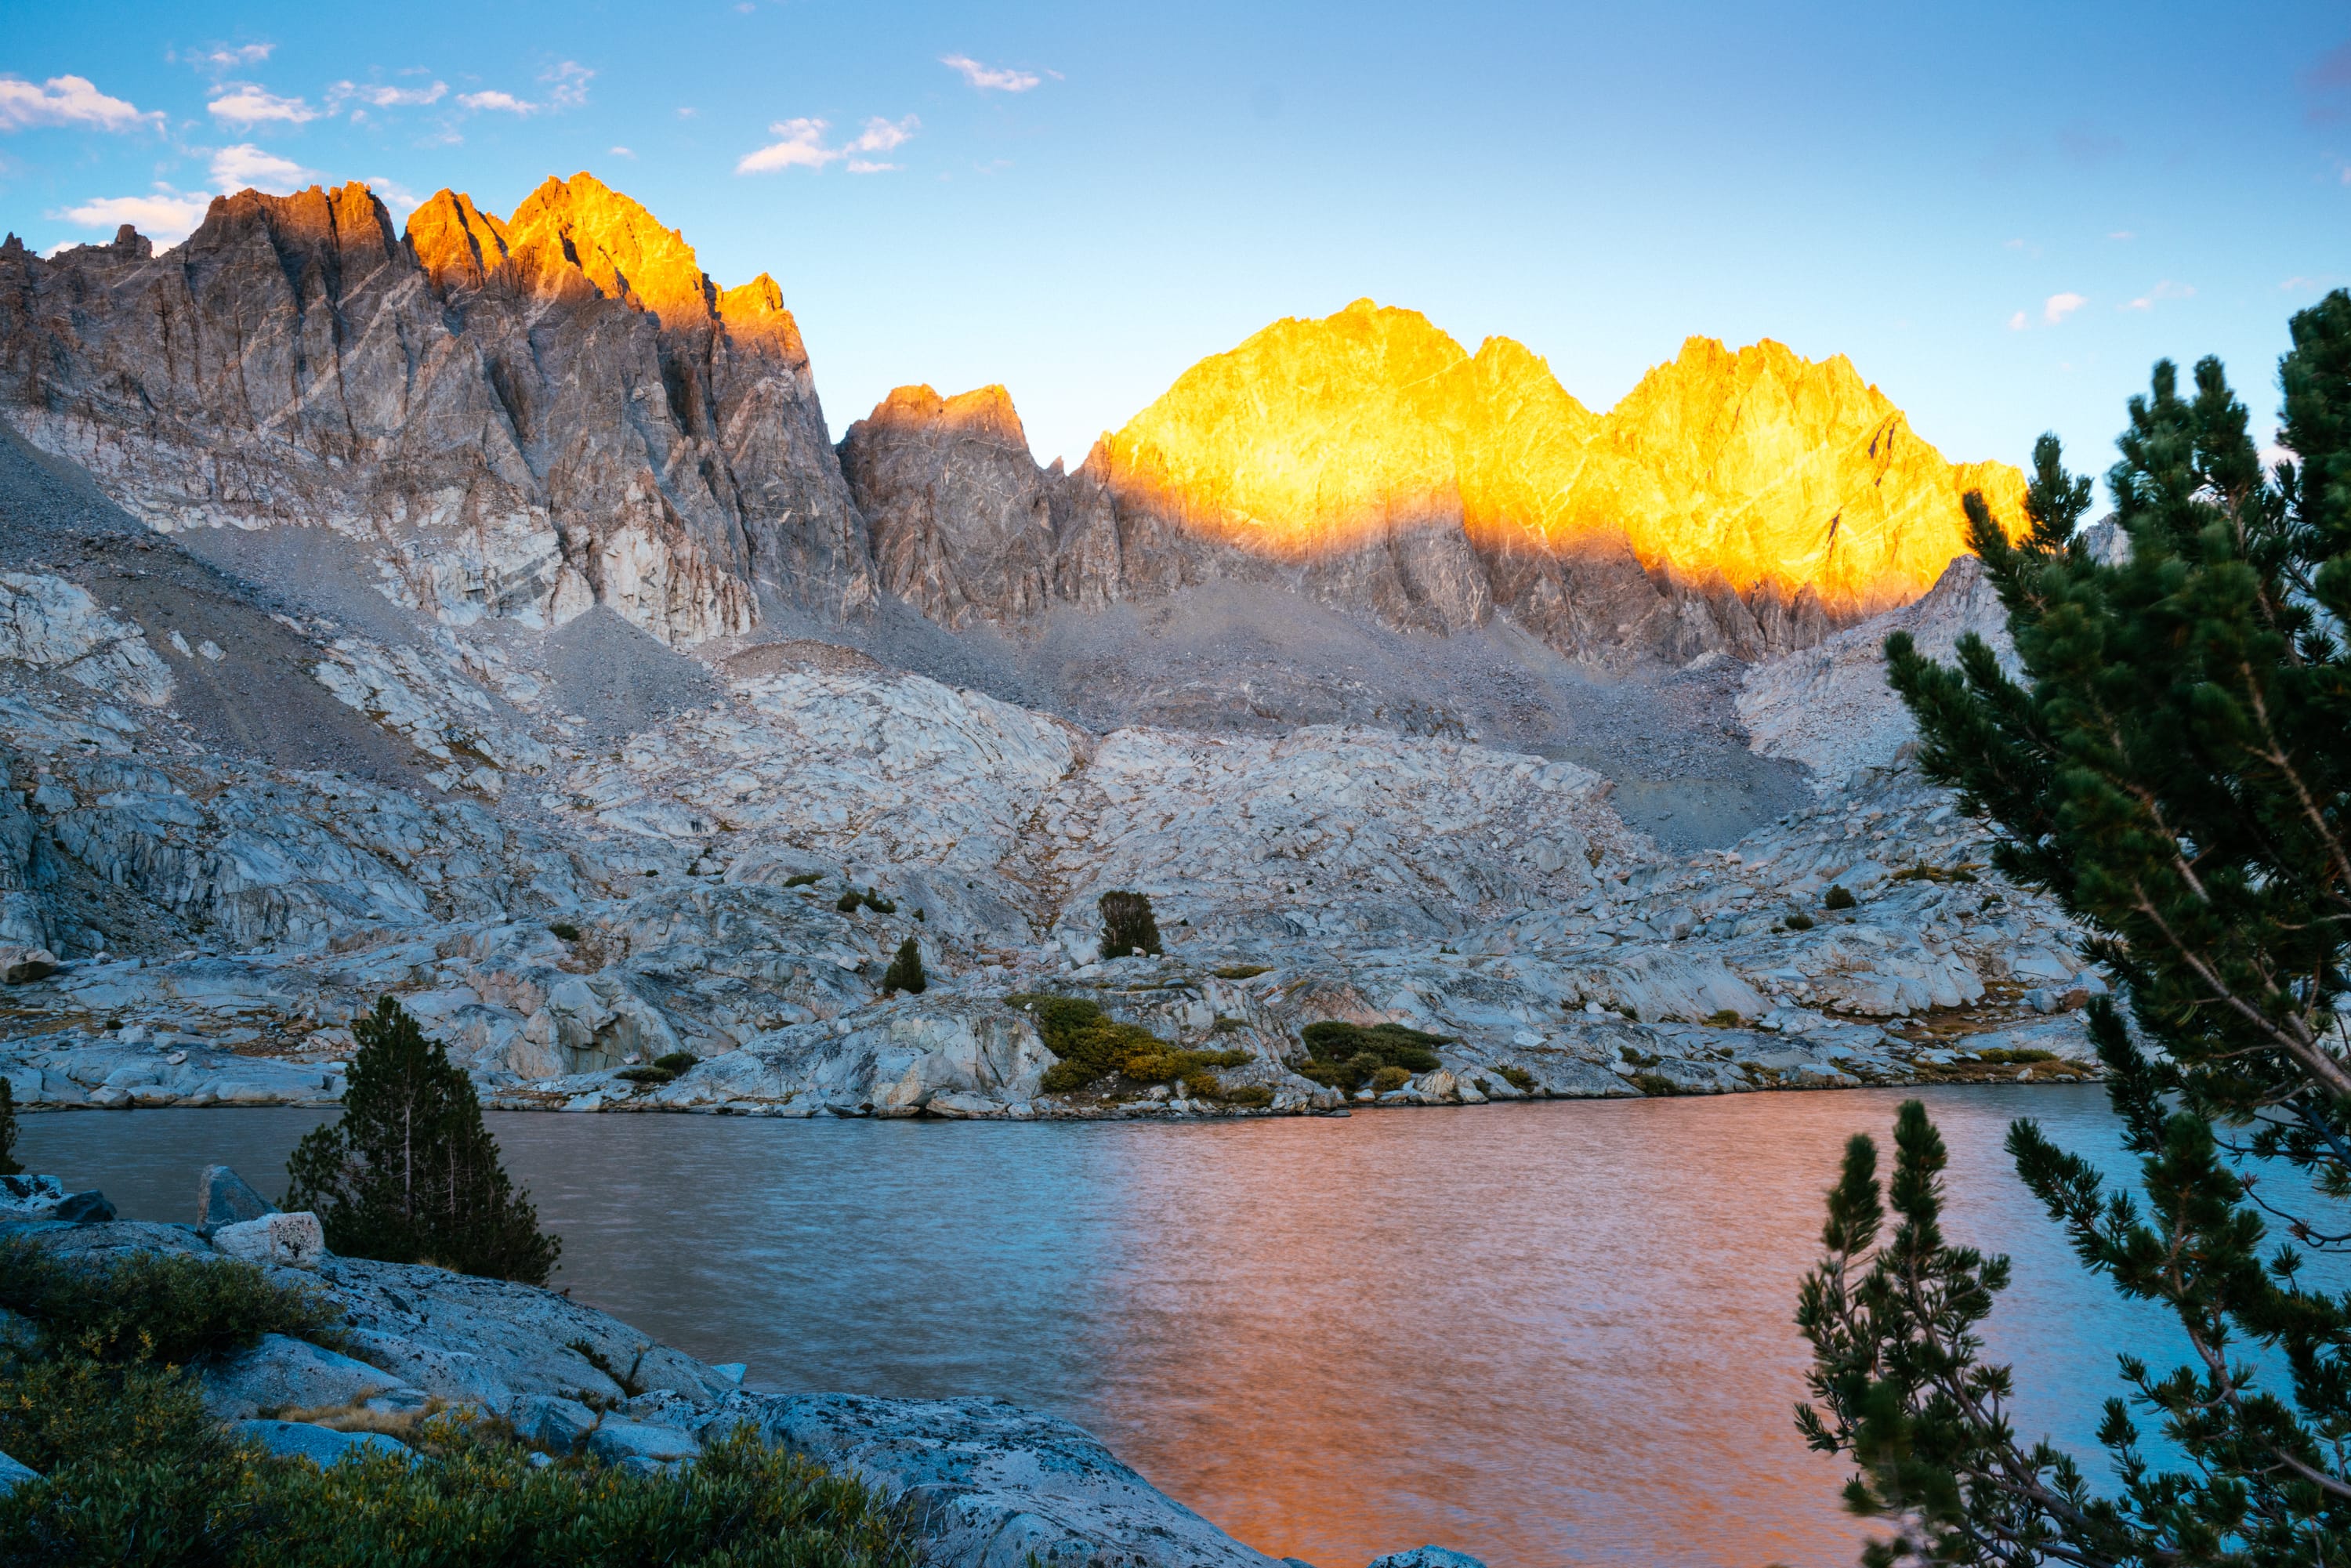
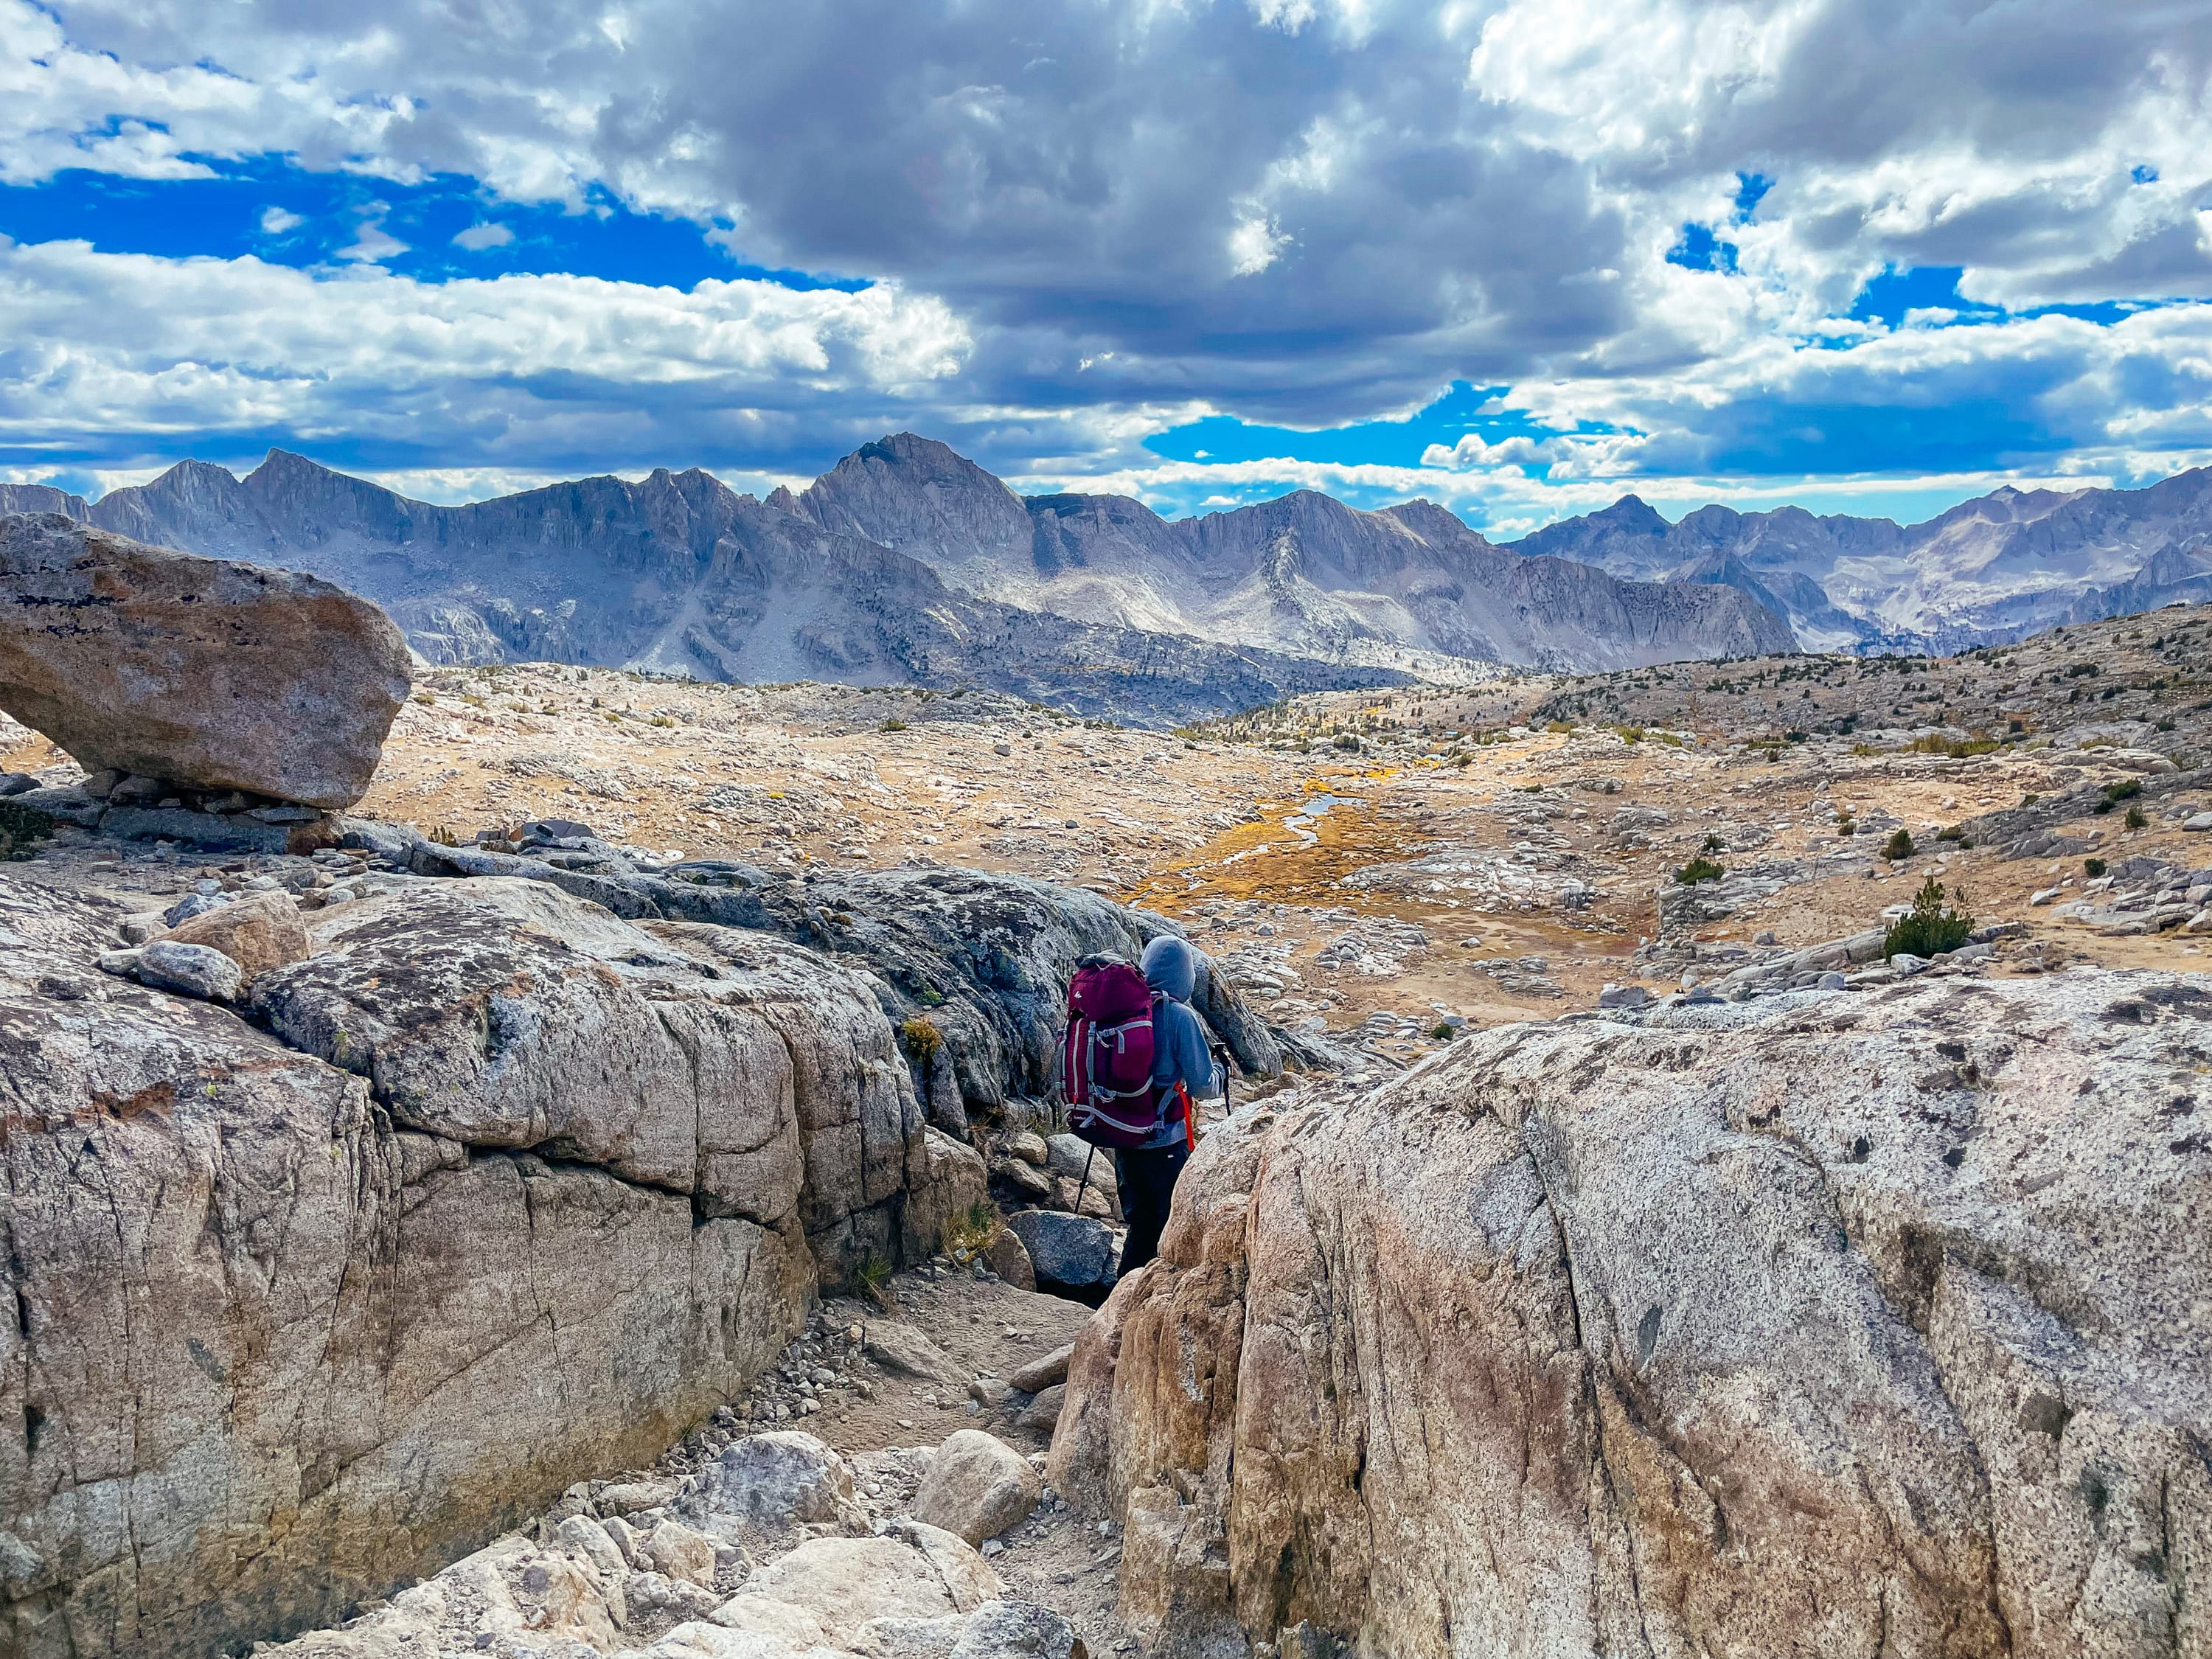
North Palisade and Mount Winchell from Dusy Basin 11388′
Like, look how miraculous it is to be here. That each next thing is still the best possible thing, that where I’m going is where I want to go, all over again. That I’m stupidly rebuilding my stupid little dreams.
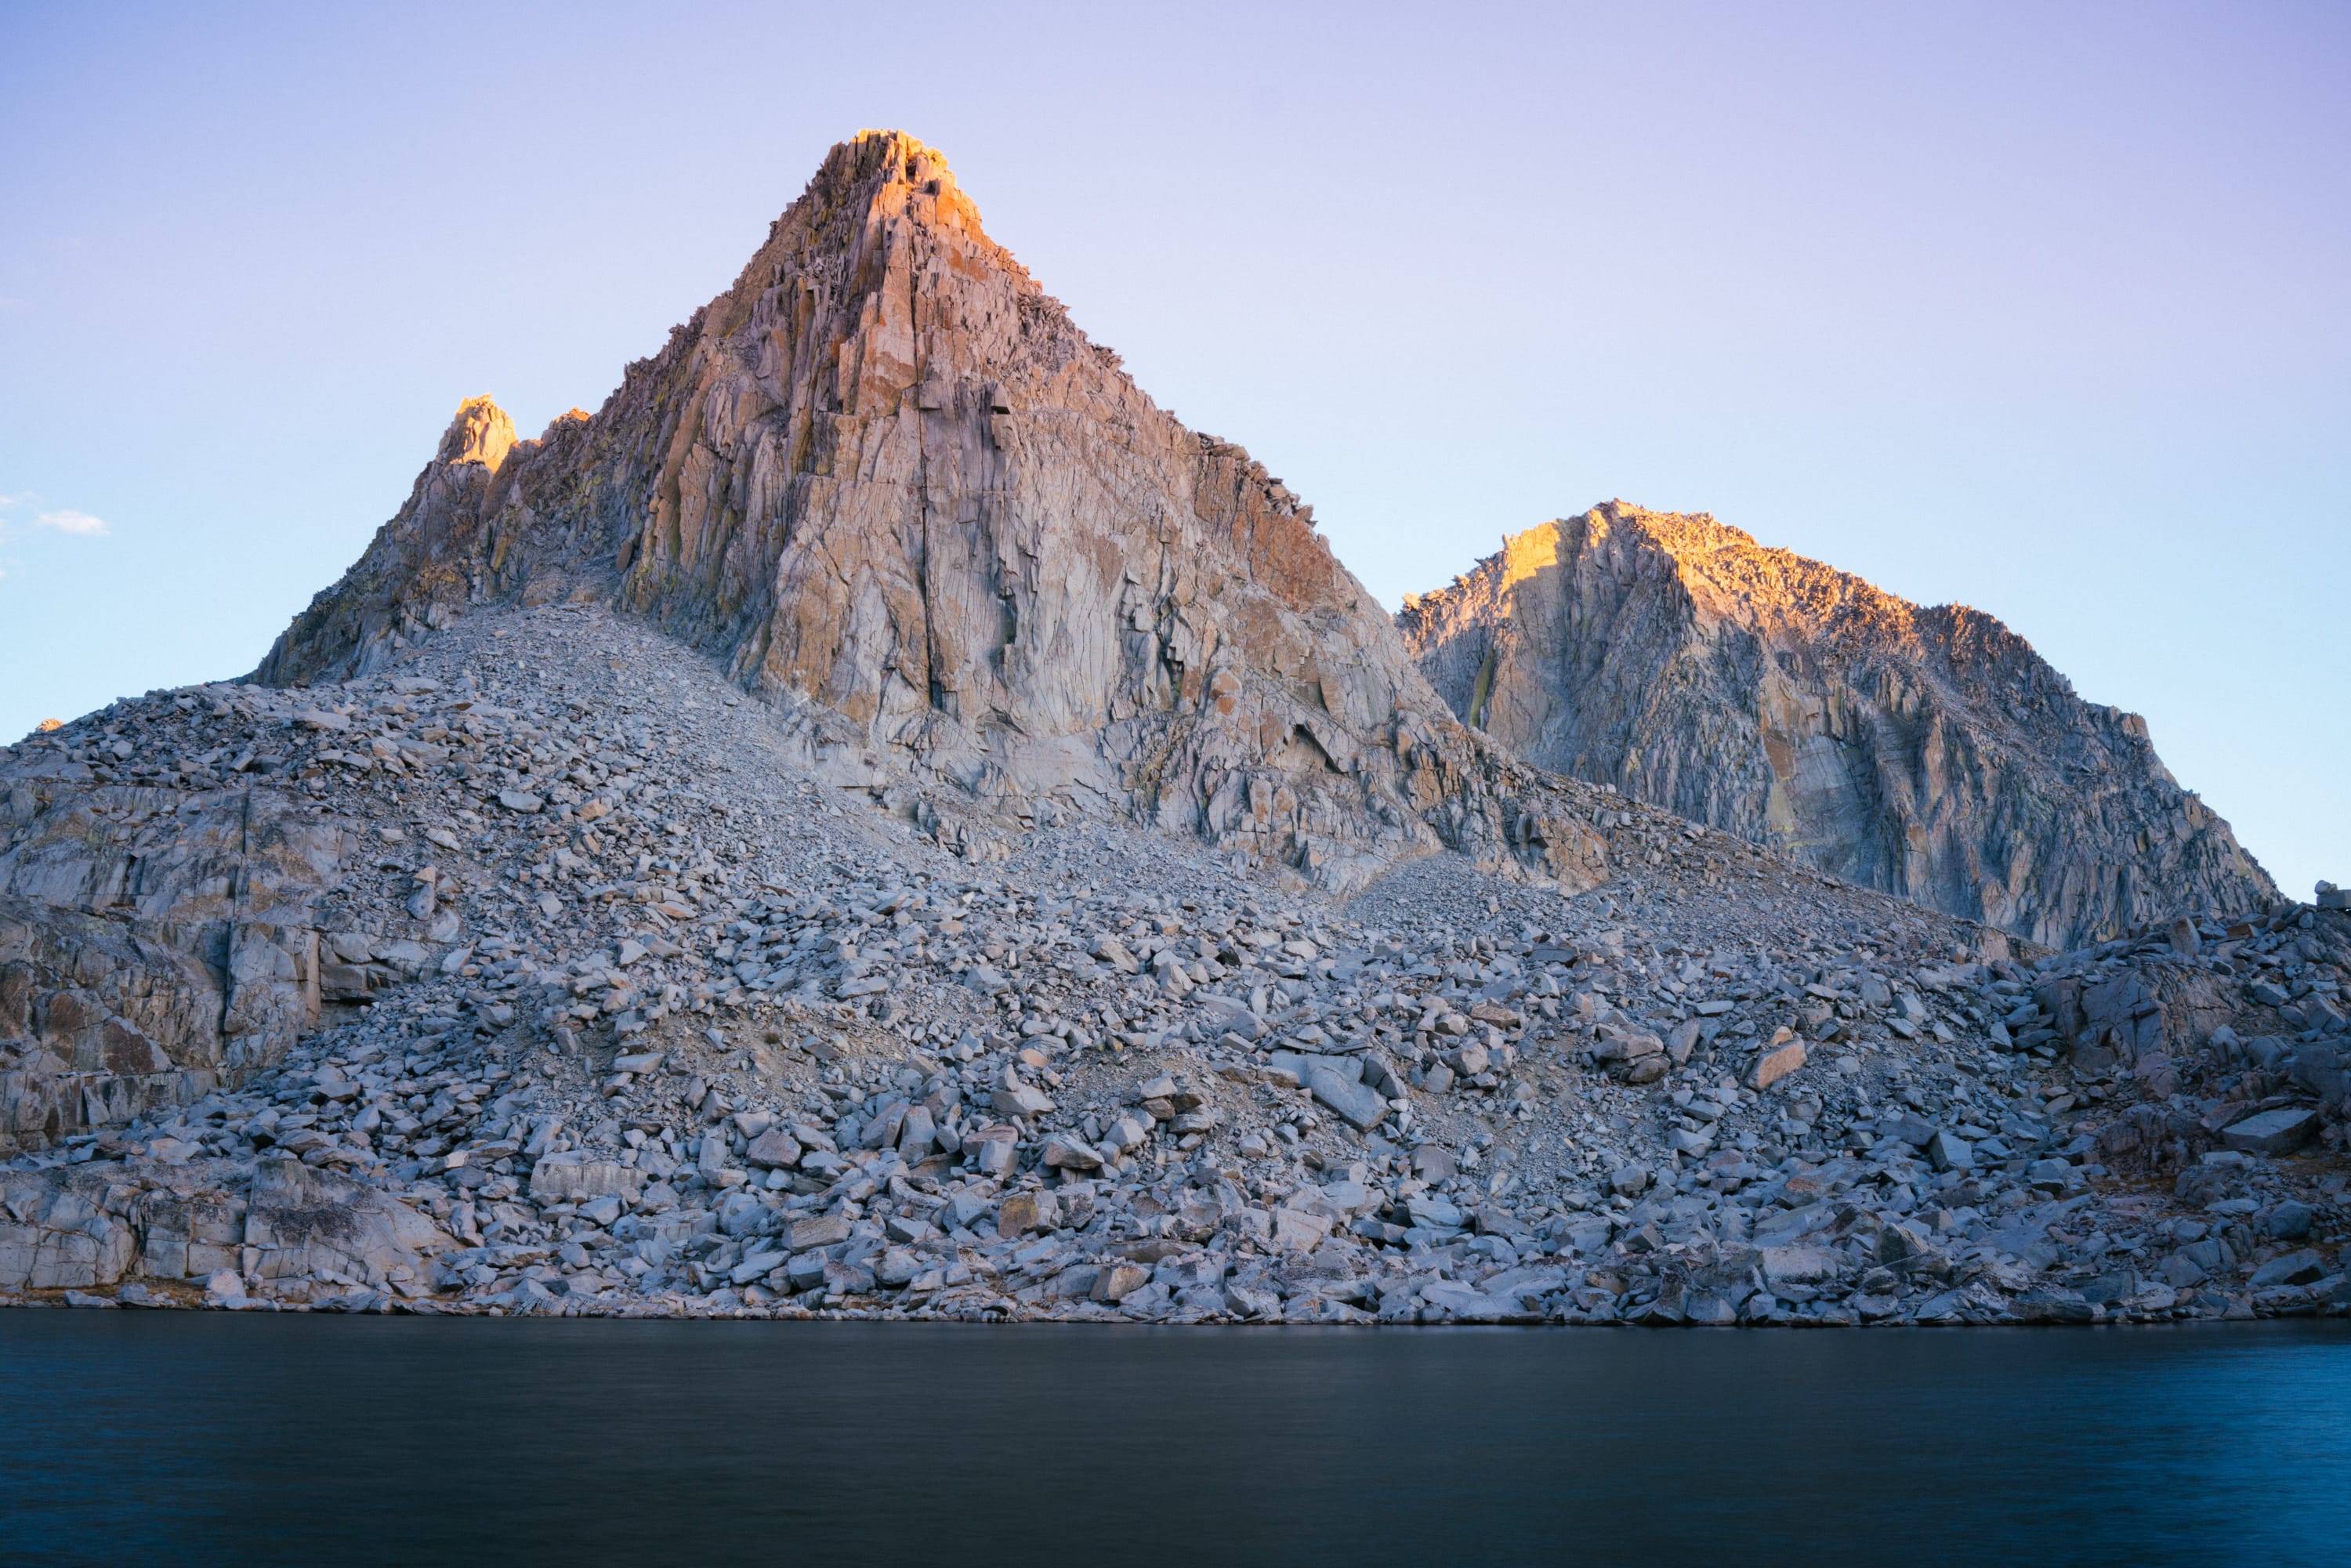
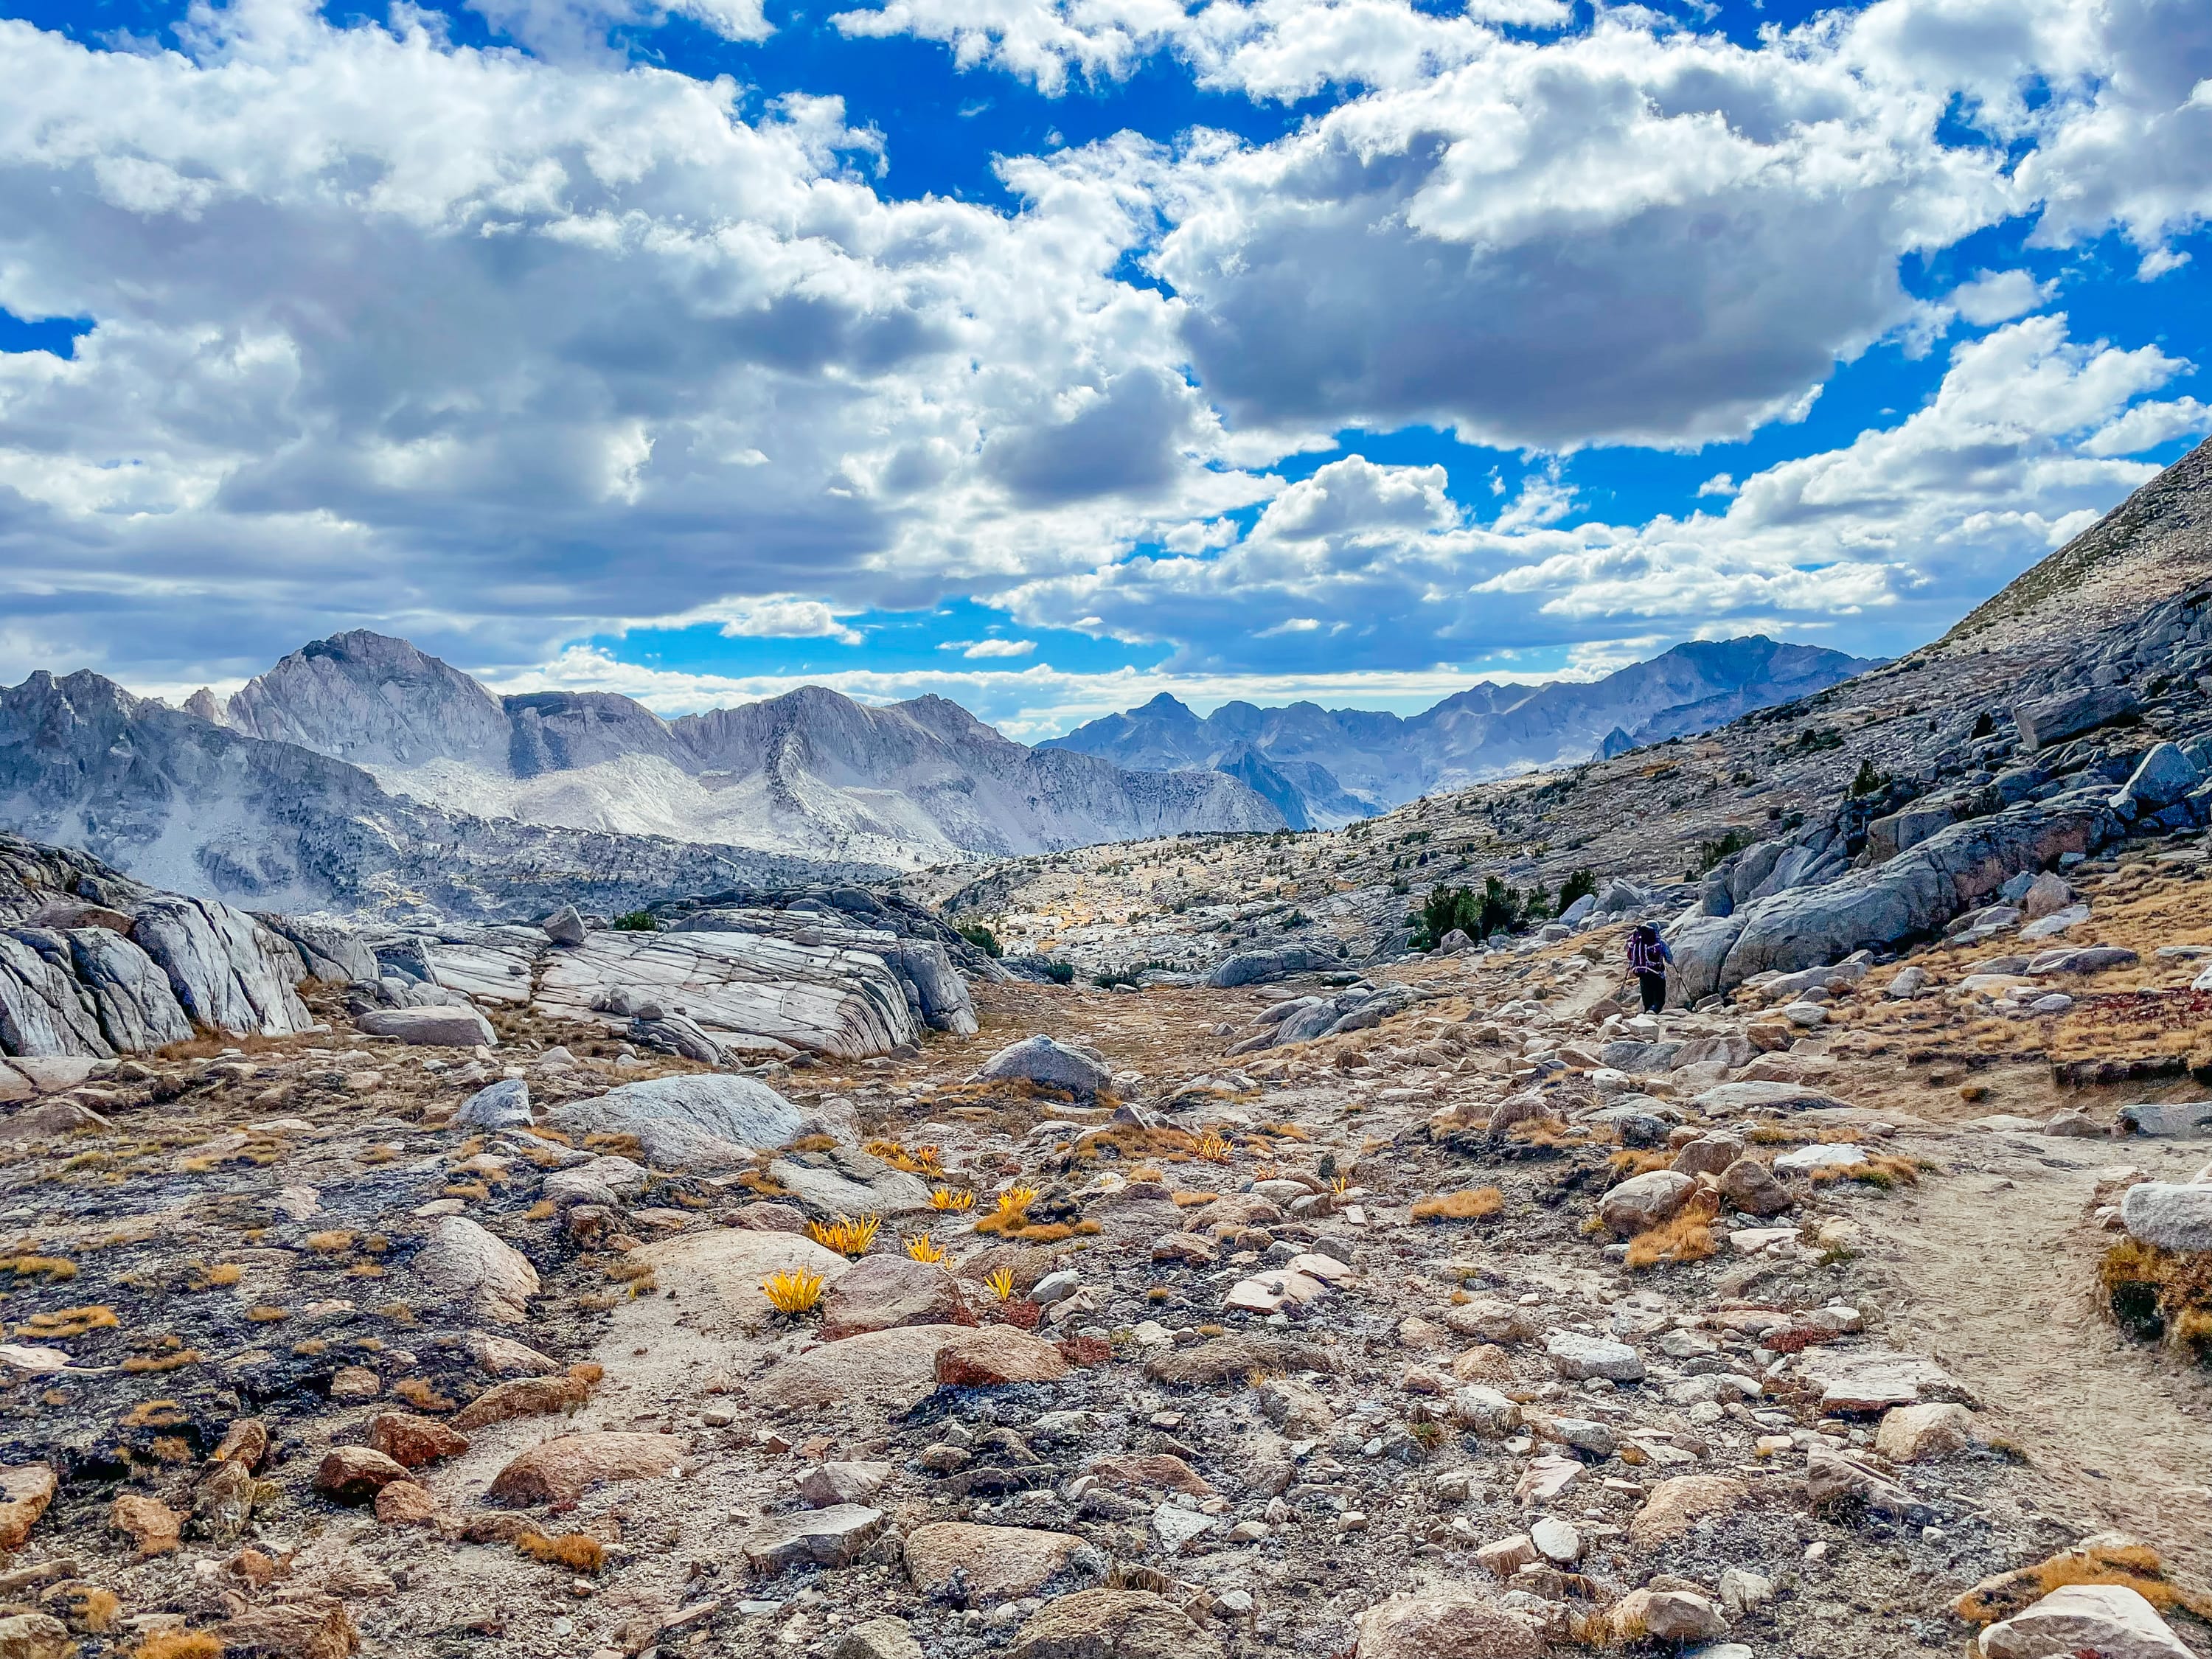
Isosceles Peak from Dusy Basin 11388′
It’s easy to take someone’s life in your hands but not so easy to study, to keep on trying when we mess up, to choose something over and over and believe, truly, that repetition brings transcendence.
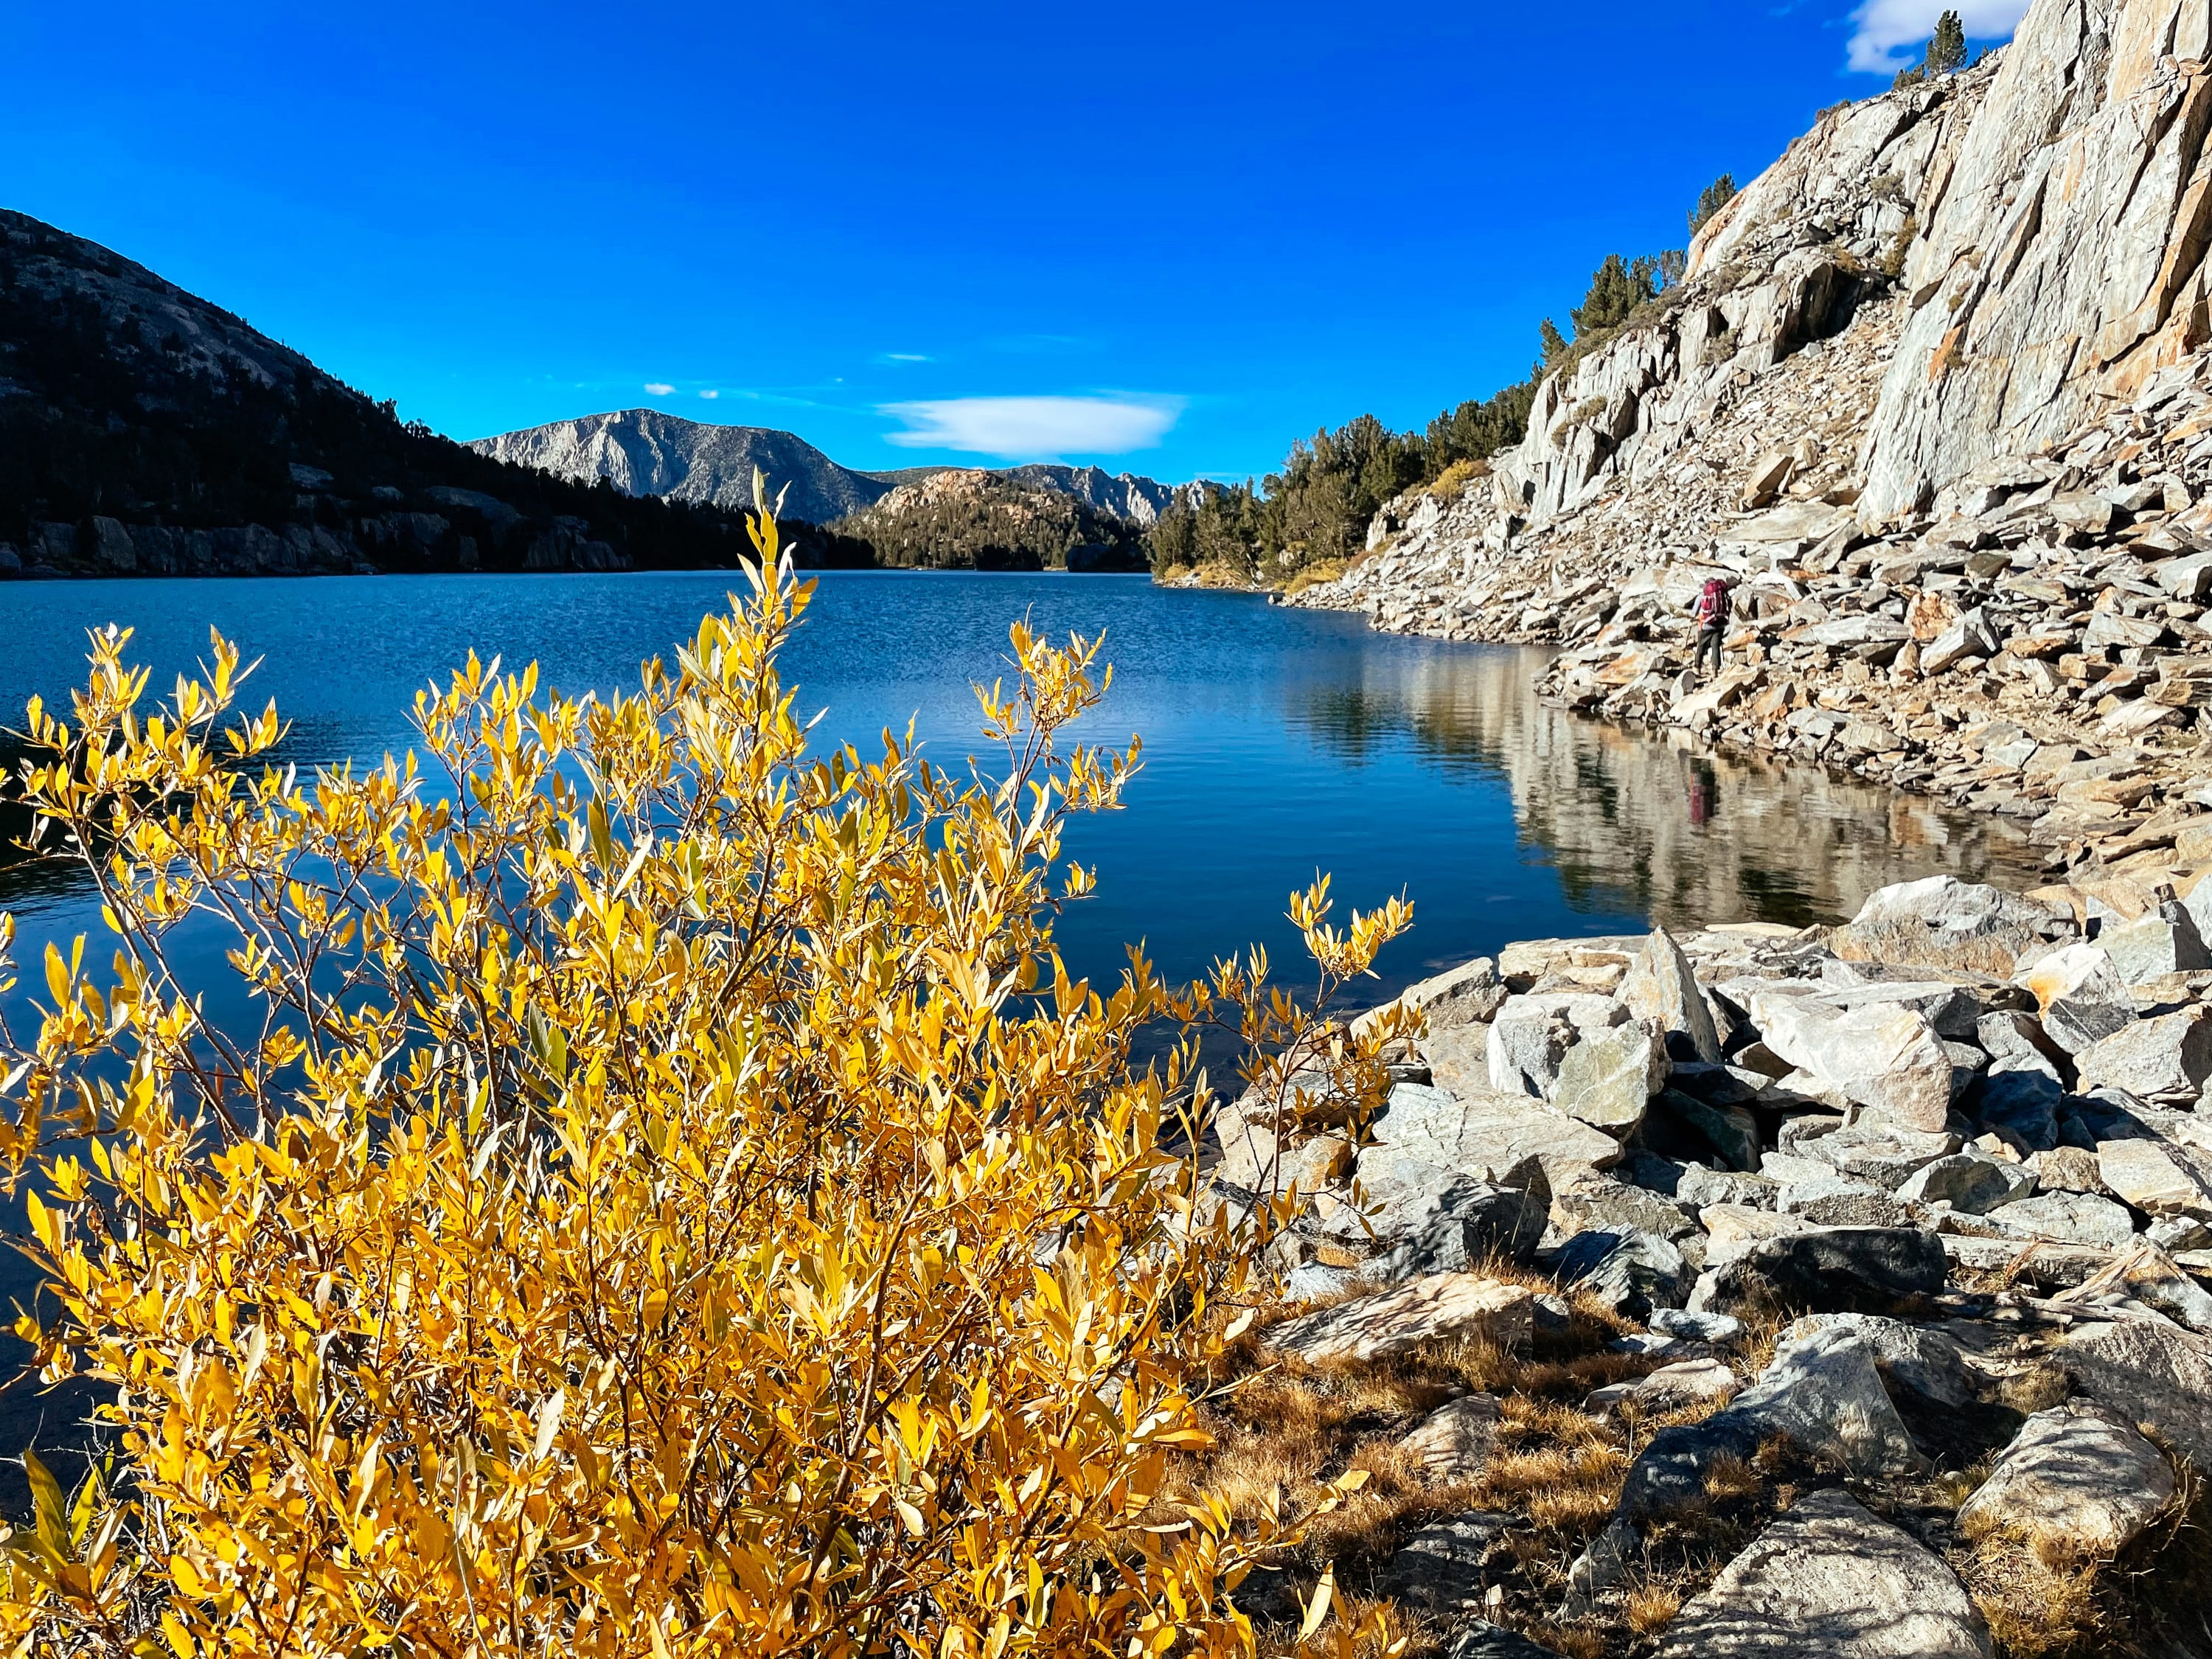
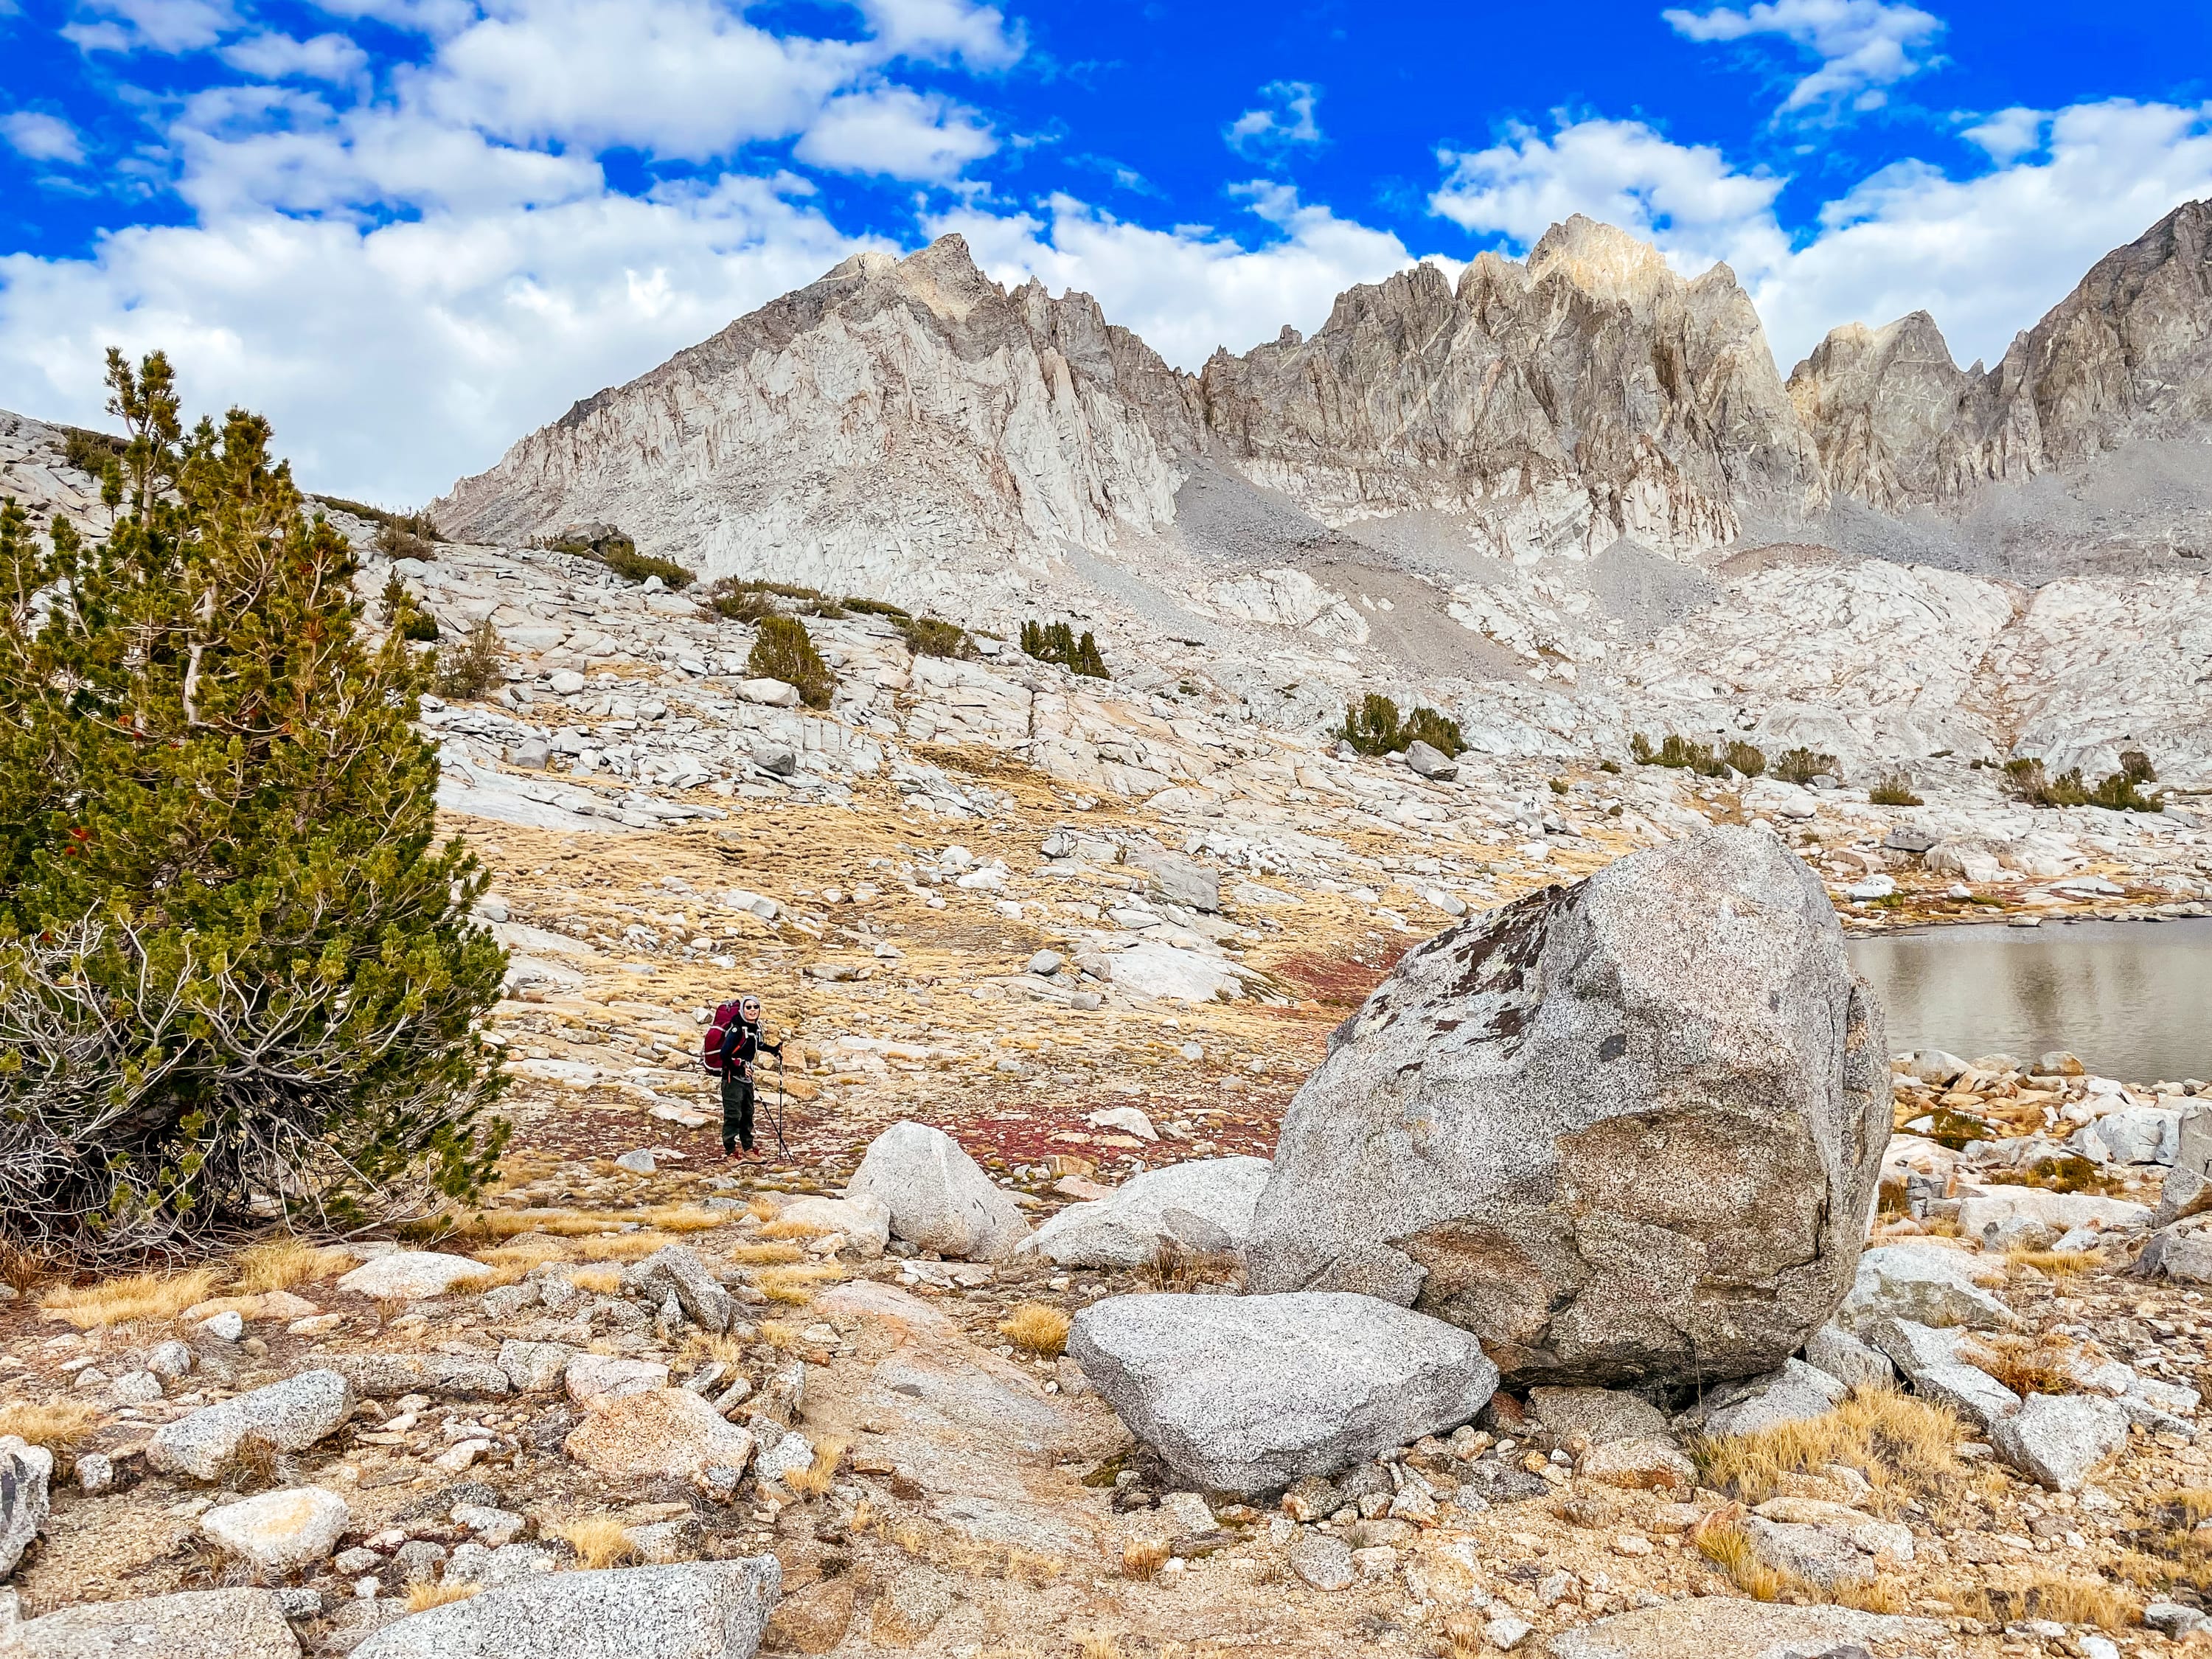
Saddlerock Lake 11128′ / Dusy Basin Lake 11388 11388′
But the opposite of taking things for granted is also stupid.
Like being outside on a very beautiful day in the late summer and stubbornly trying to find meaning it doesn’t need.
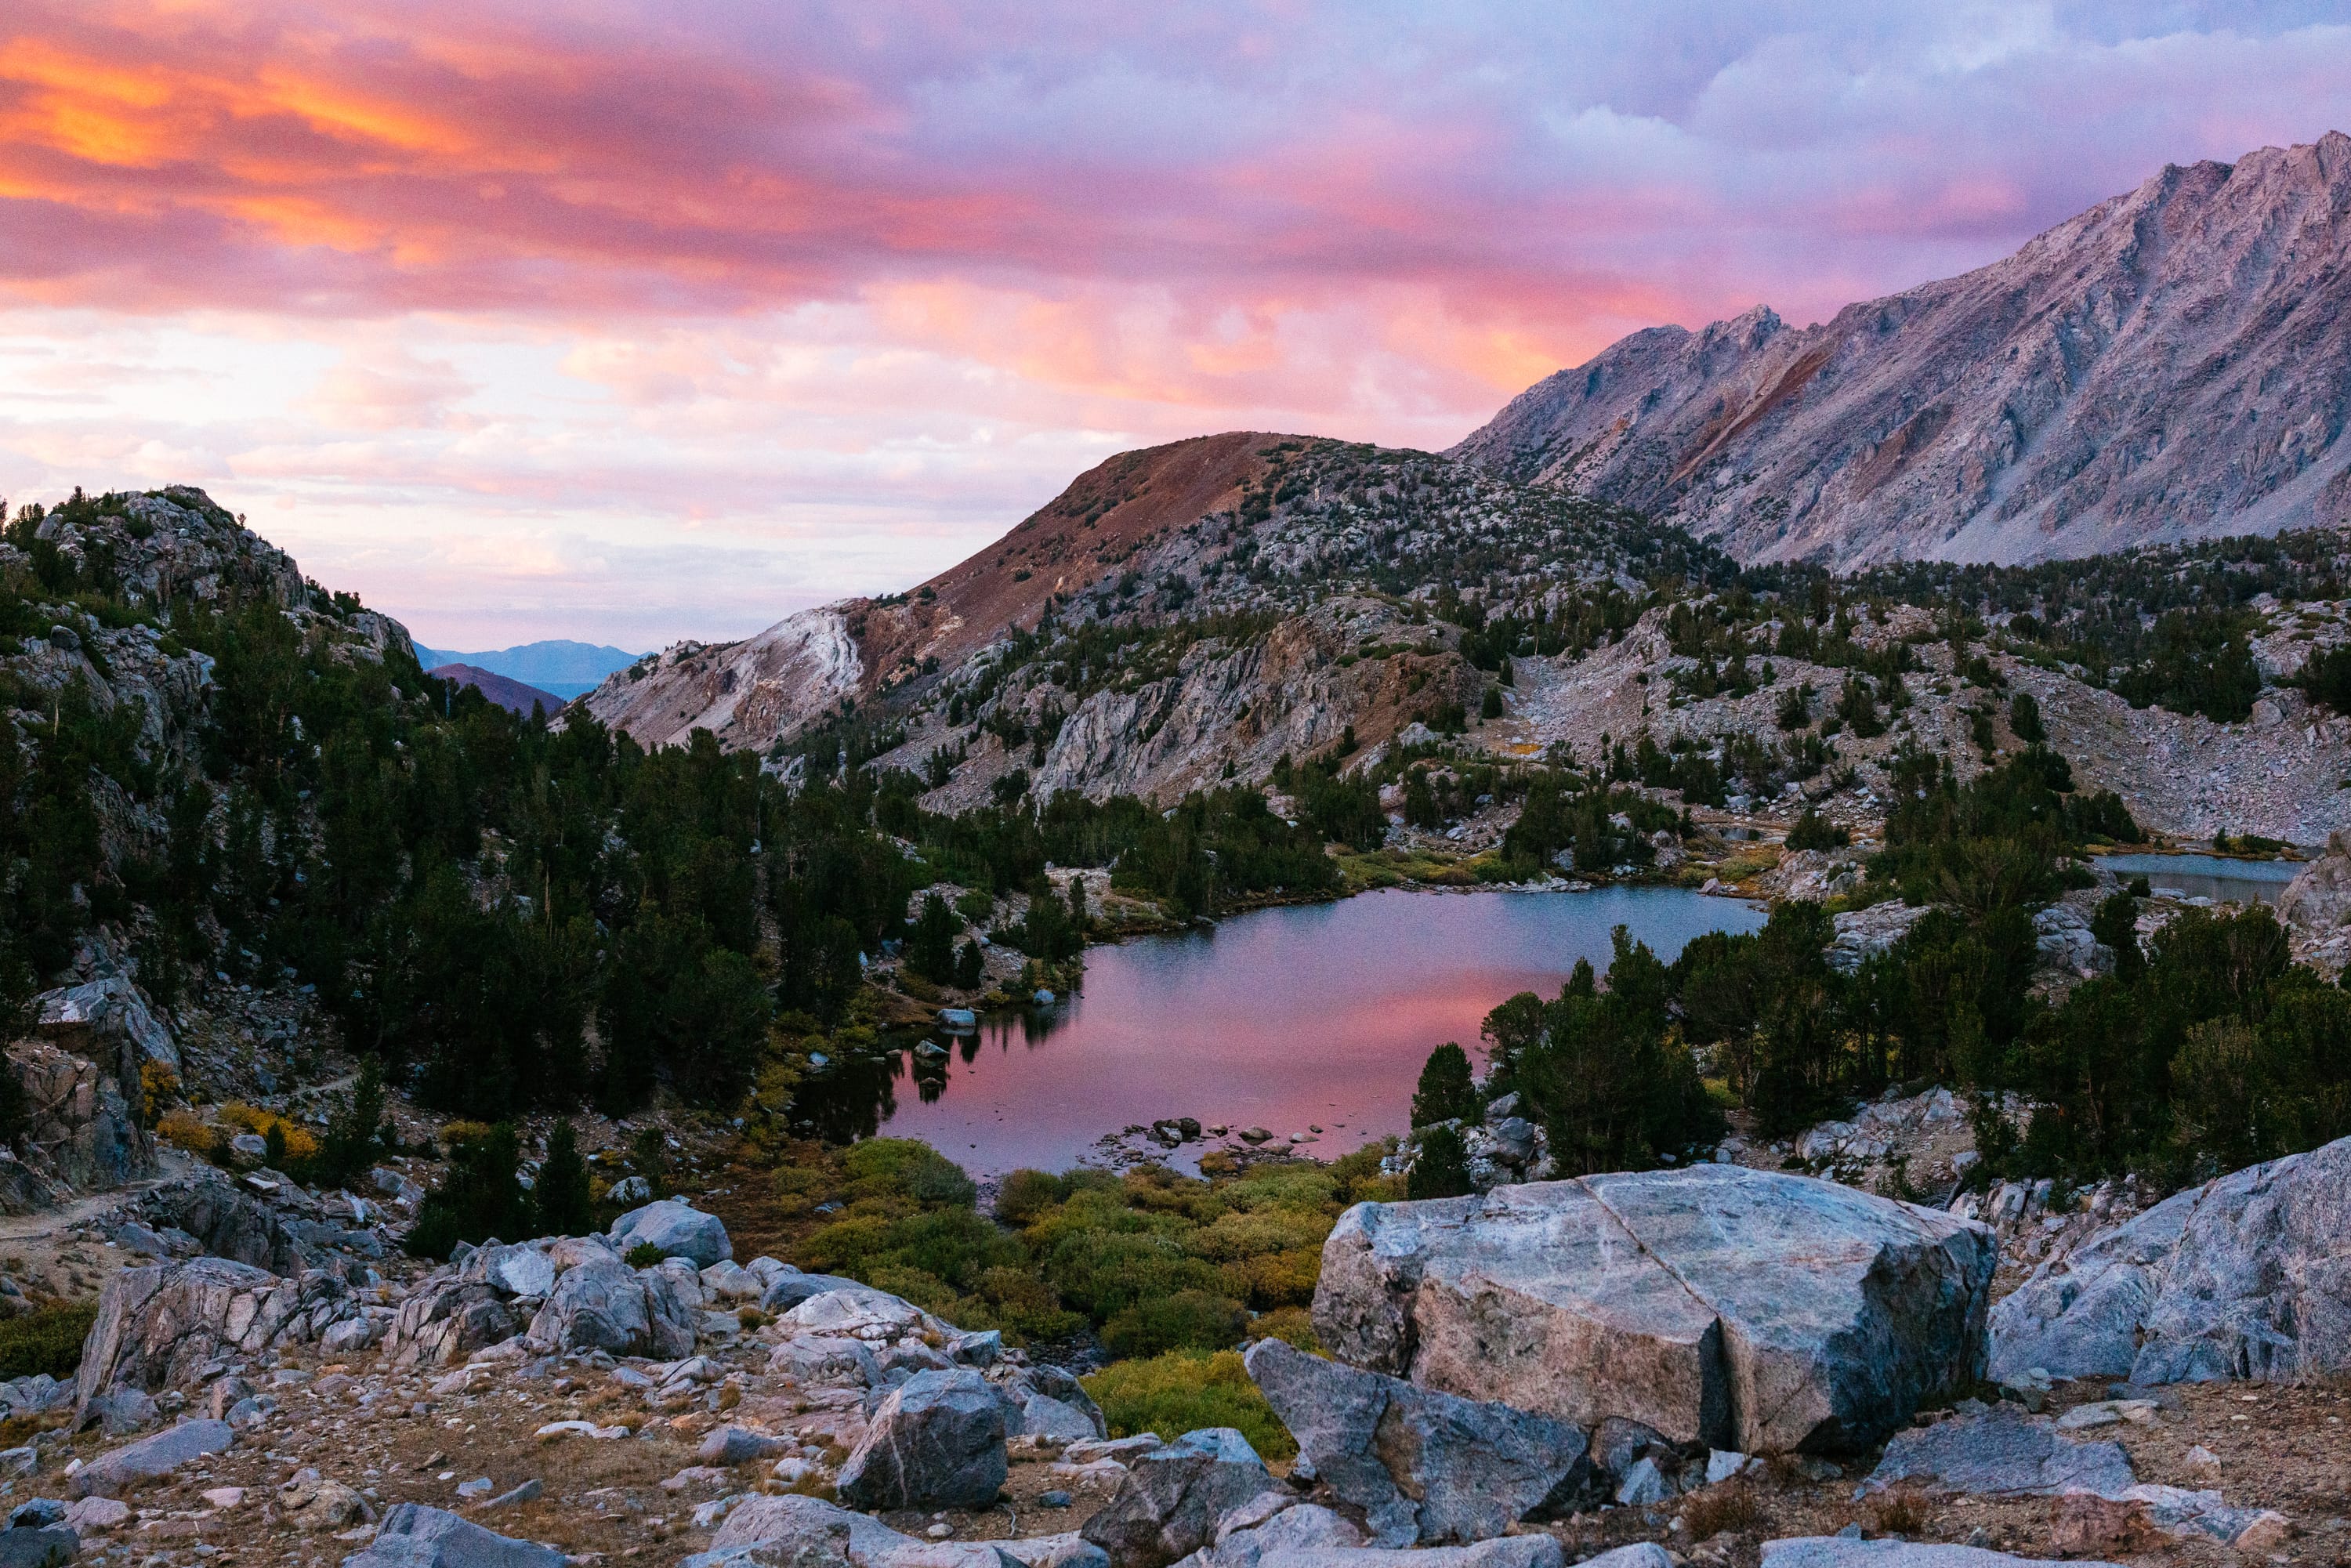
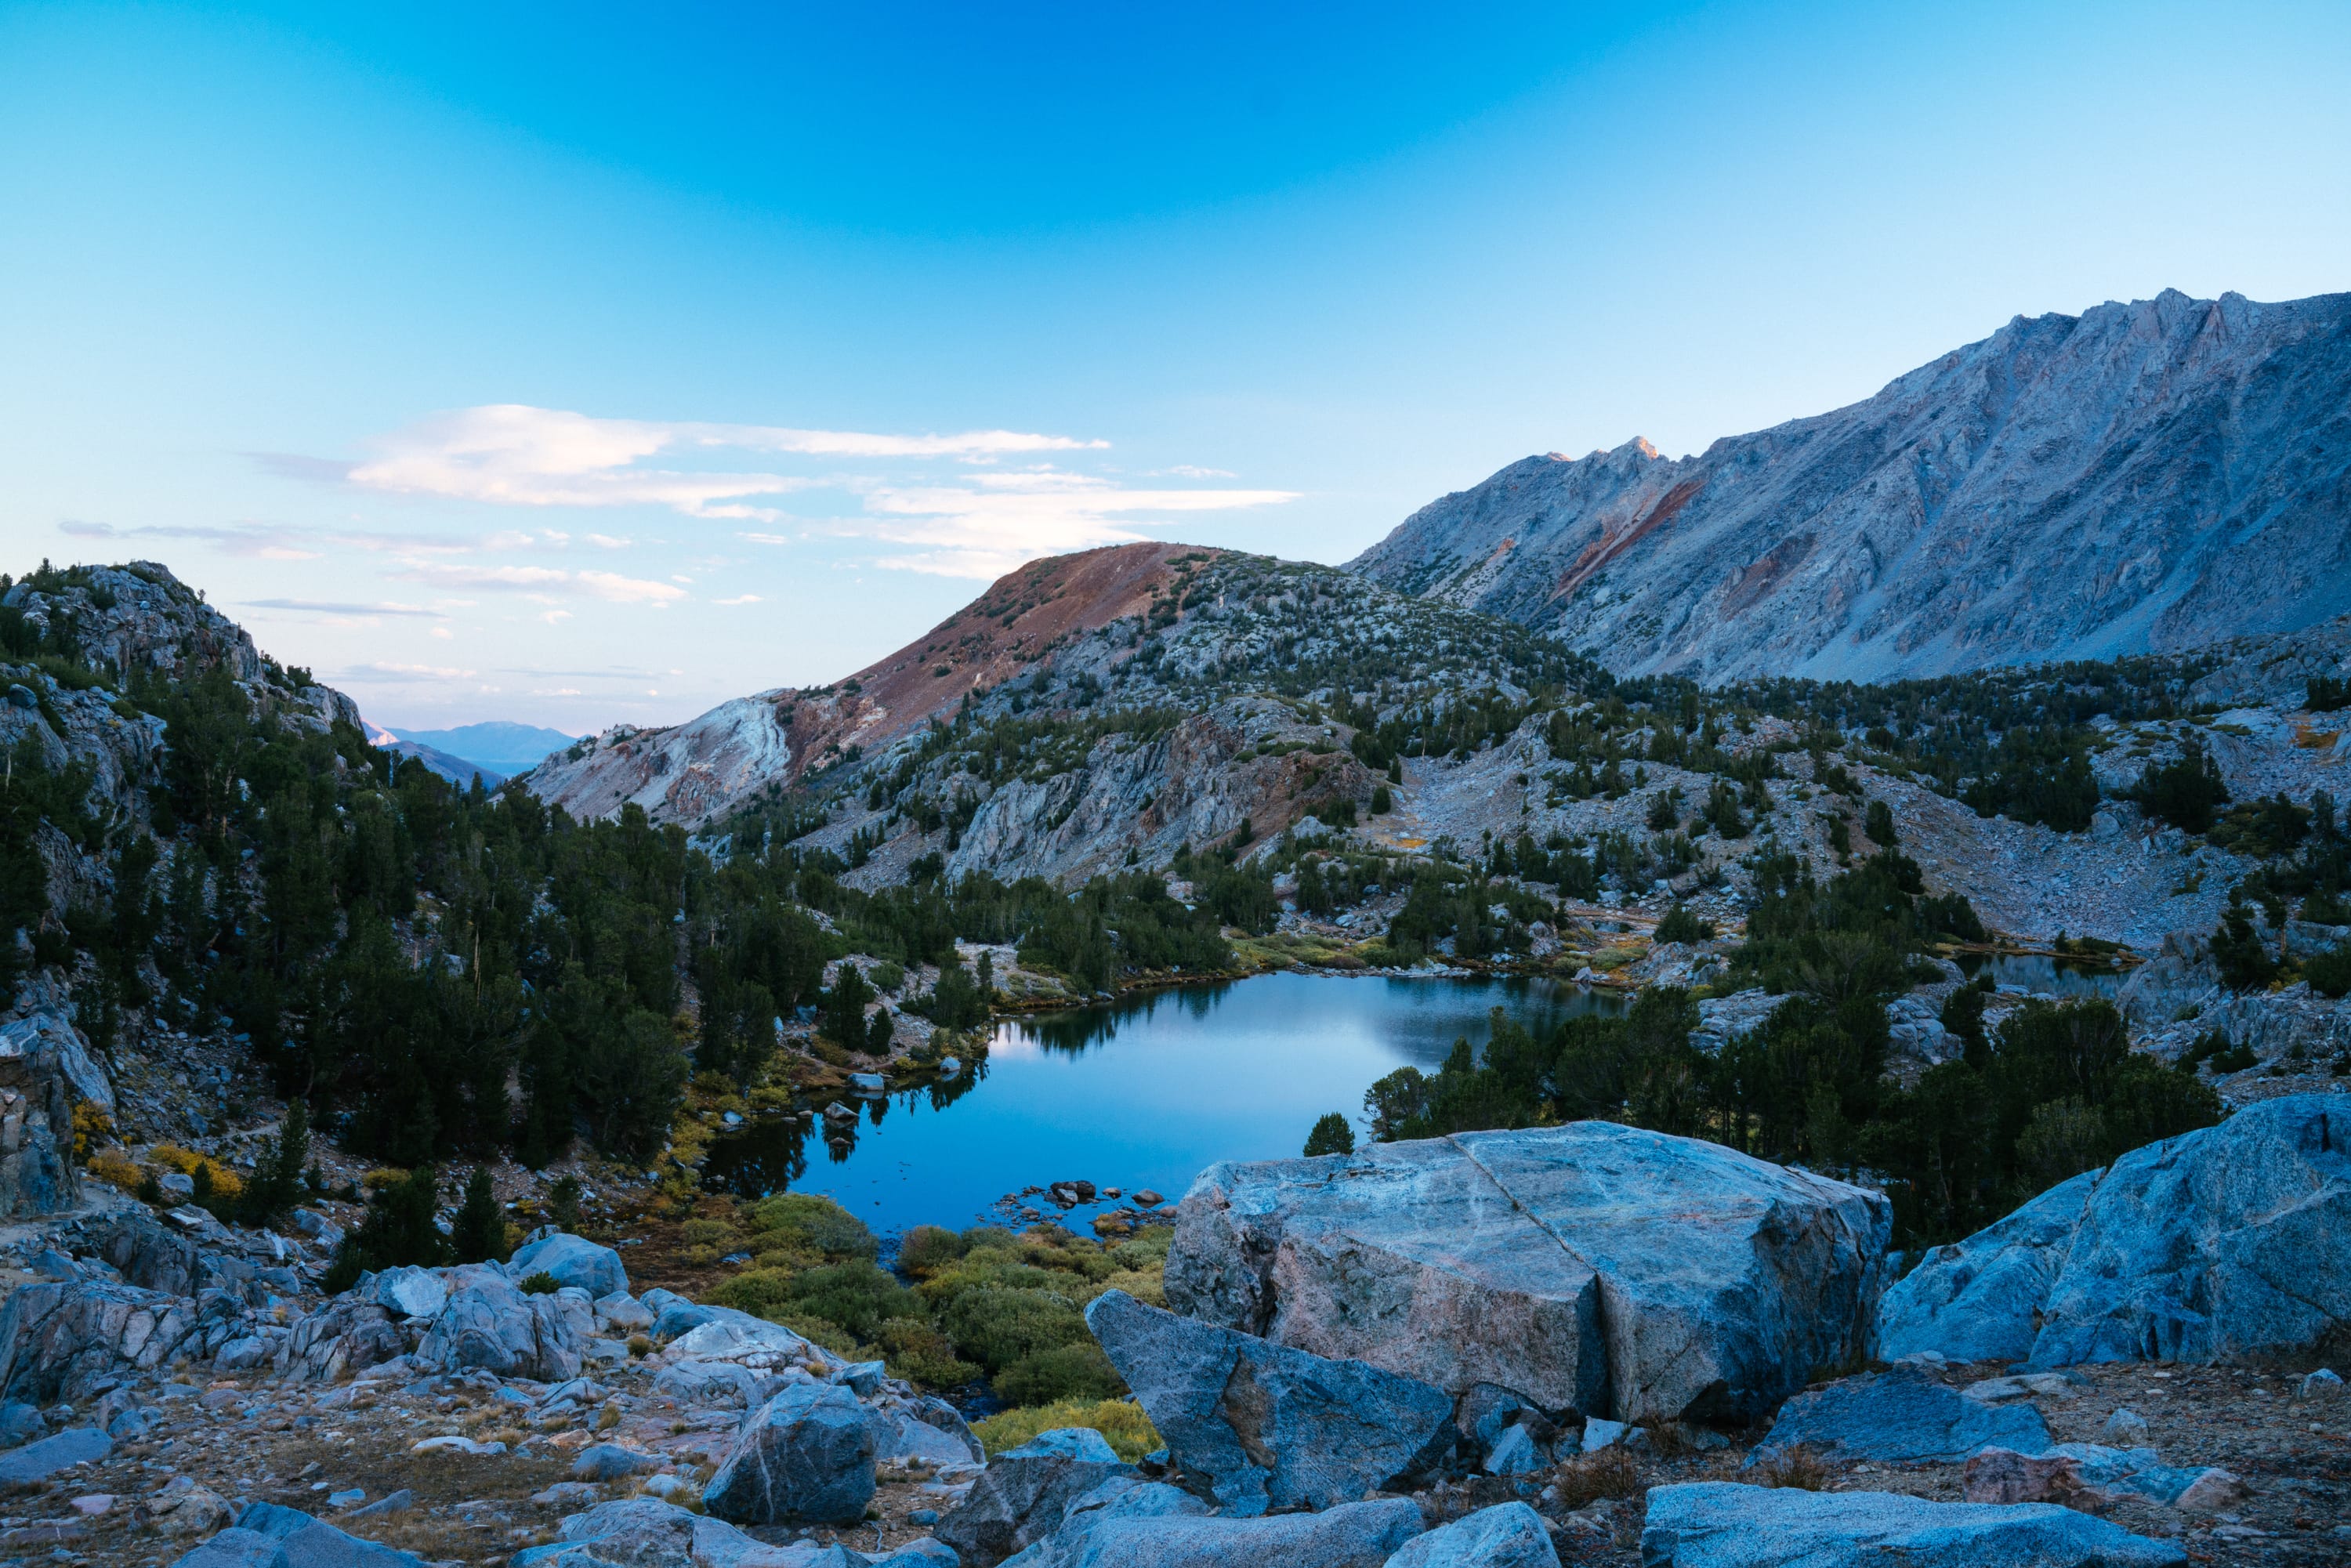
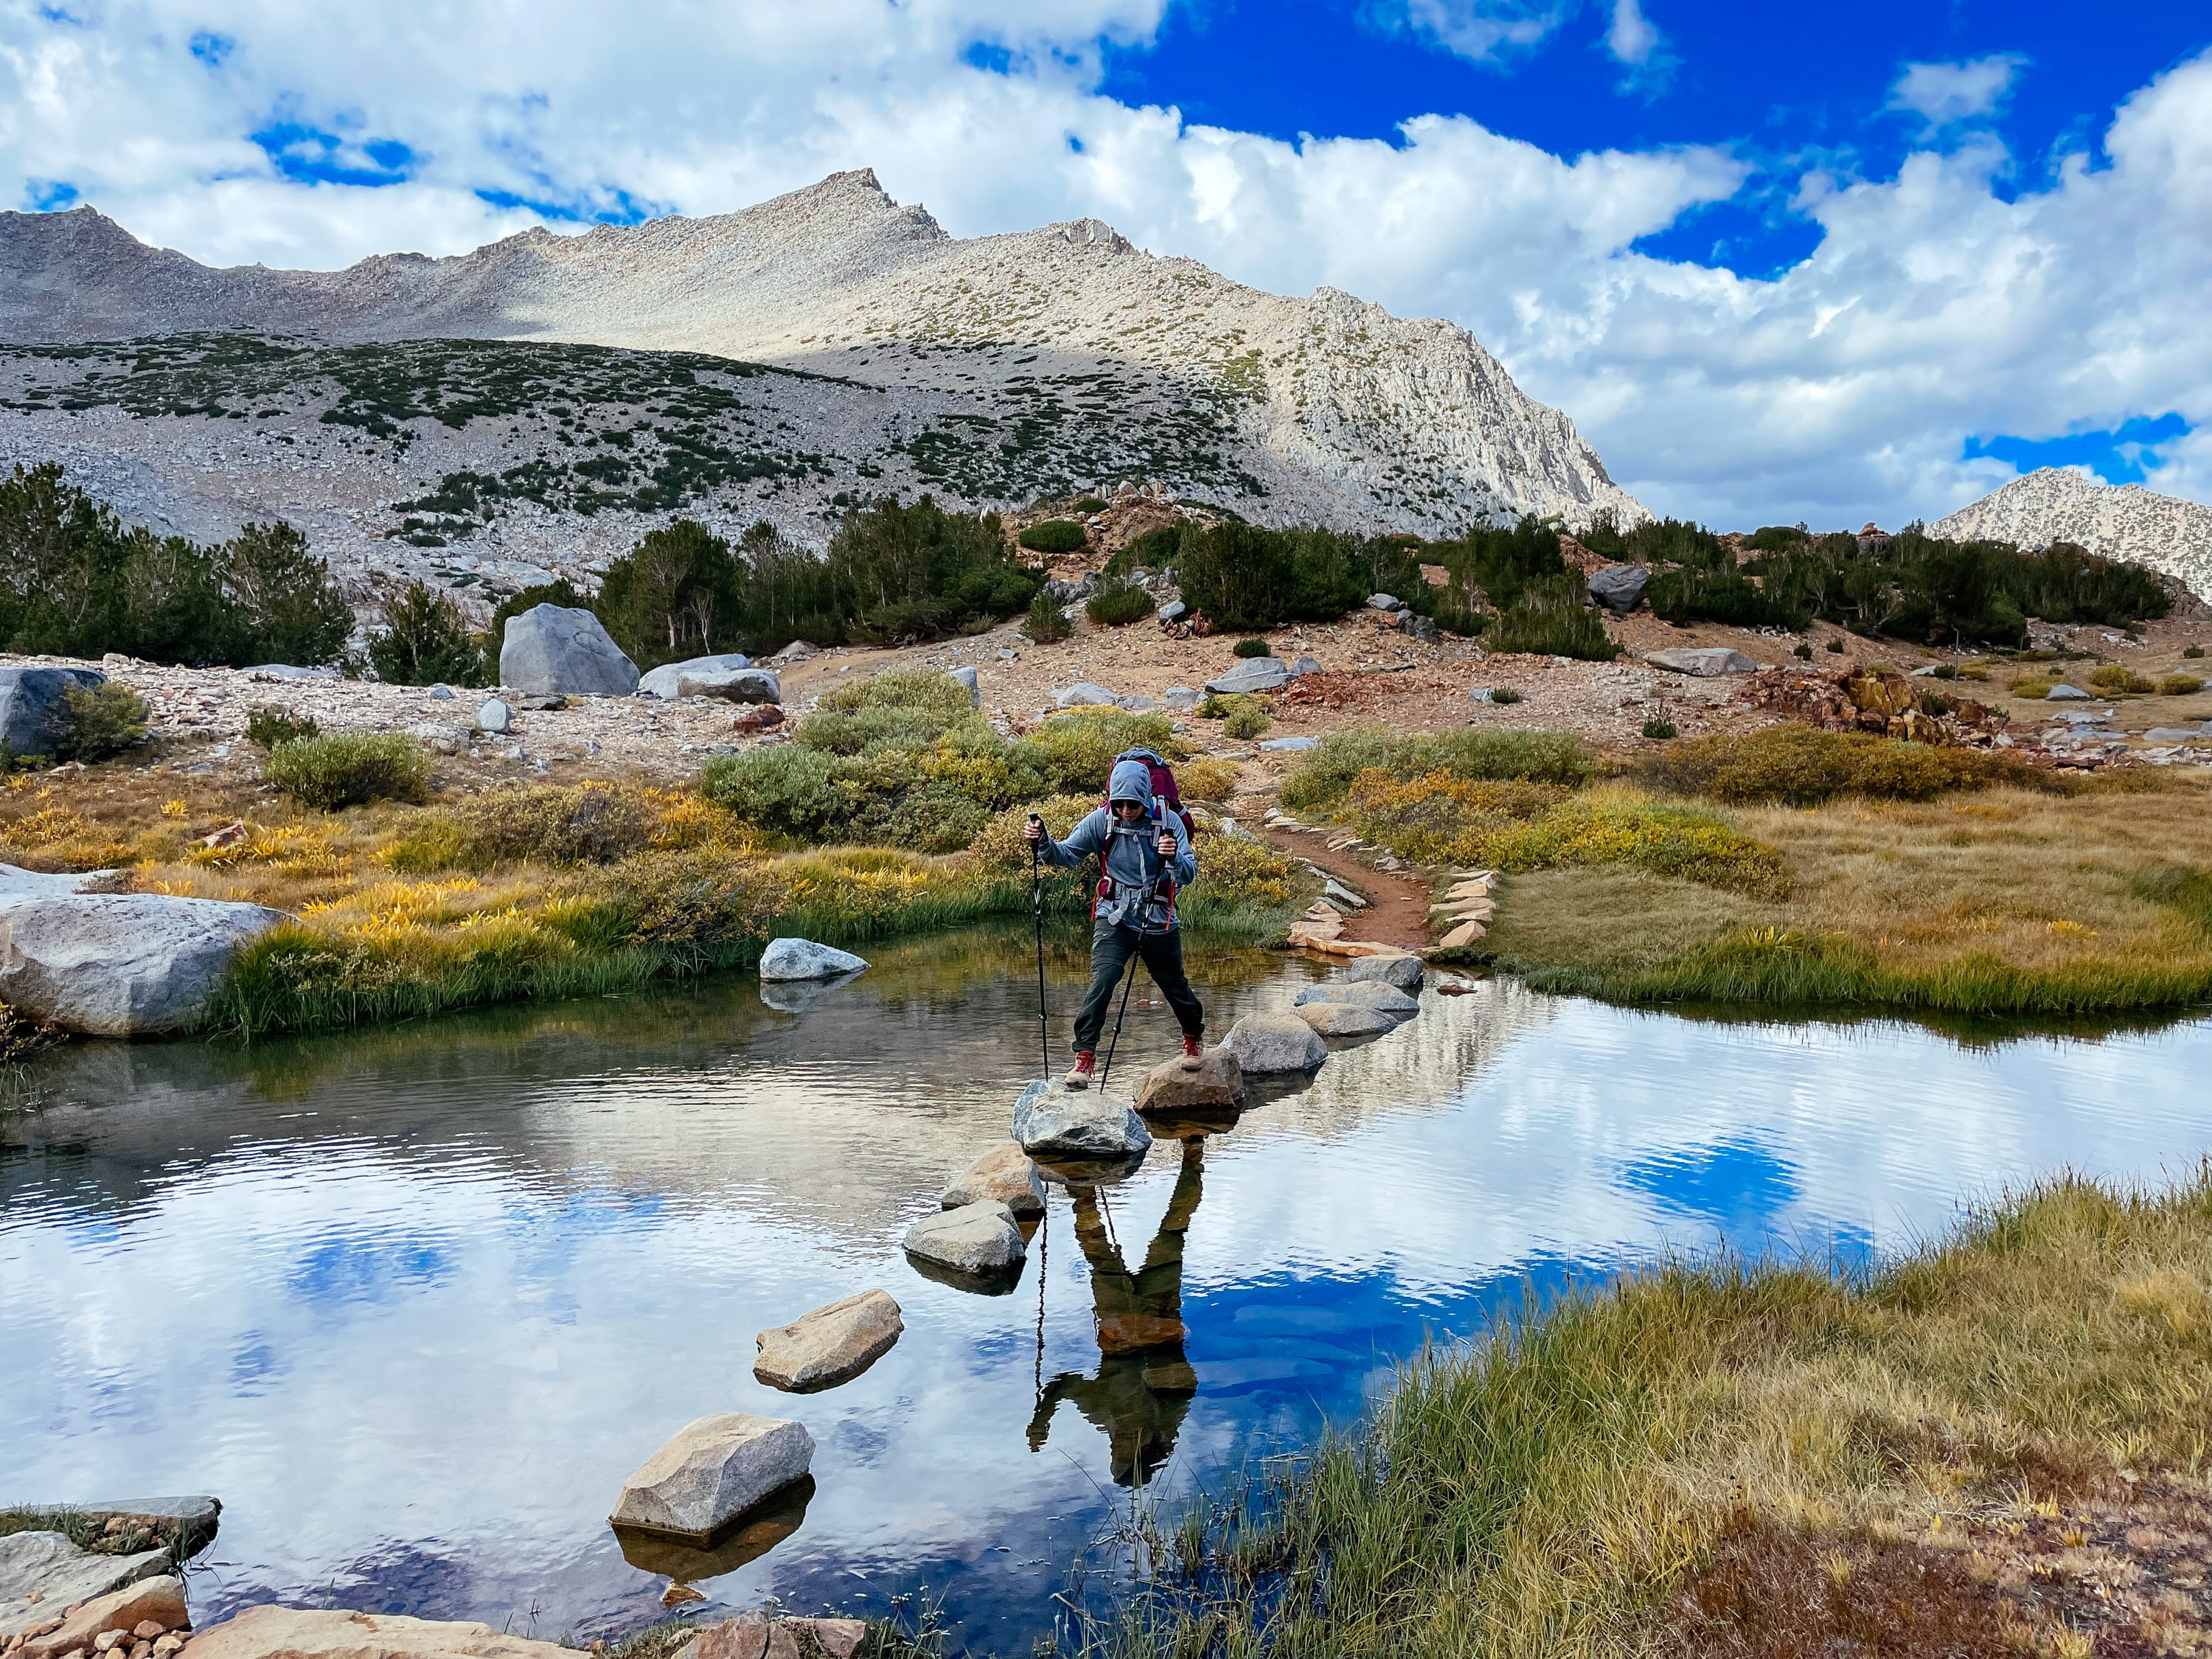
Chocolate Peak, Inconsolable Range, and blue beyond from Timberline Tarns 11076′
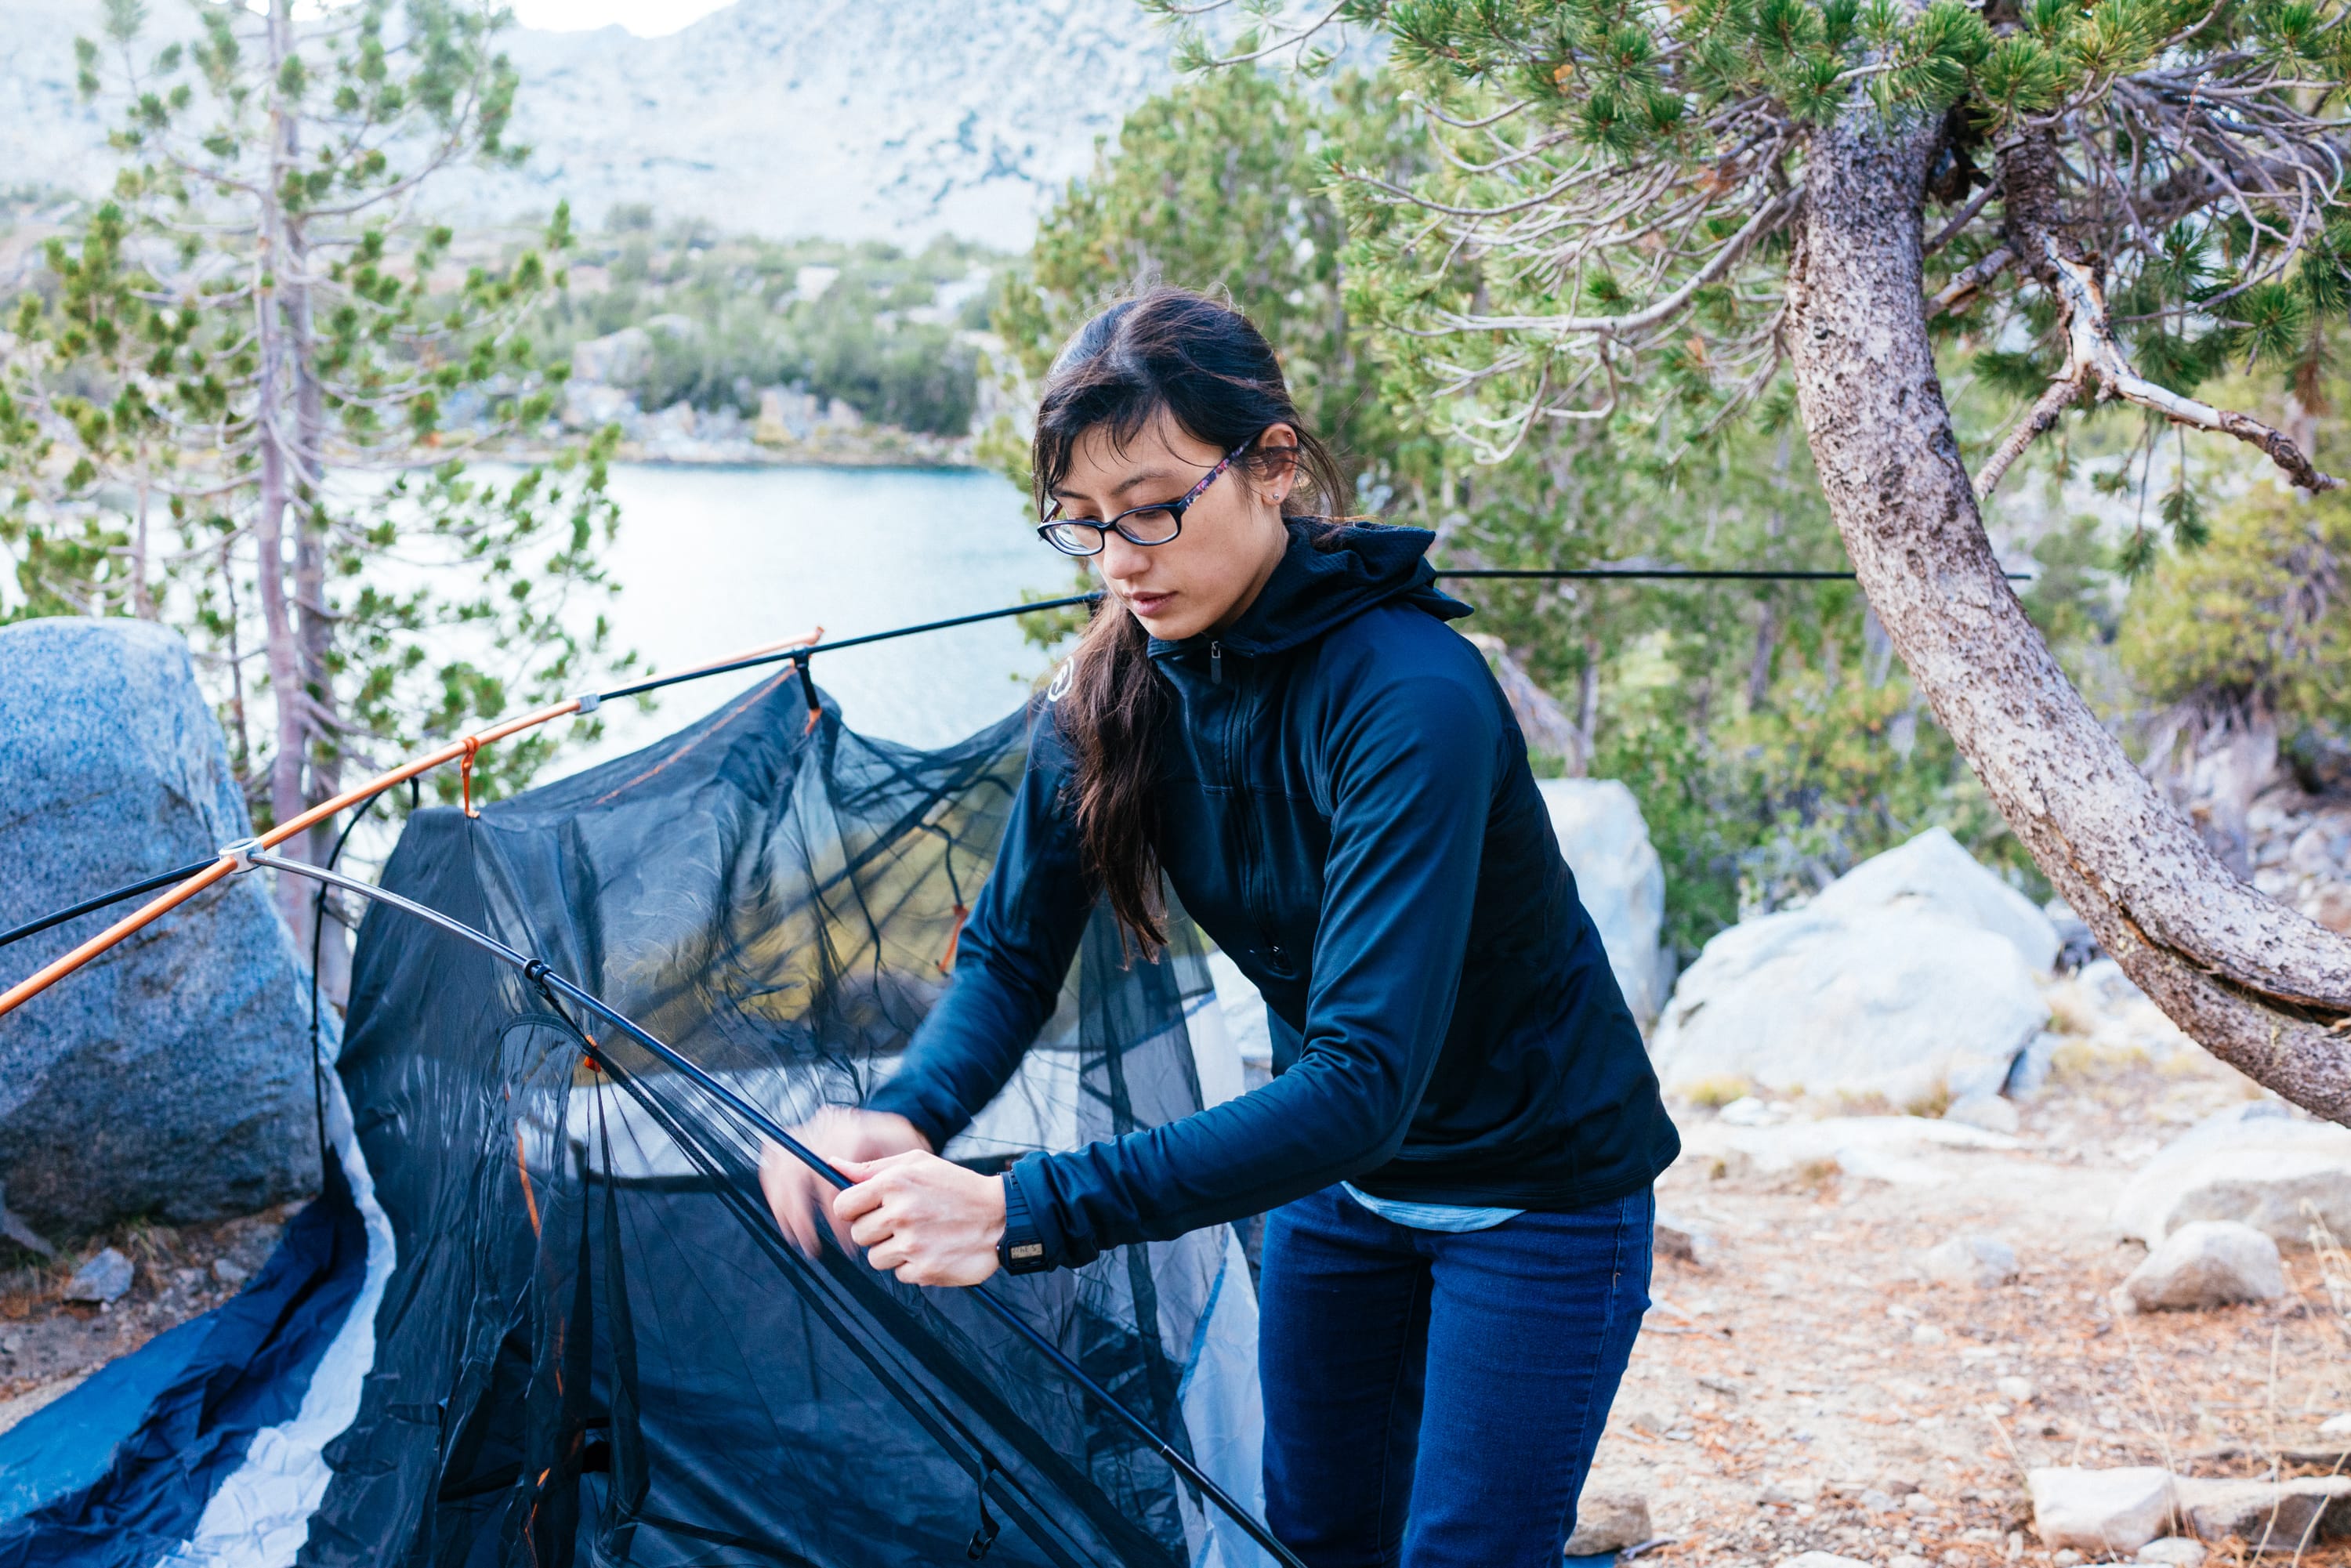
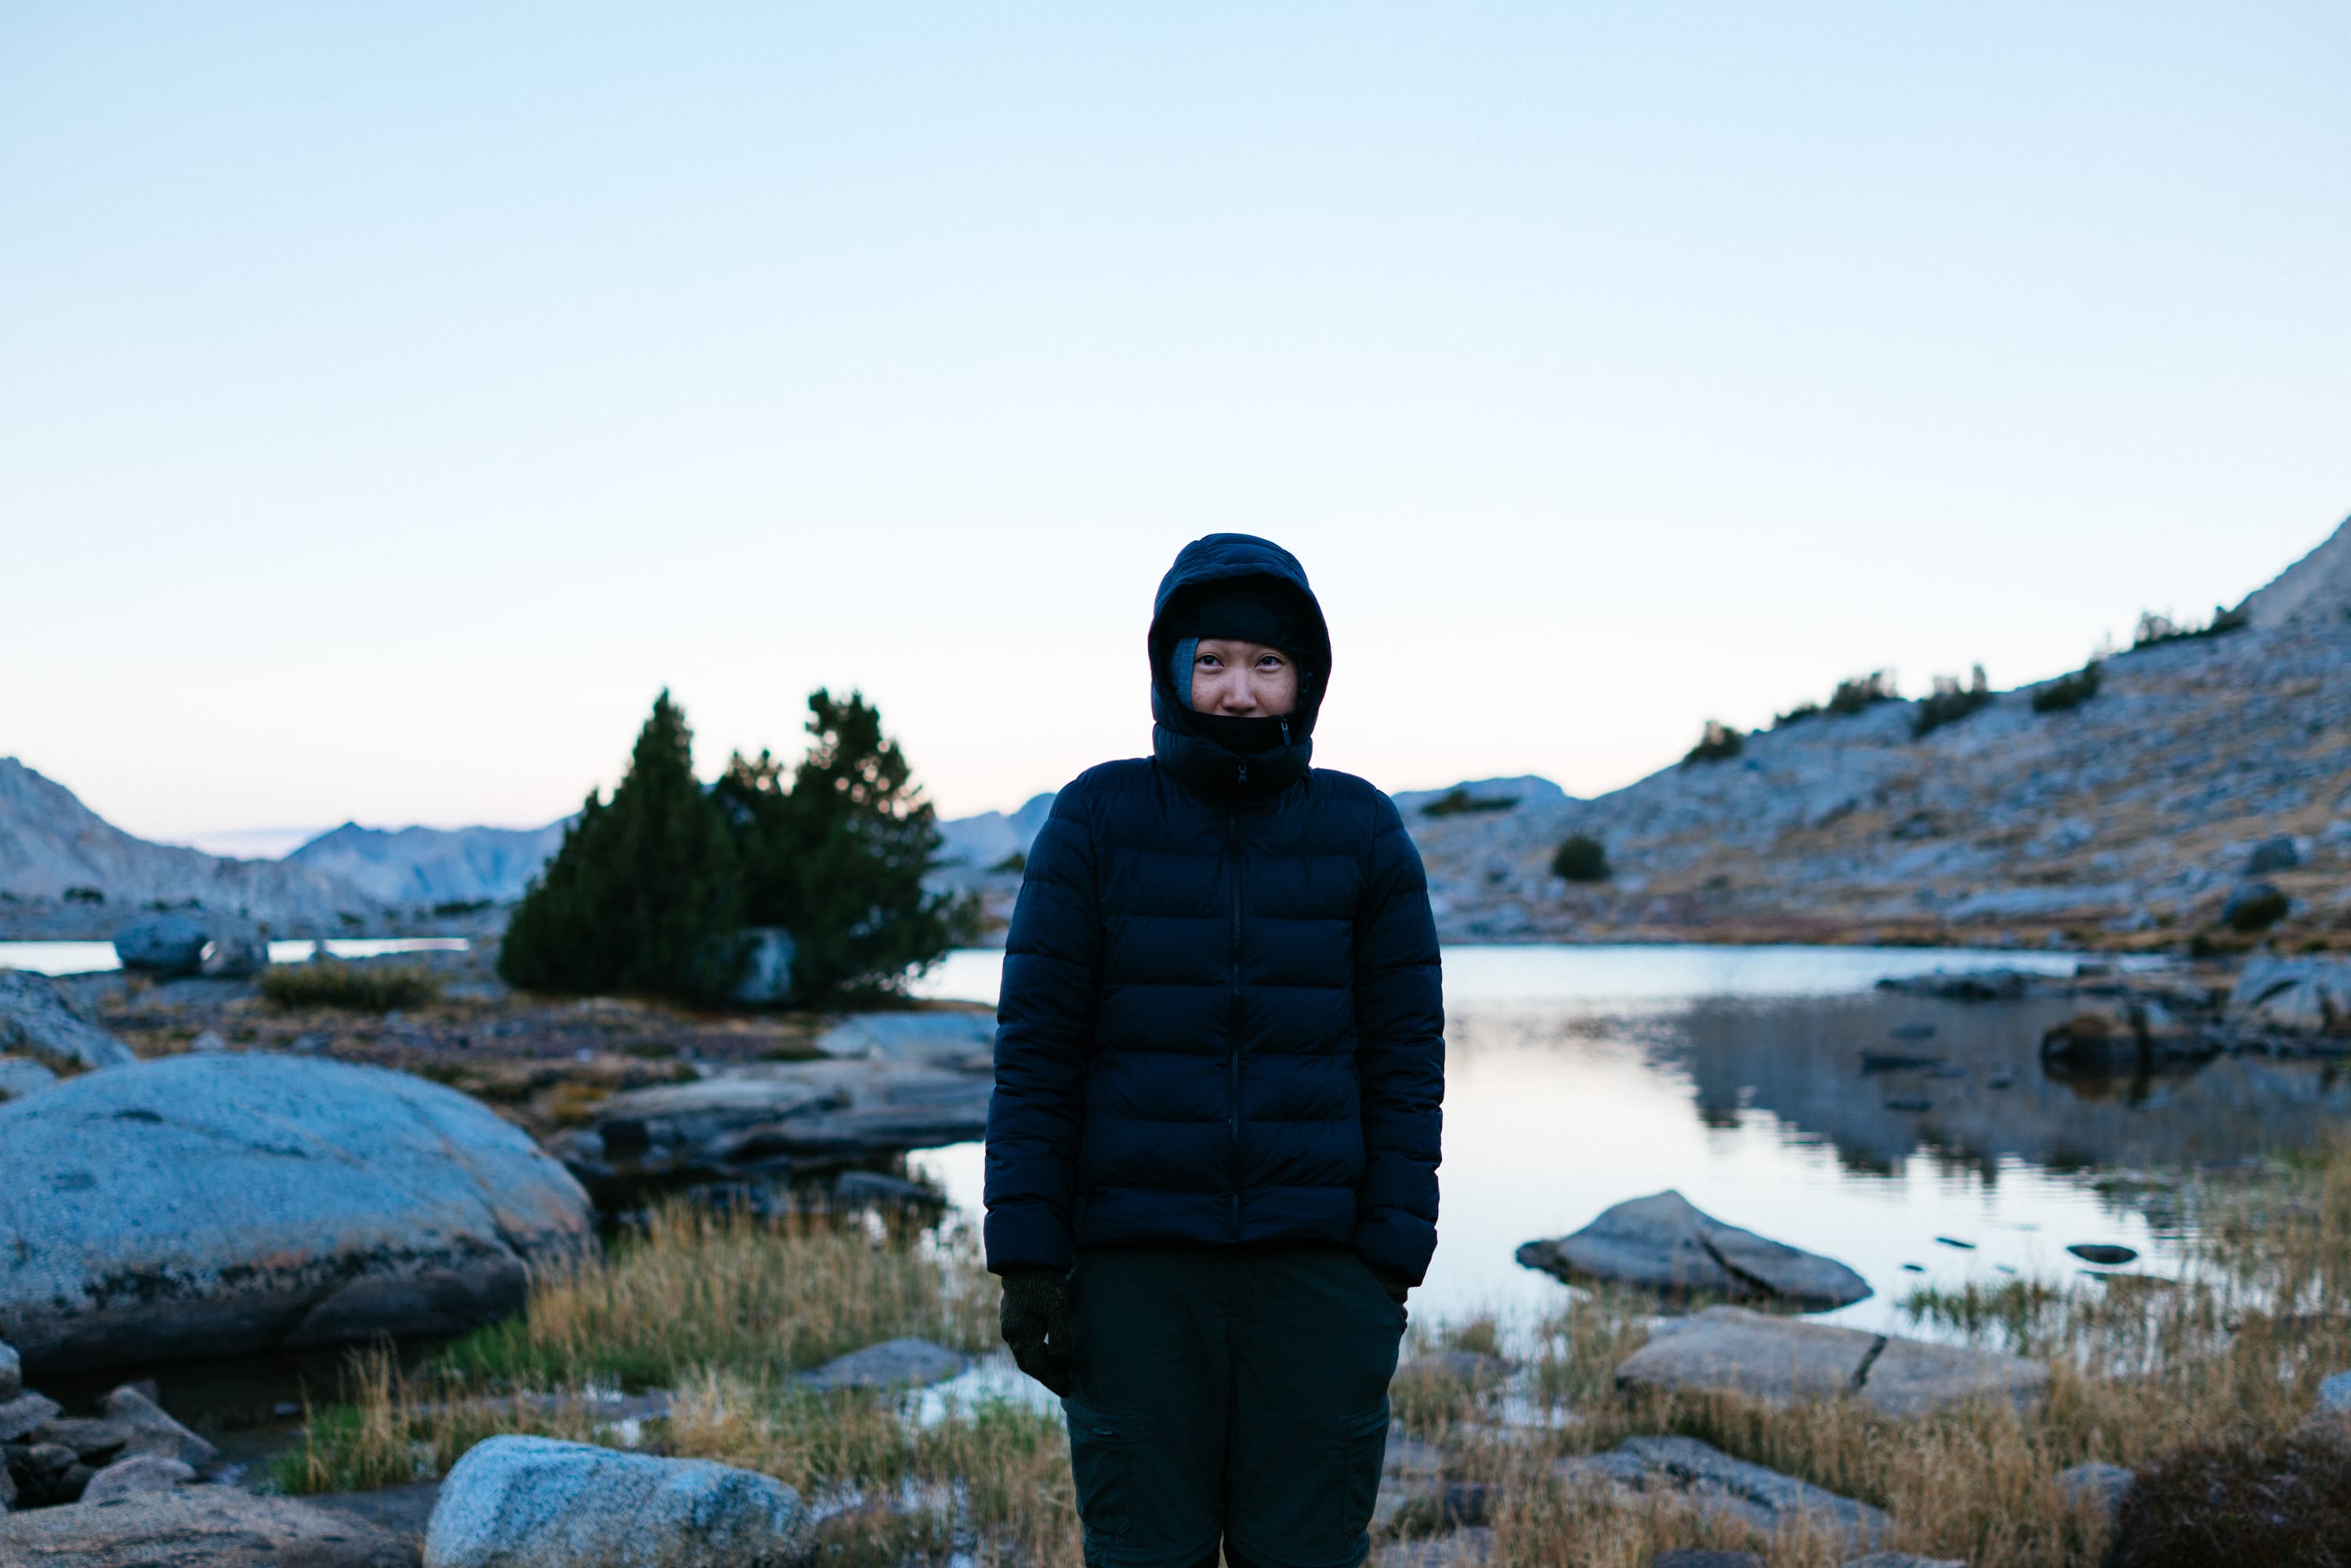
We don’t have to be good. We can get up anyway, we’re allowed to make the old things new. Throw up a sturdy structure against the swelling dark, throw on a light fleece, and huddle against the cold.
Timberline Tarns 11076′ twelve hours later
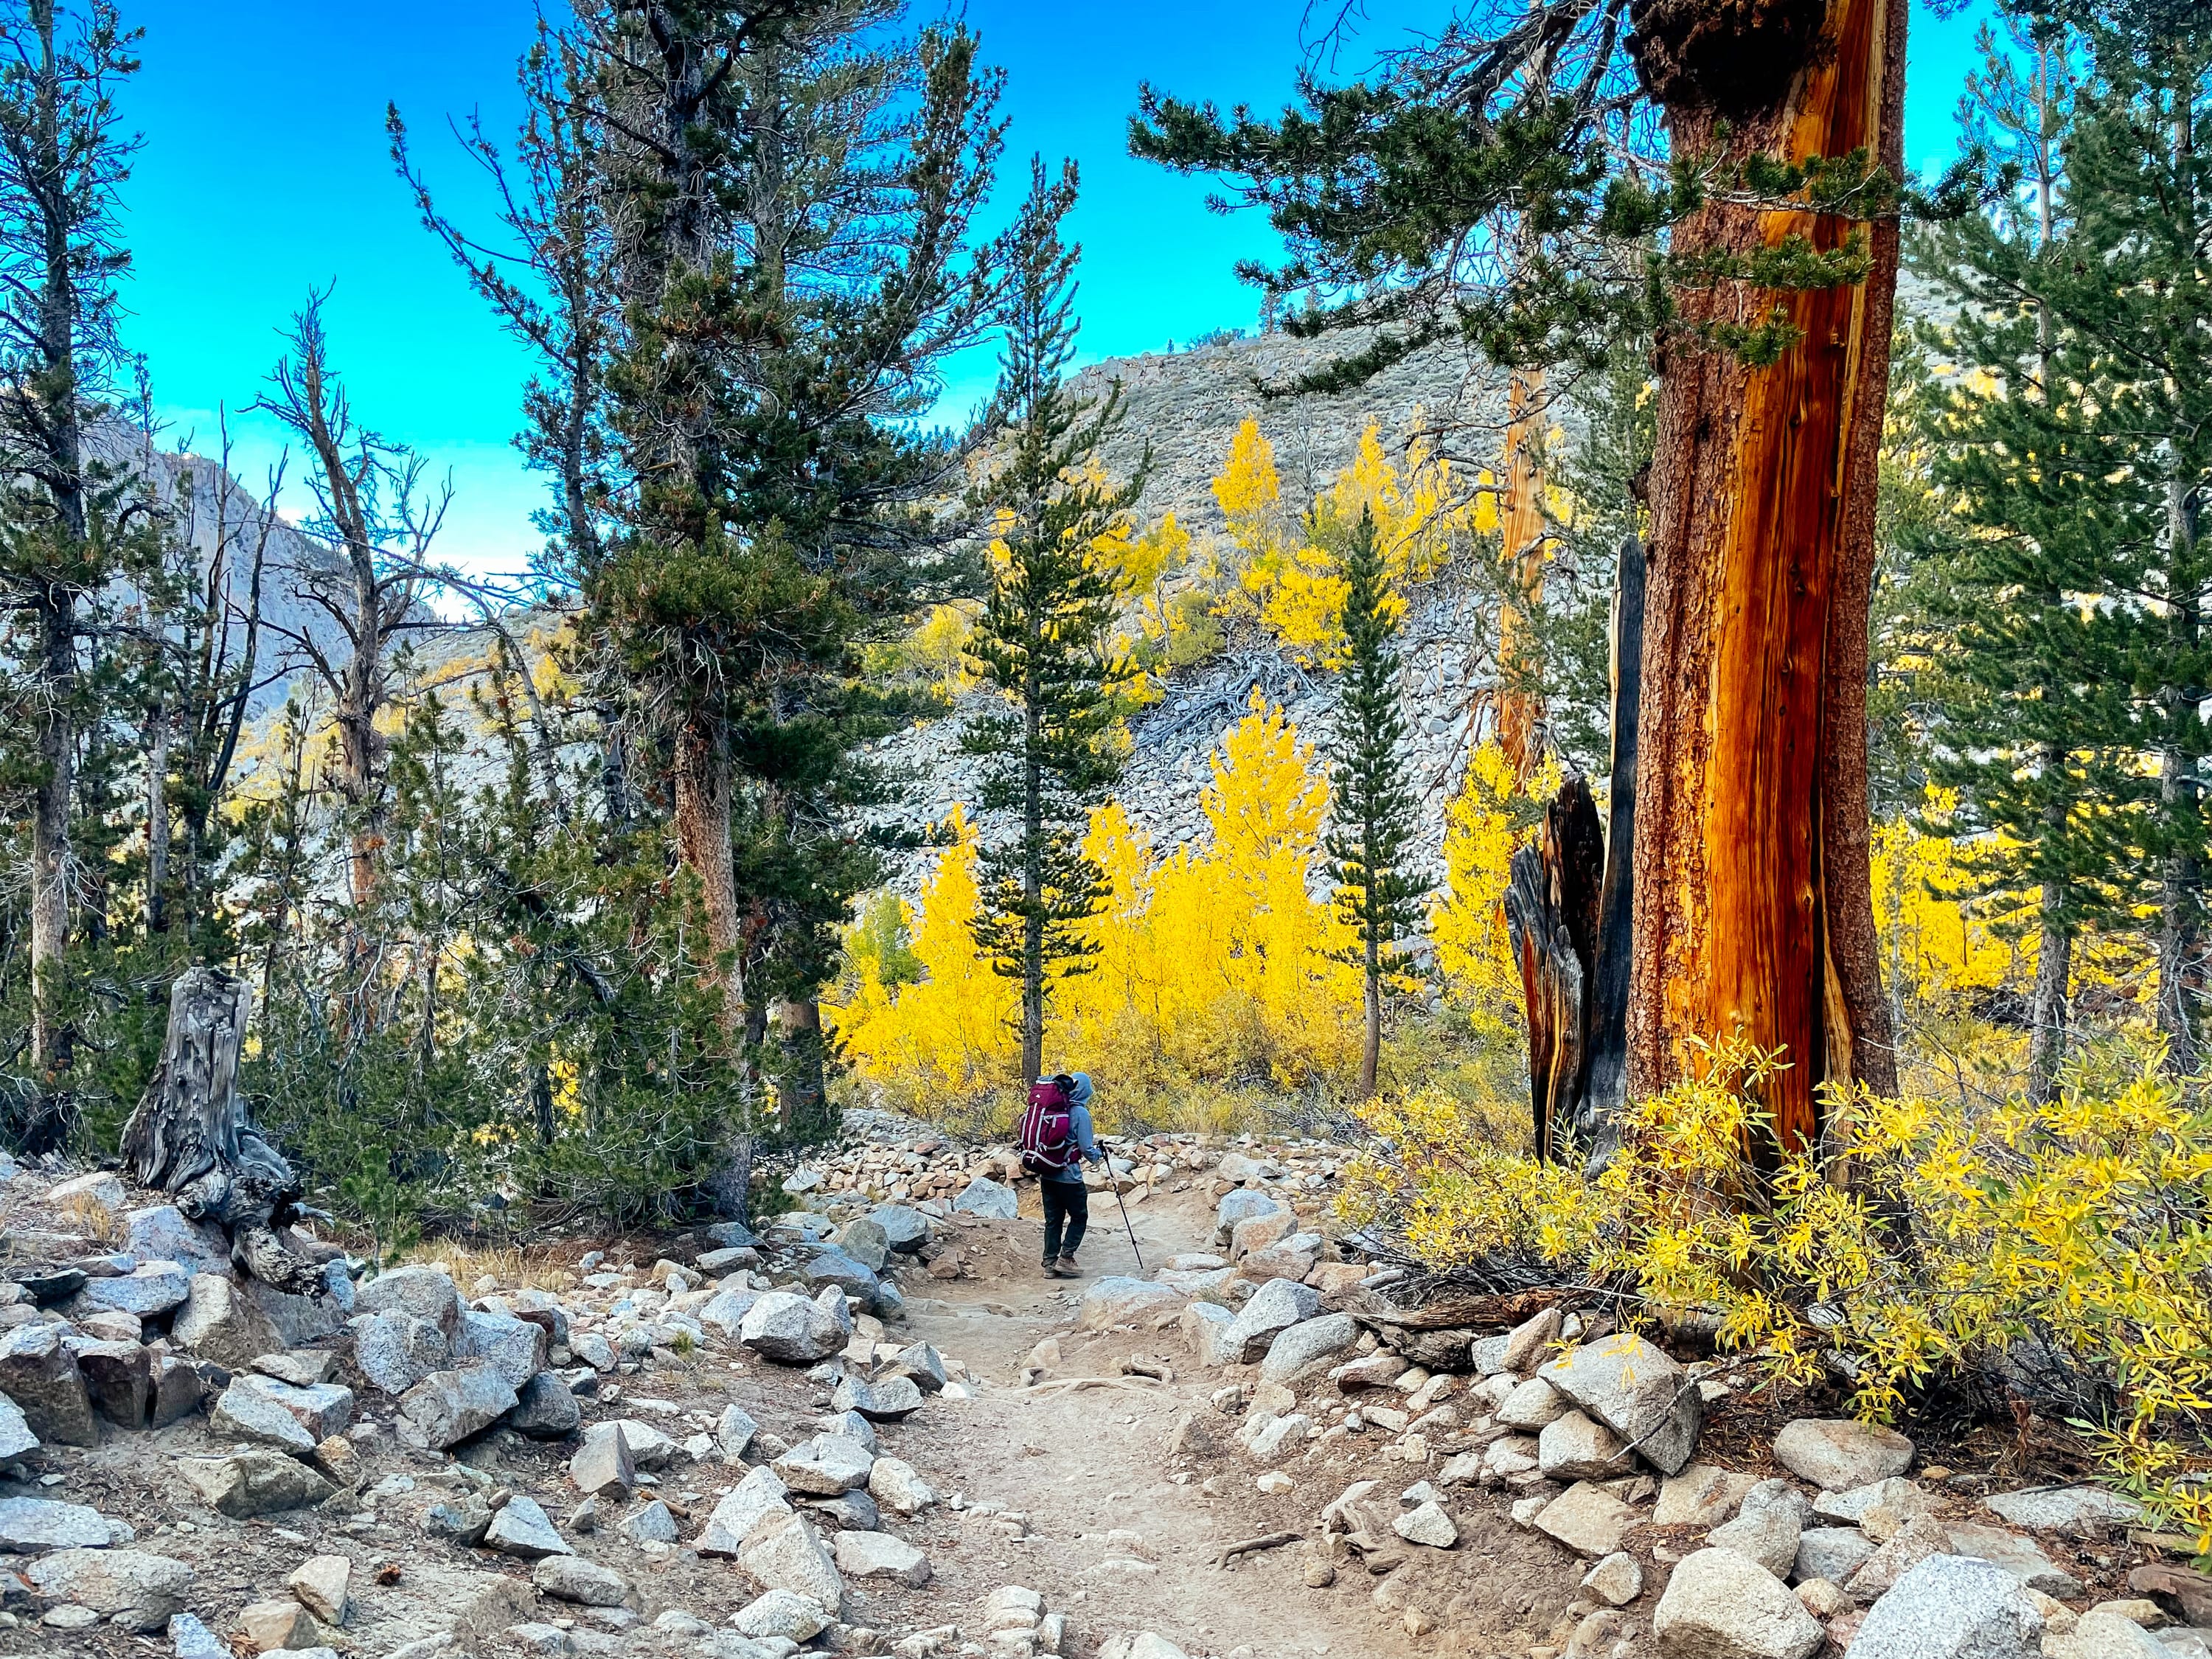
Bishop Pass Trail/cross-country in Dusy Basin
Lembert Dome 9455′
And in the morning I wake up thinking this is it, this time, this time, this time. This time I know better, this time I will do it right.
Things practiced: trying to give talk while mostly unable to string sentences together, computers
Tools used: the Paper app, a profusion of time + patience from those around me
Got a chance to speak at Strange Loop this year, in person; the fact of a tech conference in all its normalcy like a miracle, that we’ve gotten through this year so far at all. Sometimes survival feels like a great achievement and maybe all the cruelties and losses and things we’ve forgotten are just life. Anyway it’s about event-driven programming. Time washes us all away.
The Colorado Plateau has somehow, through a series of coincidences, survived as a coherent block since the Precambrian; nowhere else on Earth can we see such a history of the last two billion years.
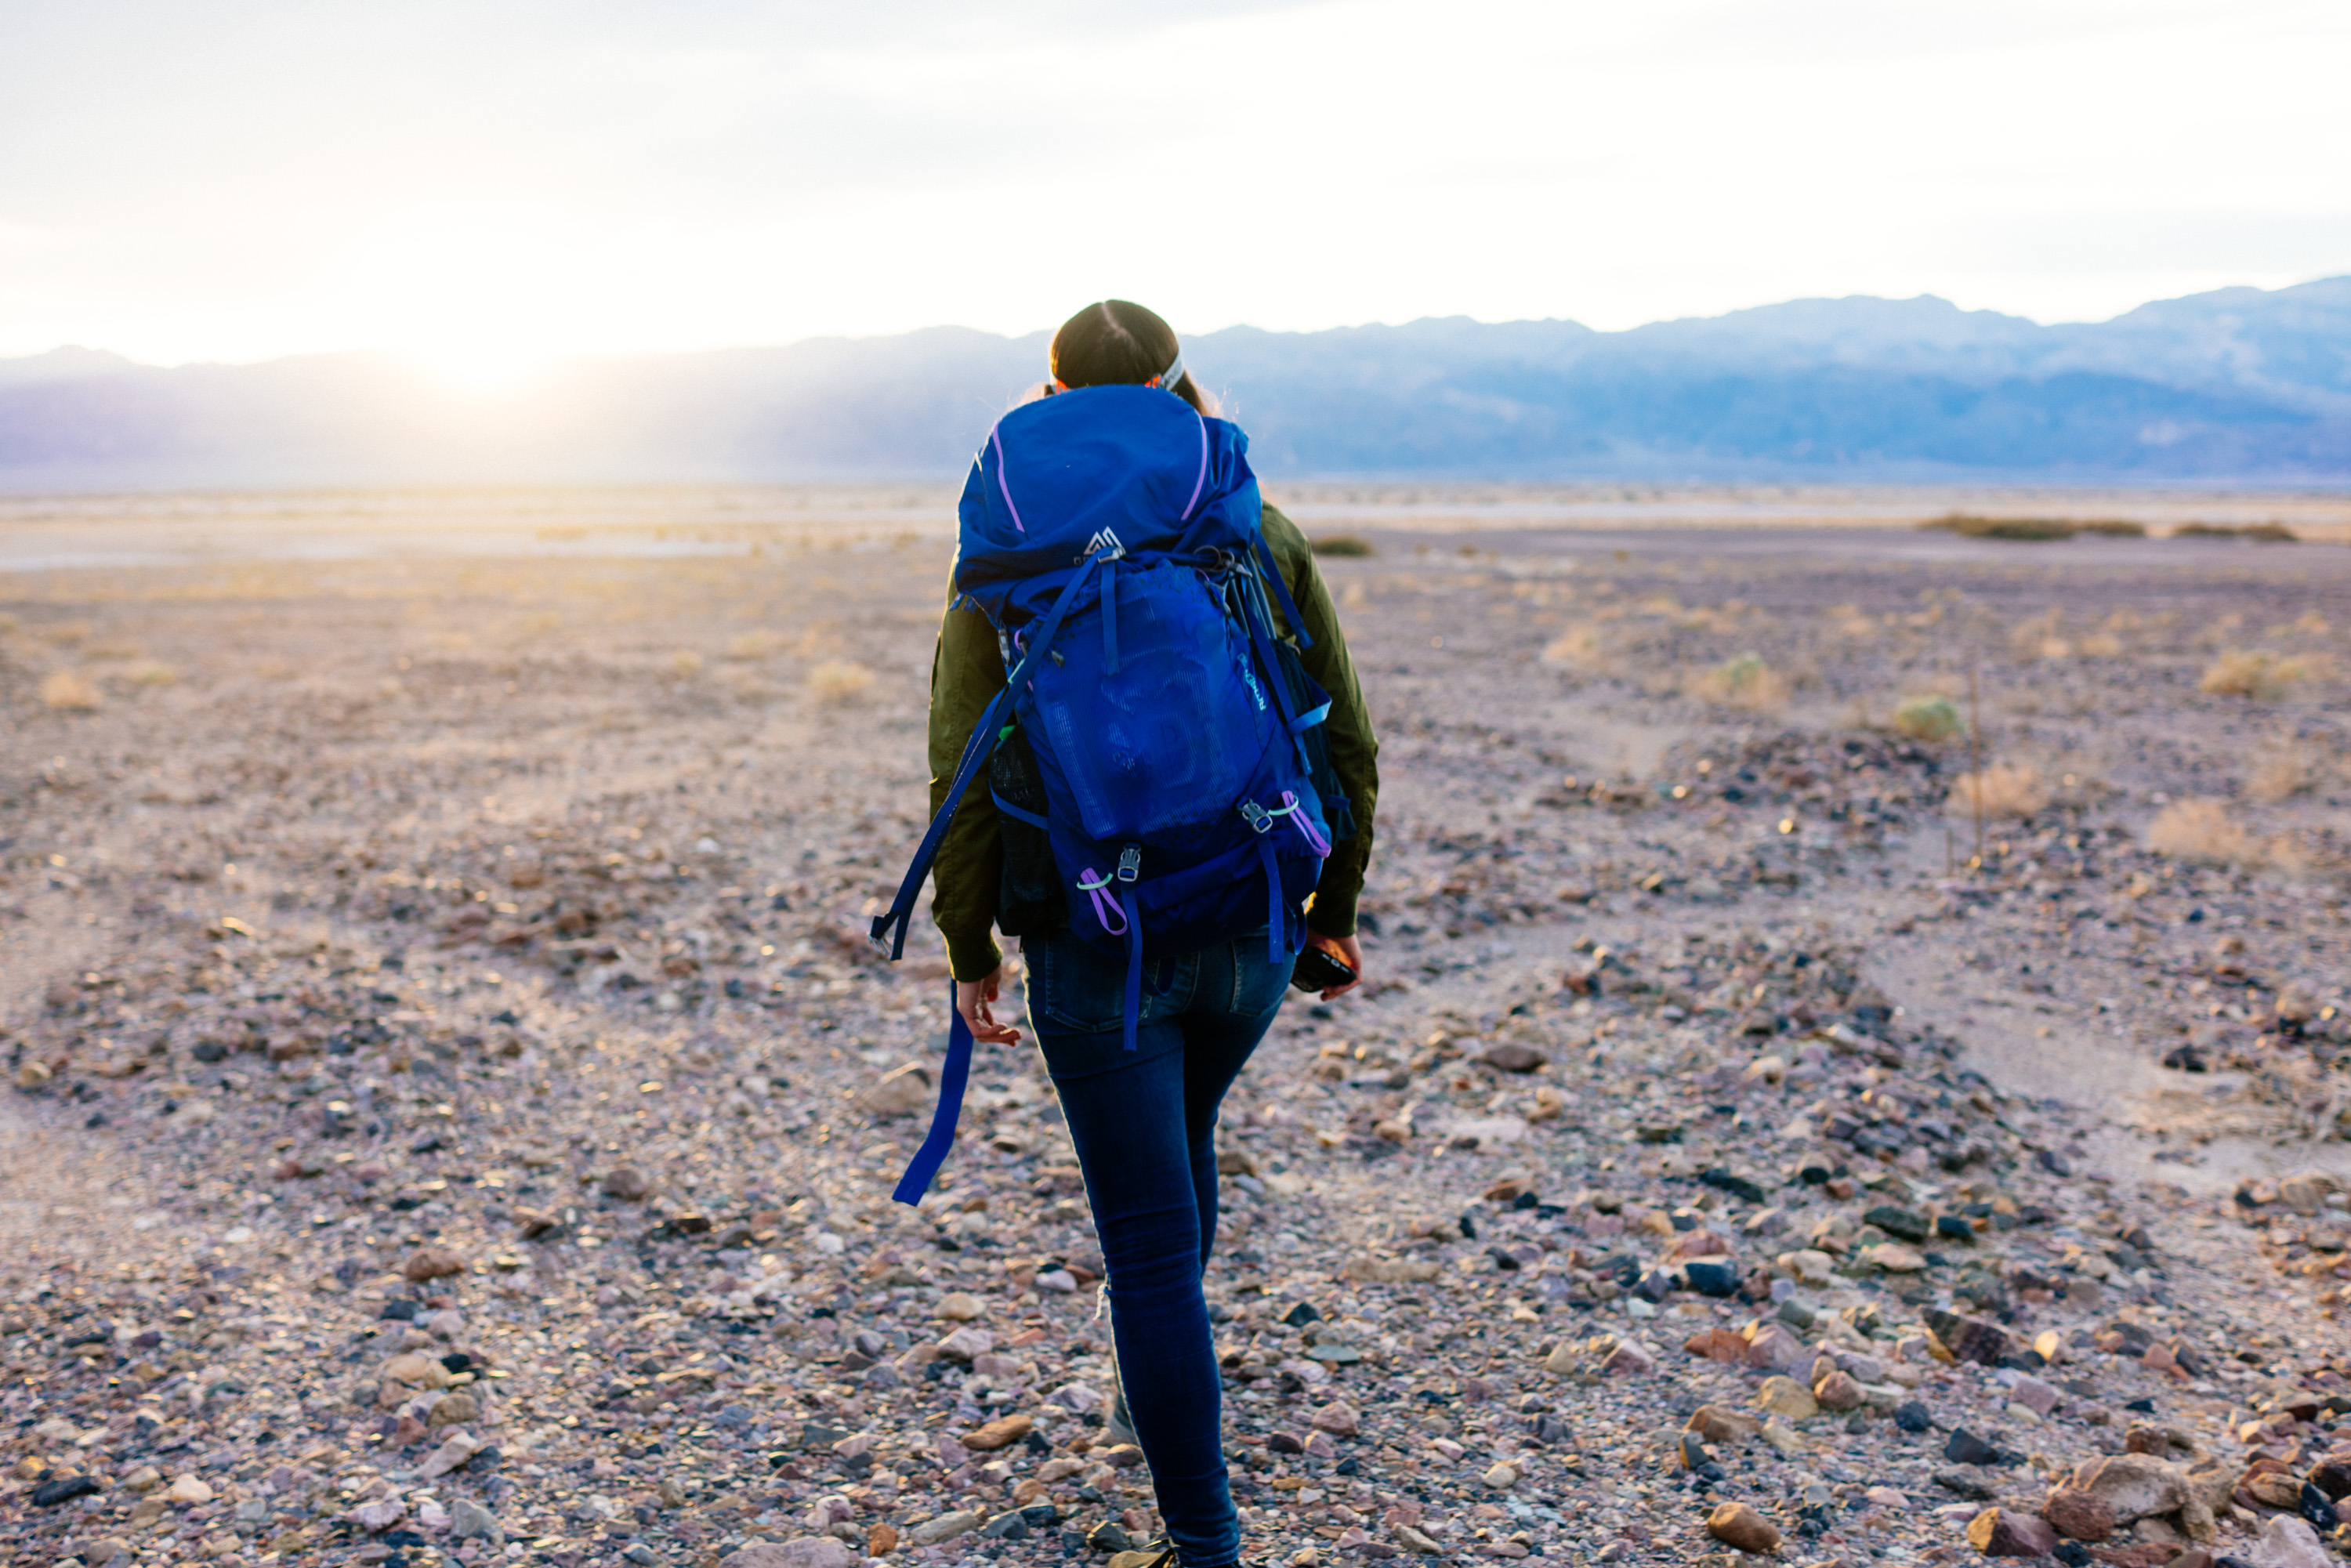
One couldn’t dream a place like this. The sky is open all the way; I only want to walk a little longer.
Here’s a world far larger than our own, that stretches into the ancient past and continues into a future beyond human limits; here the landscape is infinite, its bounds beyond the horizon of human knowledge, its possibilities endless. Weird as hell.
The desert has no center. It’s a riddle with no answer, a distant and uninhabitable planet. The desert waits outside, waits for us all: desolate and still and strange, grotesque in its shapes and colors and forms: canyon, butte, mesa, reef, fin, slot, dome, escarpment, pinnacle, maze, sand dune.
The desert says nothing, it lies there like the bare skeleton of being, spare, sparse, austere, utterly useless, clean, pure, simple, untouchable by the human mind.
The land is sand or sandstone, naked, monolithic, austere, unadorned, like the moon, or Mars.
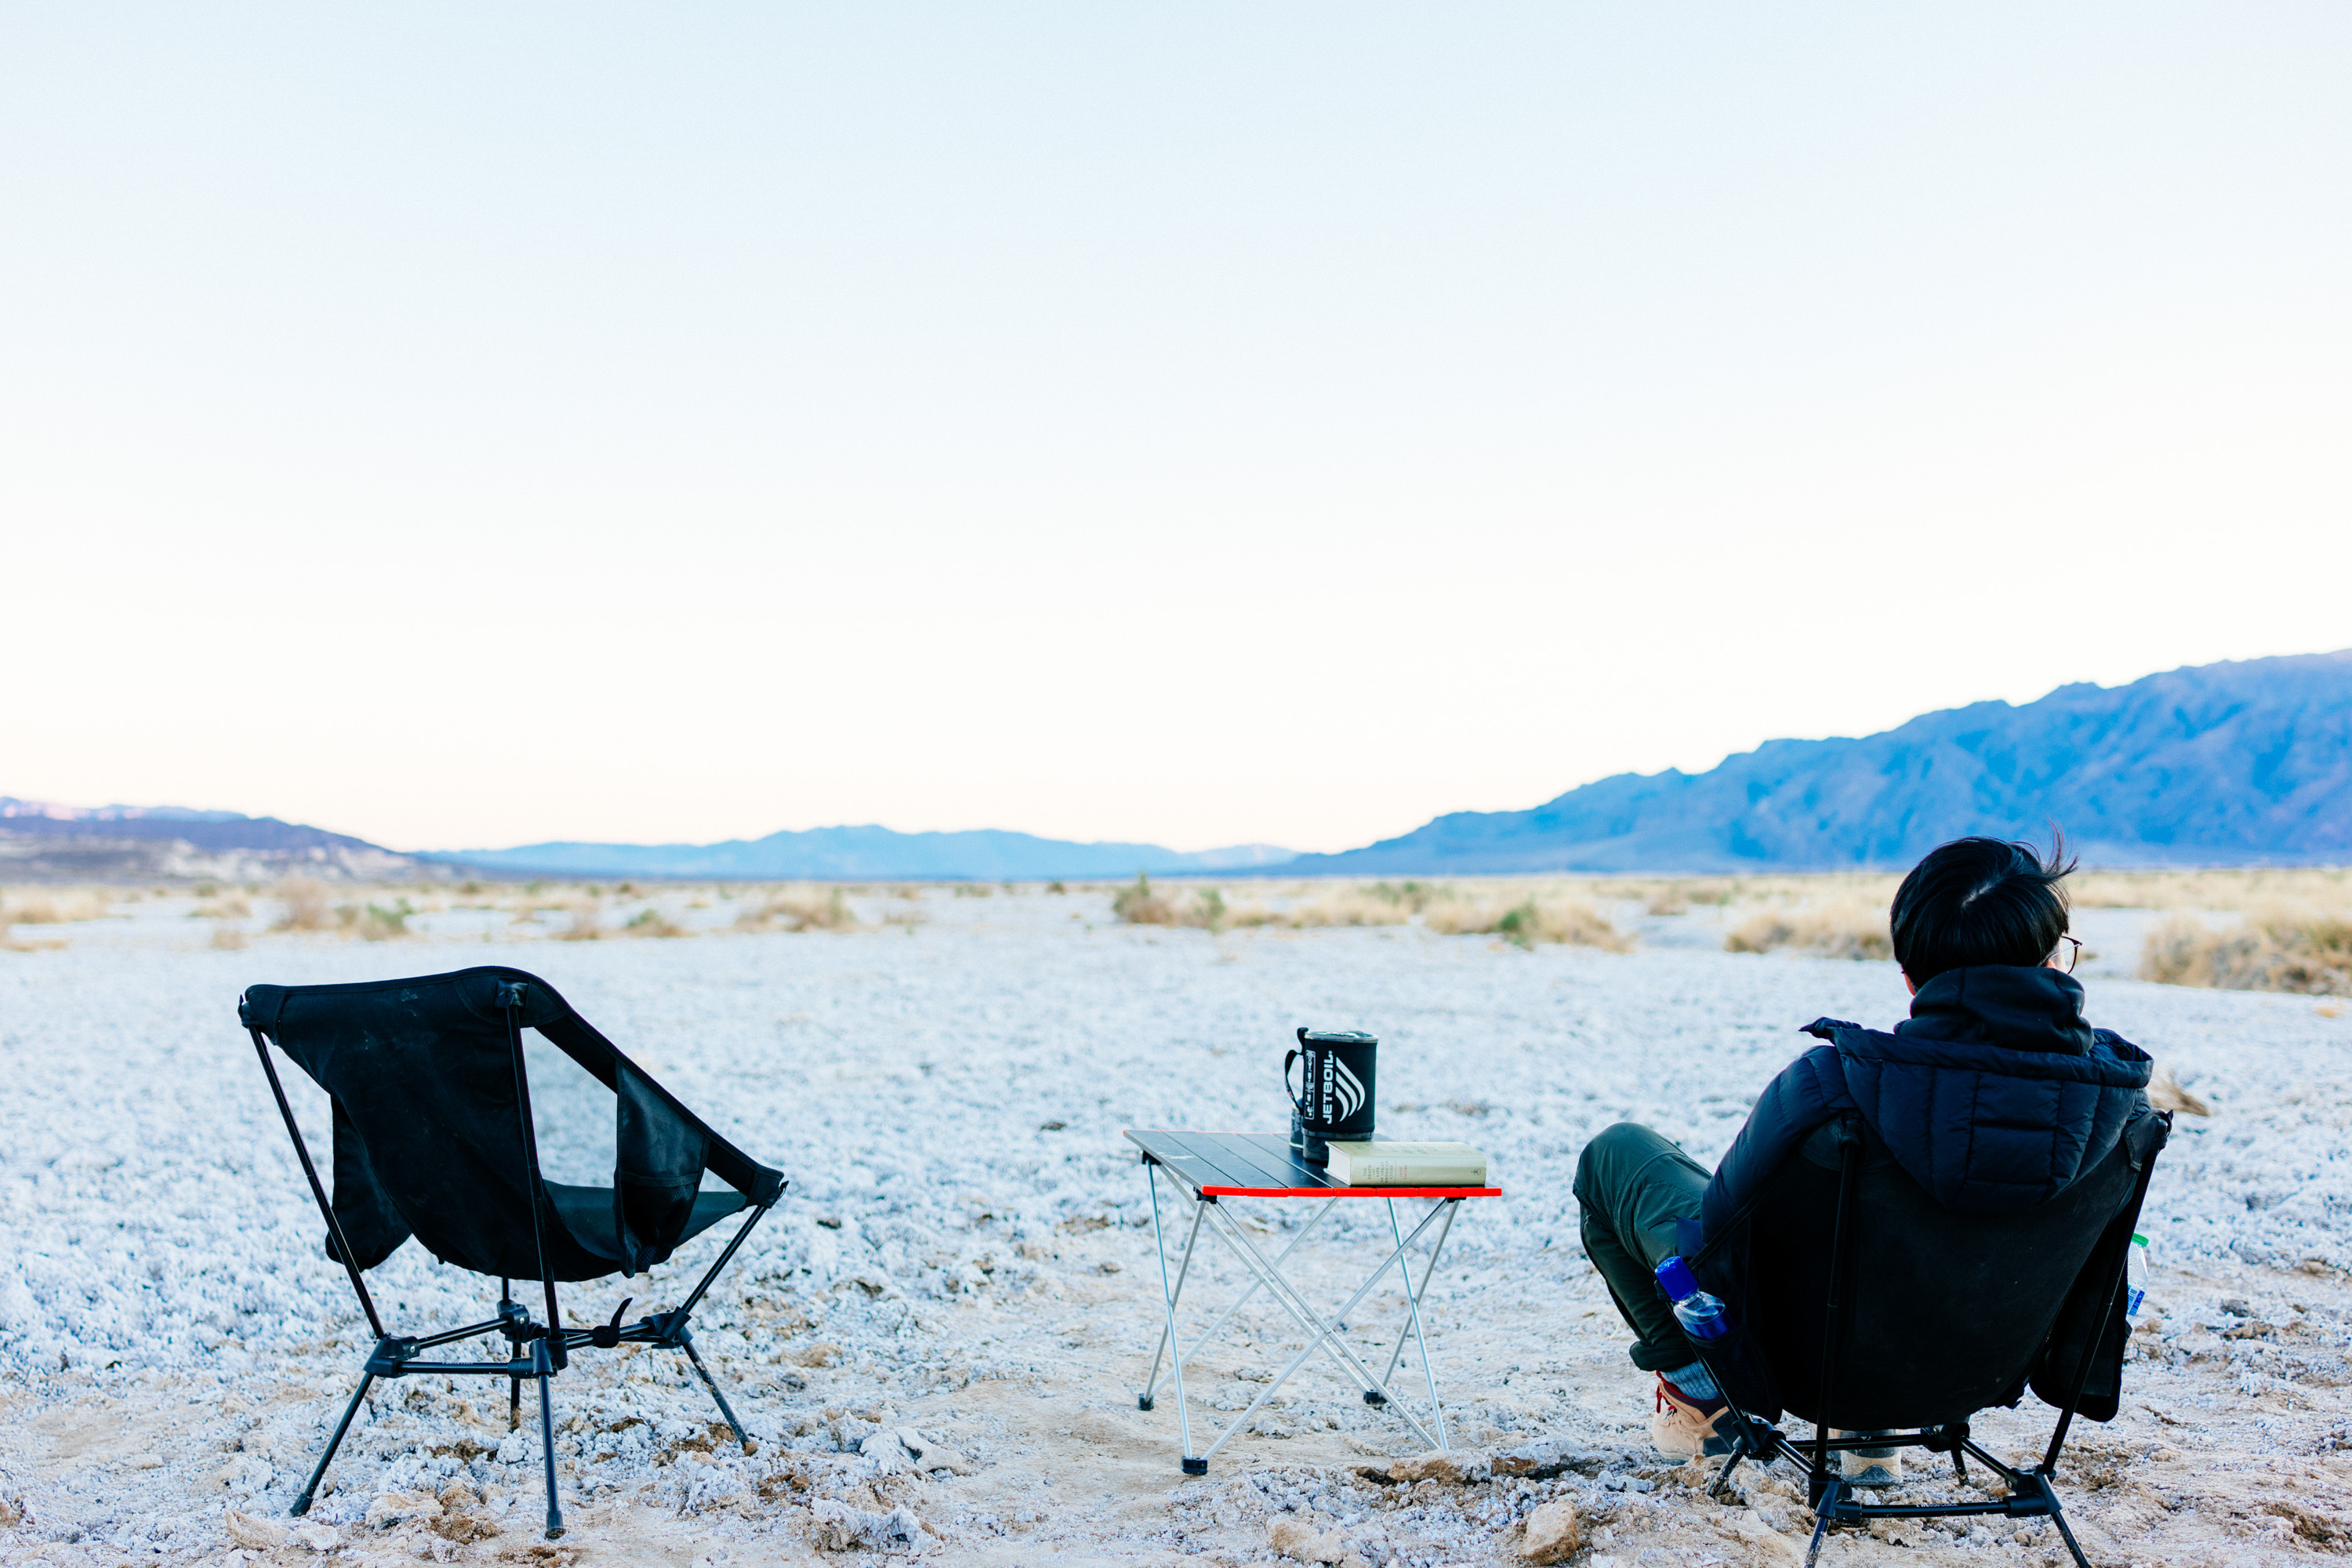
Here are canyons a thousand feet deep where you could fall for days on end, hoodoos pinnacled red and pink and beige, white and pink ice cream swirls of slickrock, labial outlines giving way to jumbles of rock, light surreal blurring the bounds of cloud and sky. Clean air to breathe; stillness, solitude, and space; a weight of time enough to let thought and feeling roam from here to the end of the world; finding something intimate in the lonely, primordial, remote, unfamiliar world. We’re let to roam; we’re let to breathe; suspended in this space between sunrise and sunset.
It’s an inverse wilderness — instead of mountains, the land recedes; instead of scaling peaks, we descend into the Earth. The sky empties us so that our minds matches the landscape, our thoughts sparse and simple. Shade and water are key; nothing else matters; consciousness is reduced to its essence. Rocks spreading glorious shade; the whole sky ours to write on; the vanishing point of the sun extinguishing time forever. We are alive here right now; all else is irrelevant; we are pleased as long as we have something to eat, our bodies, light to see by; our vision, touch, hearing, taste, smell are sharpened and heightened; I can’t sleep for being alive. The human heart has the capacity still to remember and say, forever.
We learn how to be alone and at the edge of aloneness how to be found by the world. We’re left with a distilled essence of self; we dare a new unknown to find us here.
Each stone and grain of sand exists in and for itself with a clarity untarnished by any suspicion of a different dimension. Only the sunlight holds things together, abundant, wasteful. The desert reveals itself nakedly, cruelly, with no meaning but its own existence. Life comes to a standstill, and we wait on the shore of time, free, temporarily, from the requirements of motion and progress, hope and despair. The clocks have gorged themselves on our time.
The world is so alive, the strangeness and wonder of existence underlined; life not crowded upon life as in other places but scattered in spareness and simplicity, with space for each so that each living organism stands out bold and brave and vivid against the sand and rock. The moon hangs over the canyon, a tiny radiance in a dark place. Imagine you wake up with a second chance.
We expect wilderness to be spectacular — that is, a spectacle outside ourselves, a scenic wonderland, scenery instead of nature. The highest mountain, the largest geyser, the biggest tree, the deepest canyon.
In that first moment in which we wake there is a slanting light, a small opening into the day, which closes the moment we begin our plans. What we can plan is too small for us to live.
It’s absence that creates the feeling of wildness — the absence of roads, human intrusions, our preconception of what is sublime. Maybe we fear our capacity to feel, and so annihilate physically and symbolically all that might make us tender, silence the music and reduce beauty to a collection of objects we can curate and control. We homogenize the outdoors to homogenize our innards, erase our inner ugliness, destroy our selves.
Maybe wilderness lives only in places without maps. We draw maps so that we don’t lose our way, but it’s only because the way was lost to us already that we did. The world cannot be lost, and the maps we’ve drawn ourselves can’t save us, can’t find the way again for us. We think of maps as pictures of reality, but they twist our minds away from what’s real, and create the situation they describe. Instead of helping us find our way they proscribe the way we can think of ourselves.
People paying more attention to what other people tell them than to their own perception is the beginning of civilization. Perhaps in our homogenization of landscape, we’ve eliminated beauty from our lives. We stand at the edge of the fathomless crowd.
If we can learn to love space as deeply as we’re obsessed with time now, we might discover a new way to live. The light insists on itself in the world; we want to be loved shamelessly, by the shameless.
Sometimes we need to push ourselves into existence; to reach into areas where we might potentially fail. Sometimes it takes a sky to find a first slice of freedom in your own heart, someone has written something new in the ashes of your life. You’re not leaving, even as the light fades quickly. You’re arriving.
Why not wake at dawn, after all is gone, and go on? Don’t stop; breathe in; breathe out; the world was made to be free in; the rocks framing, only for now, our horizon. In this place we leave everything we know behind.
We’re still here, breathing and constellated, small and infinite and quiet. The sky is dimming so fast it seems alive and we have our whole lives ahead of us.
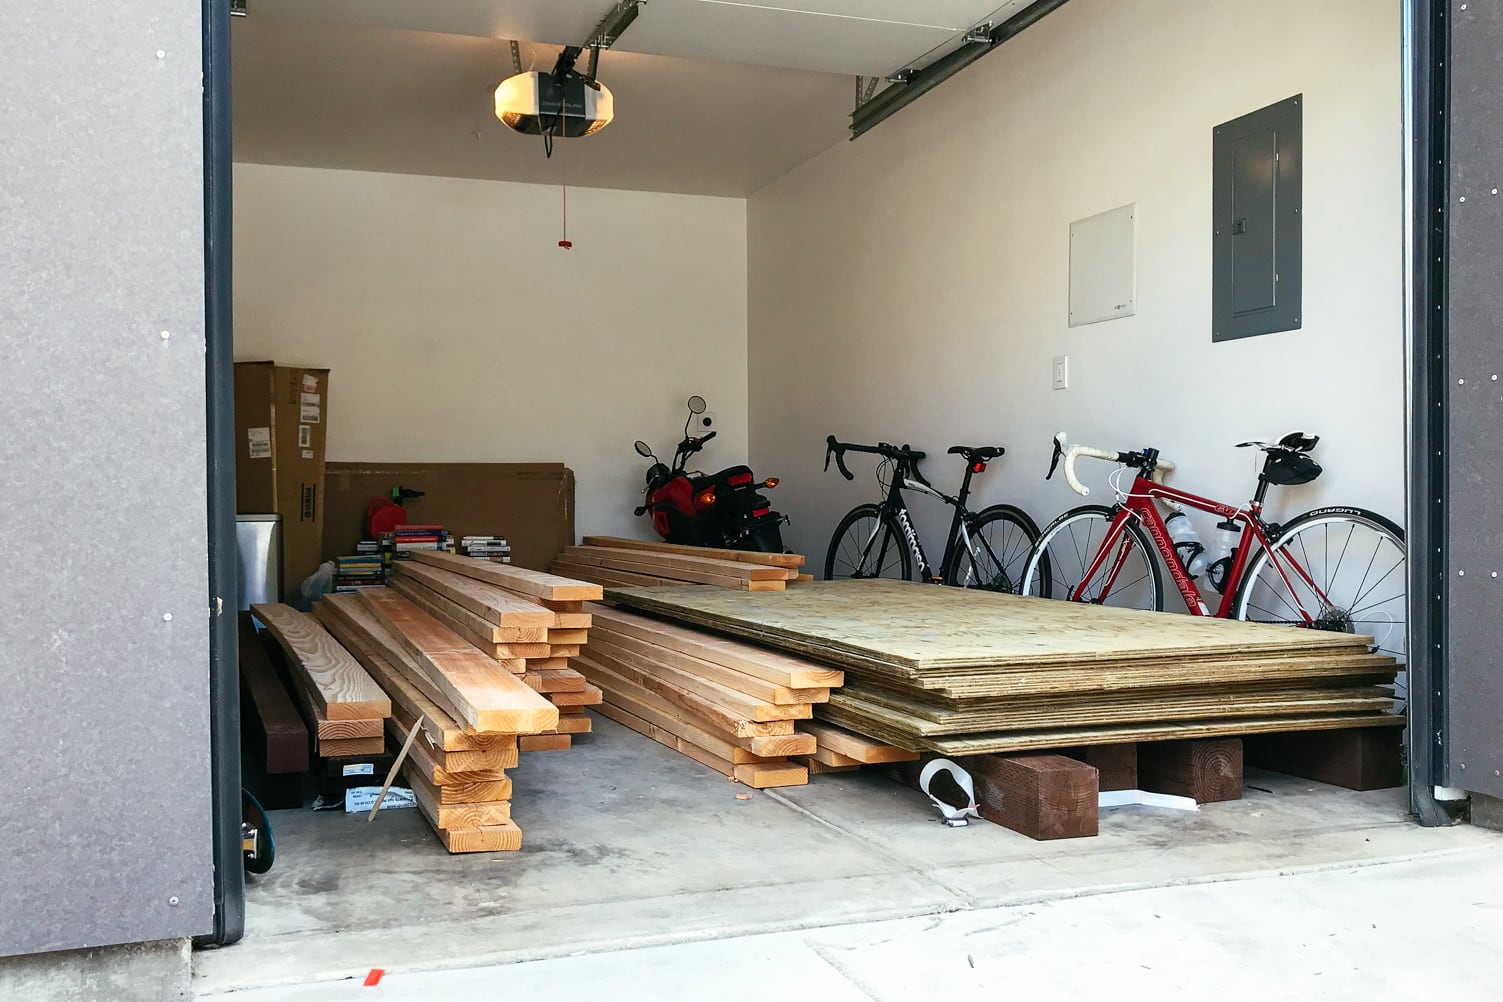
Based mainly on the perceived safety of obtaining sheets mid-pandemic, we decided to go with 3/4"-thick marine-grade, pressure-treated plywood from Economy Lumber Oakland. Each sheet was a standard 4’ x 8’, and we decided to get 11 sheets to cover all our surfaces and leave some extra for adding volumes later.
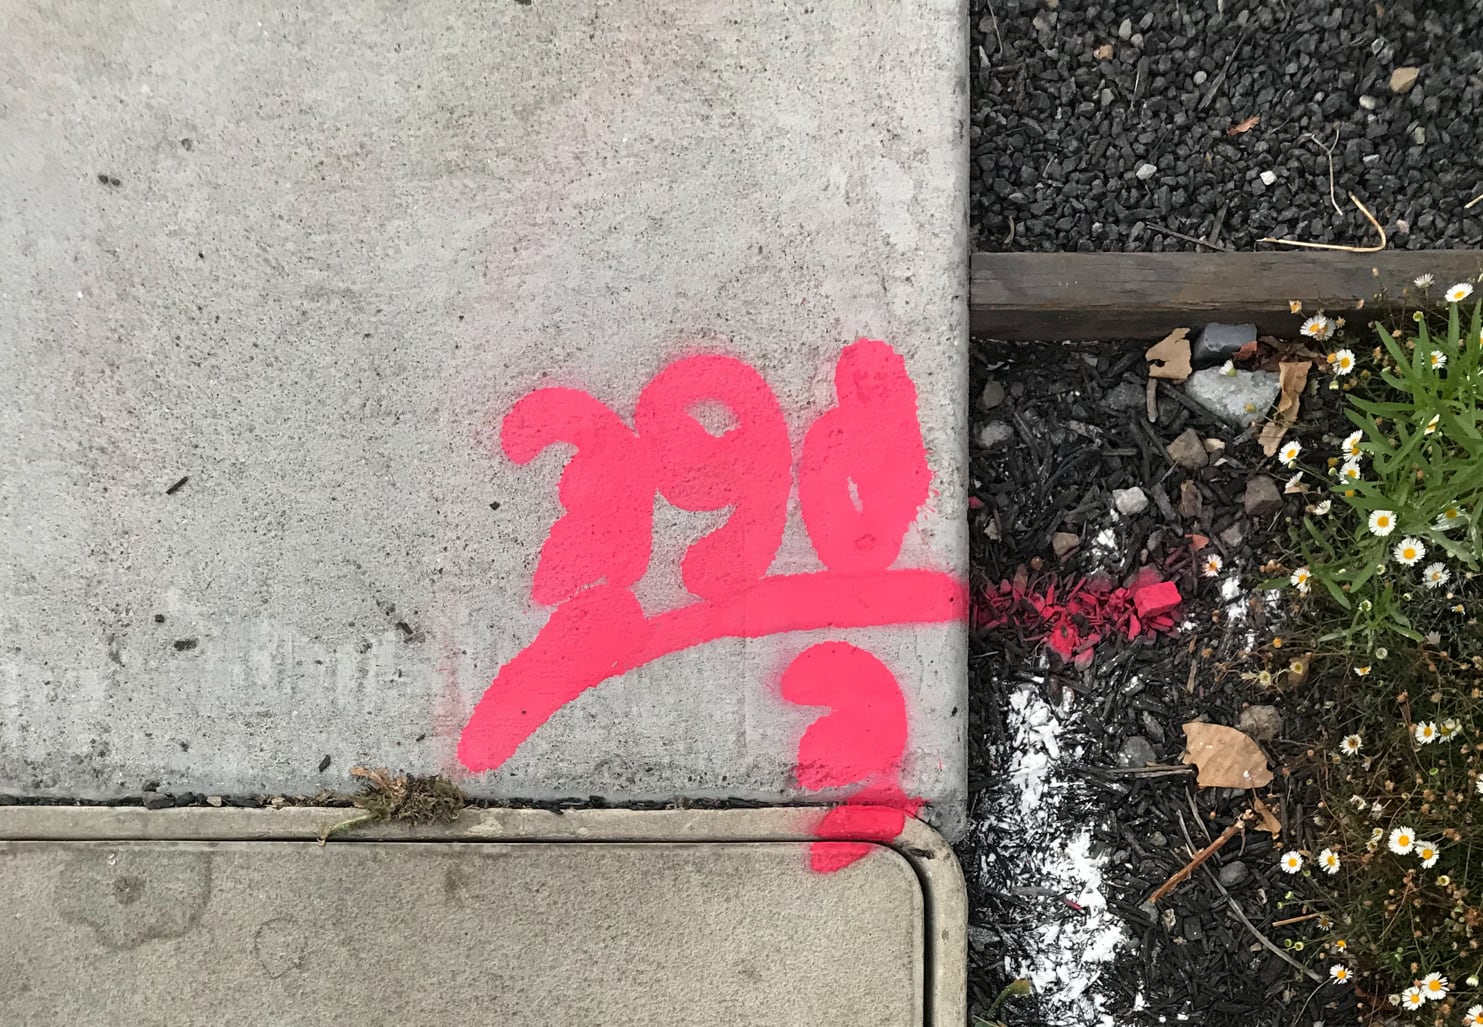
Sent the car to live out in the wild
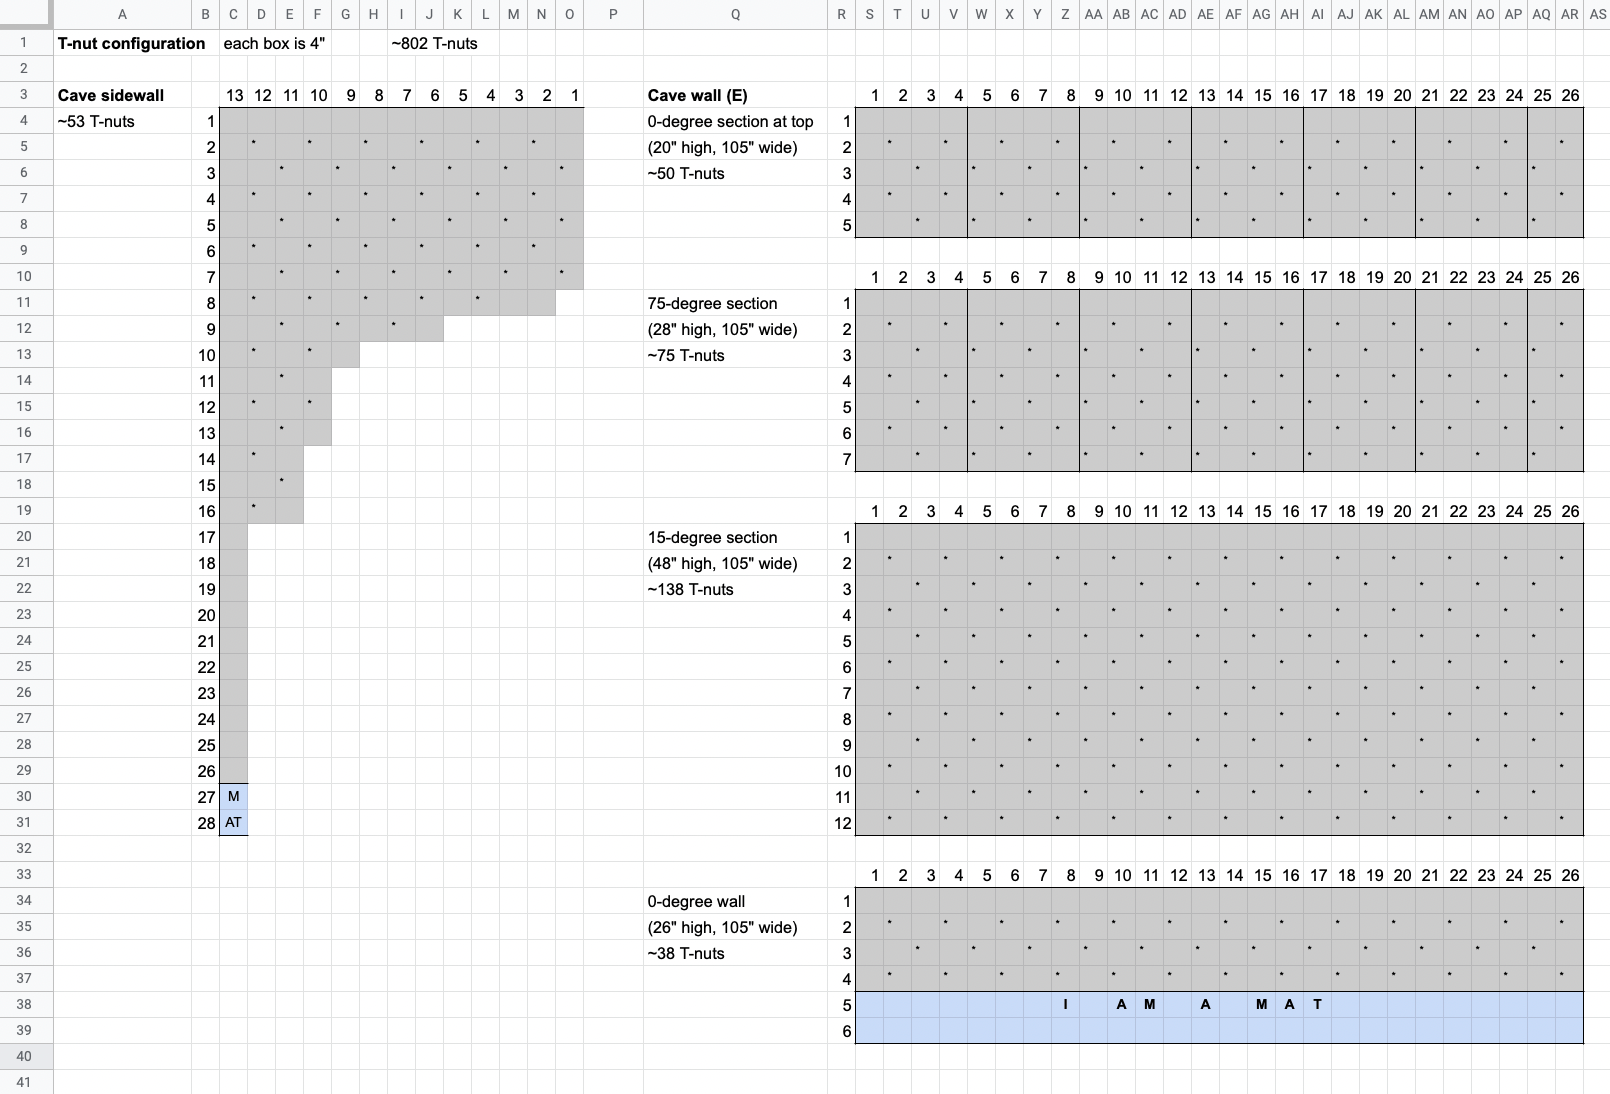
2. Choosing the T-nut layout
Climbing holds are mounted to a climbing surface (whether made of wood or not) with 3/8"-16 bolts threaded into 3/8"-16 T-nuts that are attached firmly to the climbing surface.
Before getting started with preparing our climbing surface, we needed to decide how we would lay out our T-nuts.
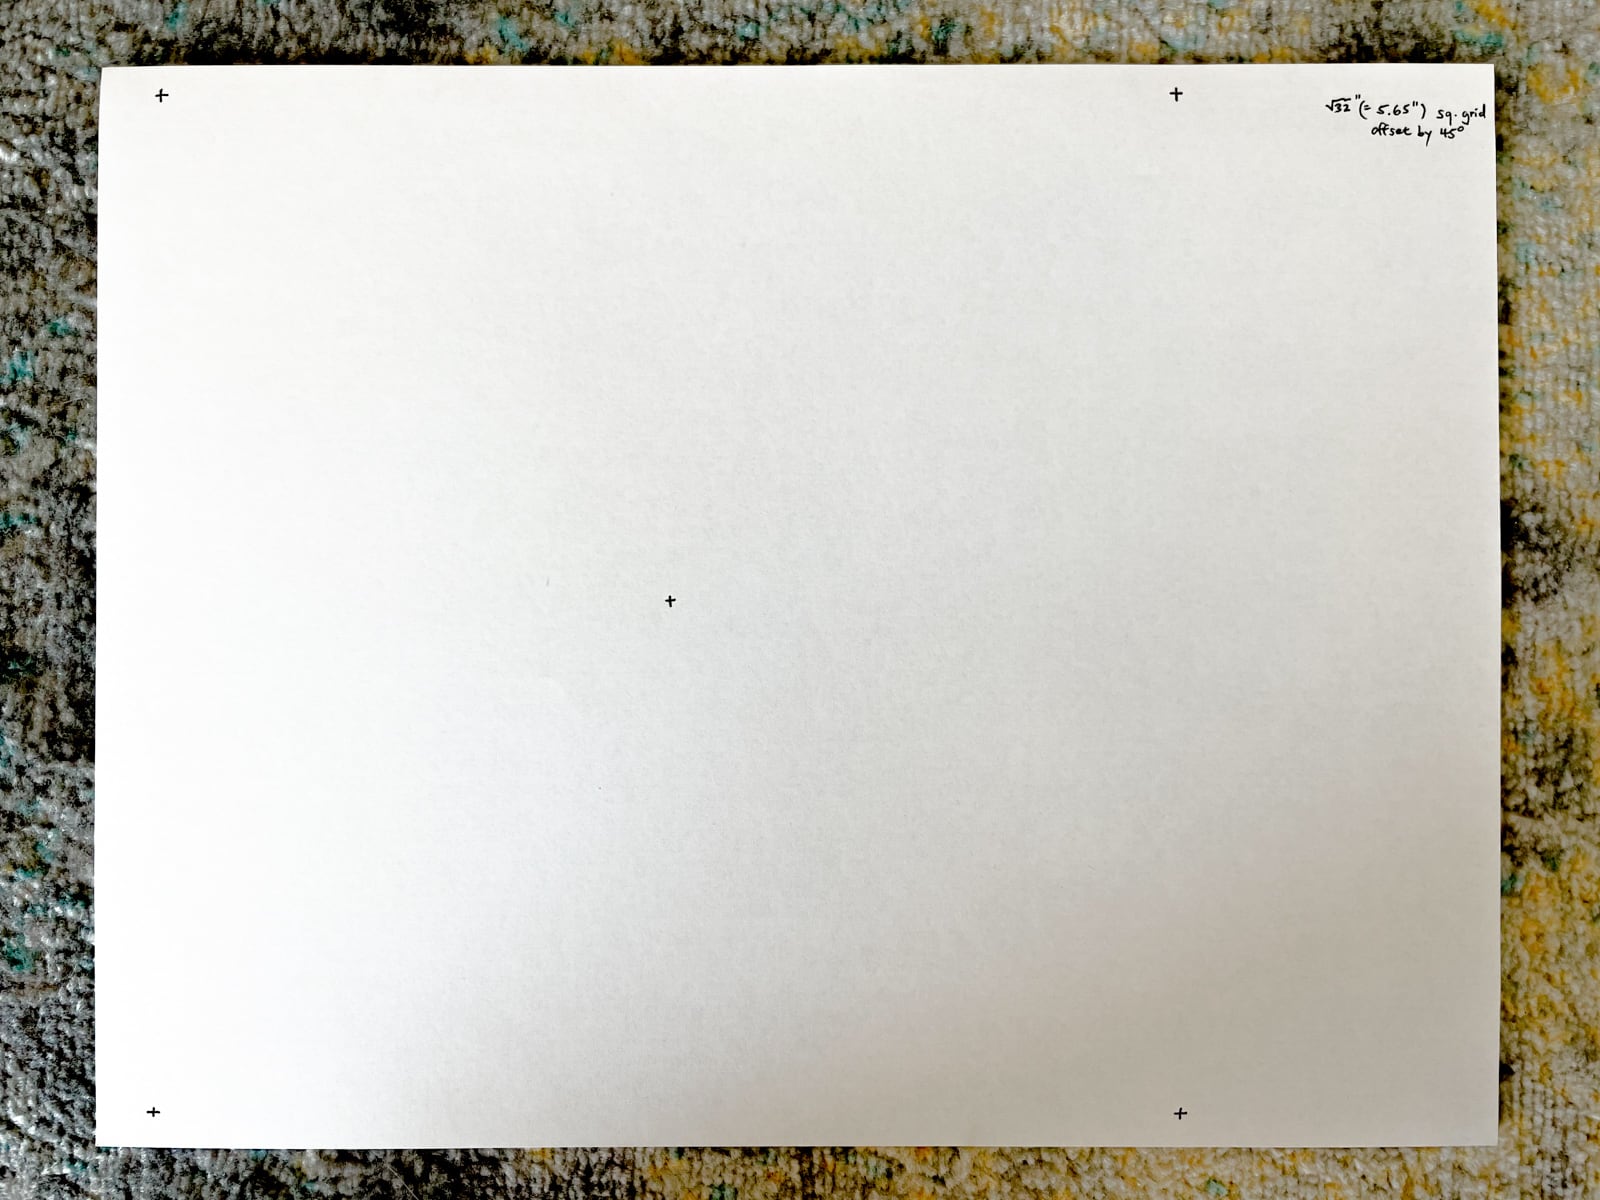
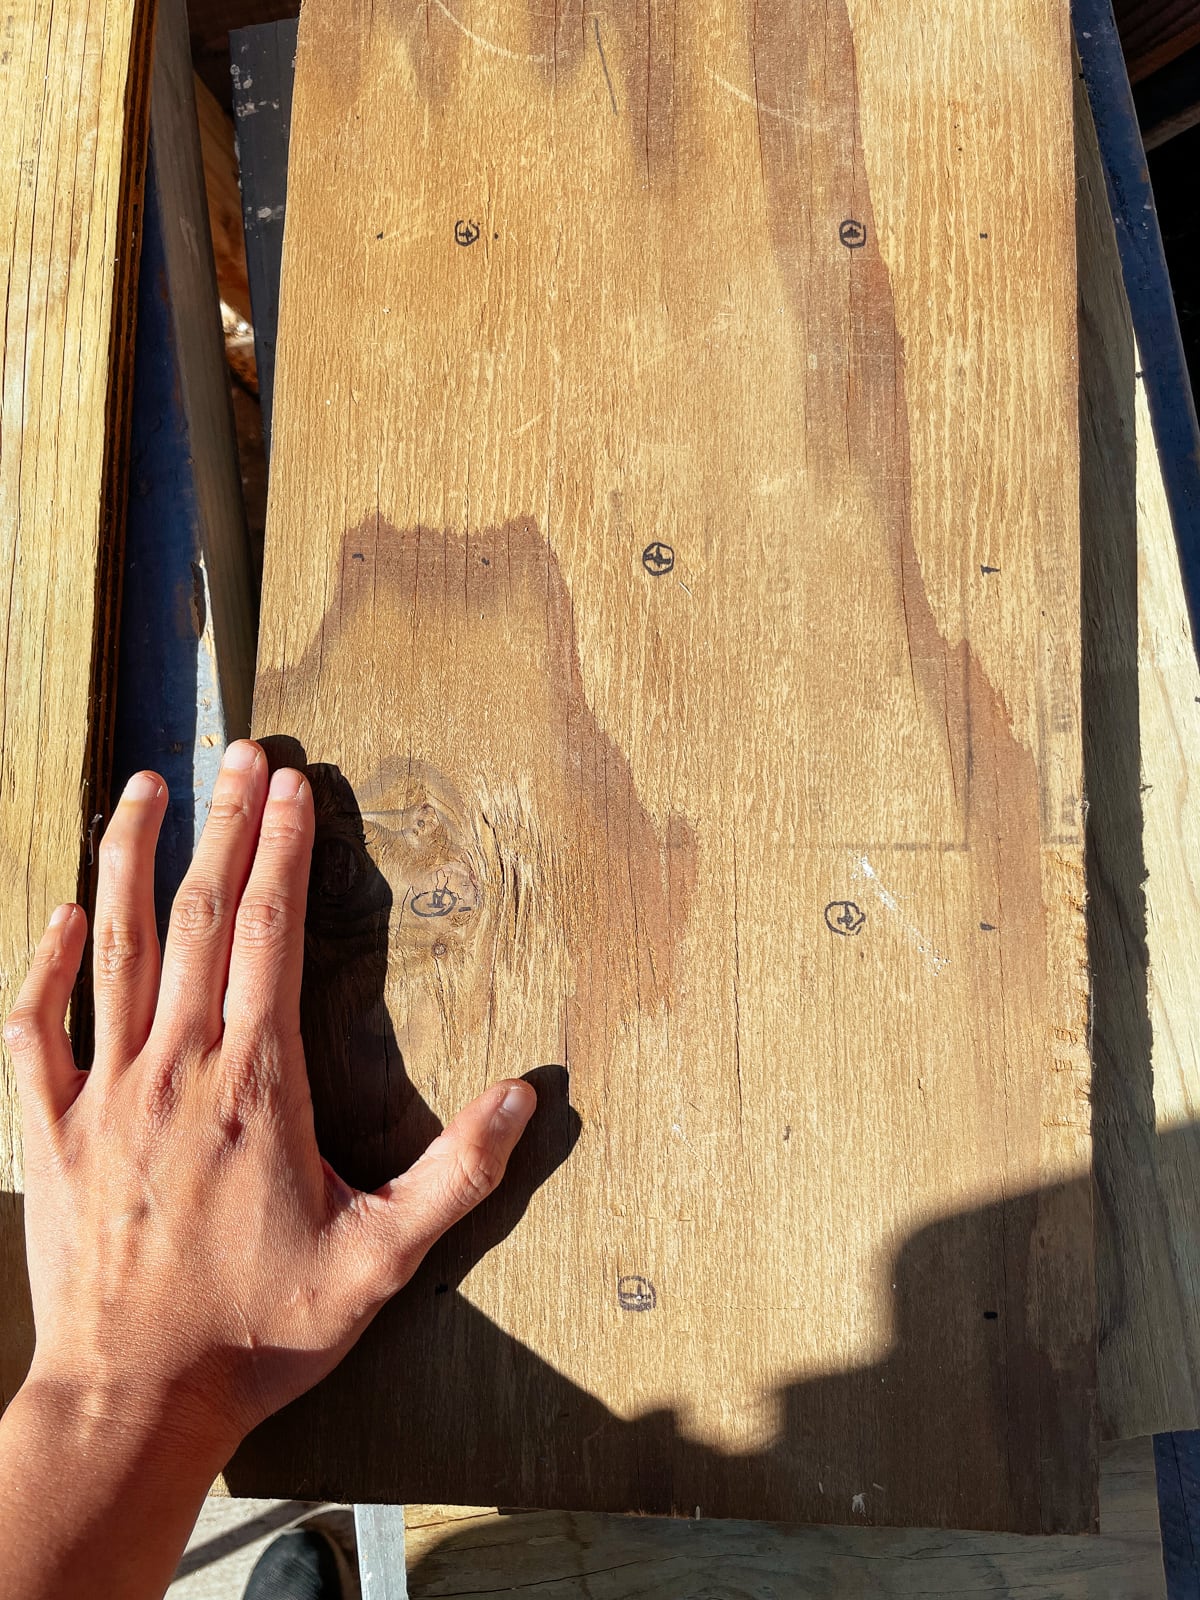
To do this, we looked around at other people’s builds, and drew alternatives out on sheets of 8.5” x 11” paper, and settled on a grid with holes sqrt(32) == 5.66” apart, diagonally (equivalent to rows of holes 8" apart horizontally, spaced 4" apart vertically, and offset horizontally by 4" per row).
T-nut layout in paper, wood/Sharpie, and Google Sheets
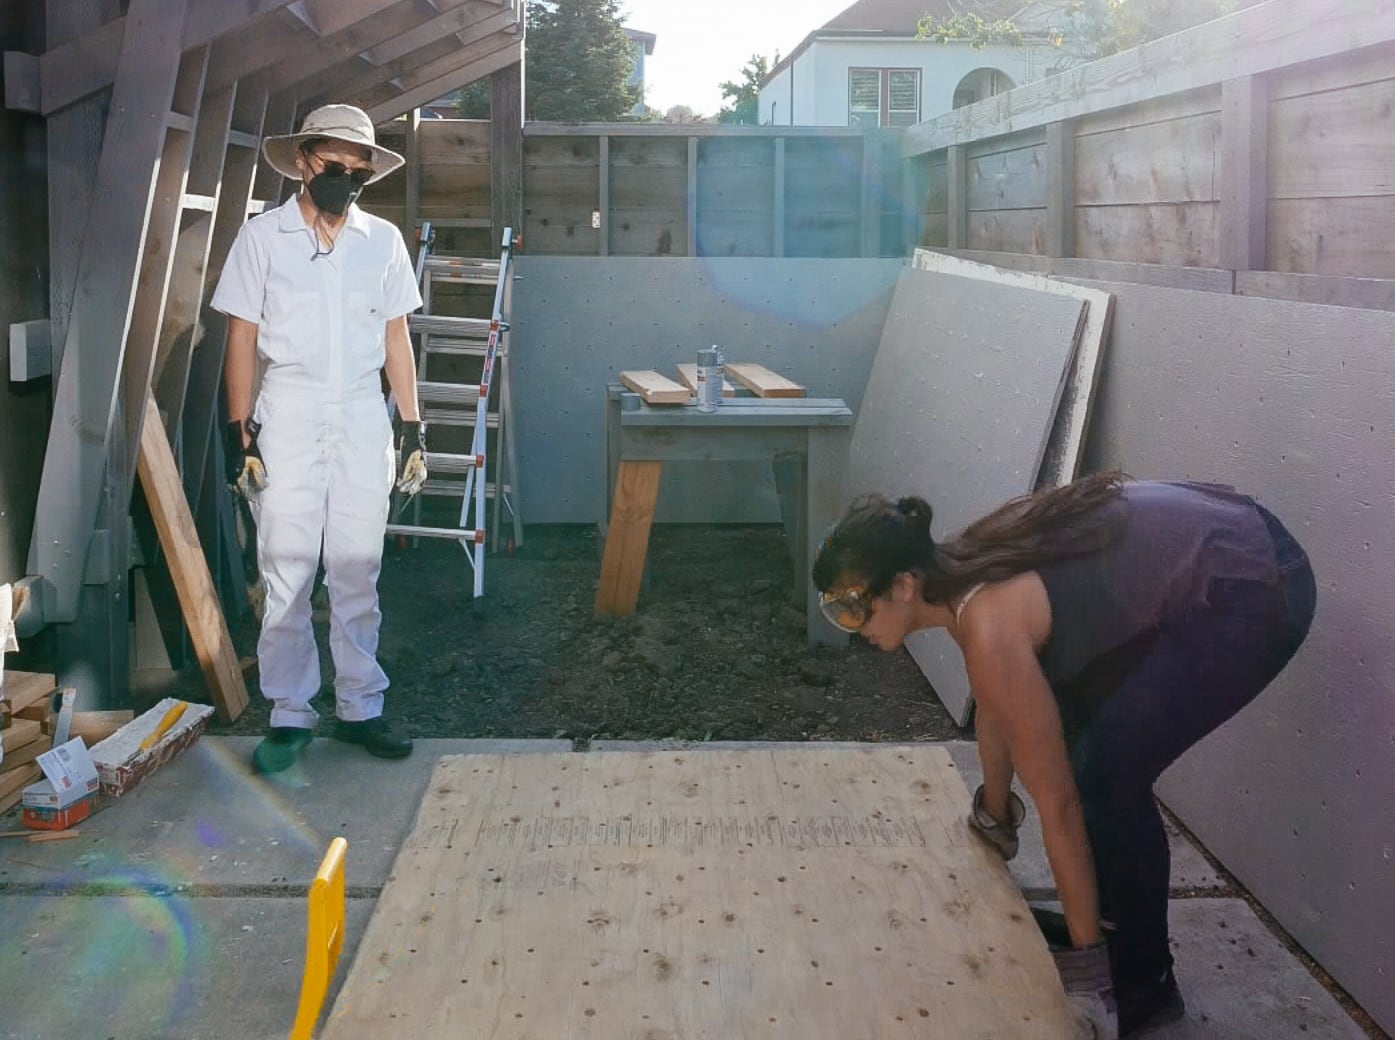
3. Setting up the workspace
Four feet by eight feet of plywood turn out to be way more cumbersome to handle in practice than they are in theory, so we needed to amass a few tools and clean out some space to make it possible to work with our plywood sheets.
First, we needed to figure out a way to cut our sheets, without snagging our saw blade (i.e. if the sheets collapse in from two sawhorses supporting each short end) or wasting too much wood cutting into our supports (i.e. if we used long 2x6s to support the sheet along its length).
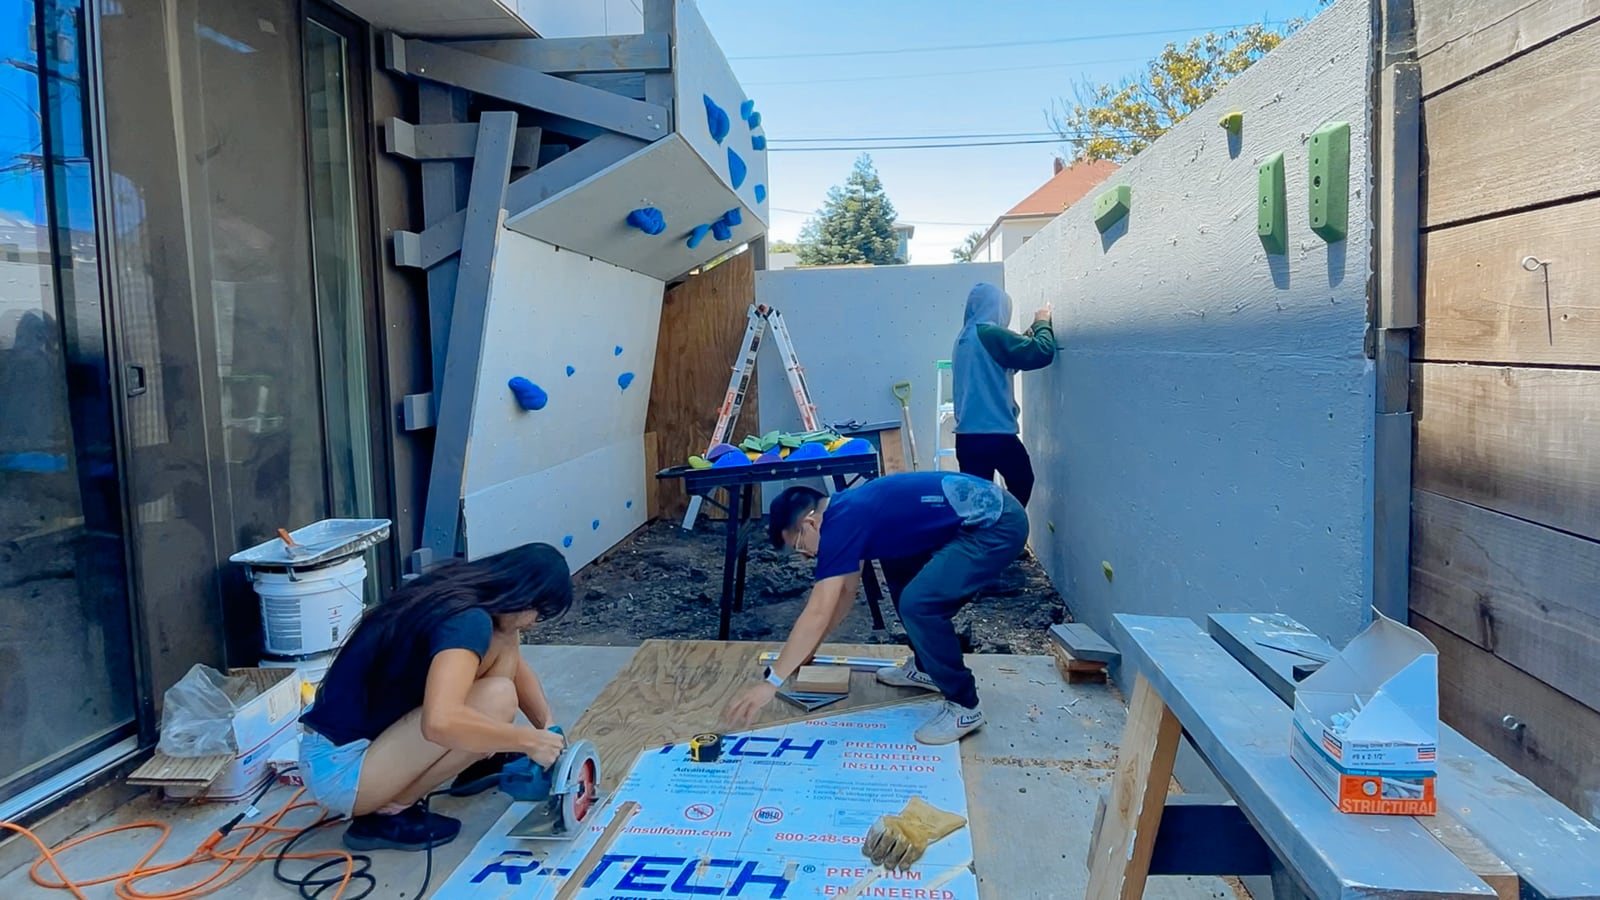
After trying to come up with cleverer options, we decided to just get a cheap piece of 4’ x 8’ foam insulation from Home Depot to place under an entire sheet of plywood as we cut it, and be okay with shredding the insulation over the course of the project. This worked pretty well.
Group cutting on the R-TECH
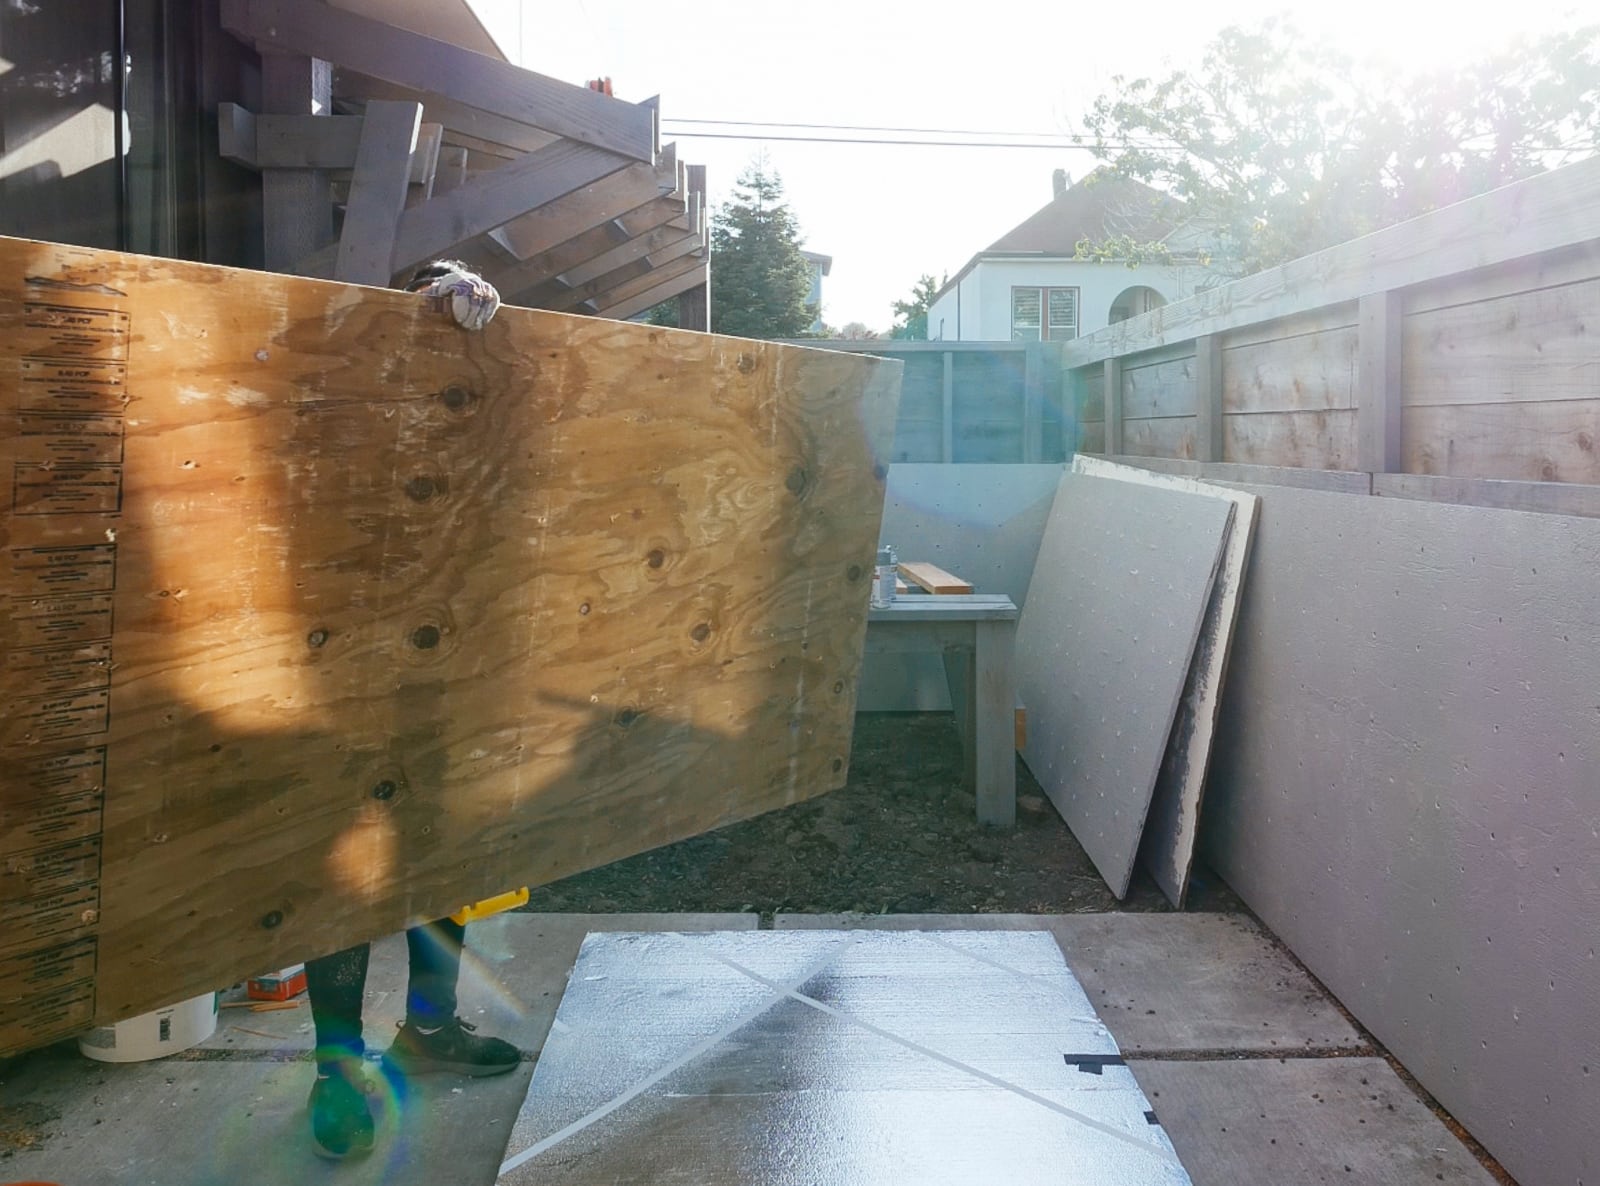
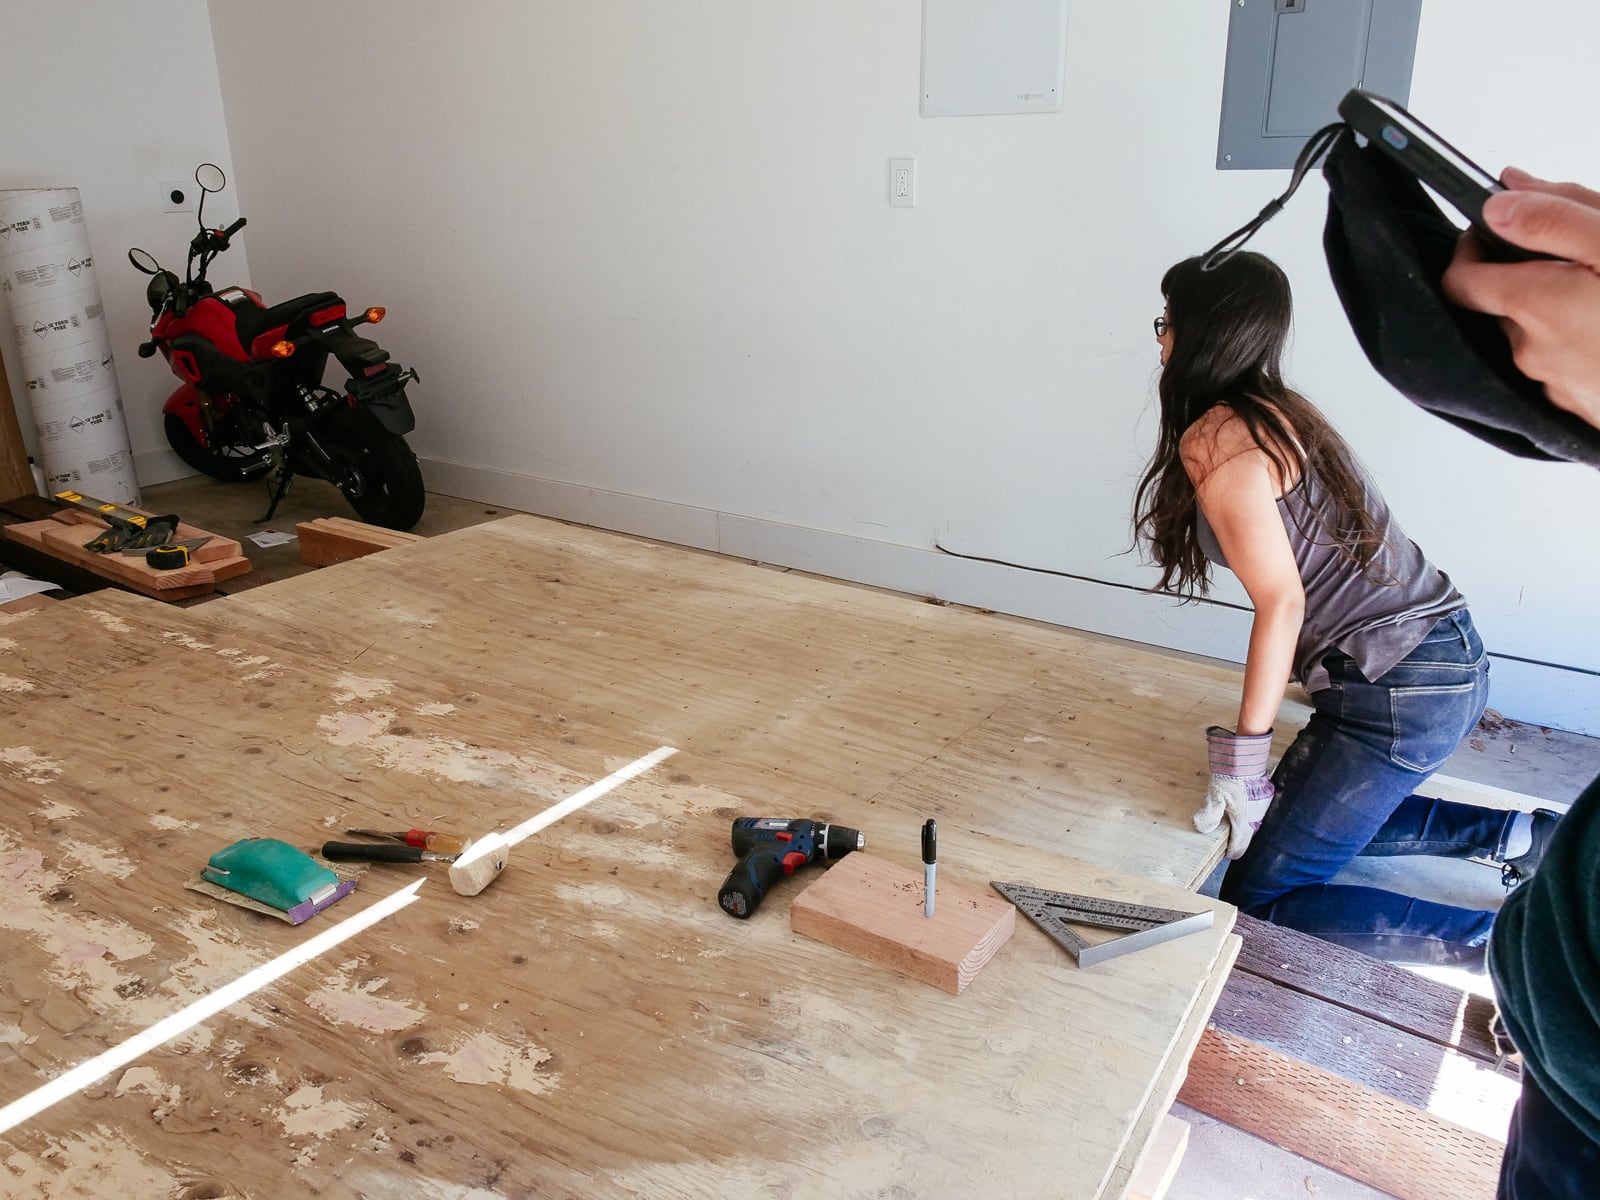
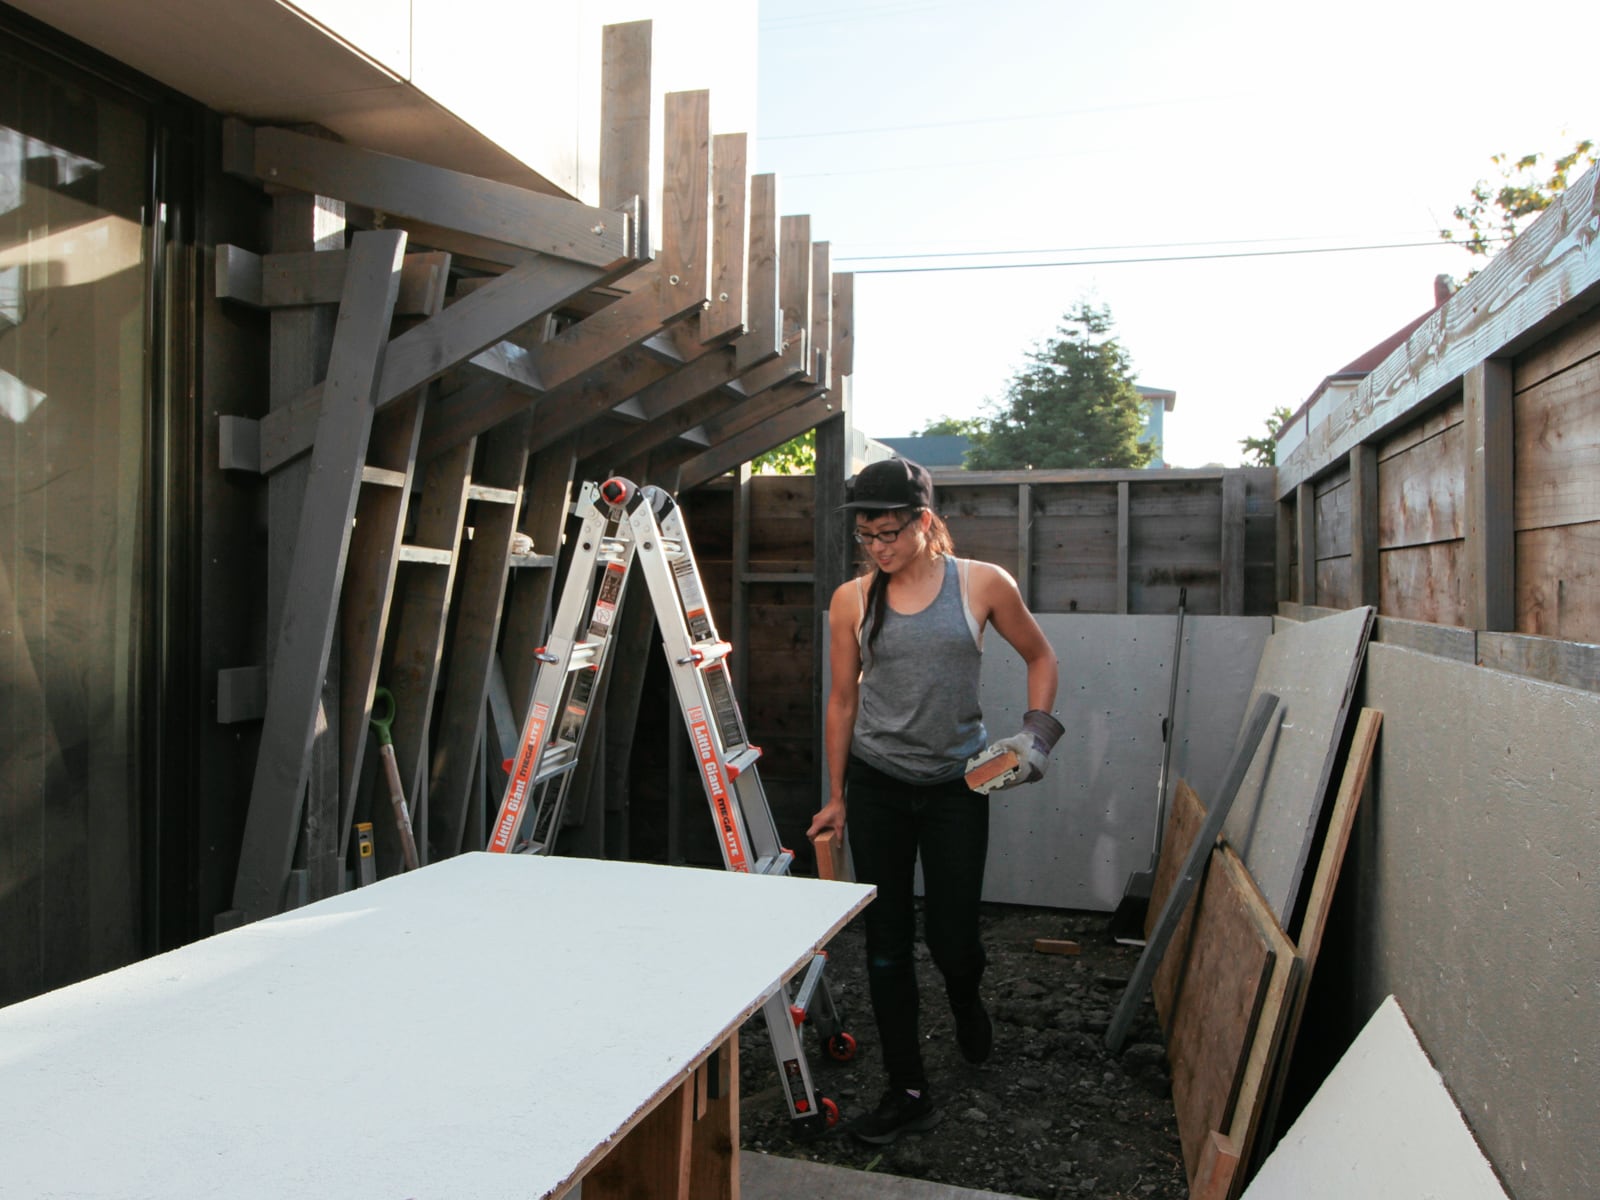
Then, learning from the failures of the stubborn approach to post digging last time, we decided to purchase a sheet-goods lifter. This is a $5 plastic handle-type thing that you use to make it possible to get both arms around a wide sheet to carry it safely. This, disappointingly, also worked pretty well.
Using the yellow handle
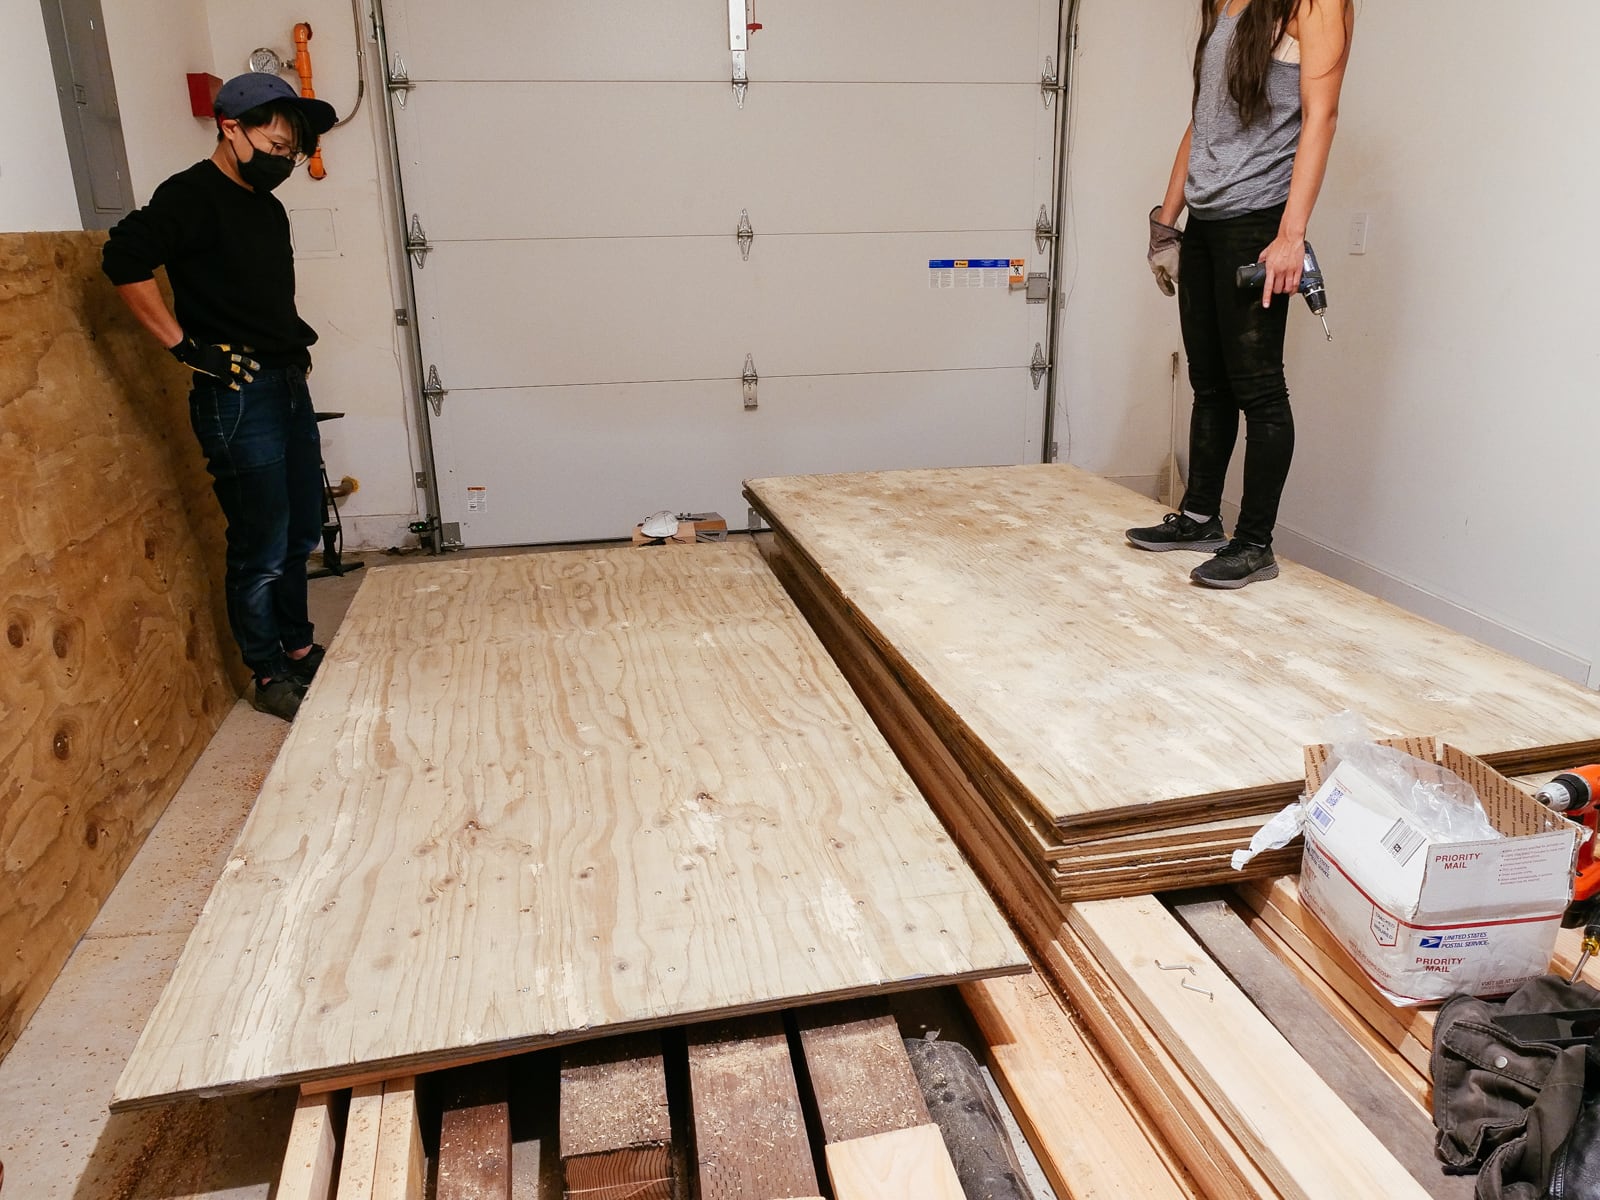
Then we spent some time moving lumber/other stuff around our home until there was a large-enough space to have three flat-sheet-of-plywood-size spaces: one for resting, one for marking and drilling, and one for one of: cutting, T-nut mounting, priming, texturing, or painting.
Moving plywood around
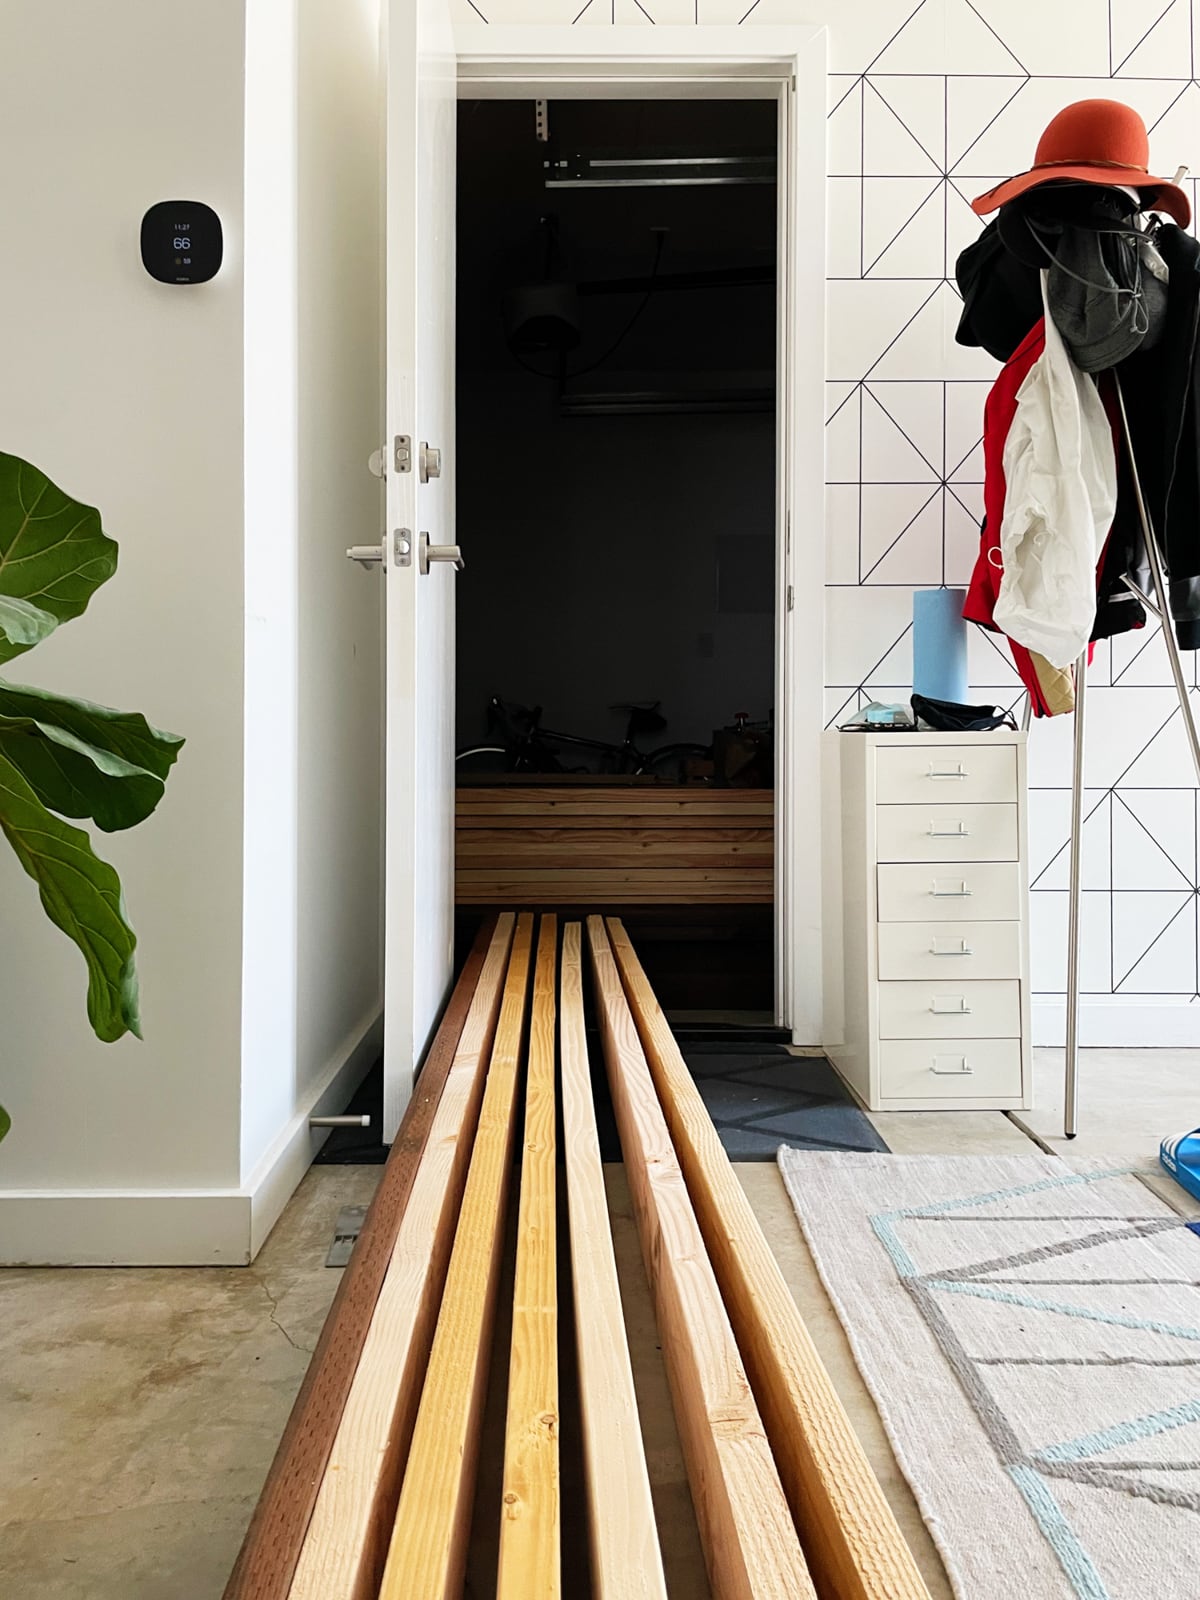
Plywood
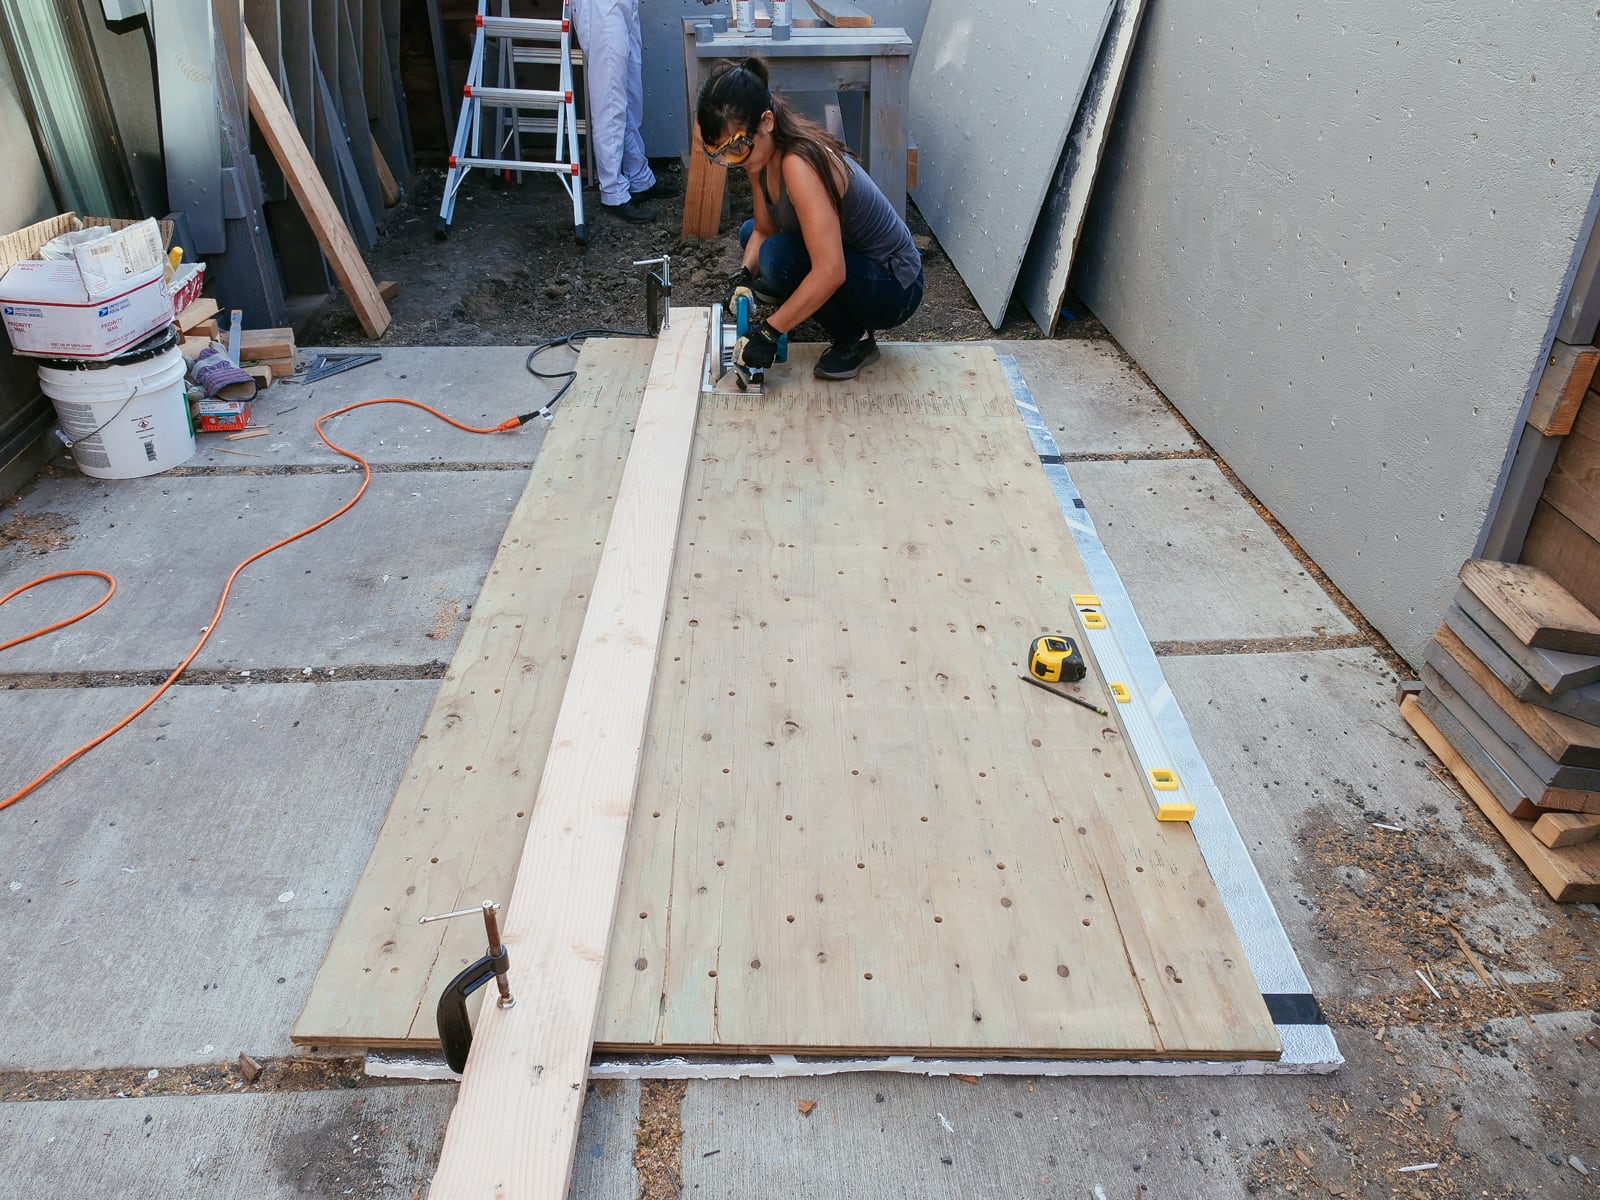
4. Cutting to size and filling in the surface with wood putty
We tried to design the shape of our wall to use an intact sheet of plywood where possible, to minimize excess cutting. The whole climbing cube is pretty small, though, so there were only three sections that were 4’ x 8’ or larger flat — so there were only three sheets of plywood we could keep whole.
For the rest of the climbing surface, we tried to close-pack our sections as tightly as possible to minimize material waste:
To make the cuts, we placed the foam insulation directly underneath the sheet being cut, marked our cuts, then just ran the circular saw across the plywood — leaving cuts in the foam but a neat and unburred plywood cut, and no cut-up sawhorses.
Cutting plywood on top of a foam sheet
Because we were using CDX plywood (which has faces of quality C and D — not good), there were significant flaws and gouges in most of the sheets. We tried our best to fill these with wood filler, then sand the surface down to be reasonably flat (but not perfect — we knew that we’d still be texturing and painting on top).
Filling imperfections with wood filler
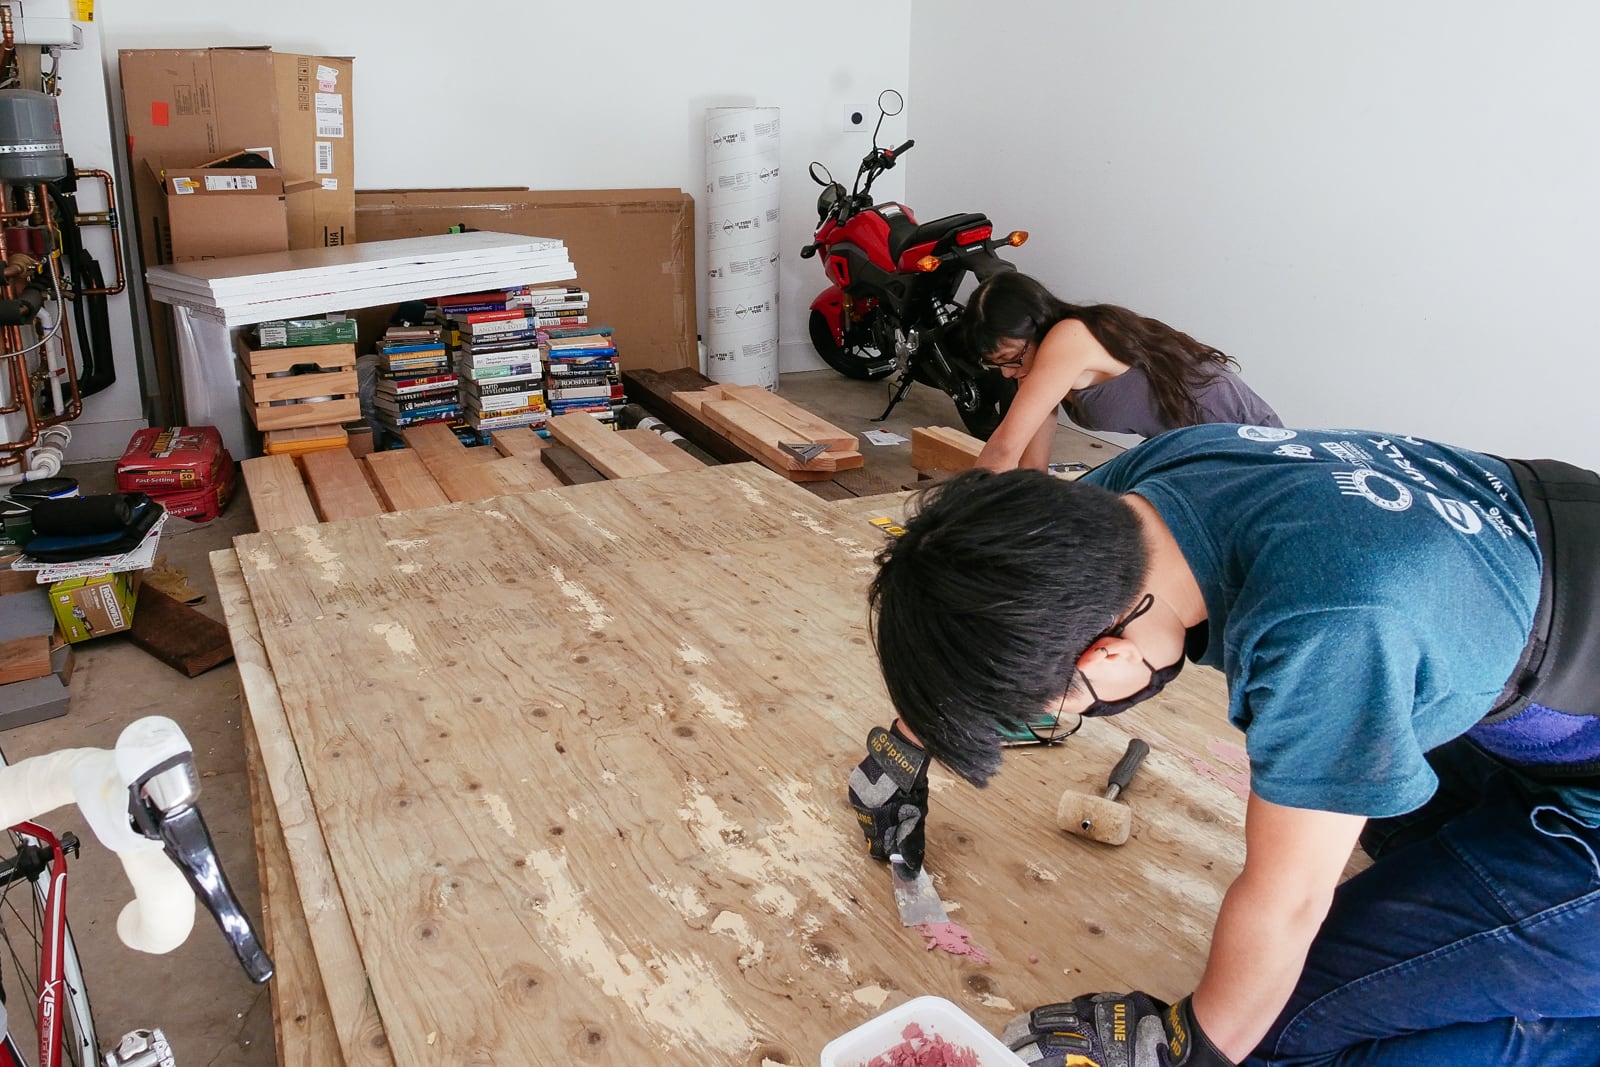
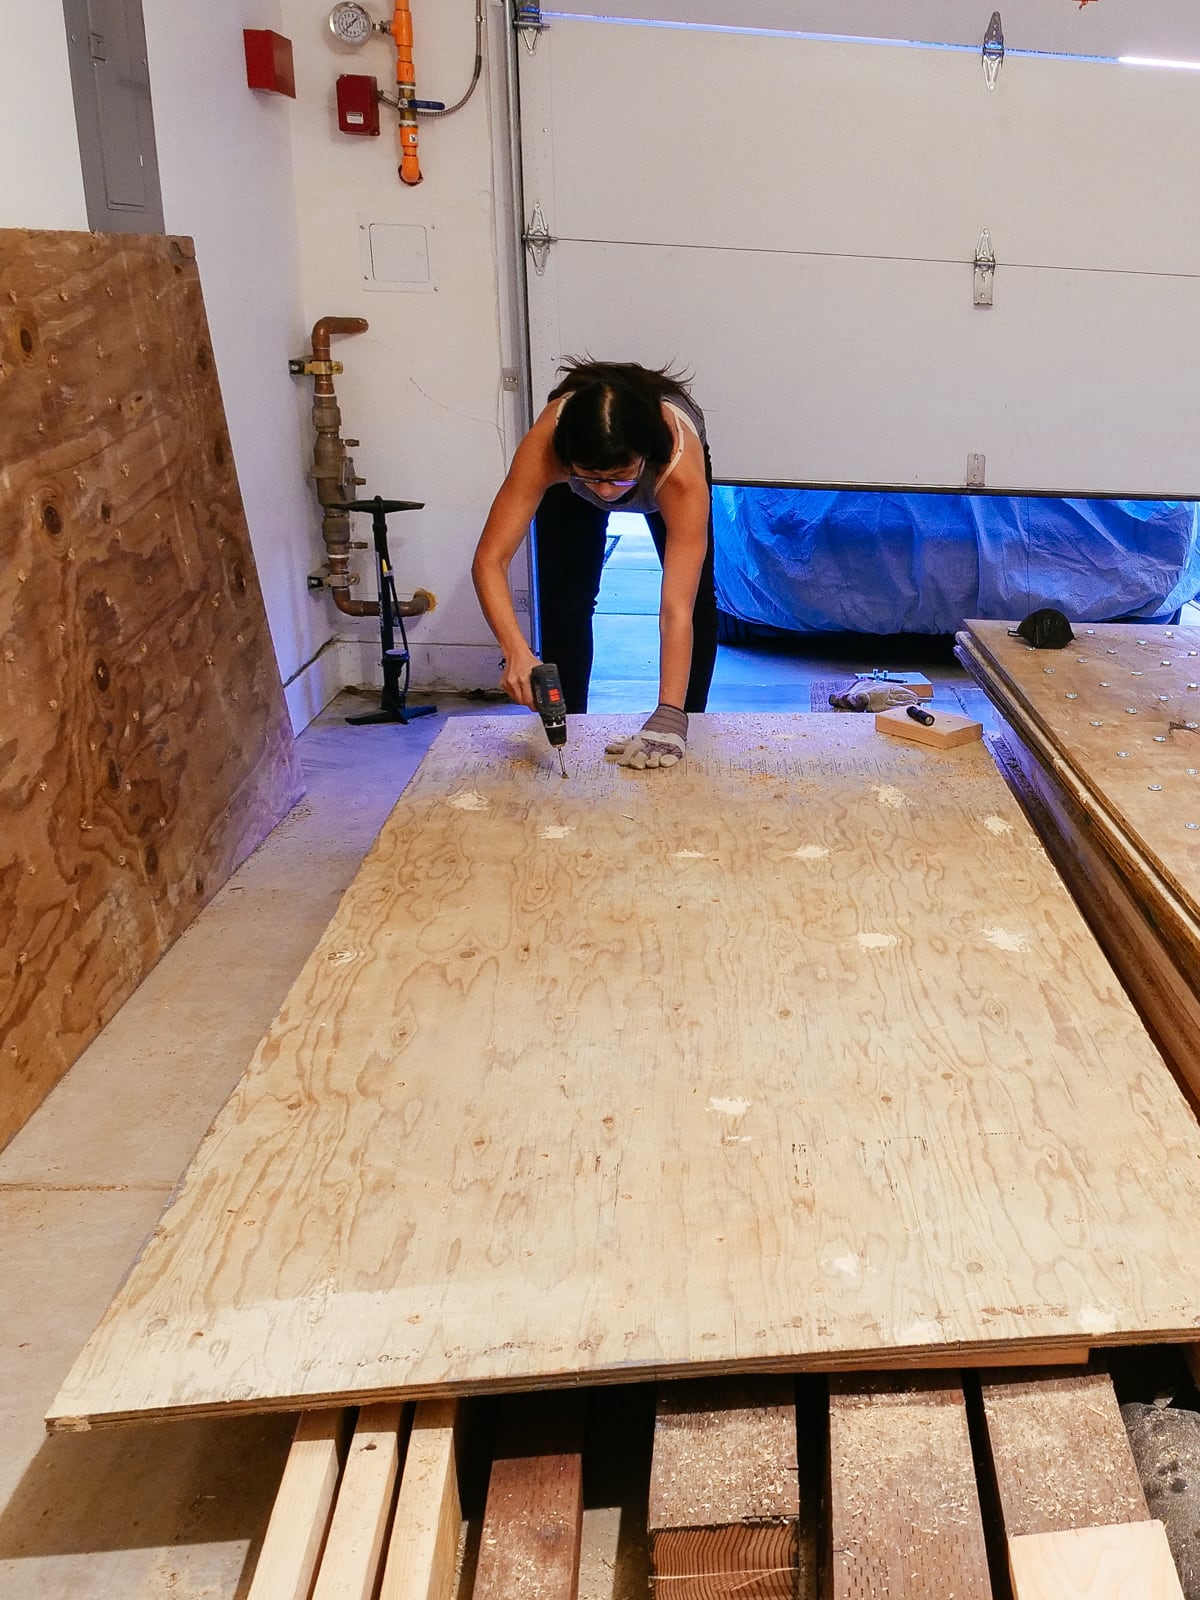
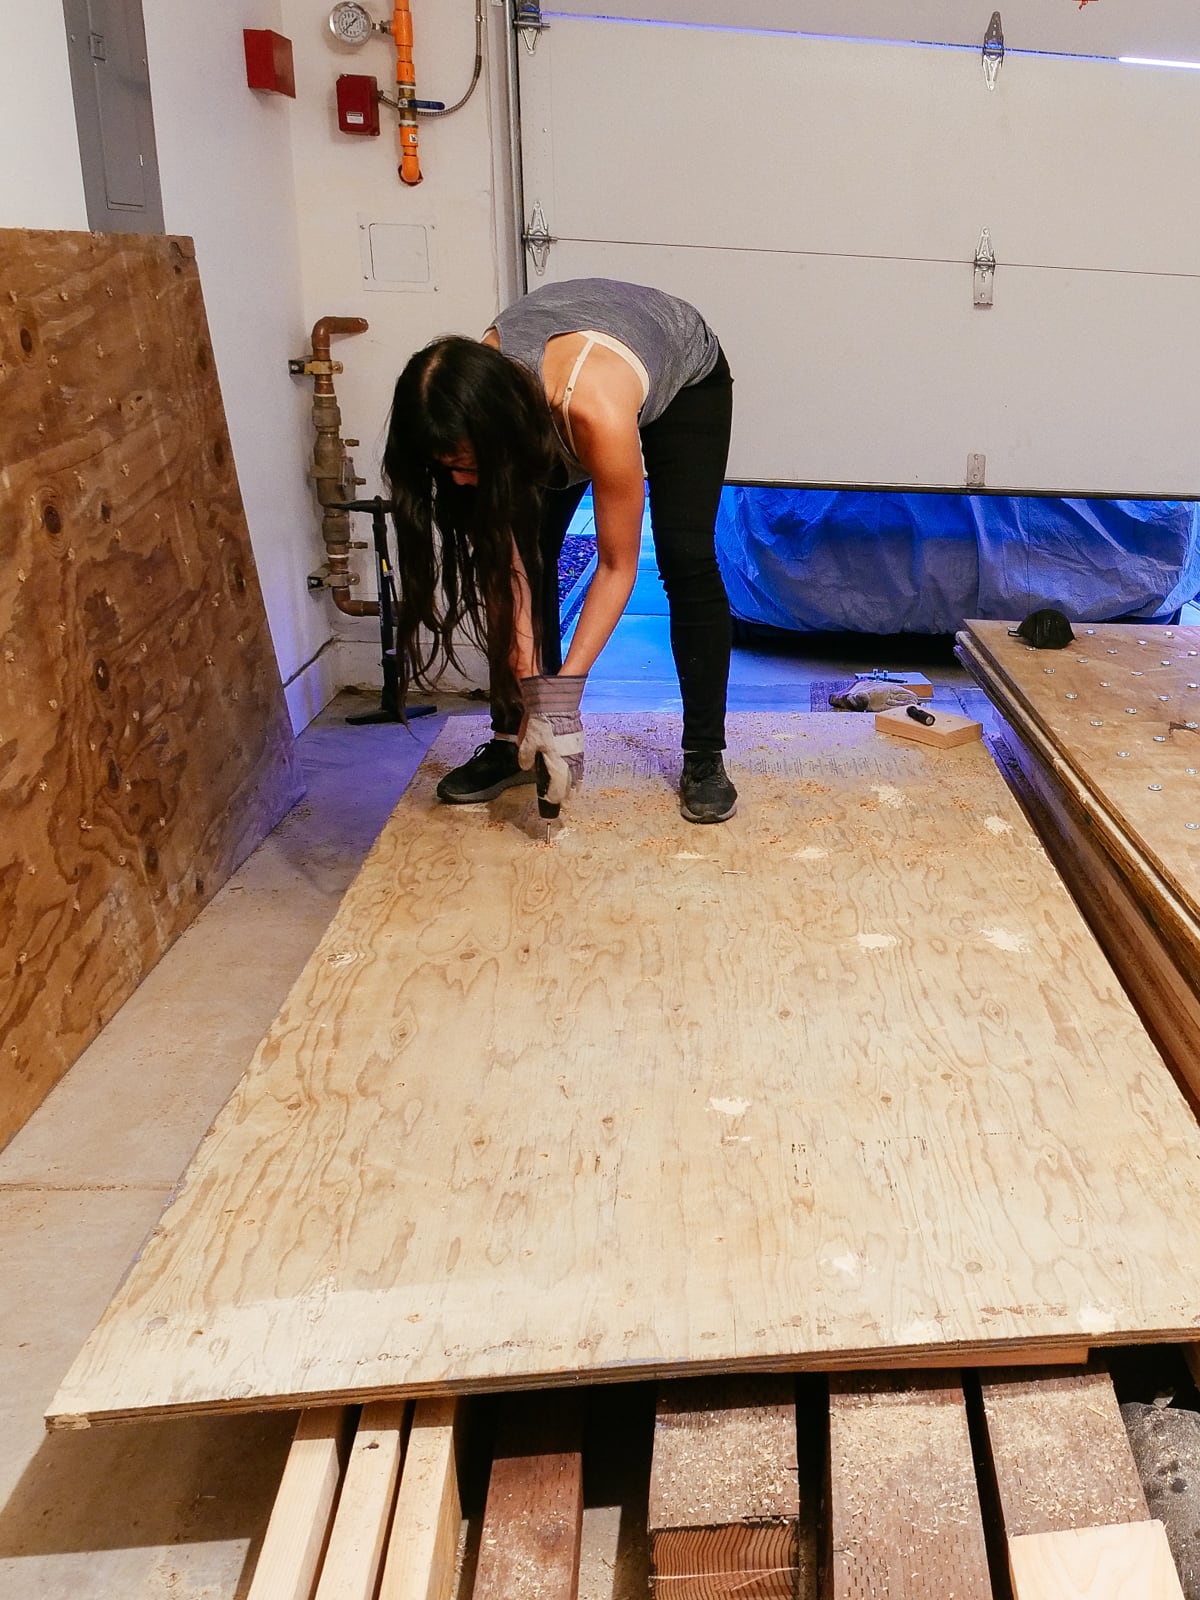
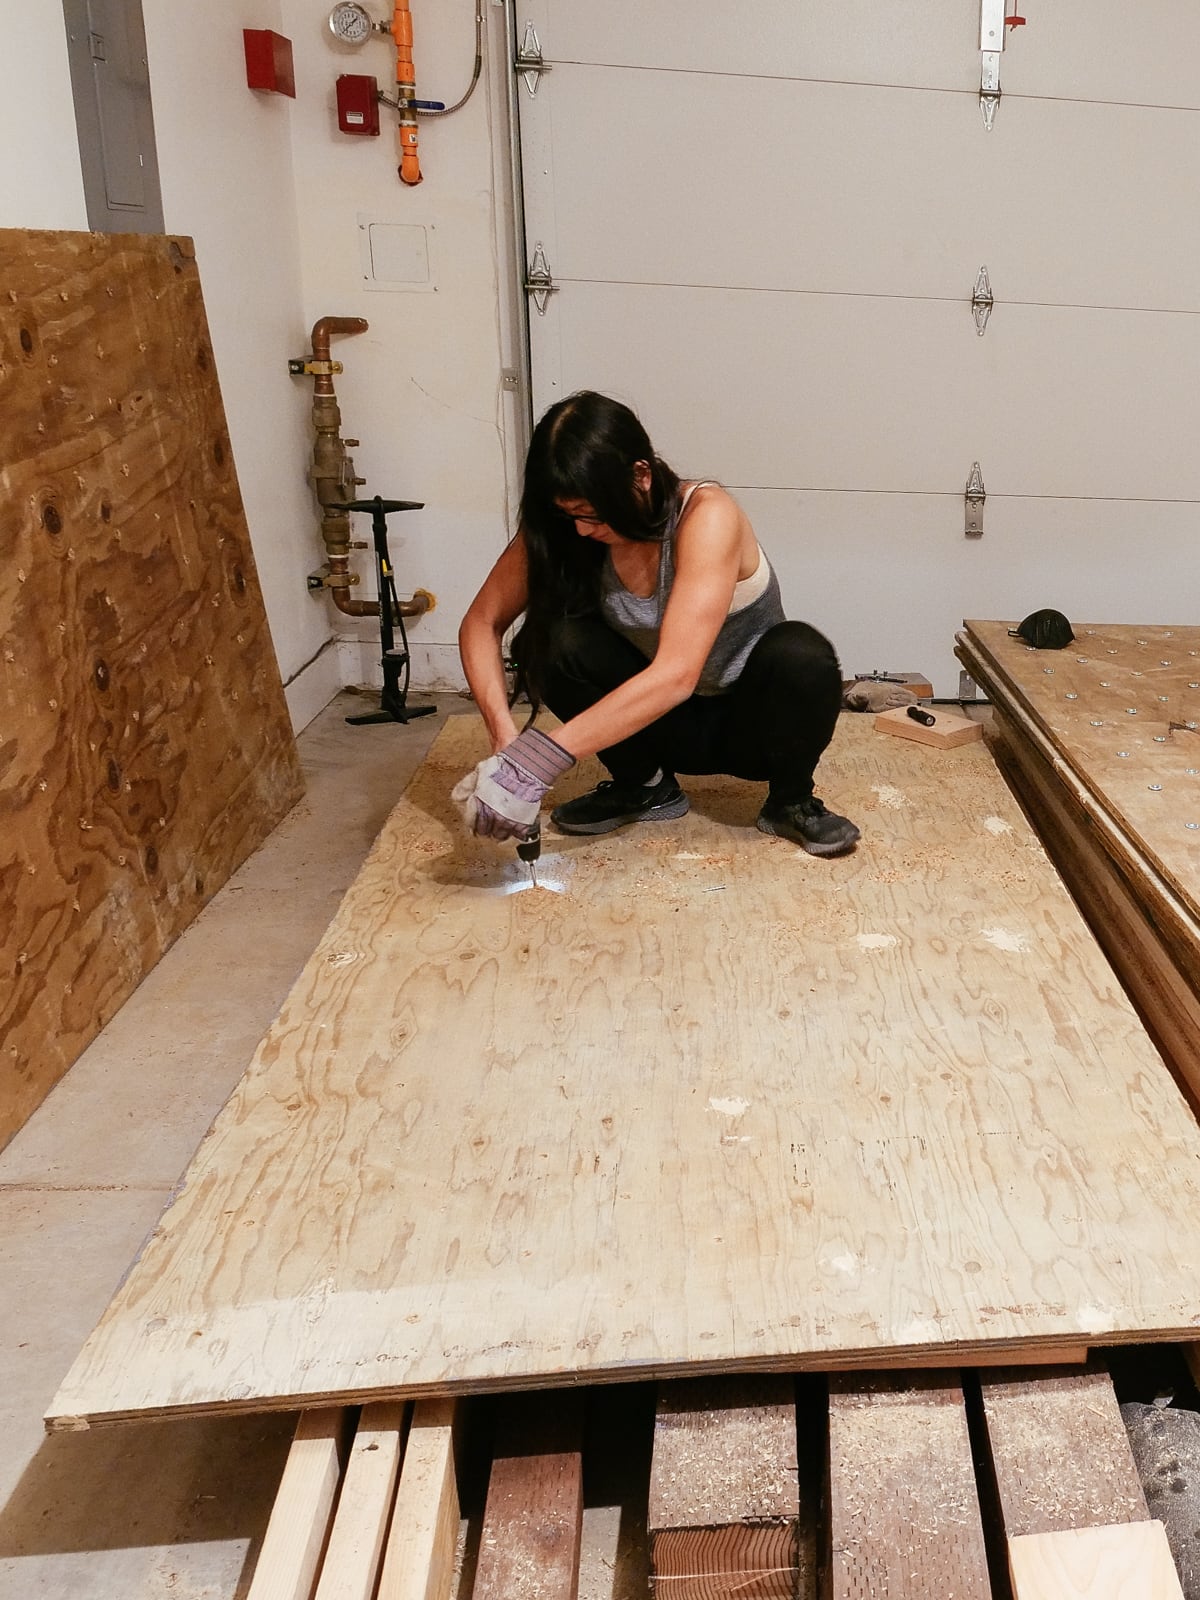
5. Marking and drilling
After each sheet was cut to size and roughly-flat, we marked and drilled holes for our T-nuts.
We tried to stick to the 5.66" grid described in 2., with some holes offset to avoid hitting the framing members that would sit behind them.
To make the holes the T-nuts would fit into, we drilled using a 7/16" Forstner bit, which was the perfect size to have the T-nuts sit snugly. (Forstner bits are expensive but make fantastically precise, crisp-edged holes — if we’d used standard bits, the holes would likely be too ragged to fit our T-nuts perfectly.)
We thought it’d be important to make the T-nut holes as perfectly perpendicular to the surface as possible, to make sure the holds would mount securely. To try to achieve this without too much tooling, we used a block of wood with a hole drilled through it as a guide. This was imprecise enough (but I was lazy enough to not make a proper jig) that we ended up abandoning this partway through and just doing this by eye. So far this has turned out to be workable.
Drilling holes for the T-nuts ad infinitum
6. Mounting the T-nuts
We chose 2-hole T-nuts from Escape Climbing, which hit a sweet spot in optimizing for barrel length, corrosion-resistance, and availability during the pandemic. (In an ideal world these would be stainless and I would’ve gotten to order them from the McMaster-Carr catalog, but that option was prohibitively more expensive.)
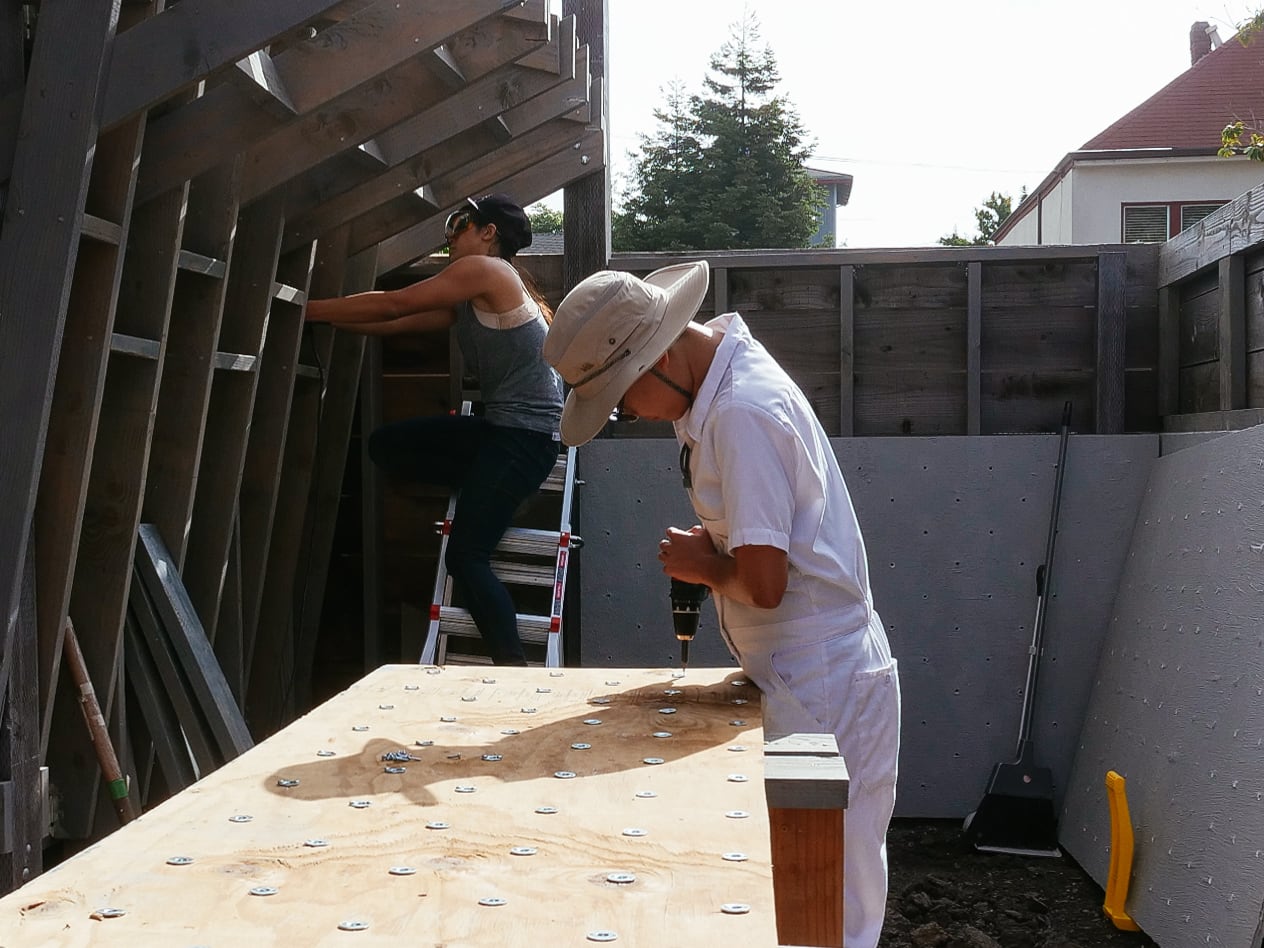
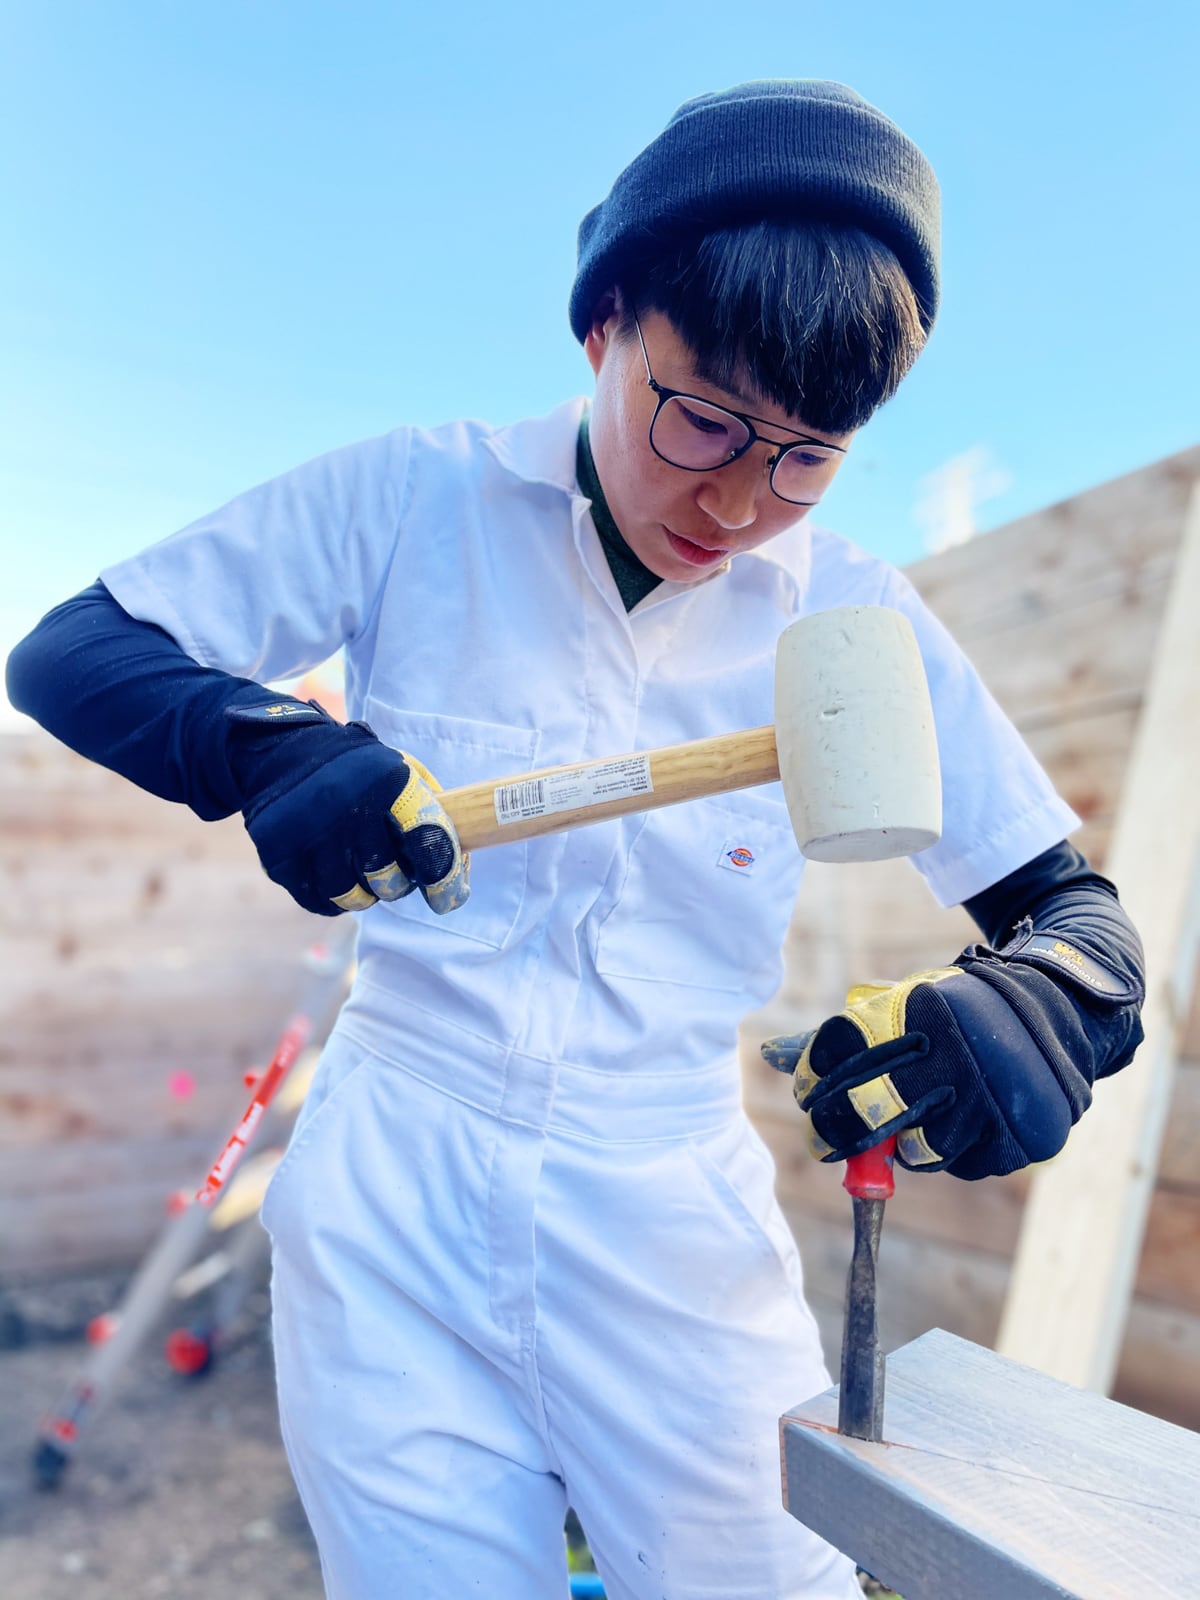
To mount the T-nuts into the plywood, we hammered them in with a big mallet, predrilled pilot holes in each screw hole, and attached with two (provided) screws.
Hammering and drilling in all the T-nuts
7. Teeing
Now, with the sheets cut to size and full of T-nuts, we were ready to add the surface finish to the plywood.
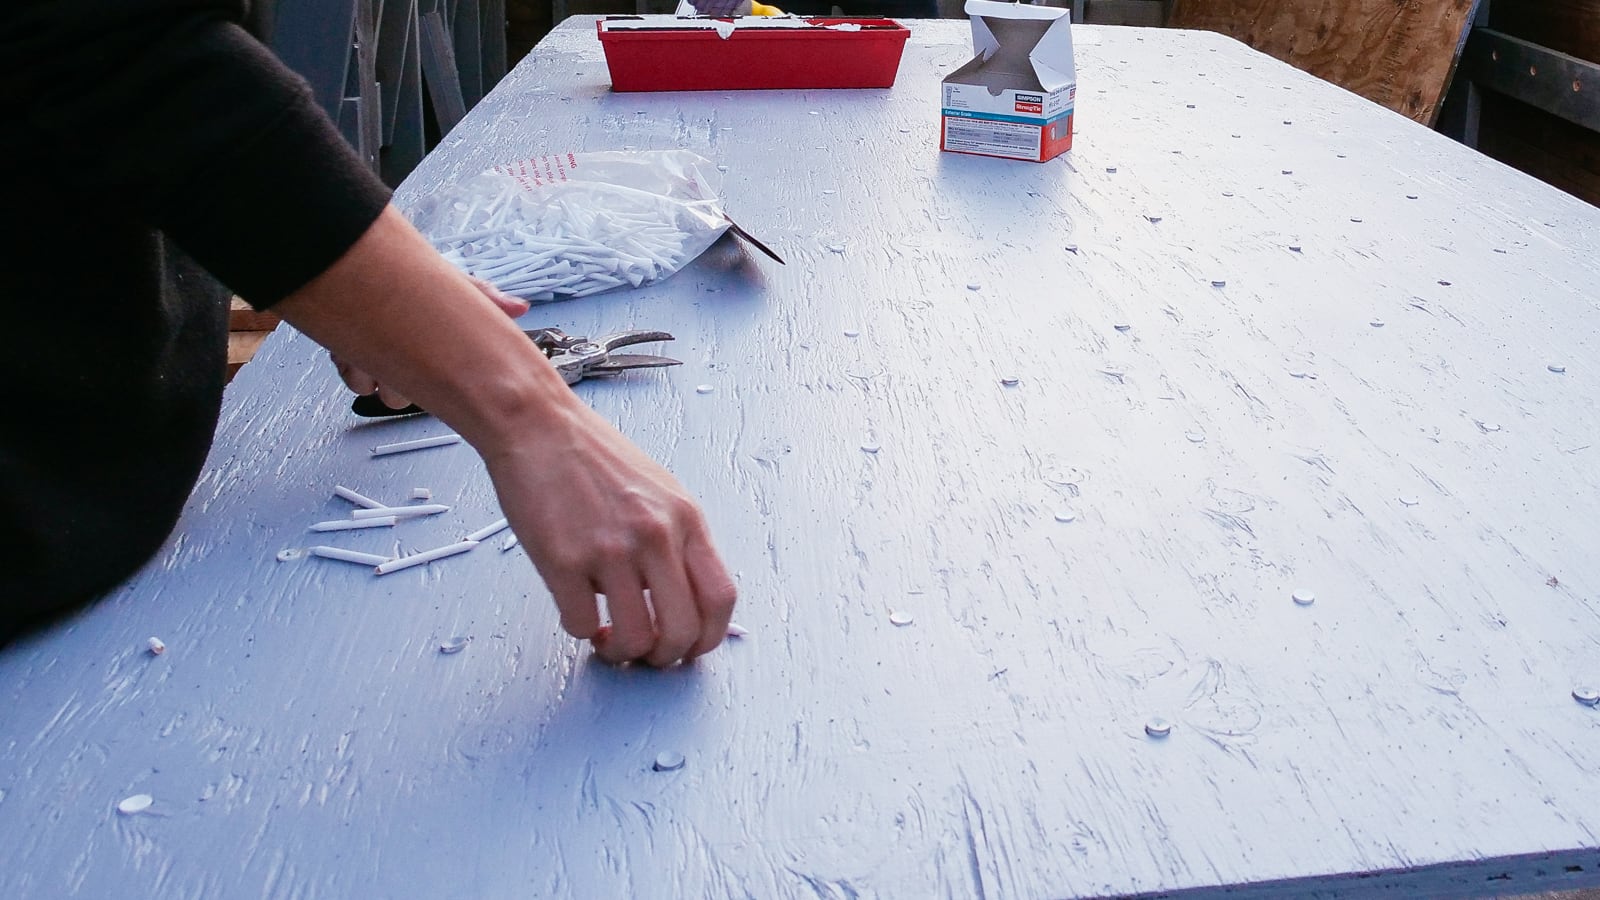
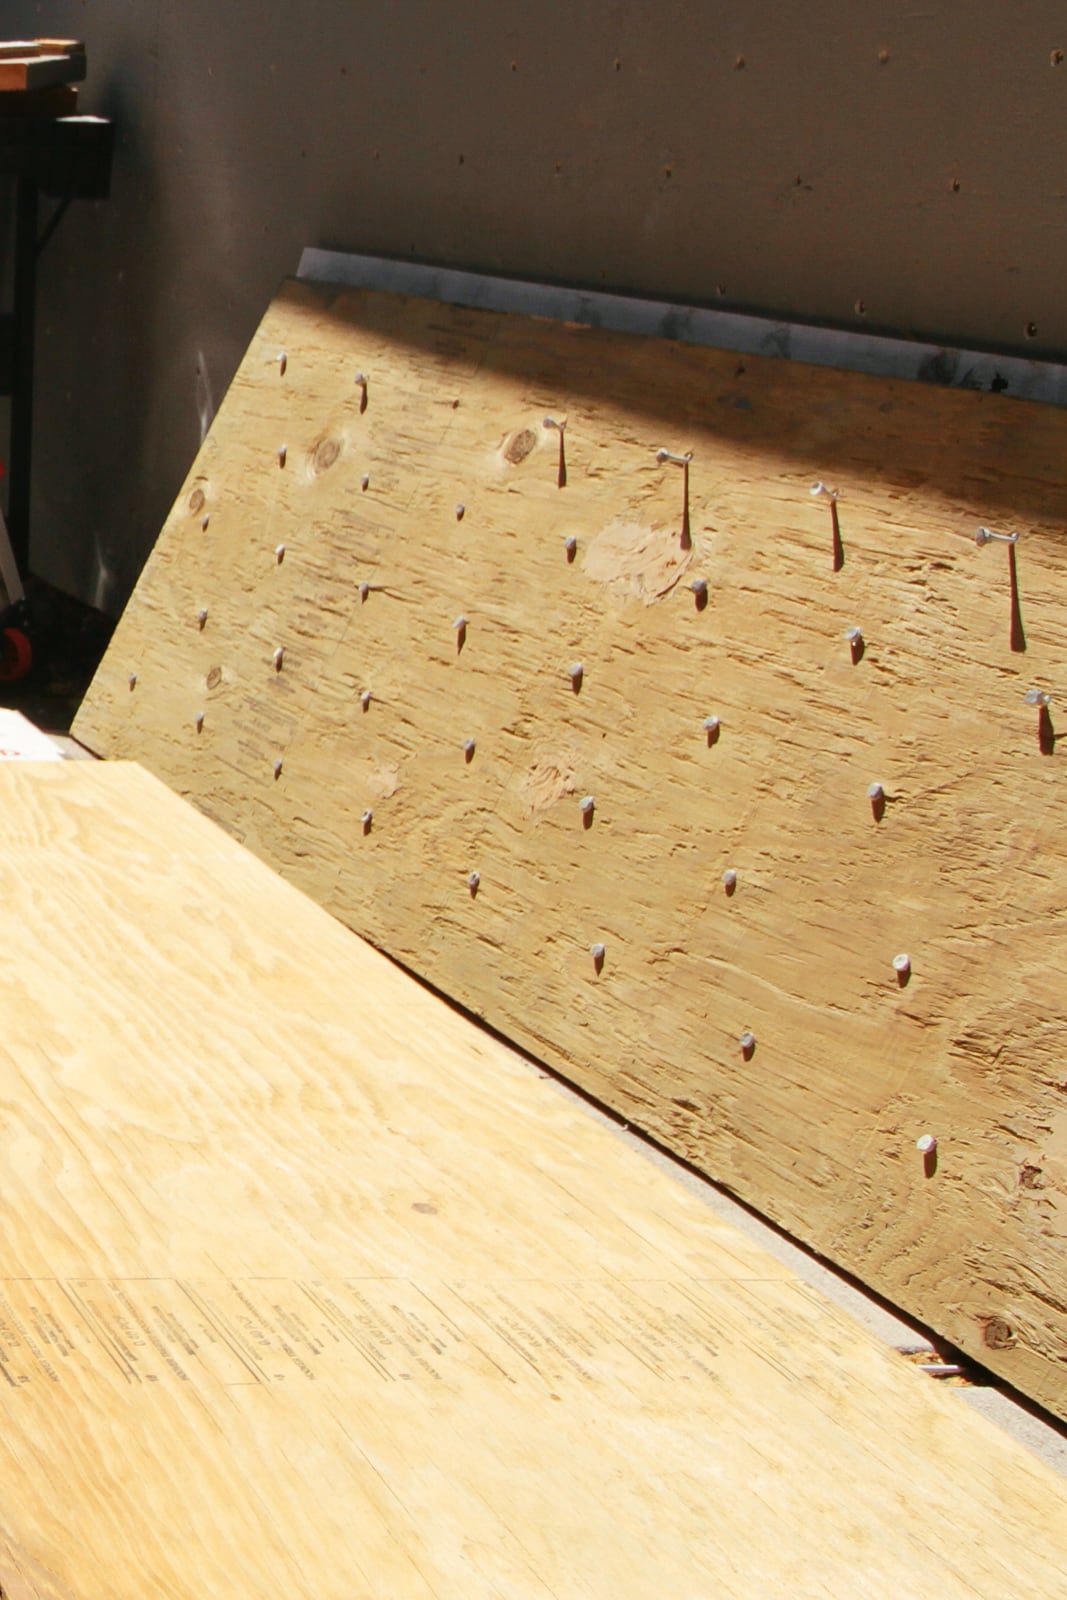
To avoid getting any primer/texture/paint into our arduously-mounted T-nut threads, we stole an idea we saw on YouTube and plugged them with golf tees.
Plugging holes with golf tees before painting/priming
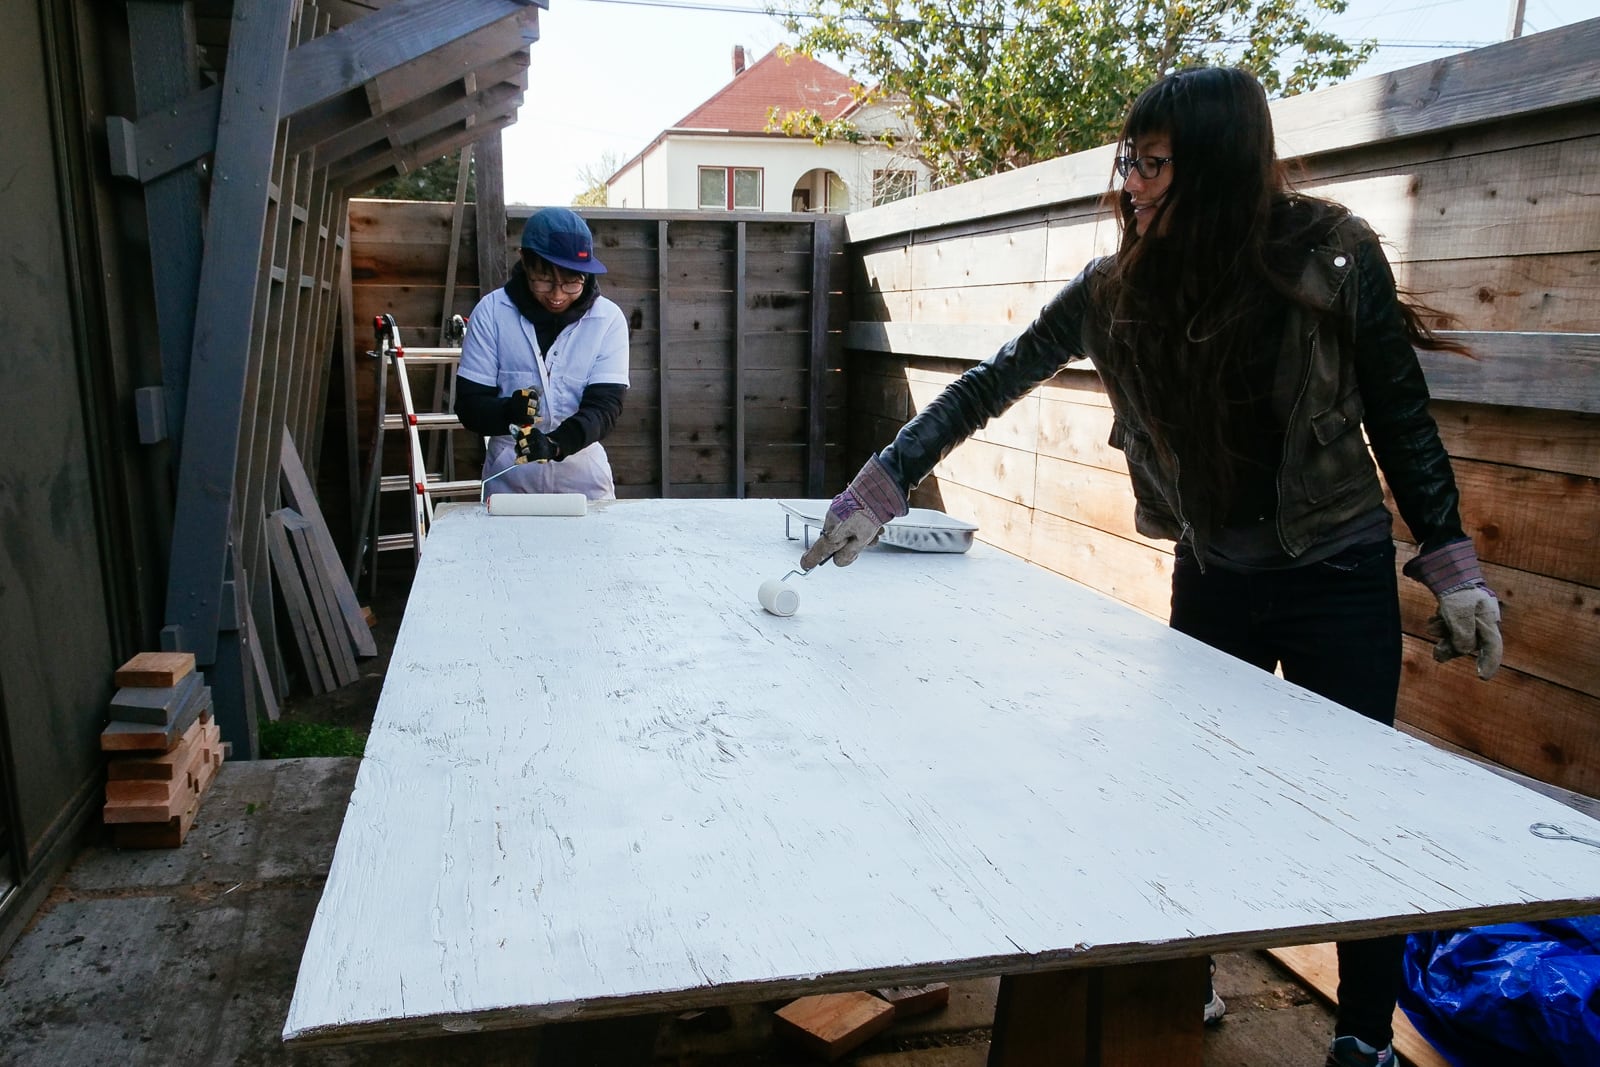
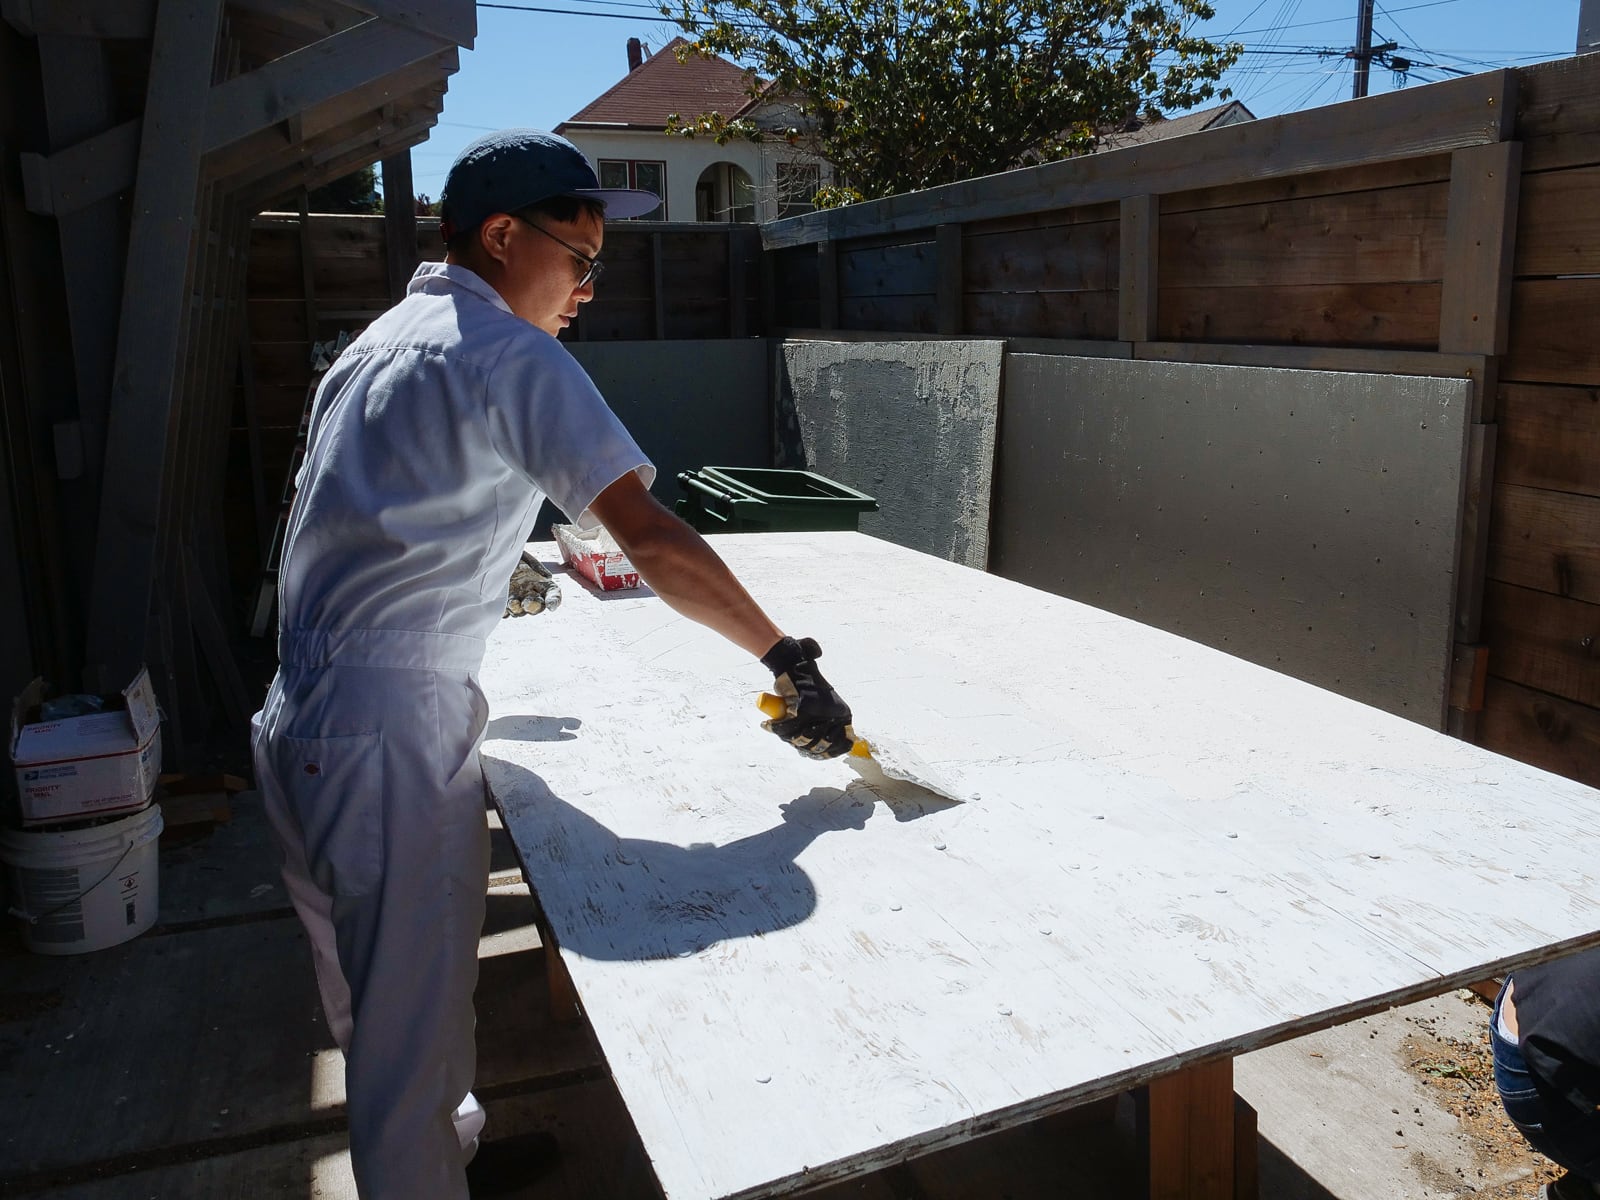
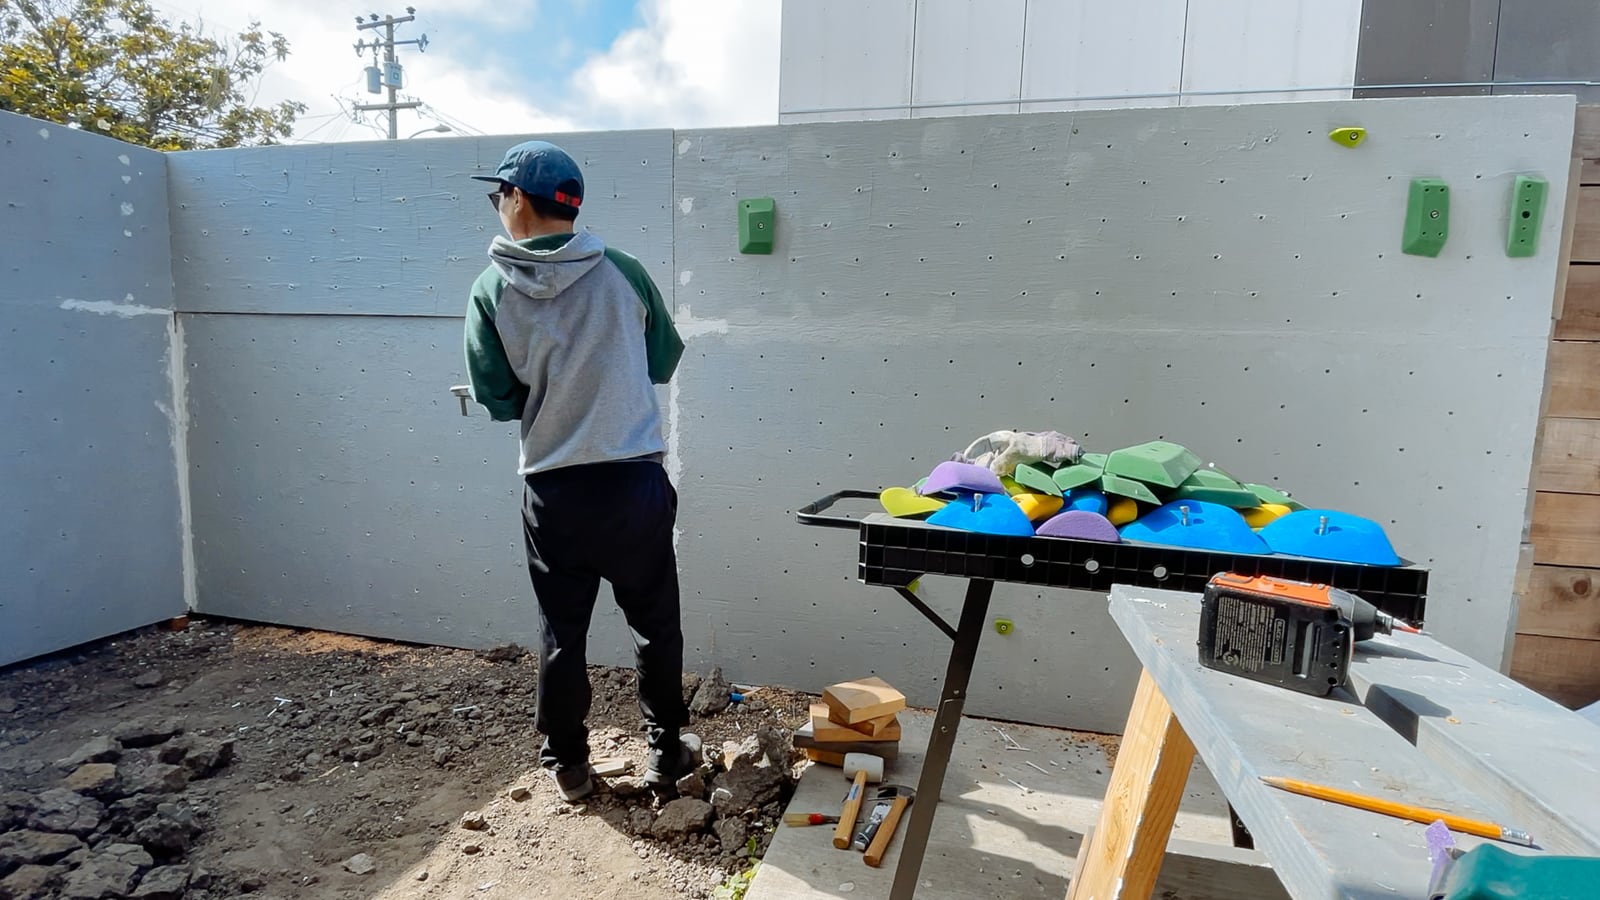
8. Priming
To improve adhesion of our texture to the plywood, we started with a latex primer layer. We used KILZ 2 interior/exterior primer, which seemed to be reasonably priced for the quality.
Priming the sheets
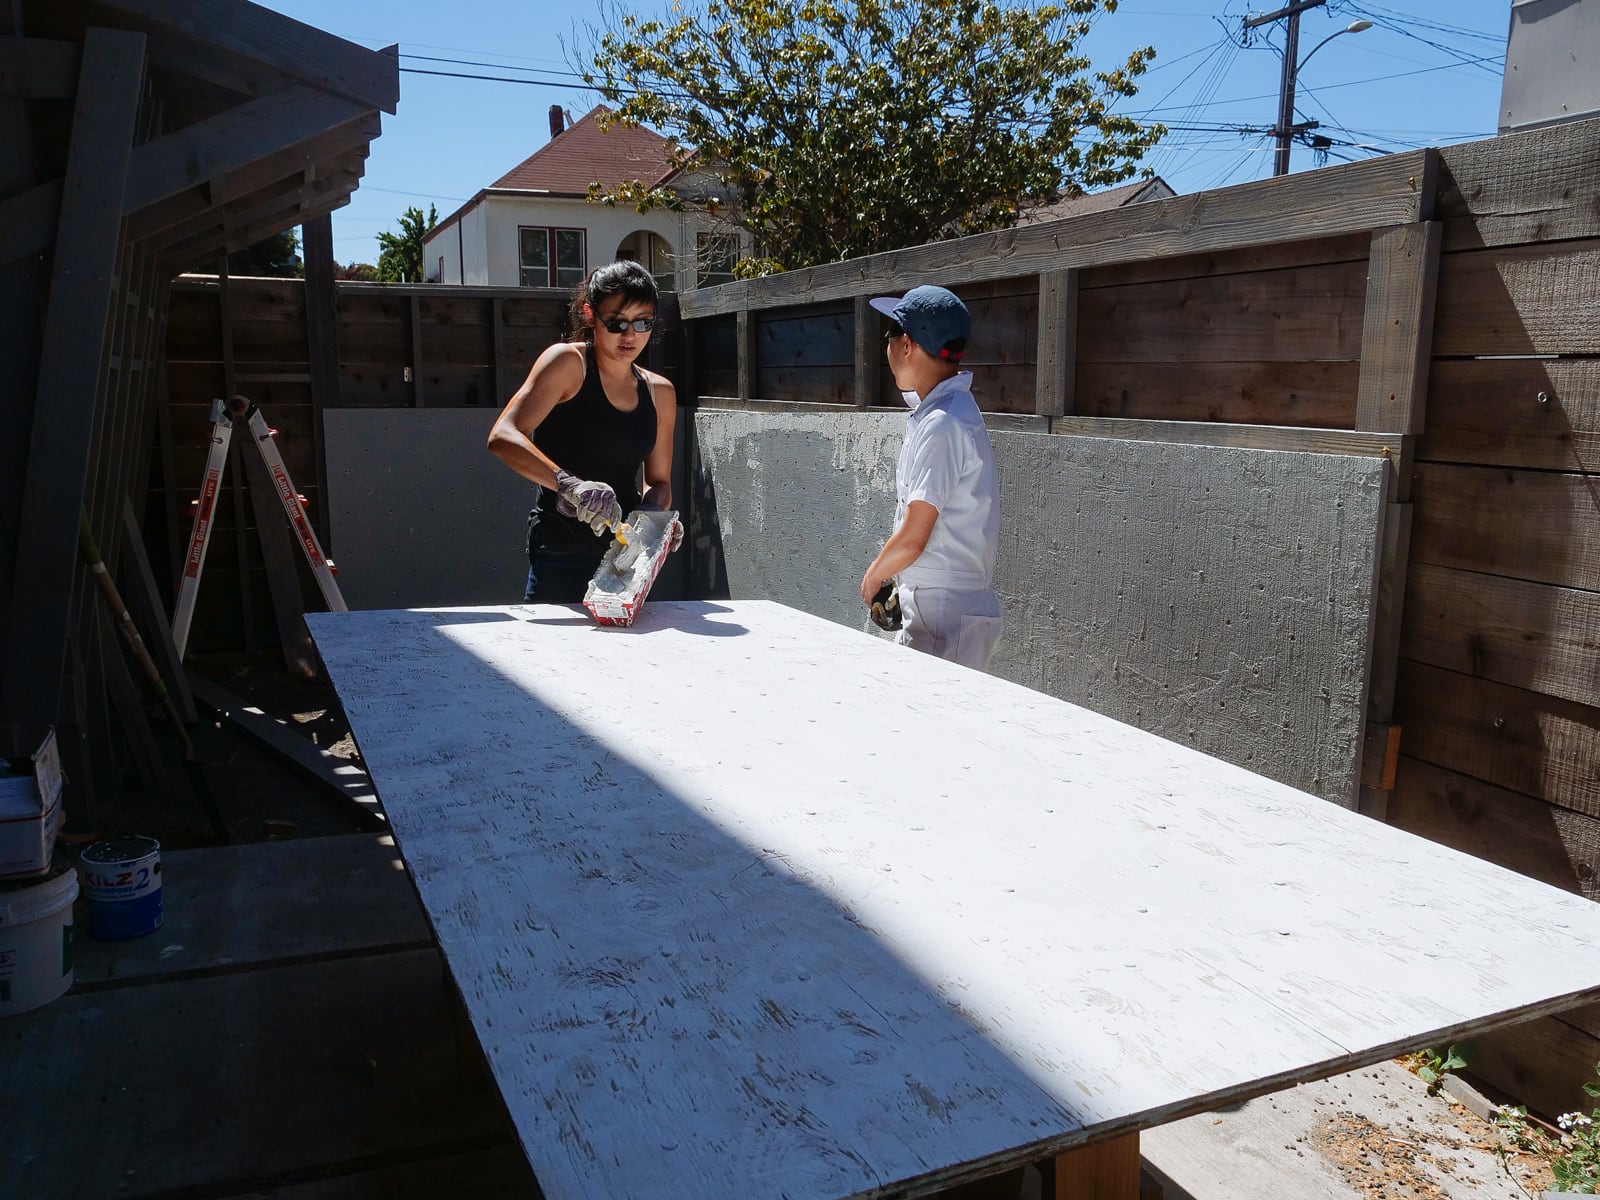
9. Surface texturing
We were originally going to skip this step and just use paint with some sand in it directly on top of the primer. We tried this on one sheet, though, and found the wood texture was too pronounced to allow for smearing, and gave us a headache.
We thought we’d be consigned to misery forever, but our friend Kris suggested that we look into rock texture, and instead of giving up we figured out how to mix up something nicely-thick that would still stick well to the plywood: about 2:3:8 by volume of sand, primer, and drywall mud. We applied this with drywall taping tools instead of a paint roller, although in retrospect it might’ve been easier to thin it with water and apply with a paint roller.
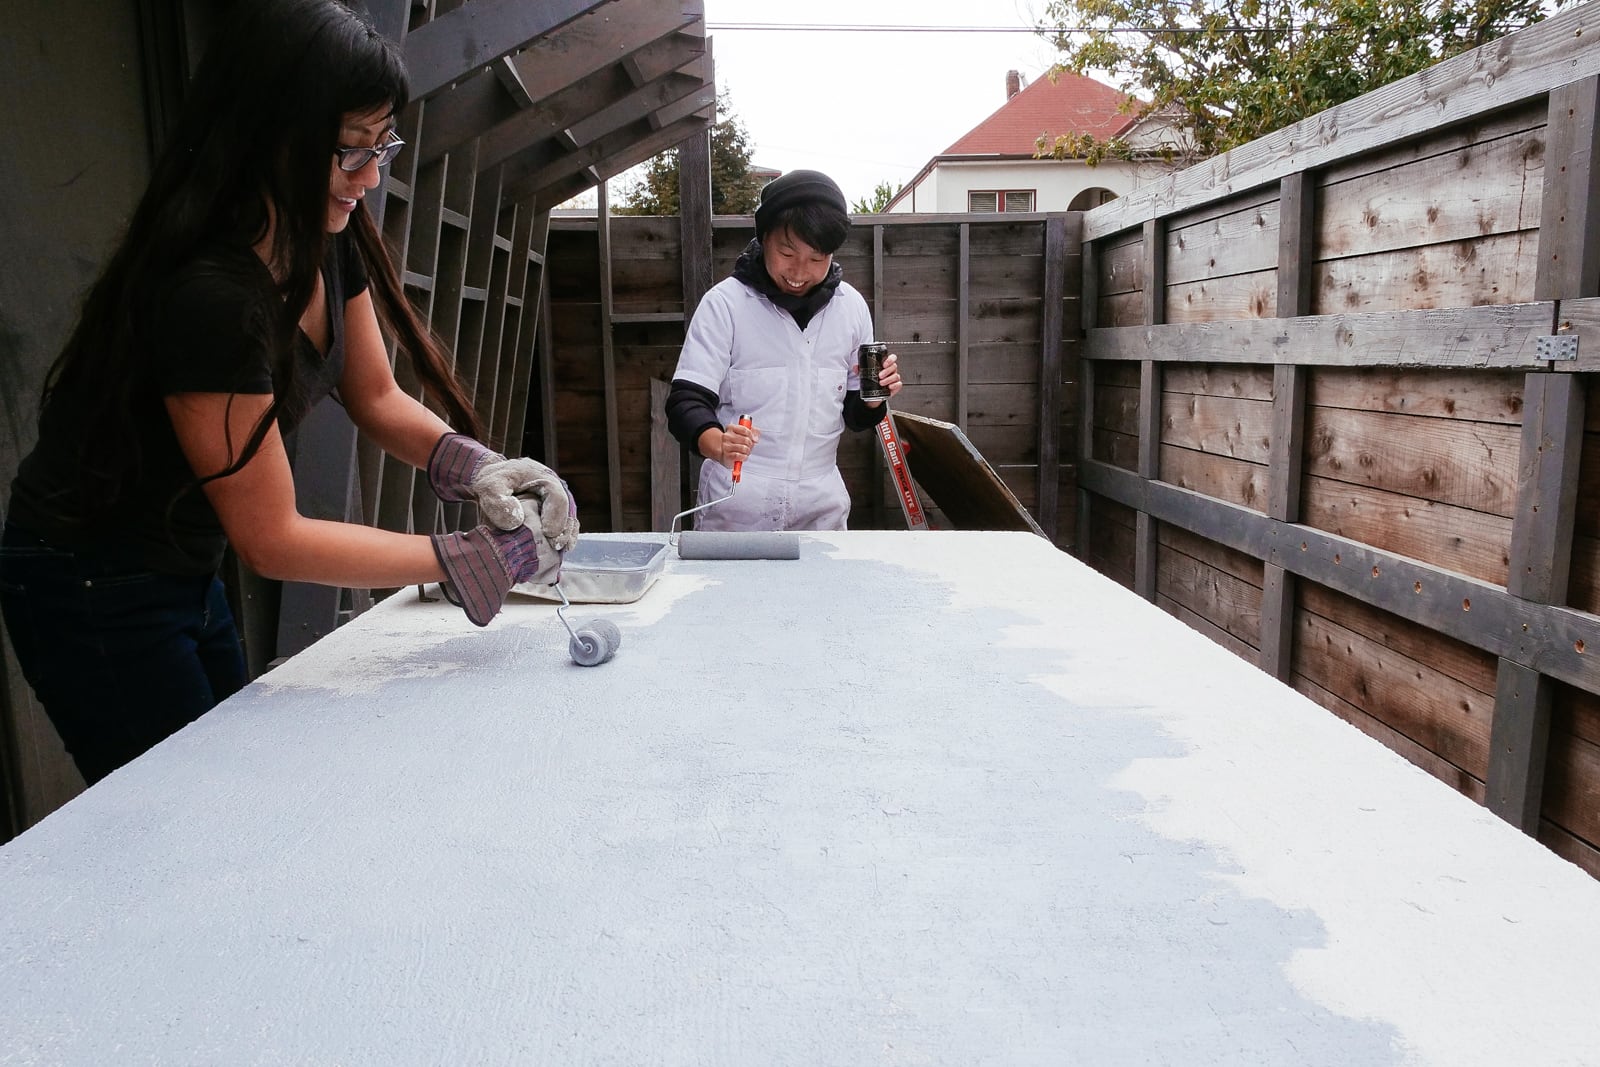
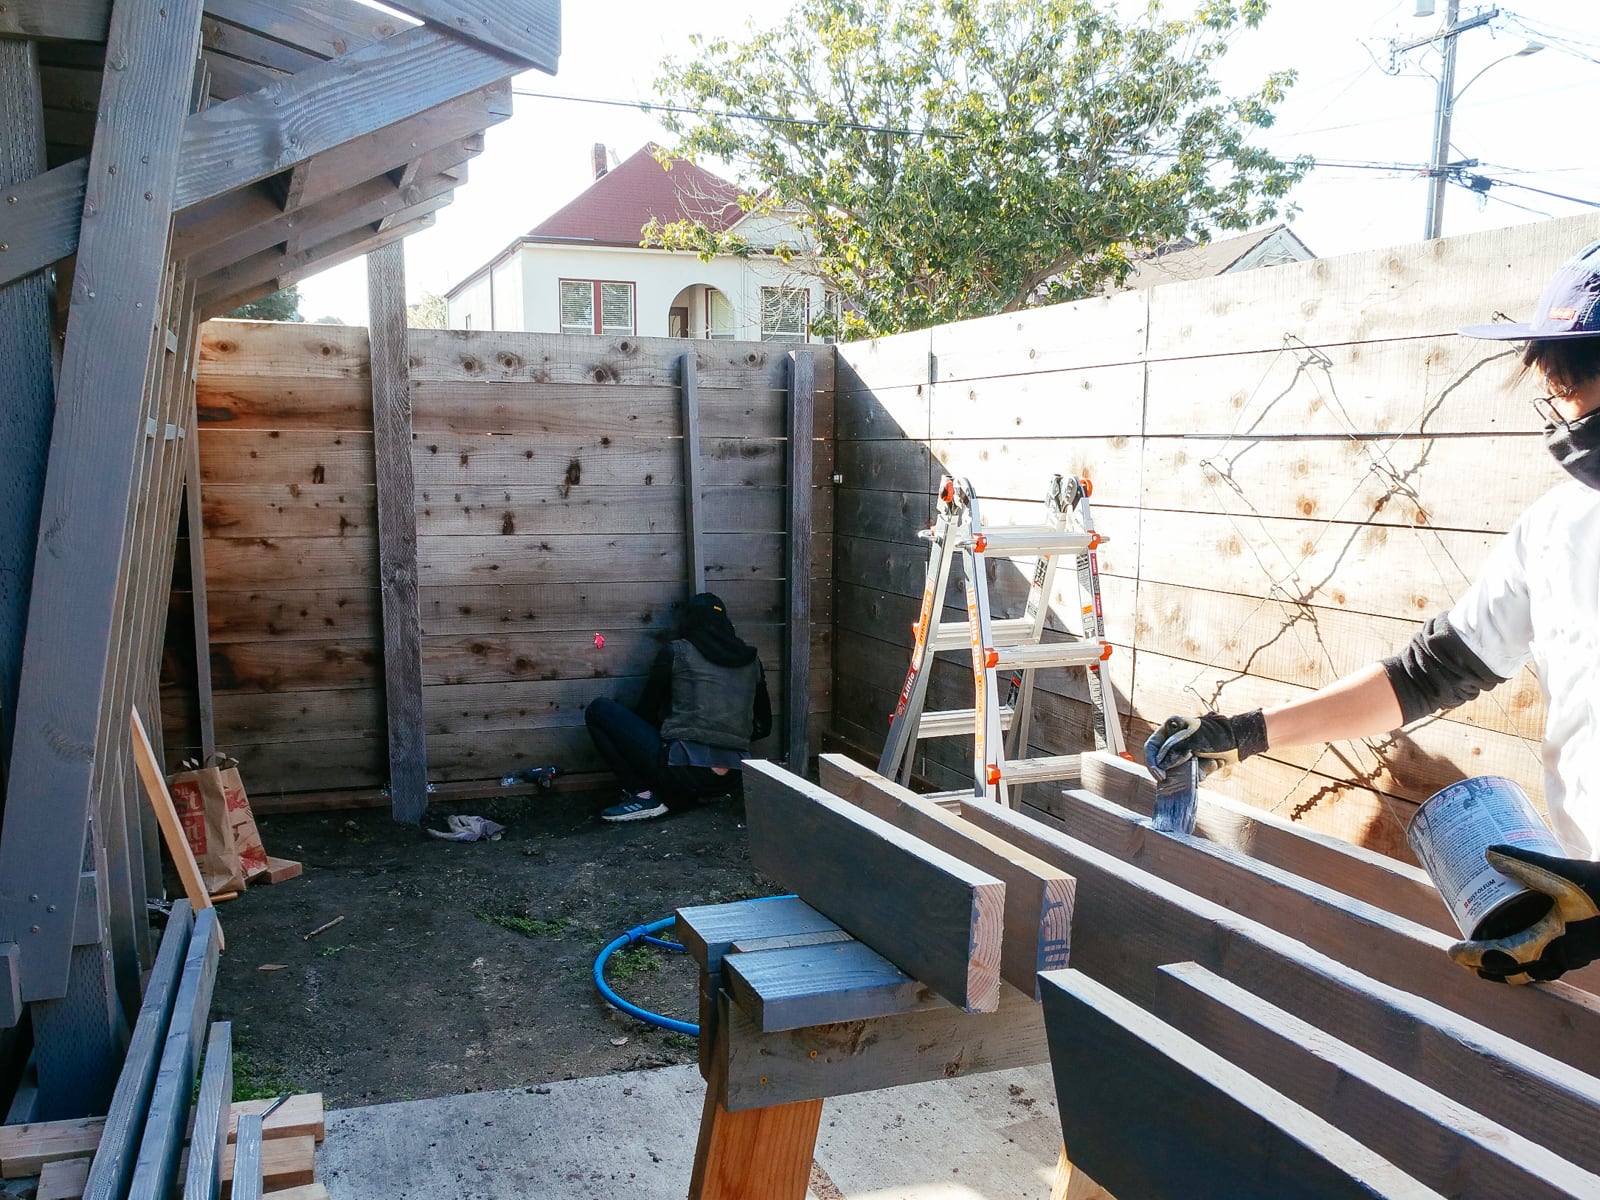
10. Painting
By this point we were really bored of doing this. But, painting is fun? We chose Behr porch and patio paint because their display at Home Depot was appealing and because climbing walls, porches, and patios are all walked on with feet.
Putting it all together
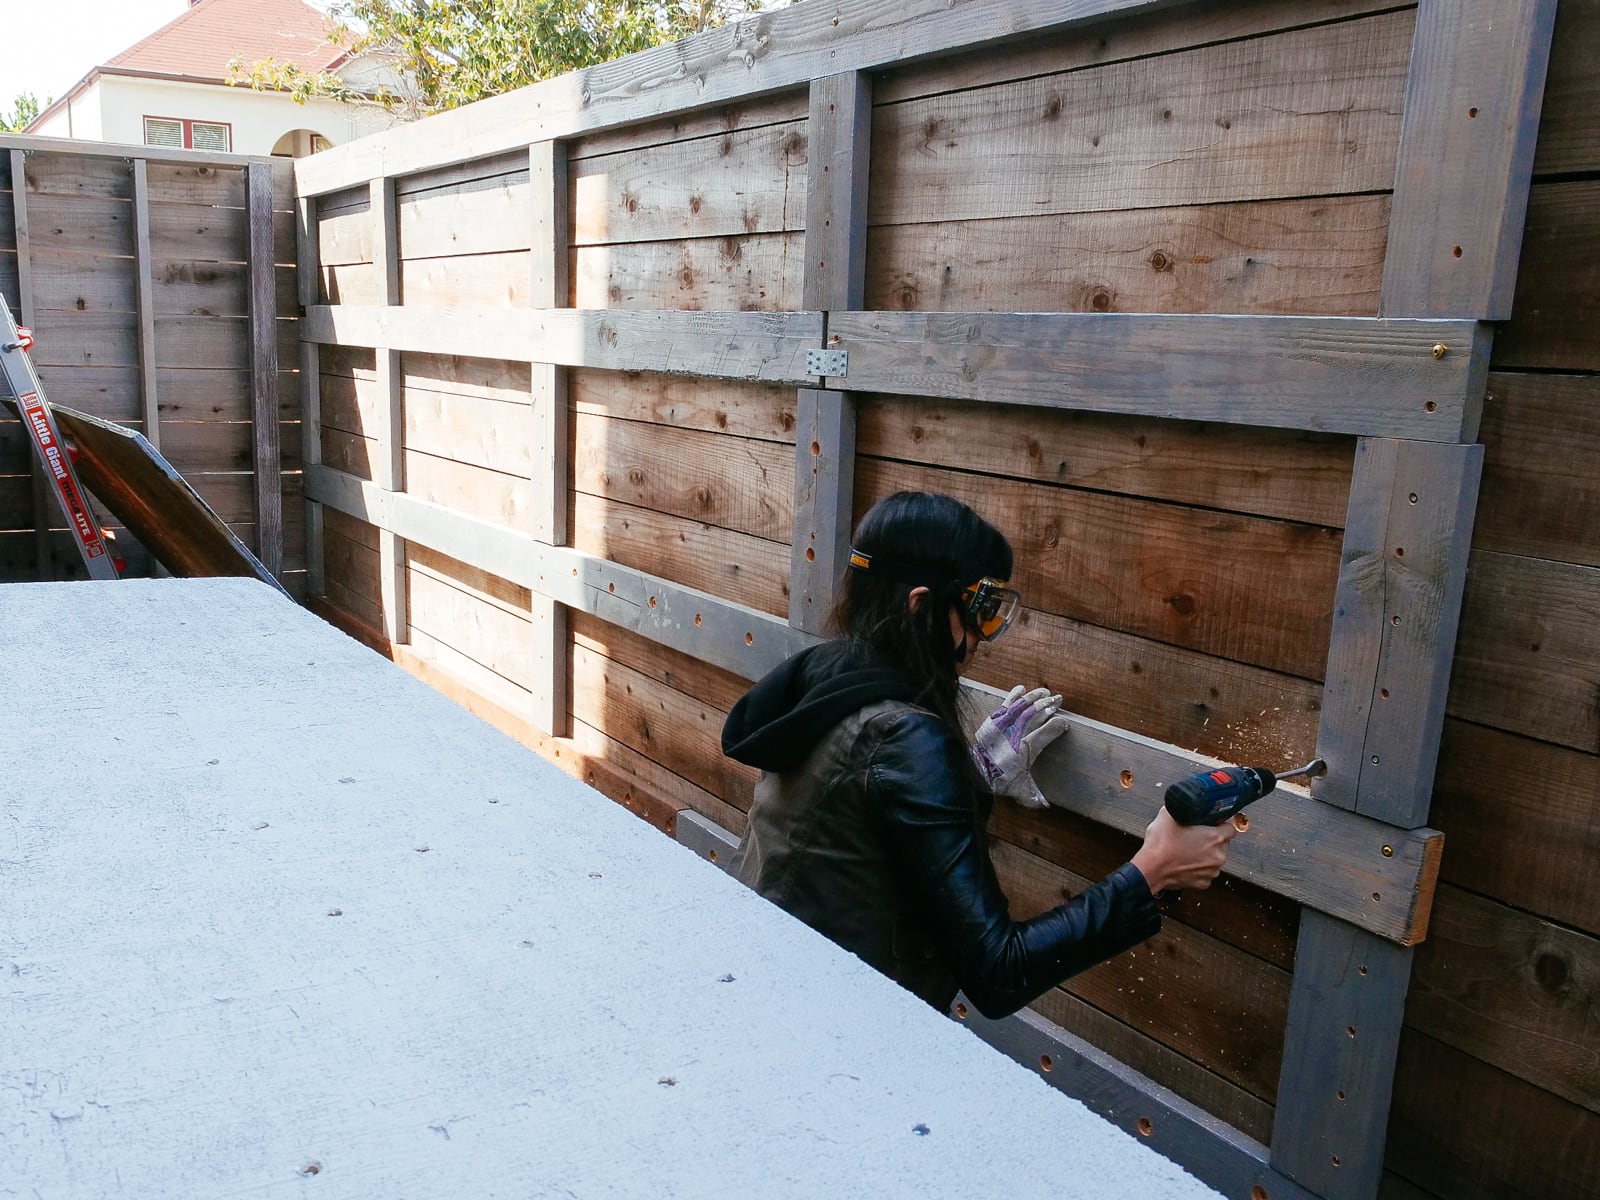
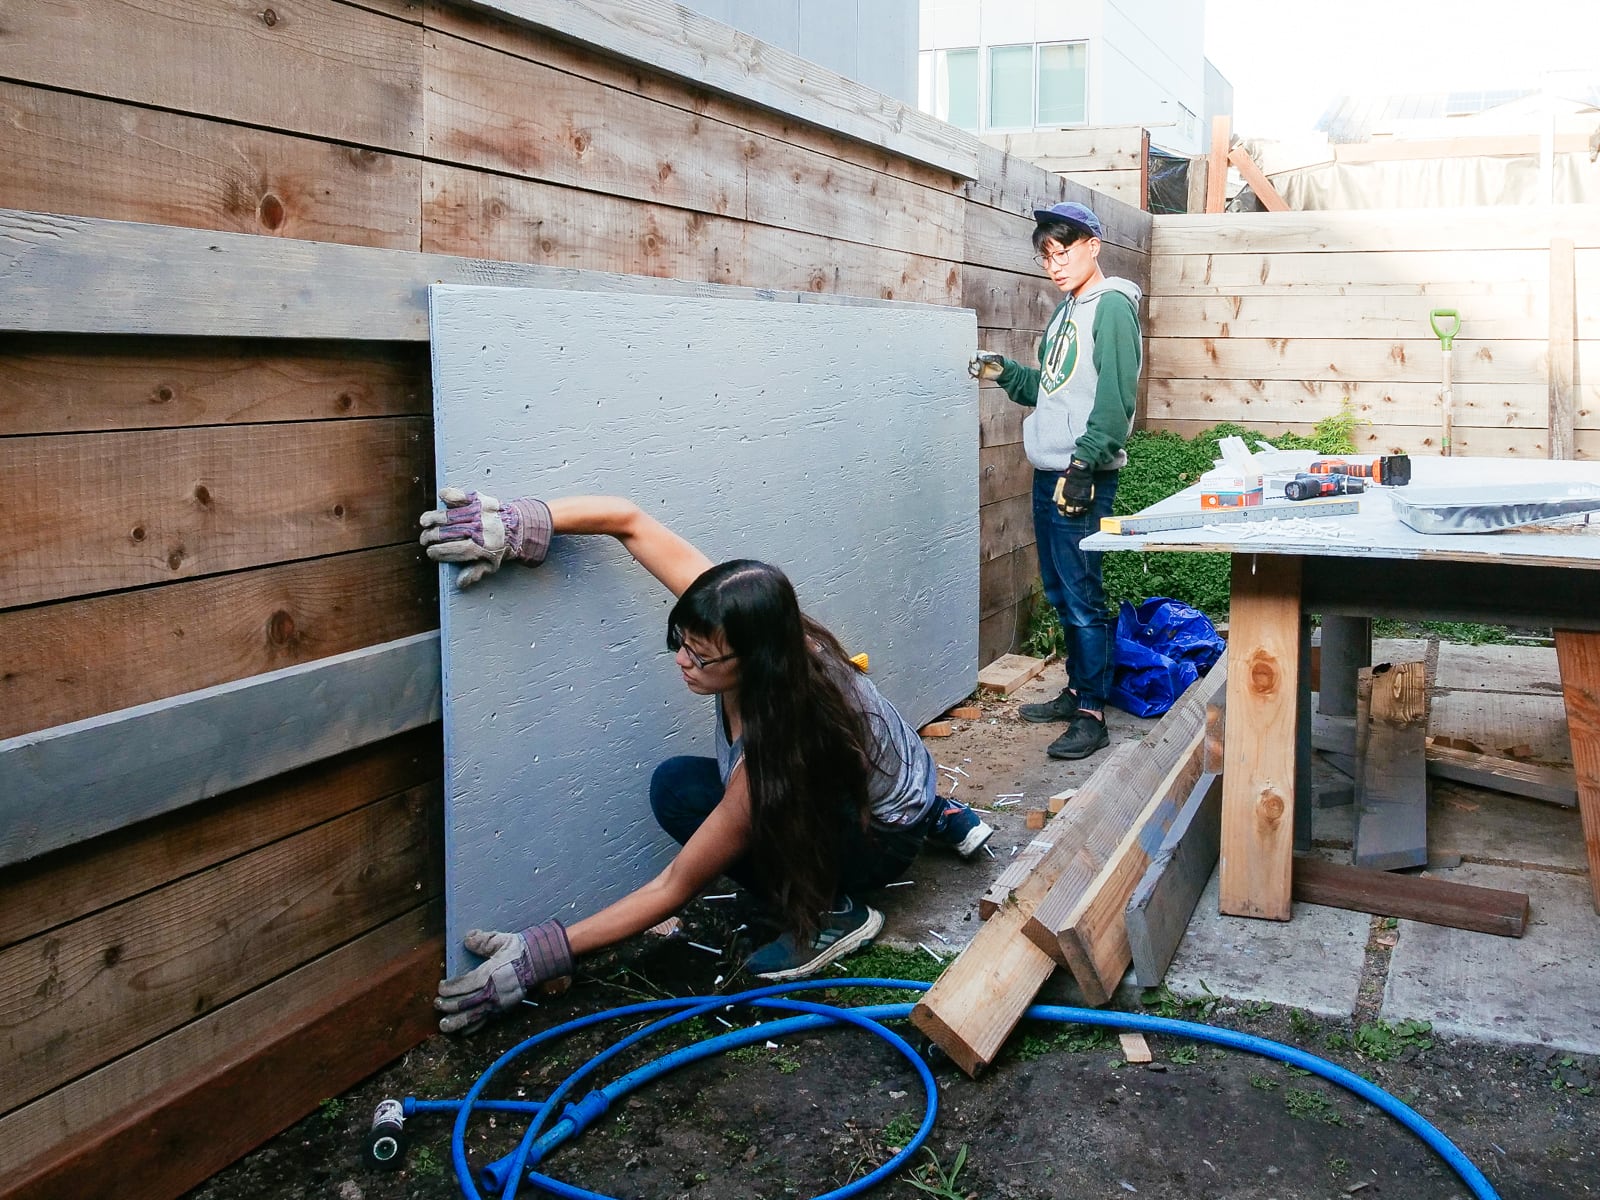
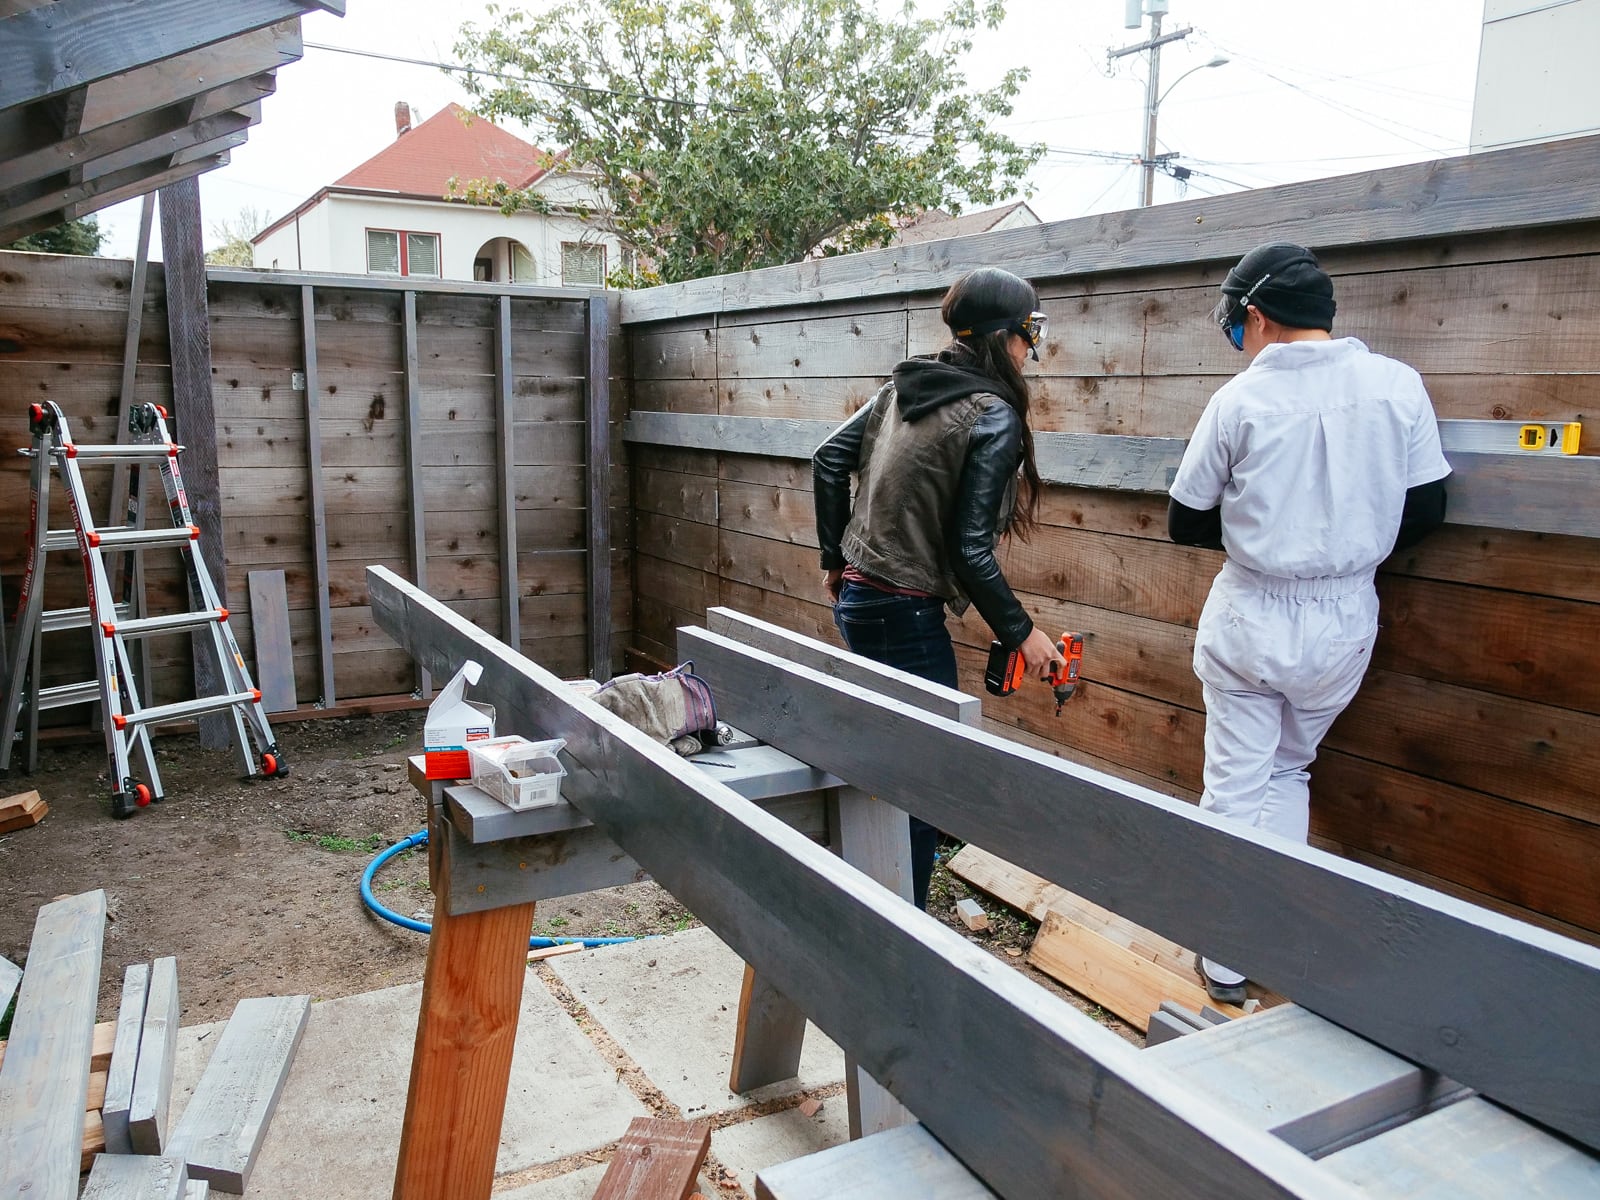
11. Mounting the wall G plywood to frame G
We had decided (when framing) to use our existing fence posts (which were already concreted down 16") as our main frame, with 2x6s added horizontally to carry load to the posts. Because these 2x6s were placed with their 5.5" face flush to the fence, in order to place the plywood flush against them, we needed to drill out holes where the T-nut backs and hold bolts would intersect with the girts.
Drilling out 1" holes behind each T-nut that would be in front of a girt
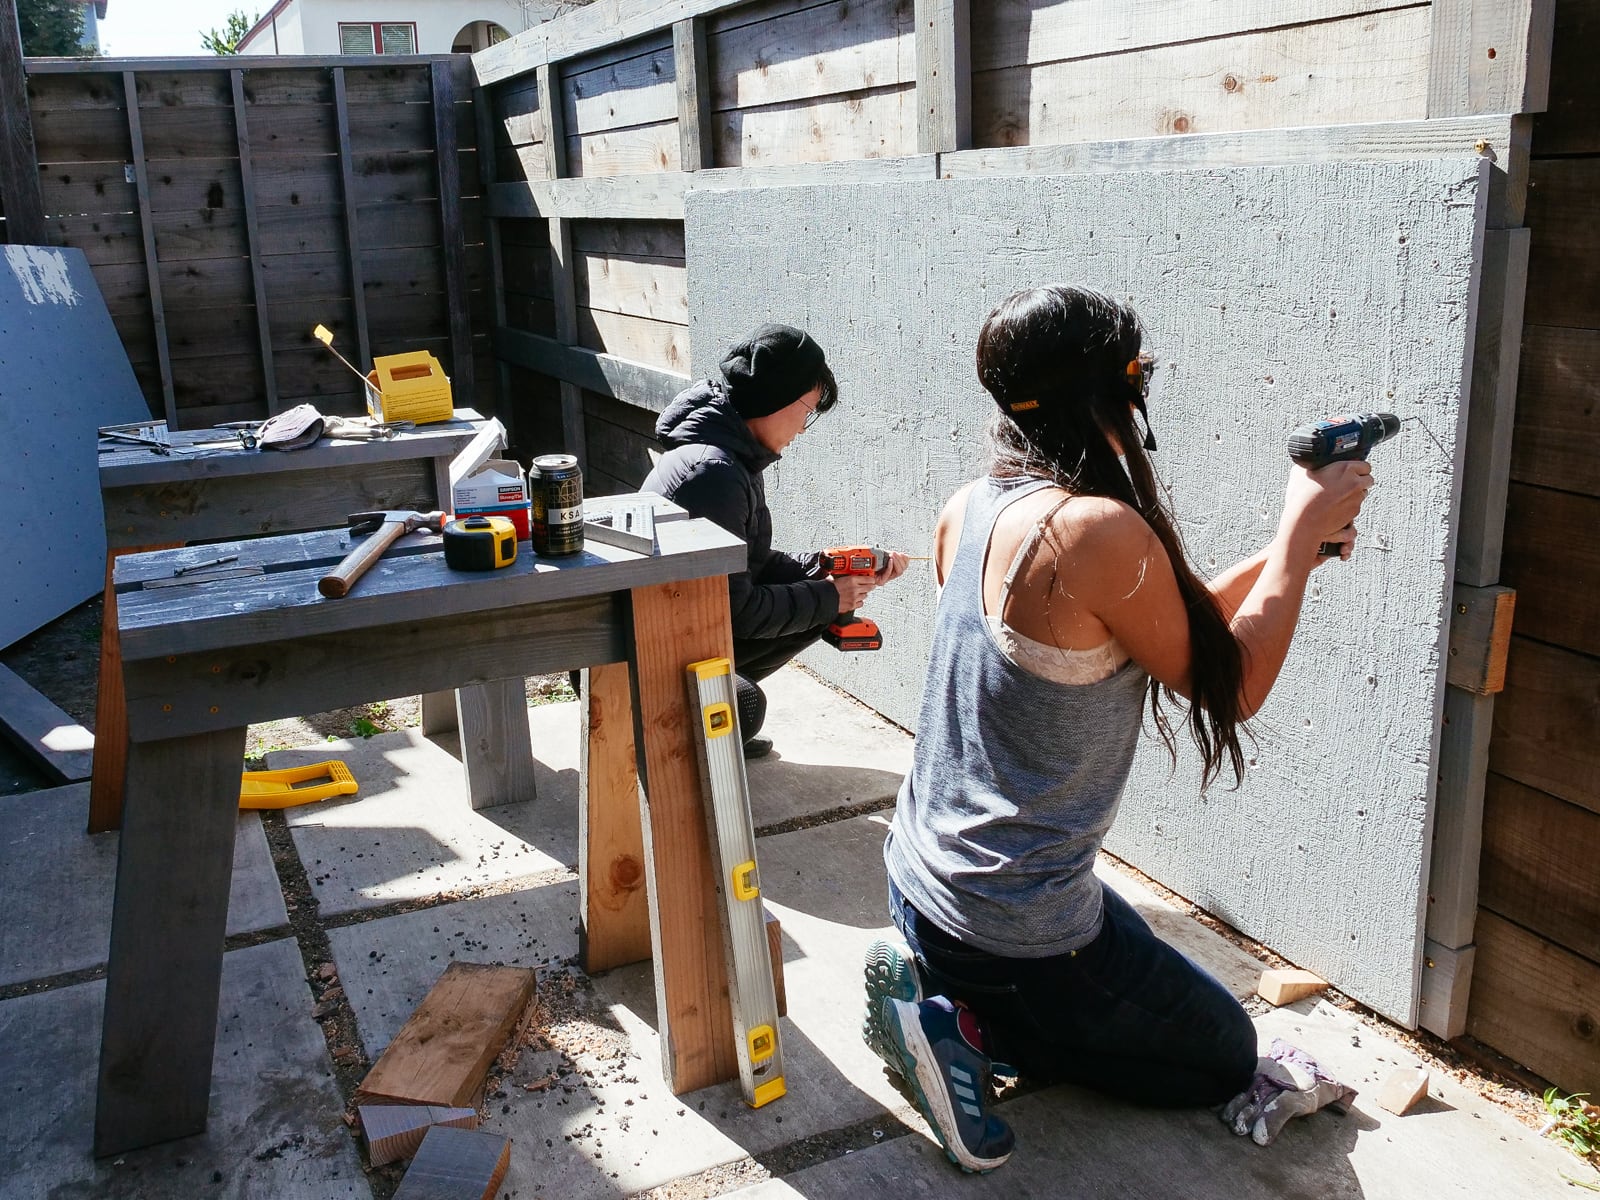
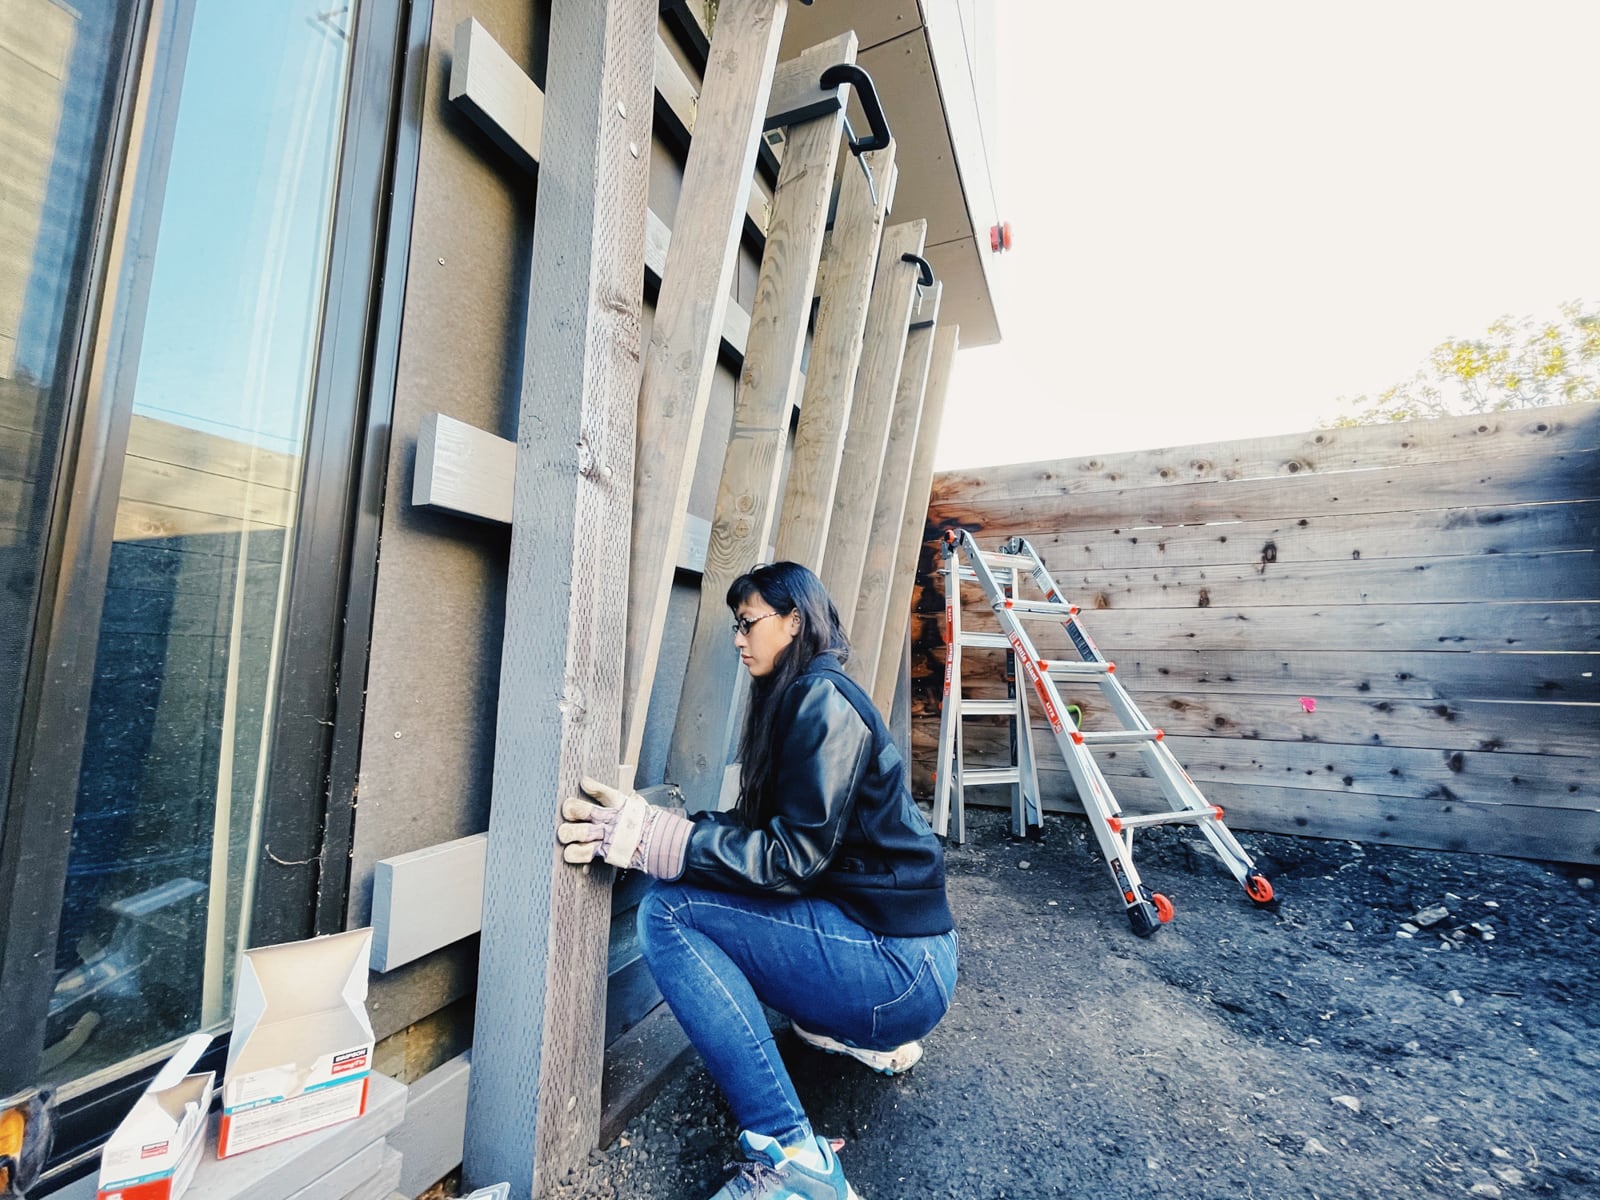
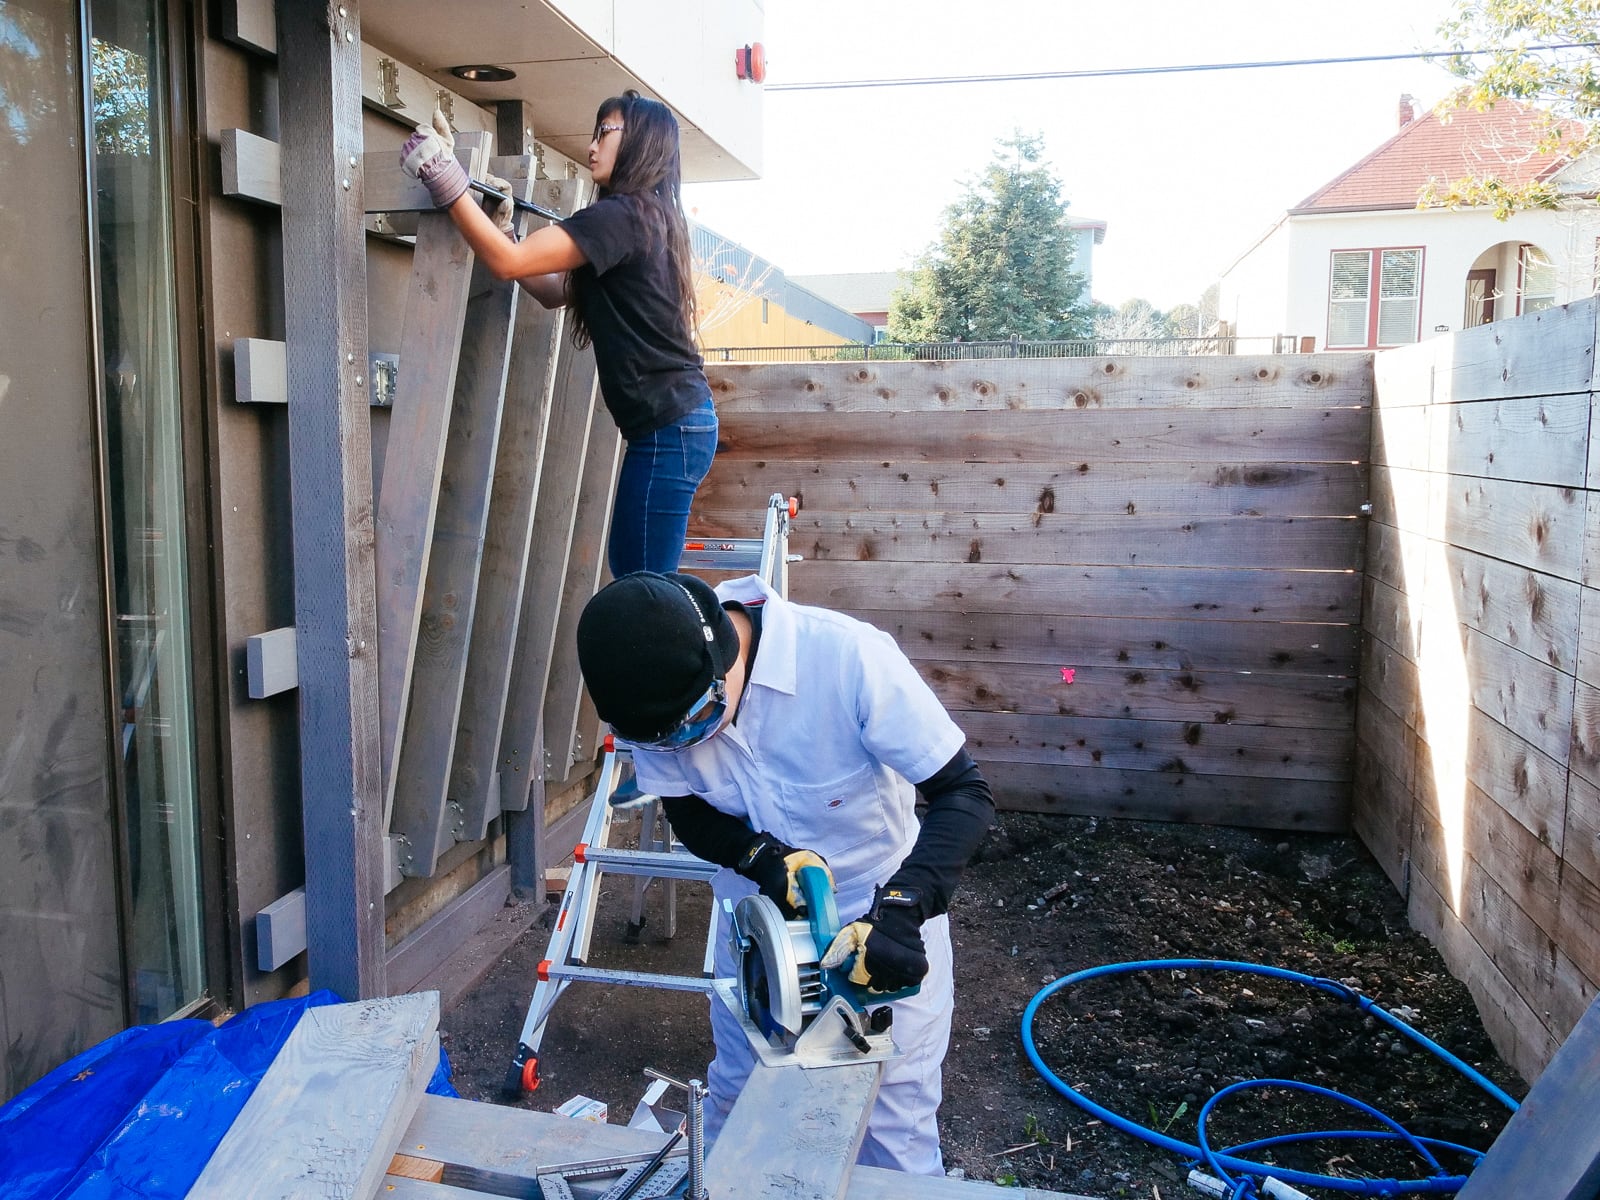
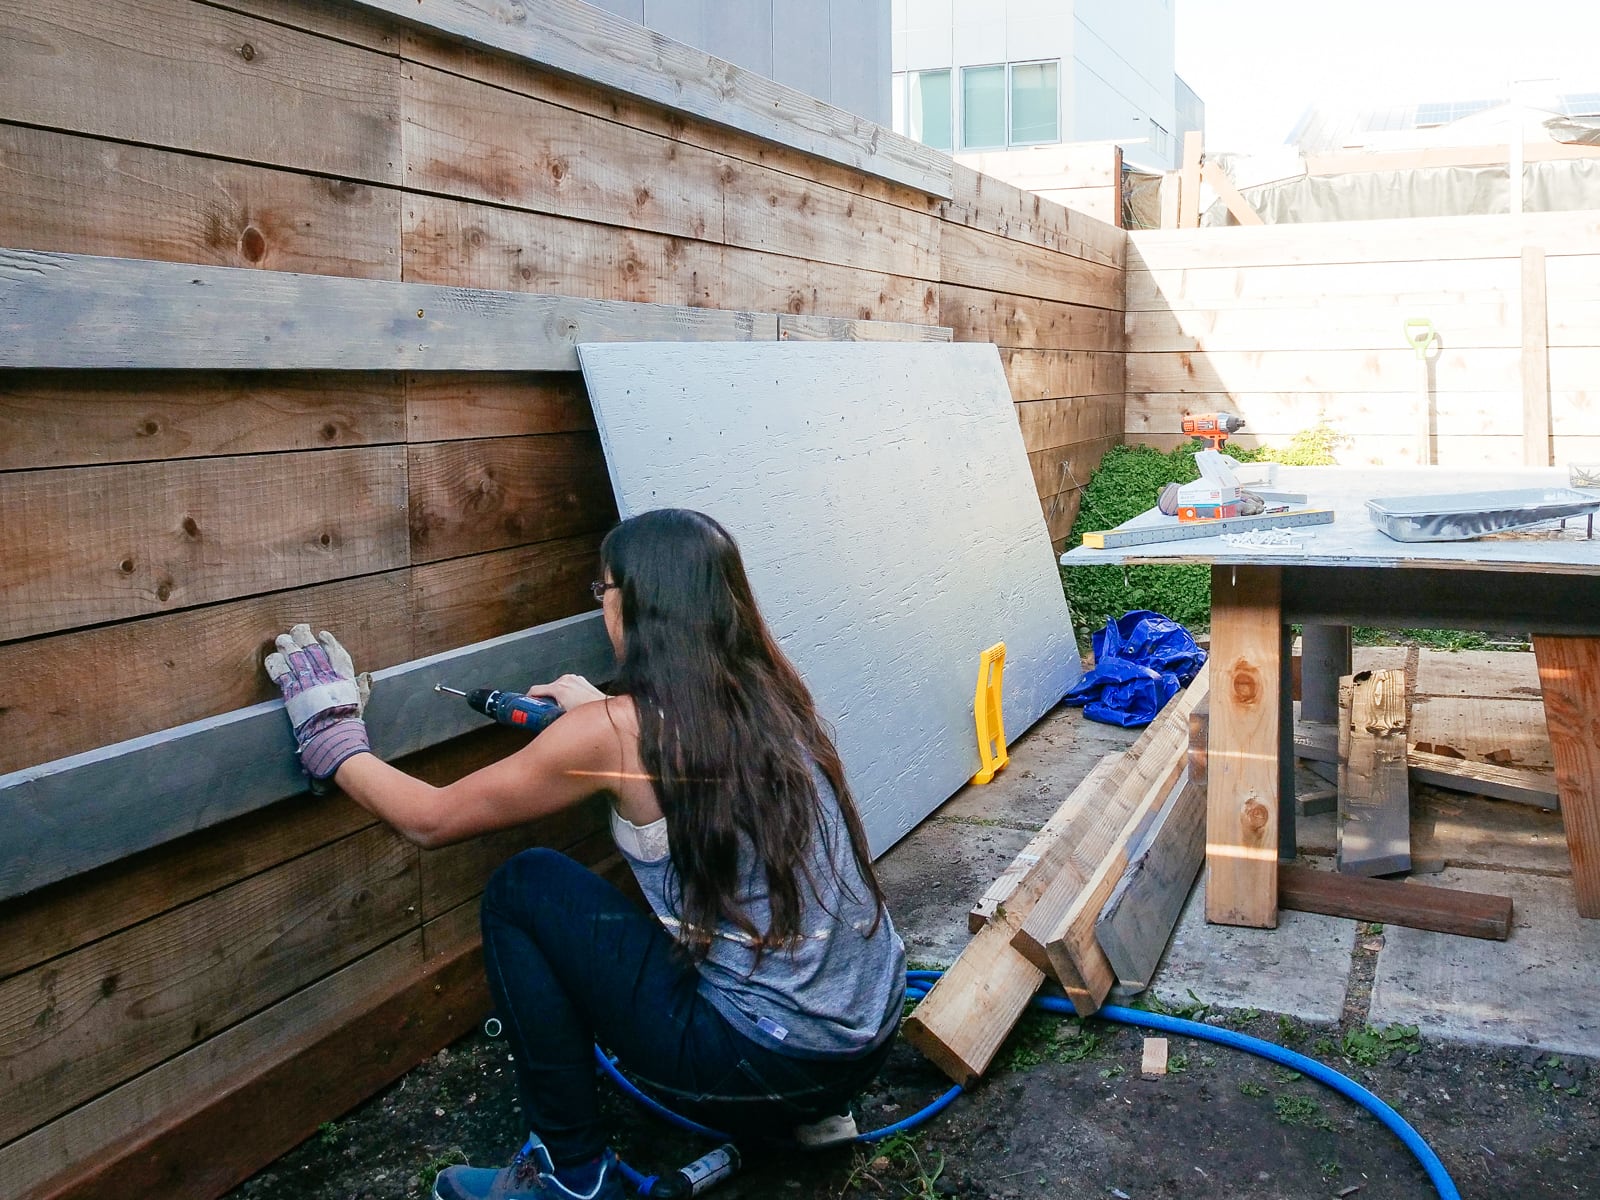
After preparing the framing members, mounting the sheets was straightforward: we used a handful of large structural screws and several handfuls of wood/decking screws per sheet to attach the plywood both directly into the fenceposts and to the girts.
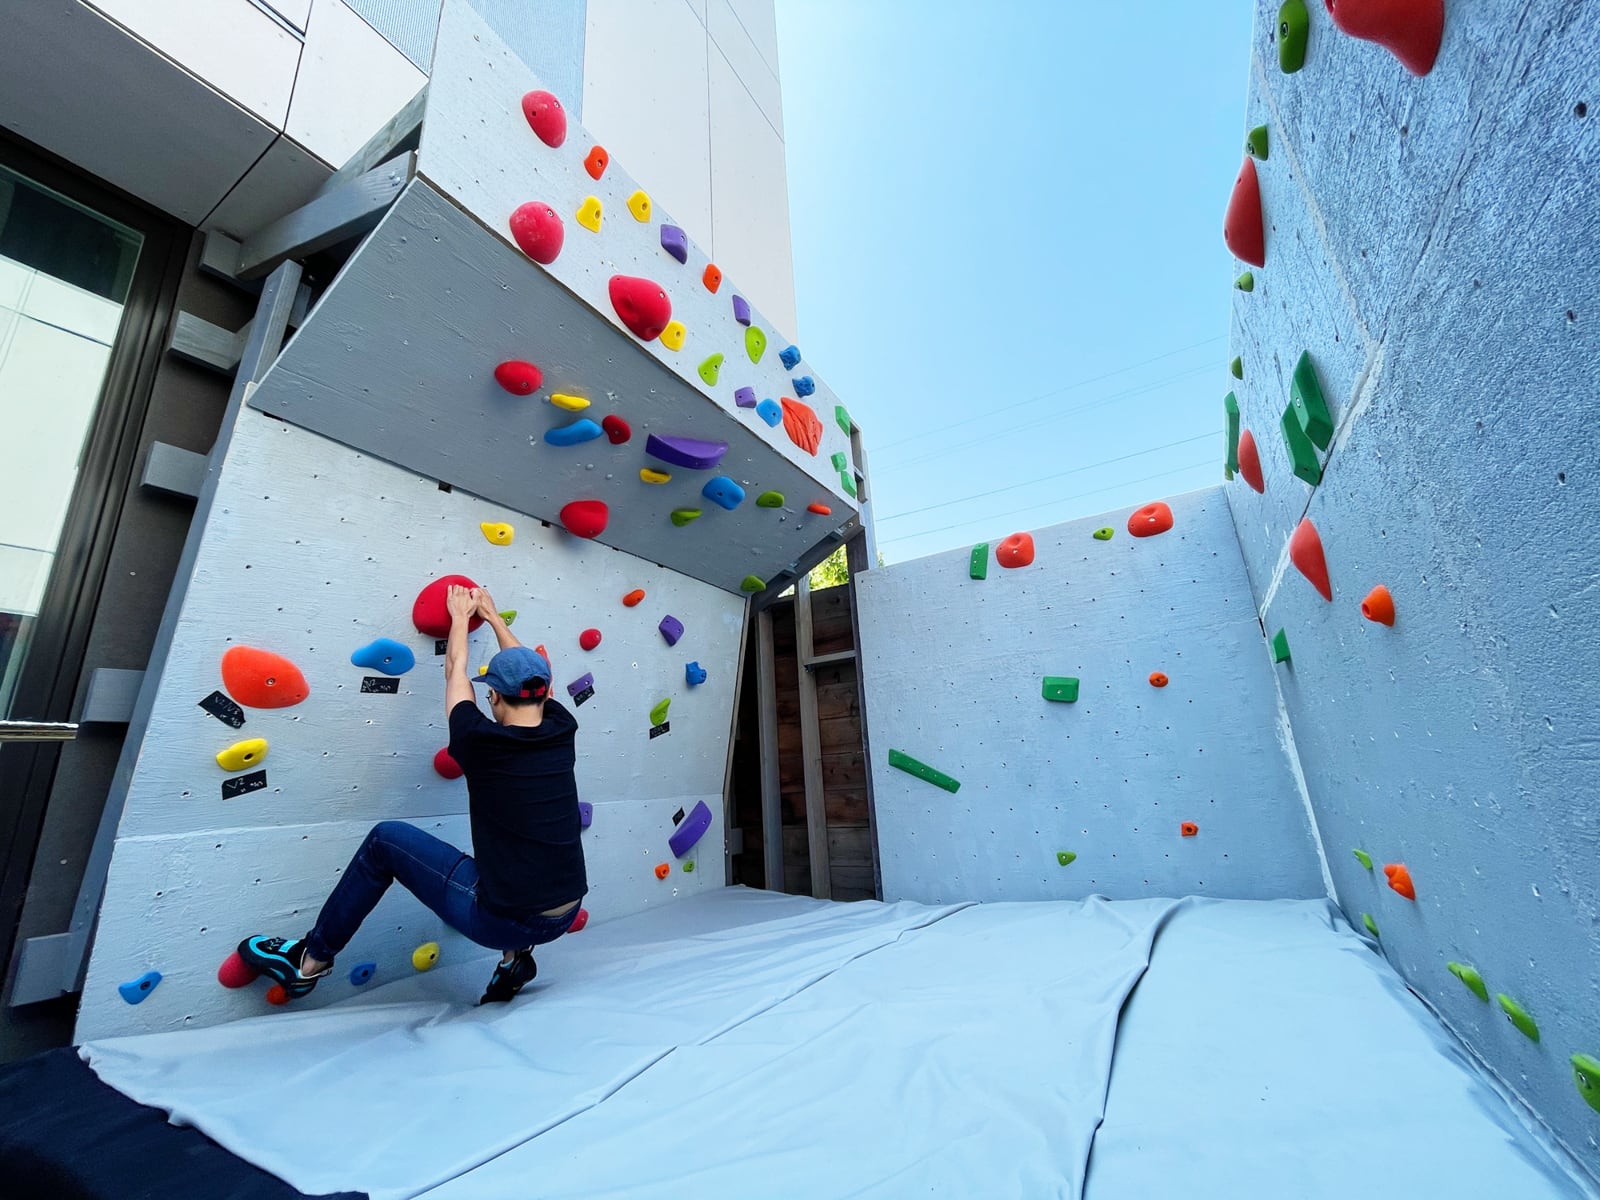
Now that we have our first climbable surface, just have to resist the urge to set a 4' x 4' boulder problem that hurts us
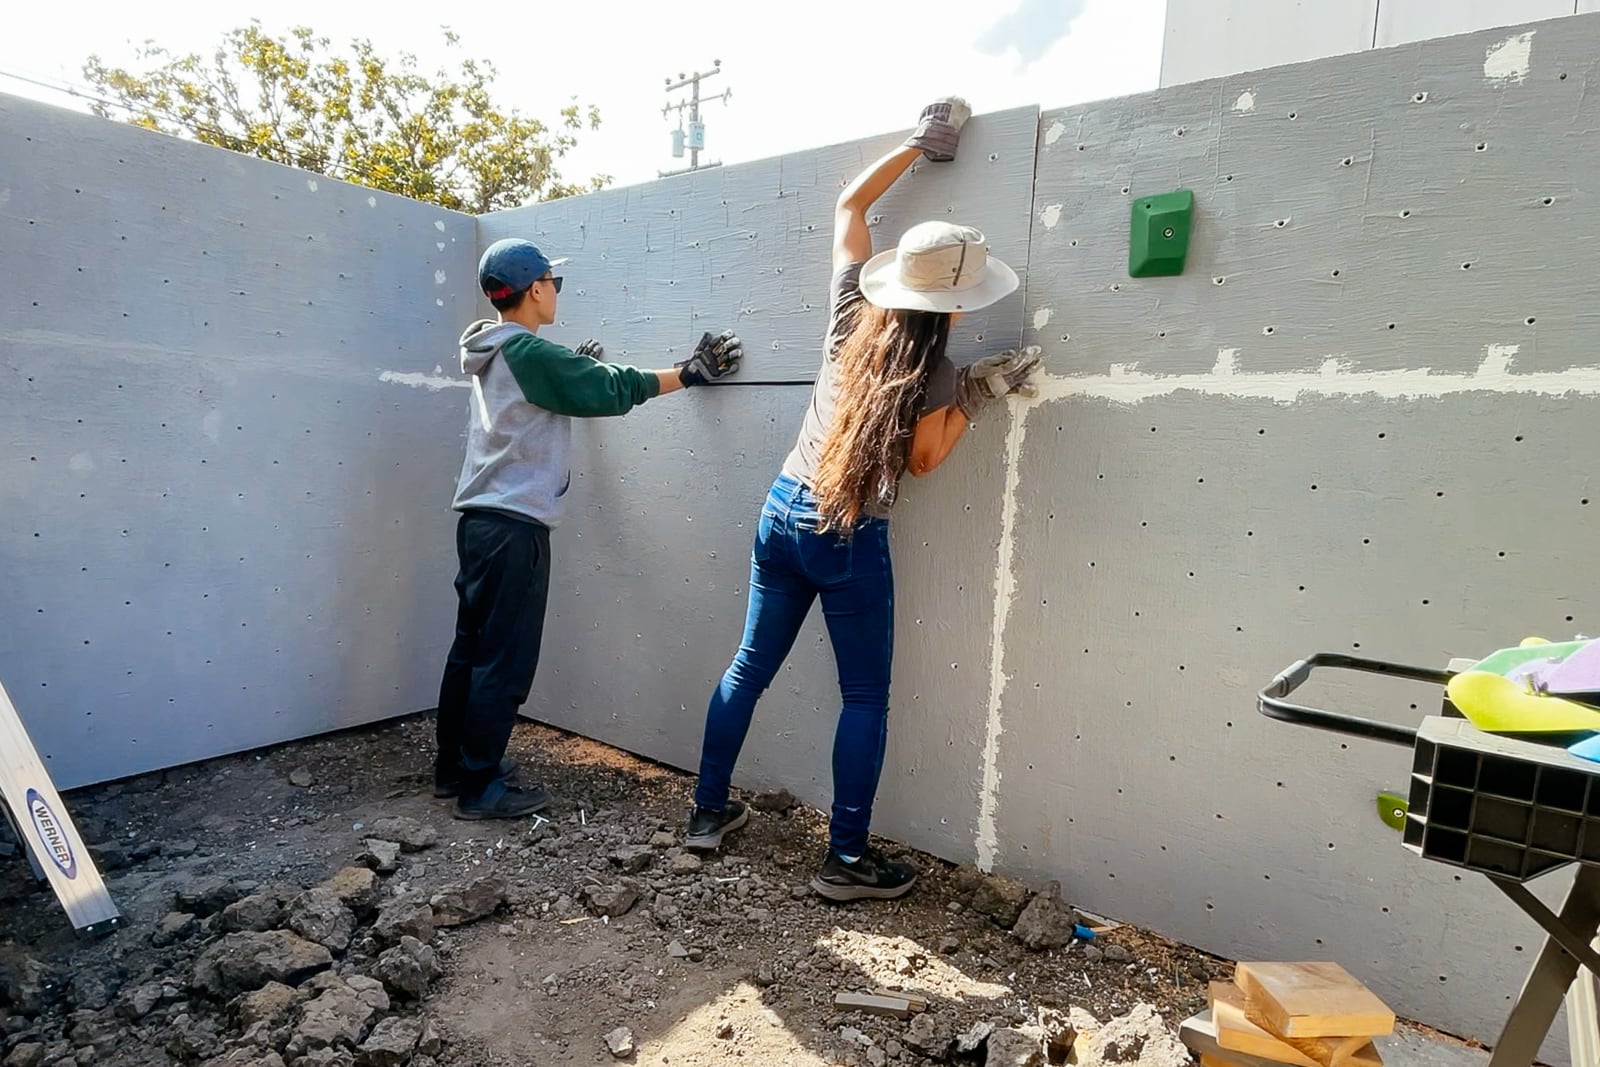
12. Mounting the wall F plywood to frame F
Mounting the surface for the right half of wall F was even more straightforward: because the 2x6 framing stringers were mounted in a standard balloon-frame configuration, we had been able to drill our T-nut holes to avoid hitting the stringers. We mounted the sheets using structural screws and wood/decking screws both directly to the posts and to the stringers across the sheet.
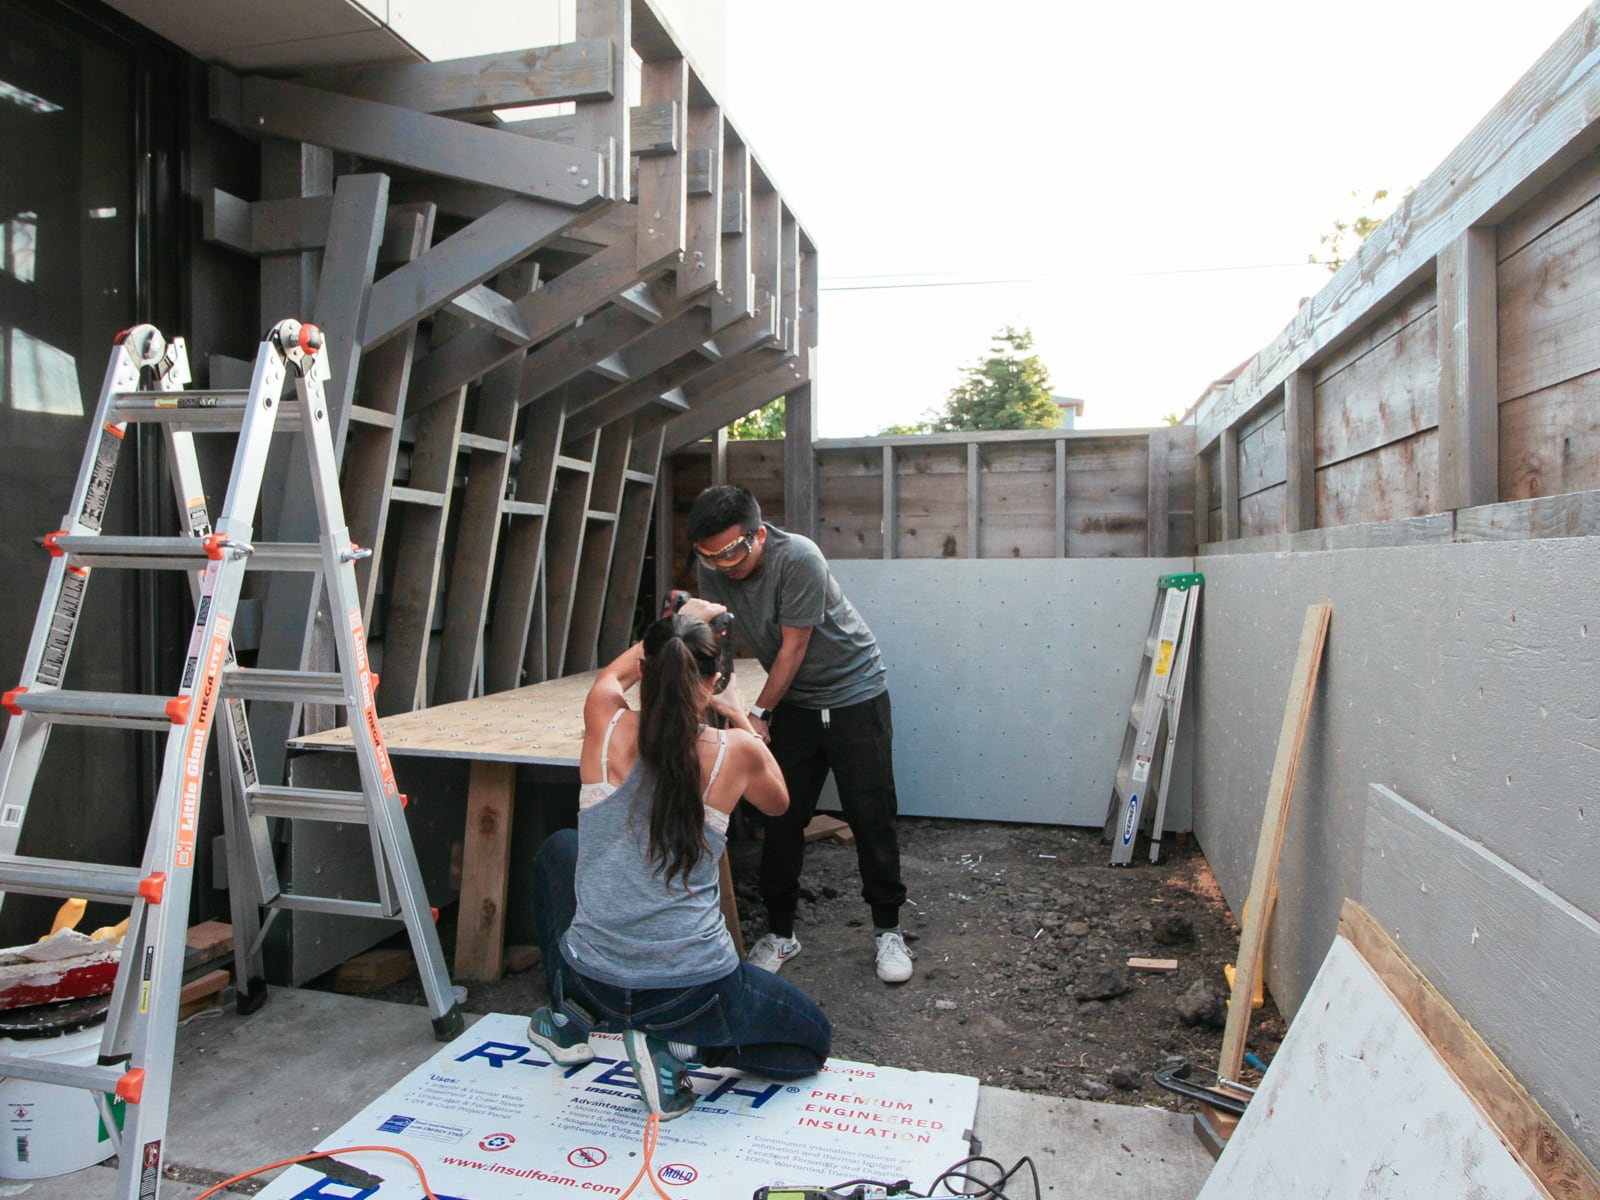
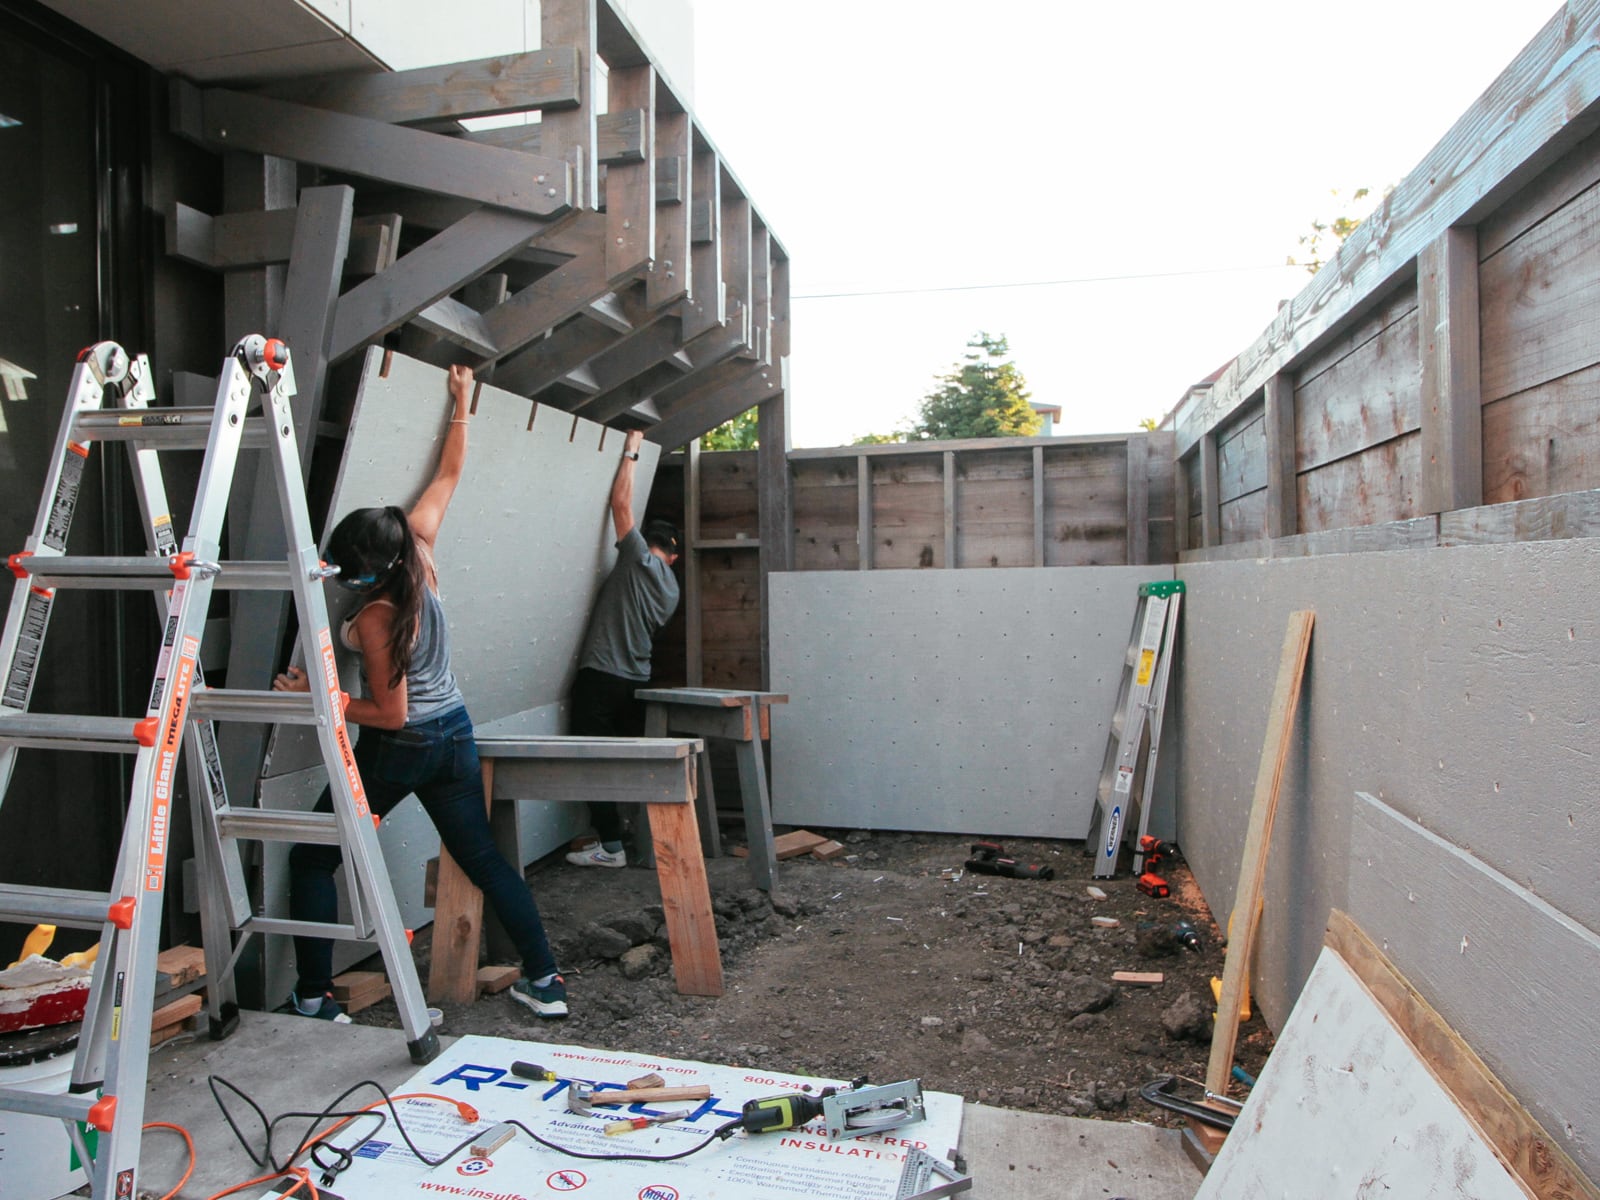
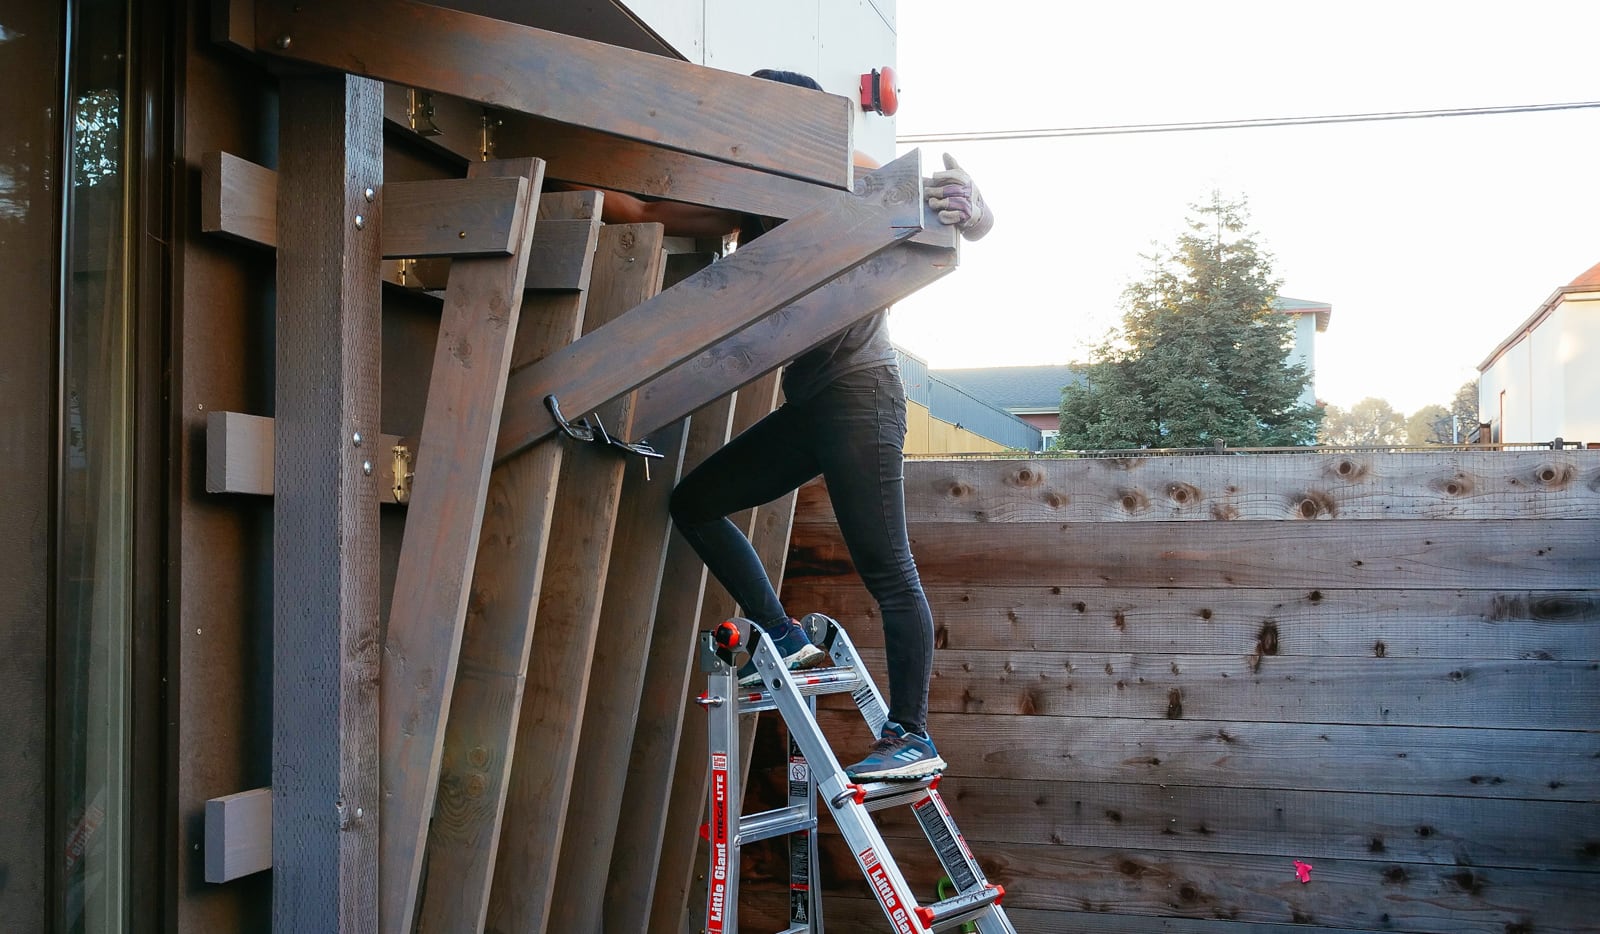
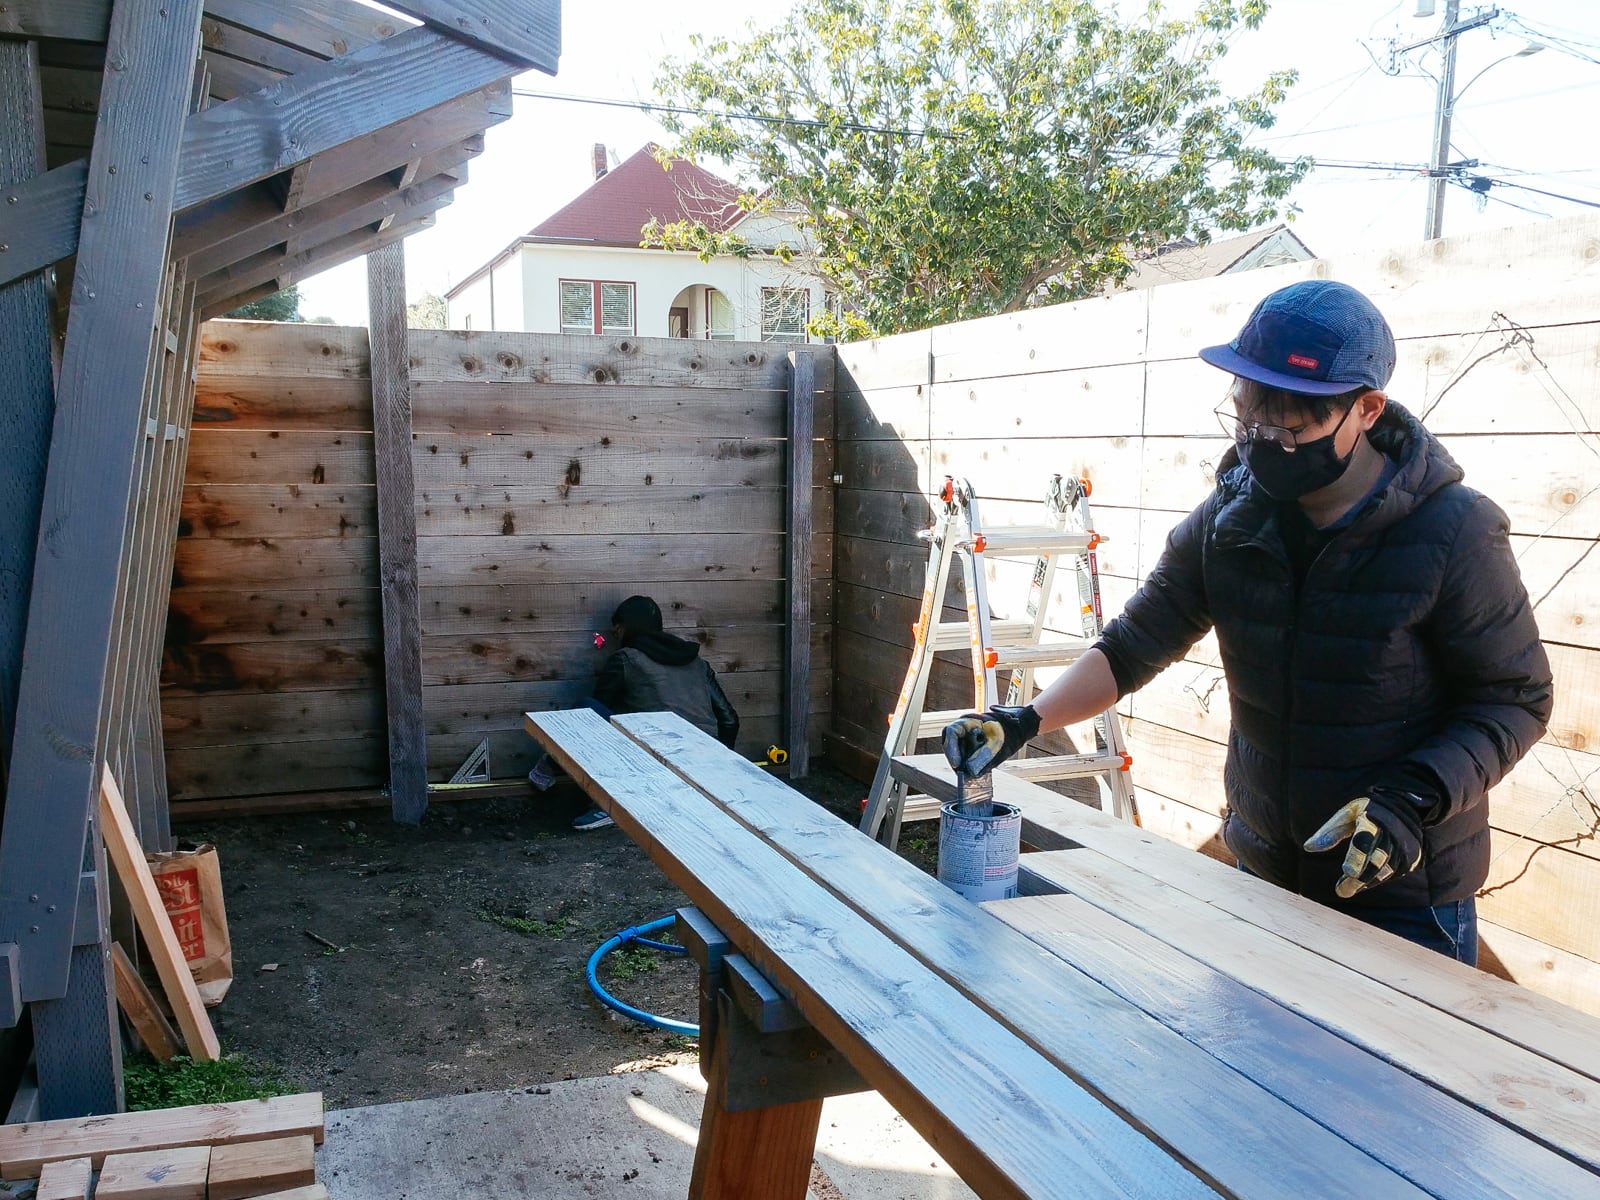
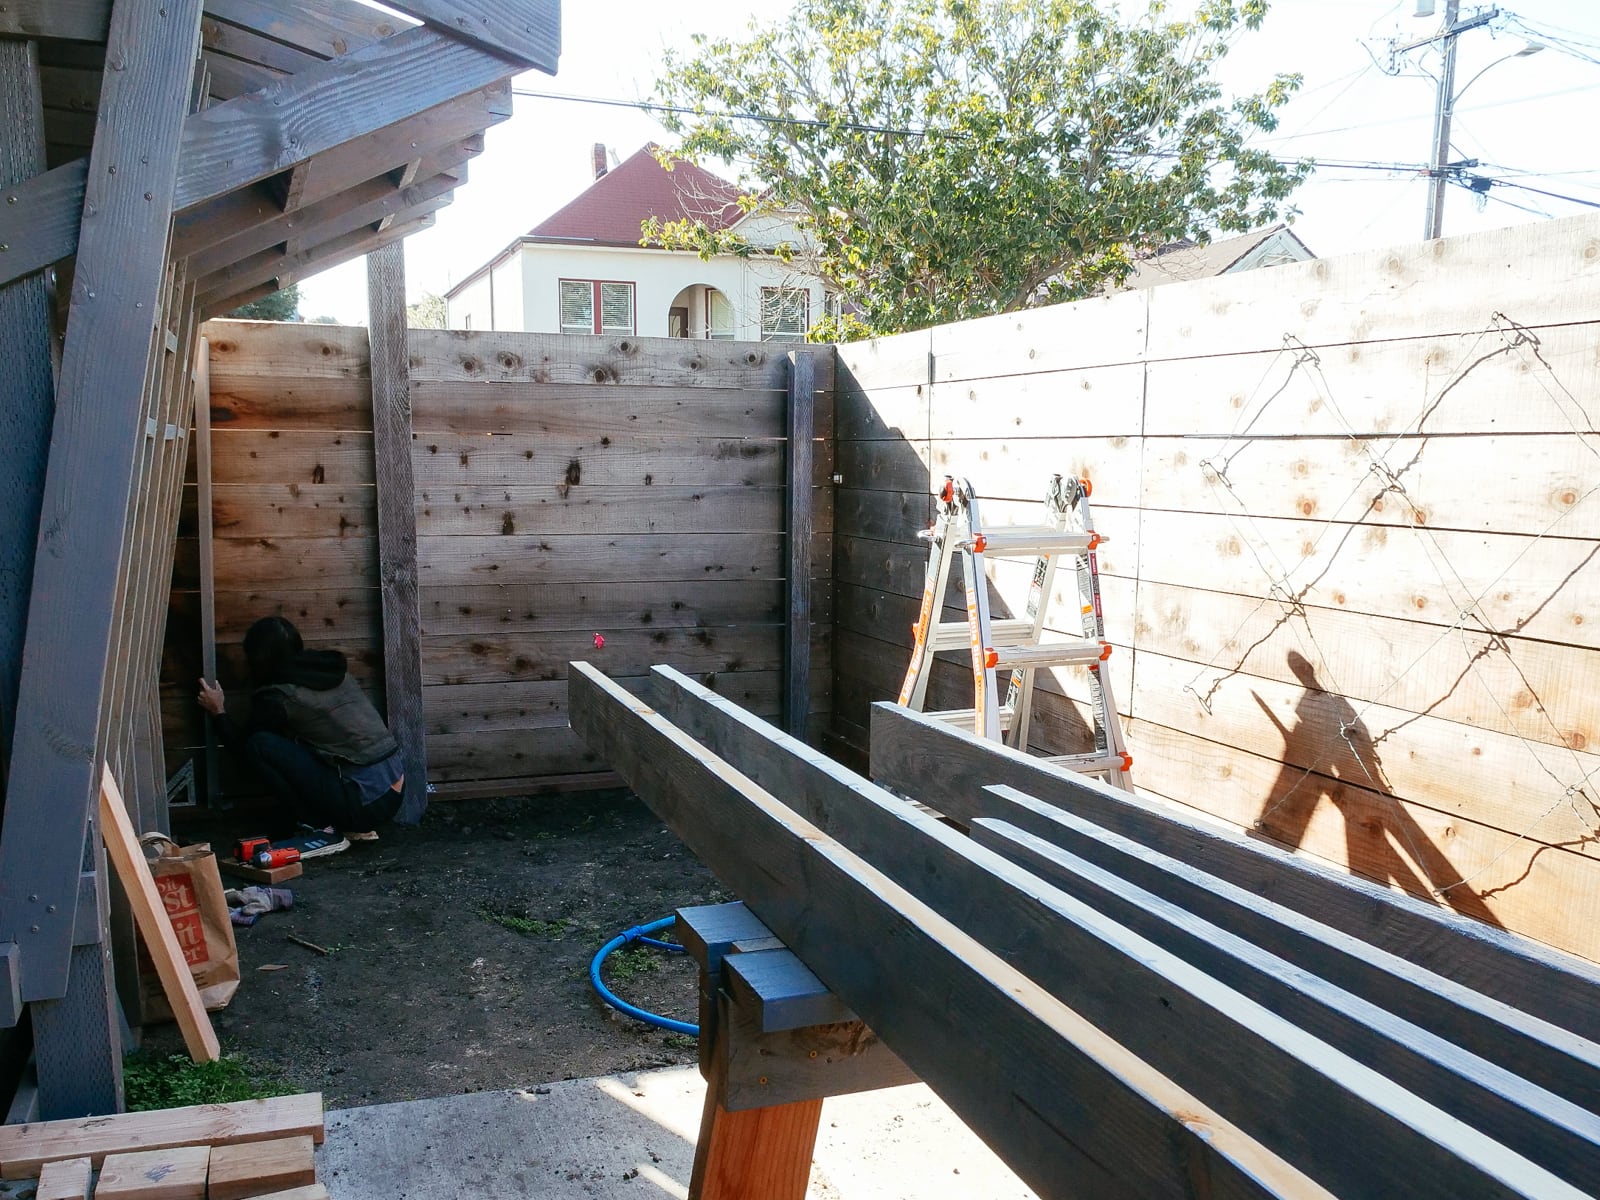
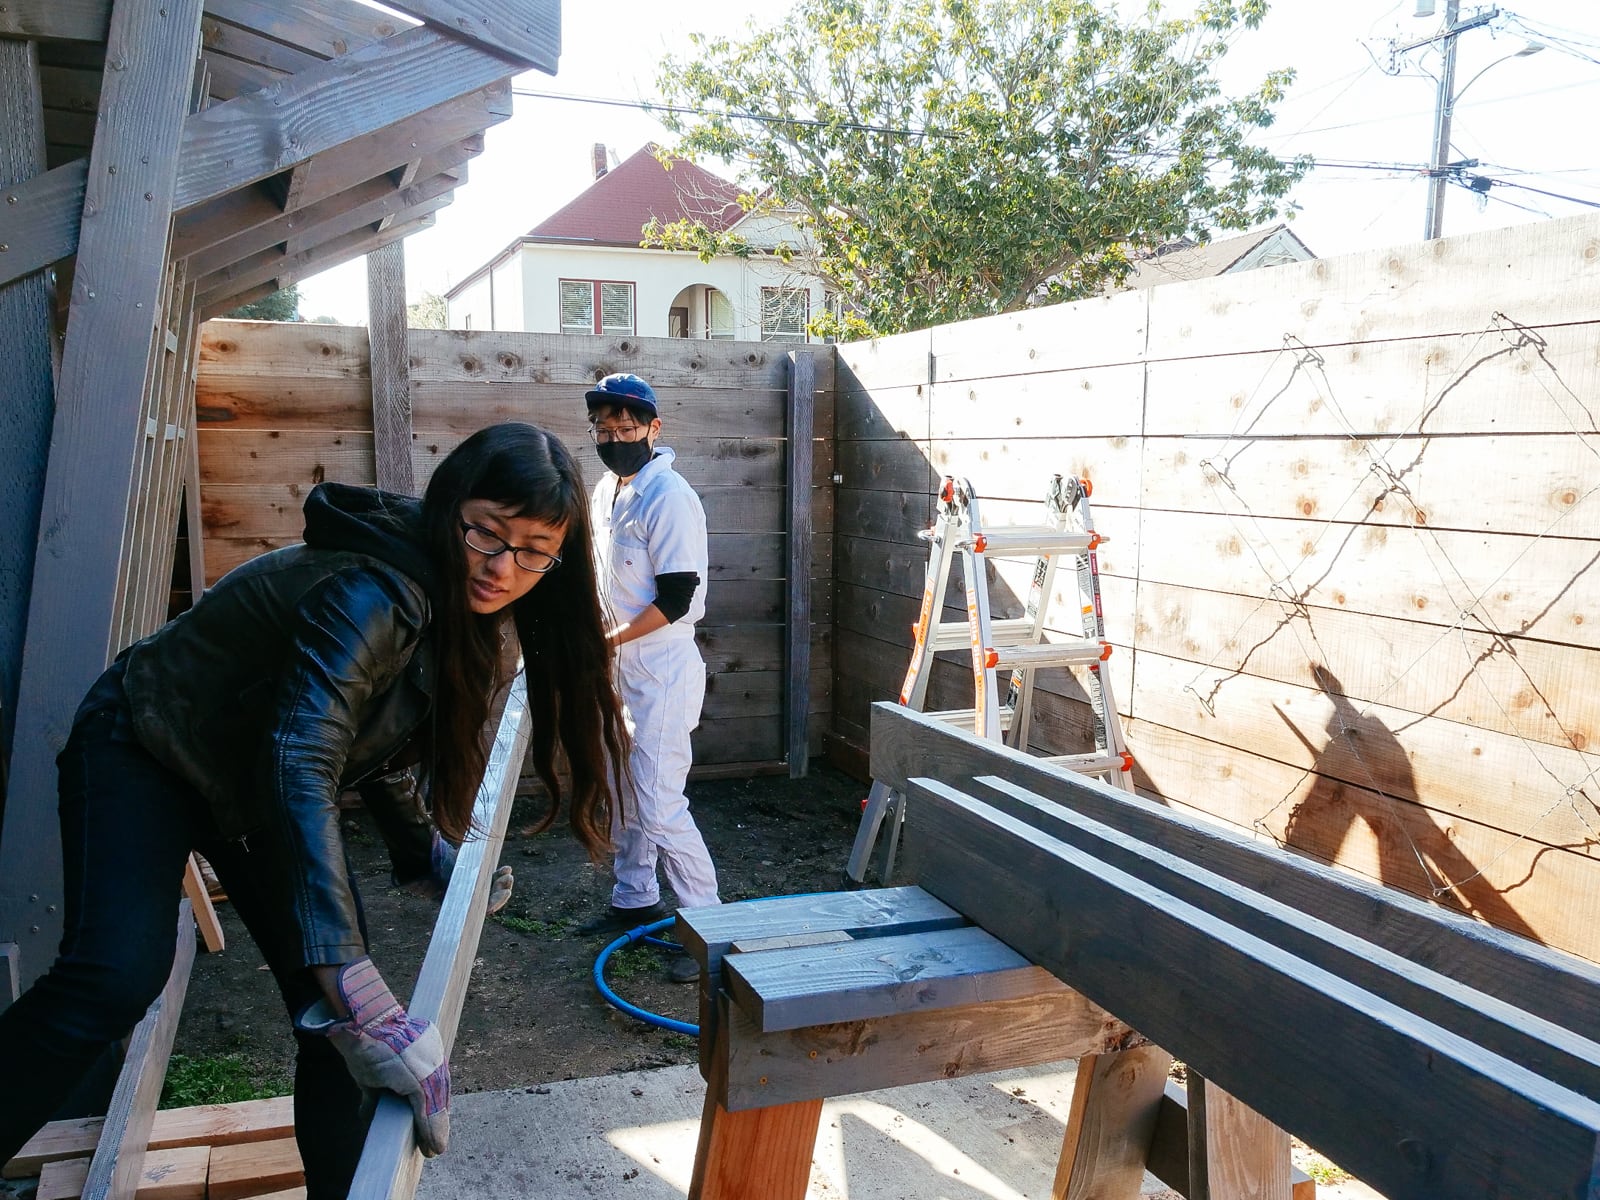
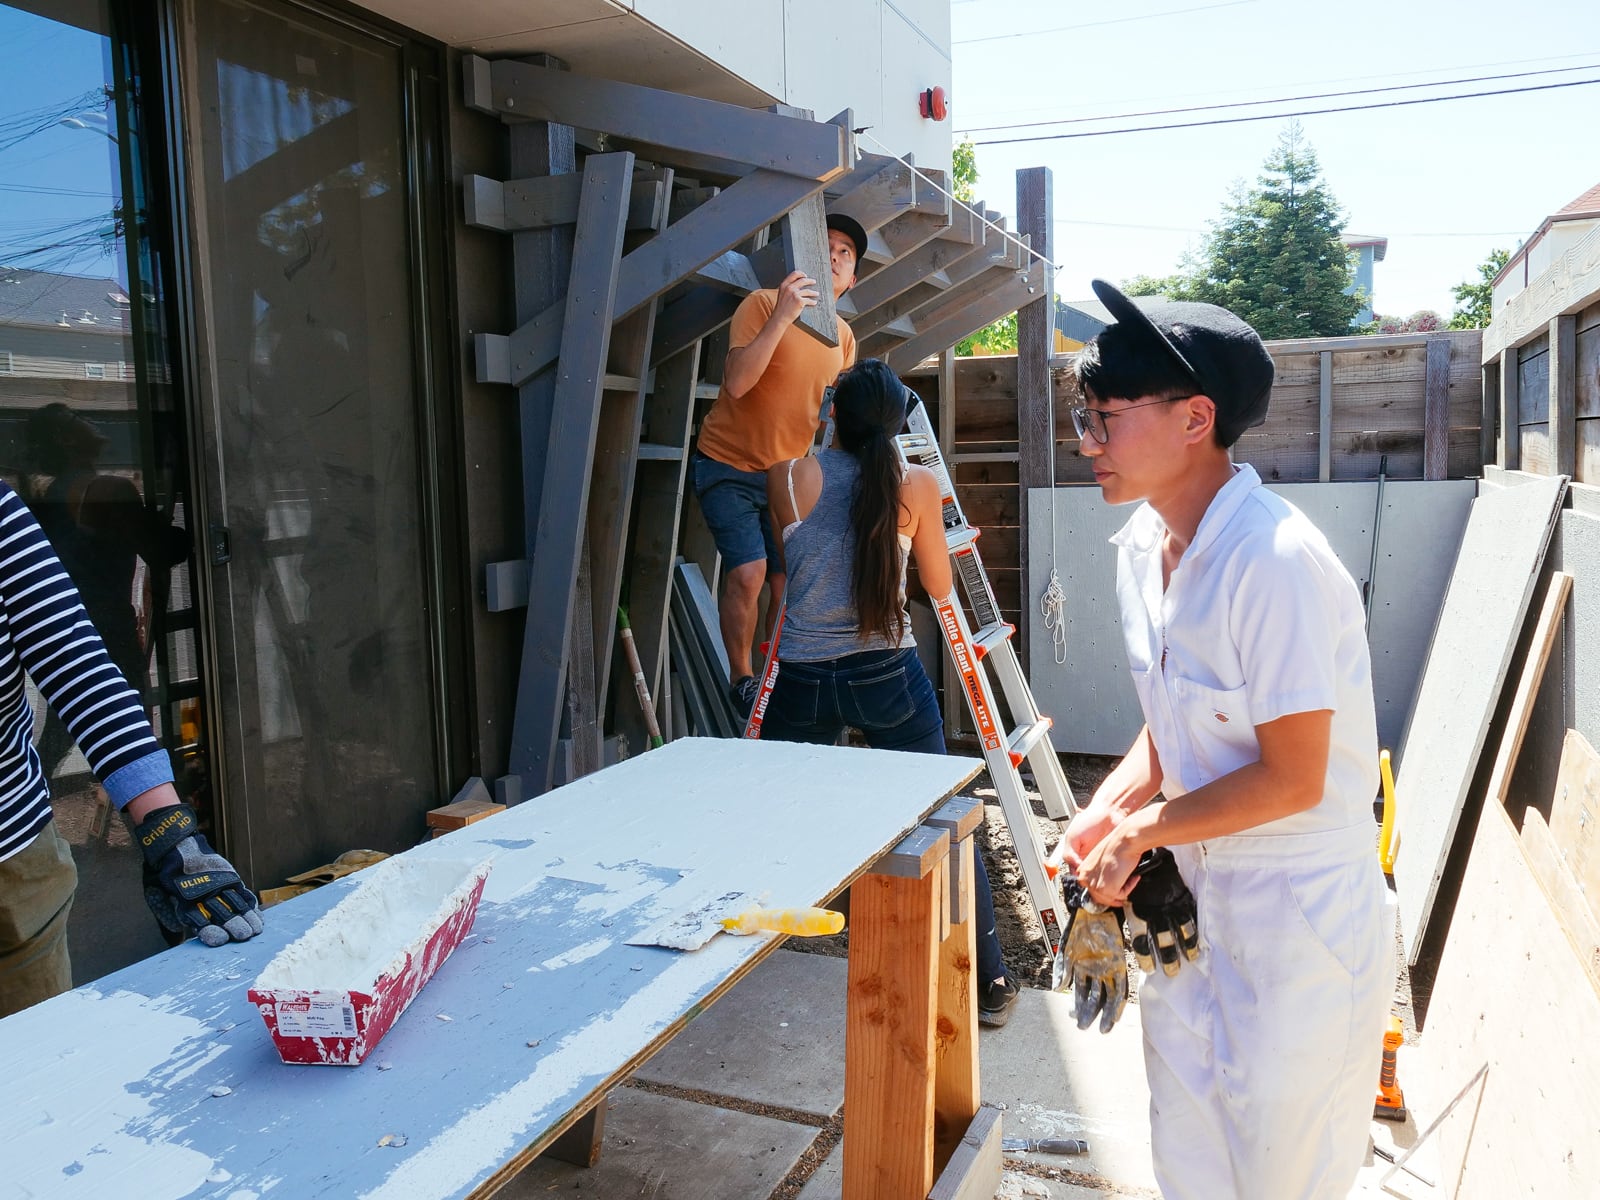
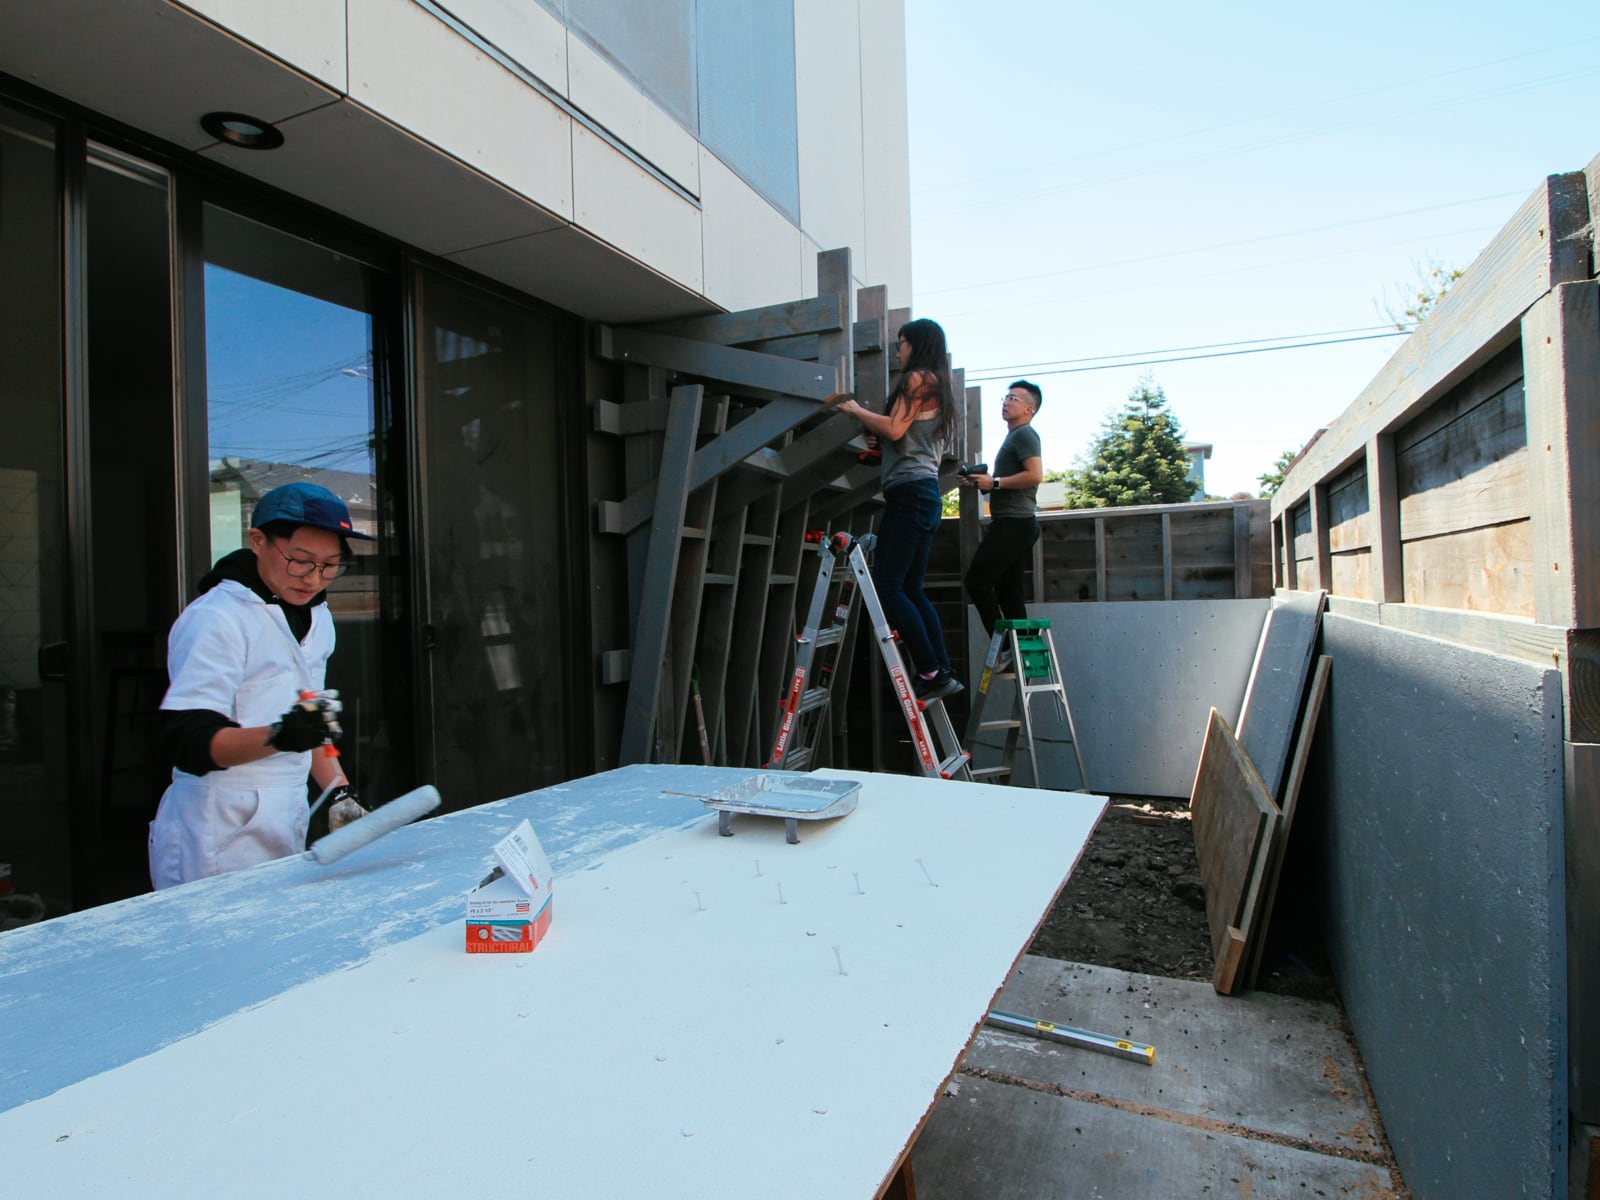
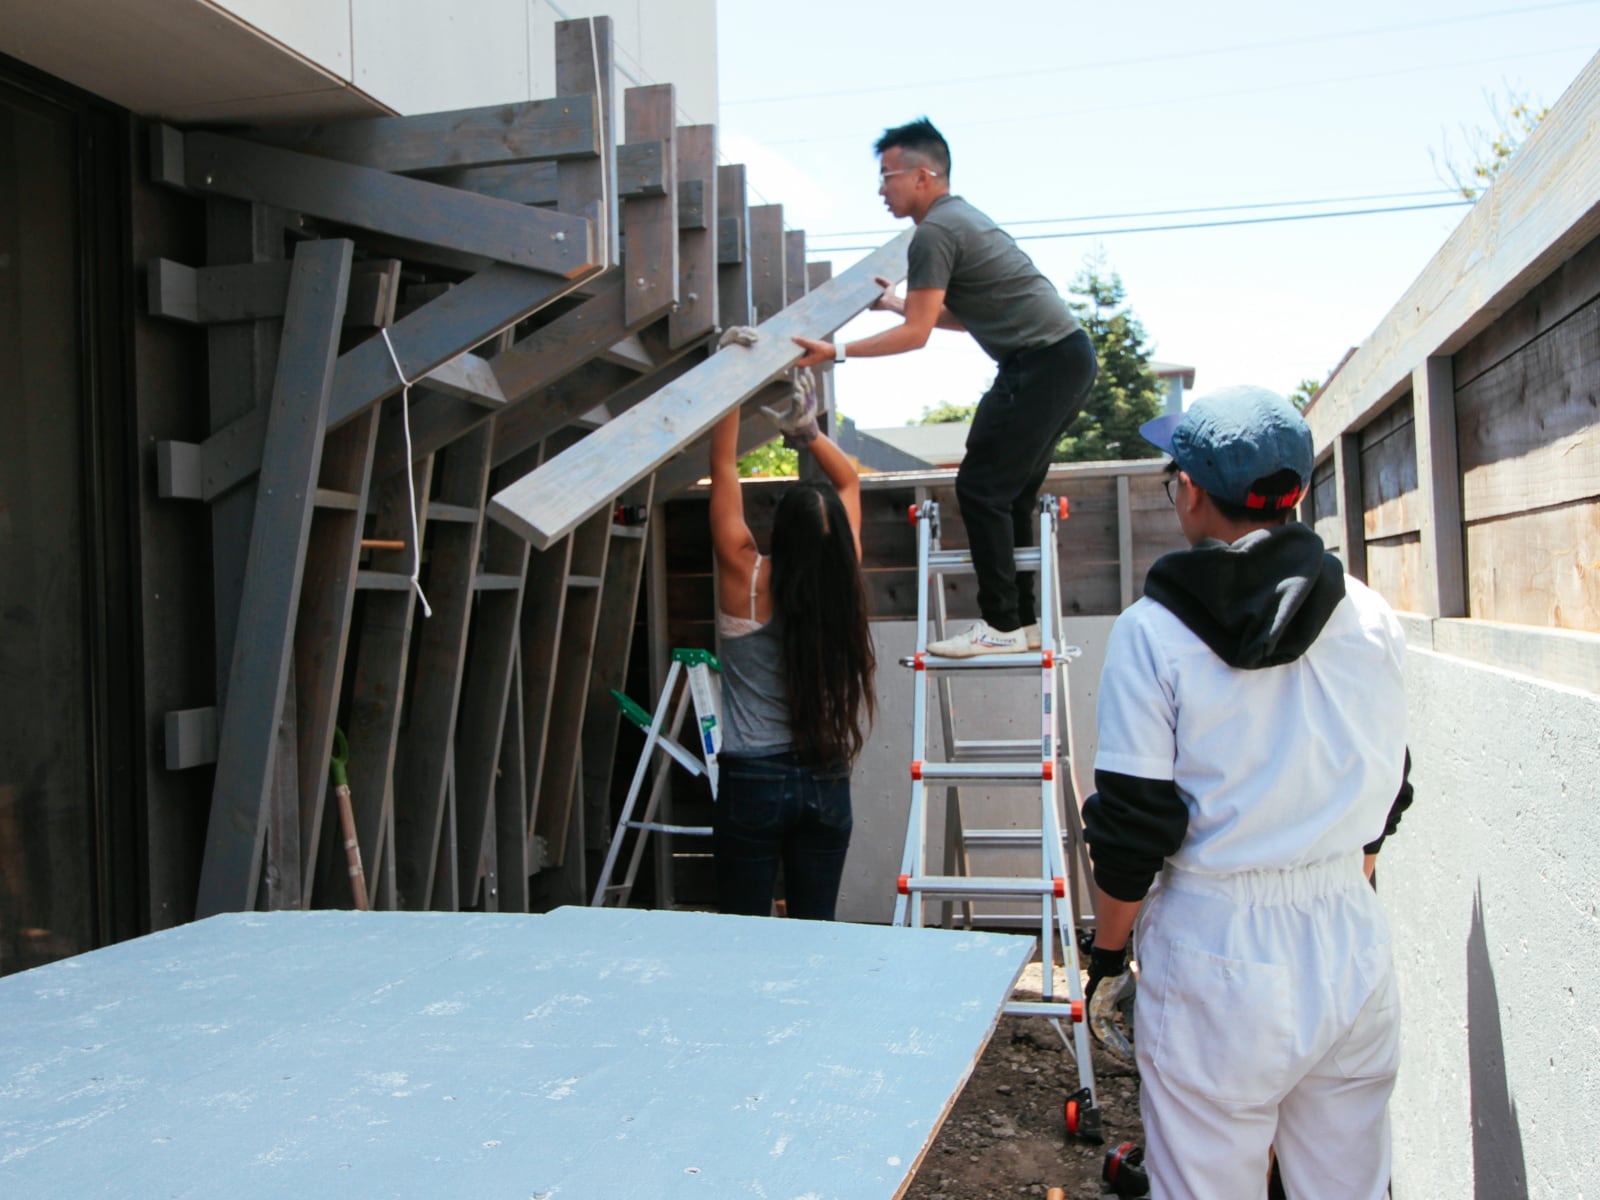
The corner piece required a team lift
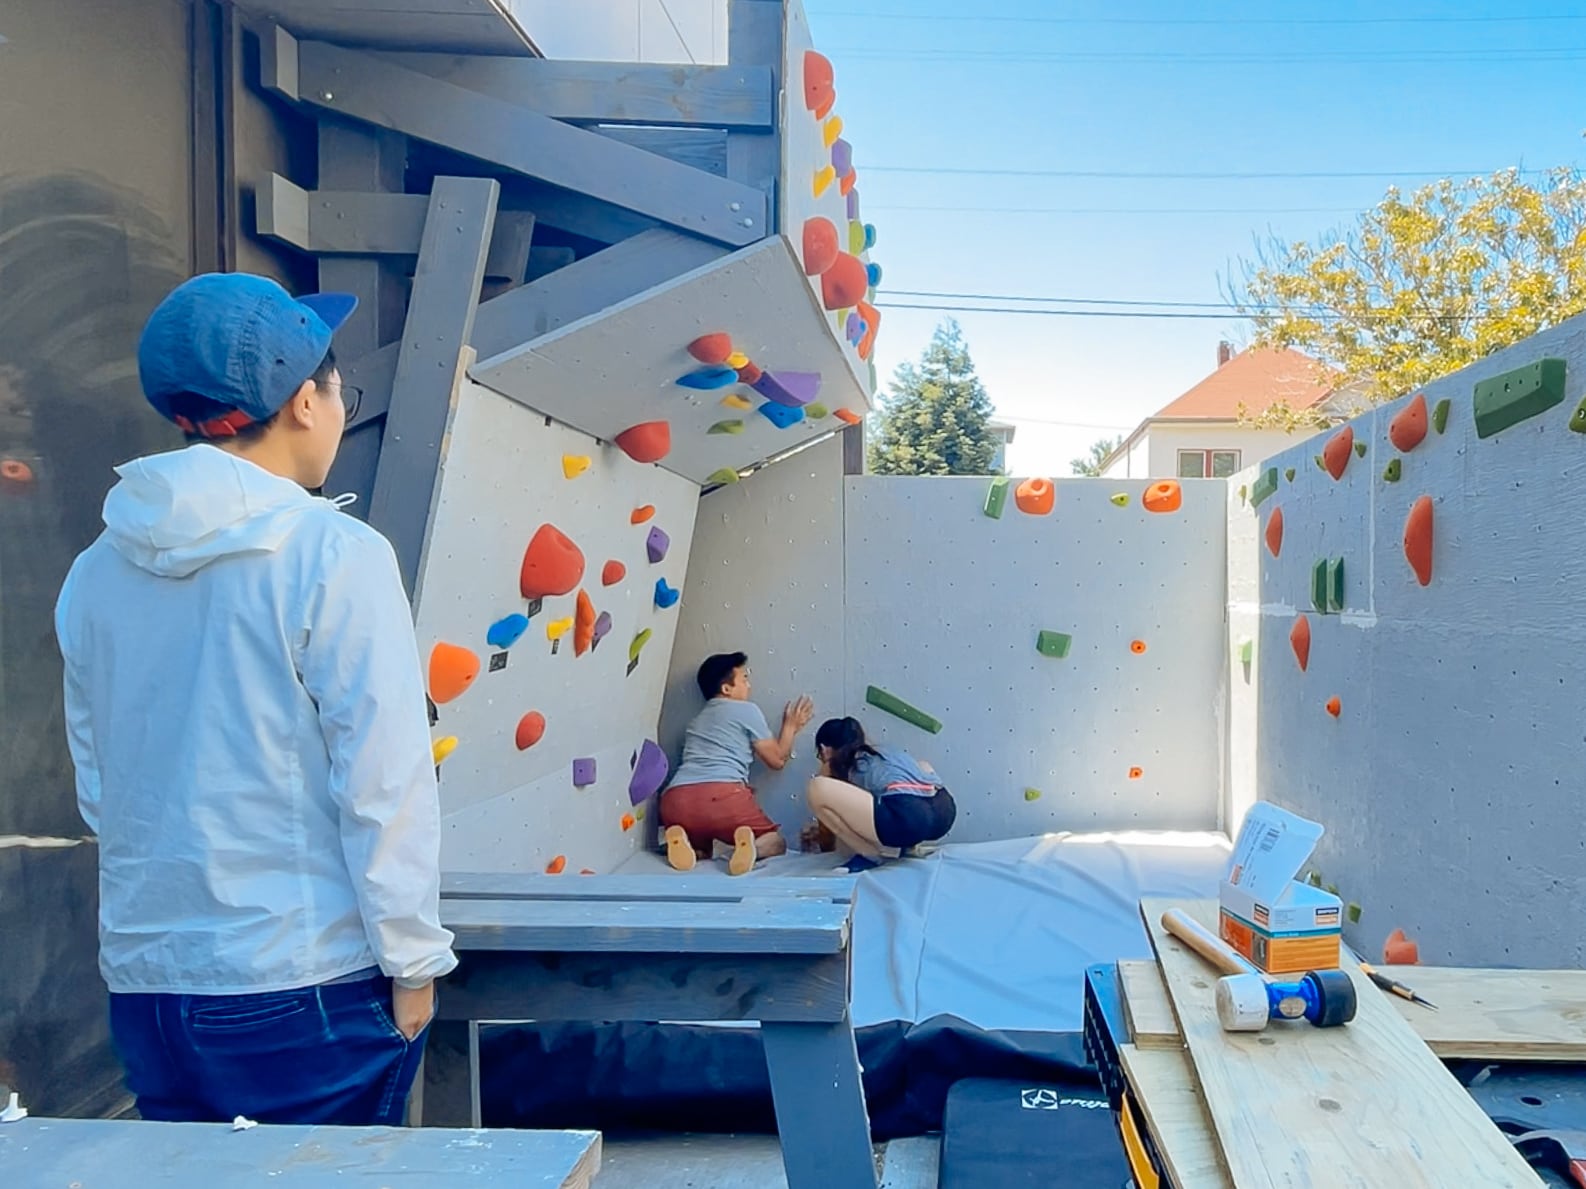
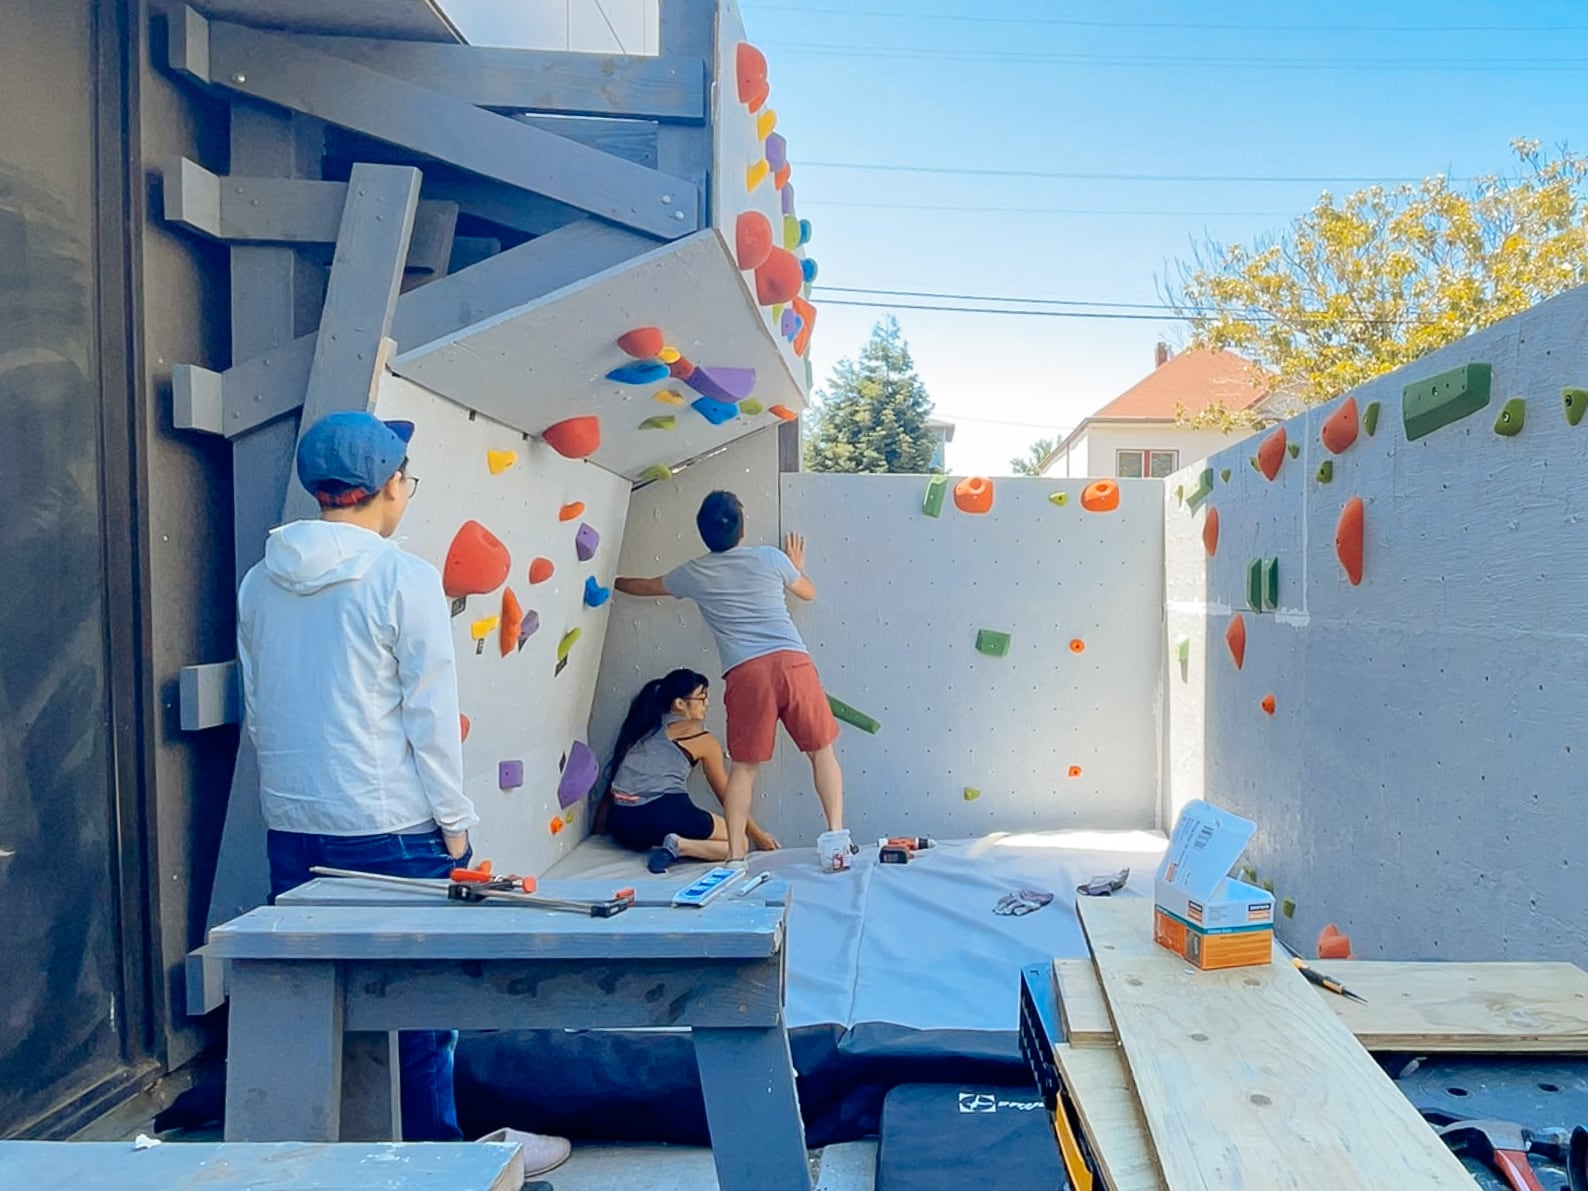
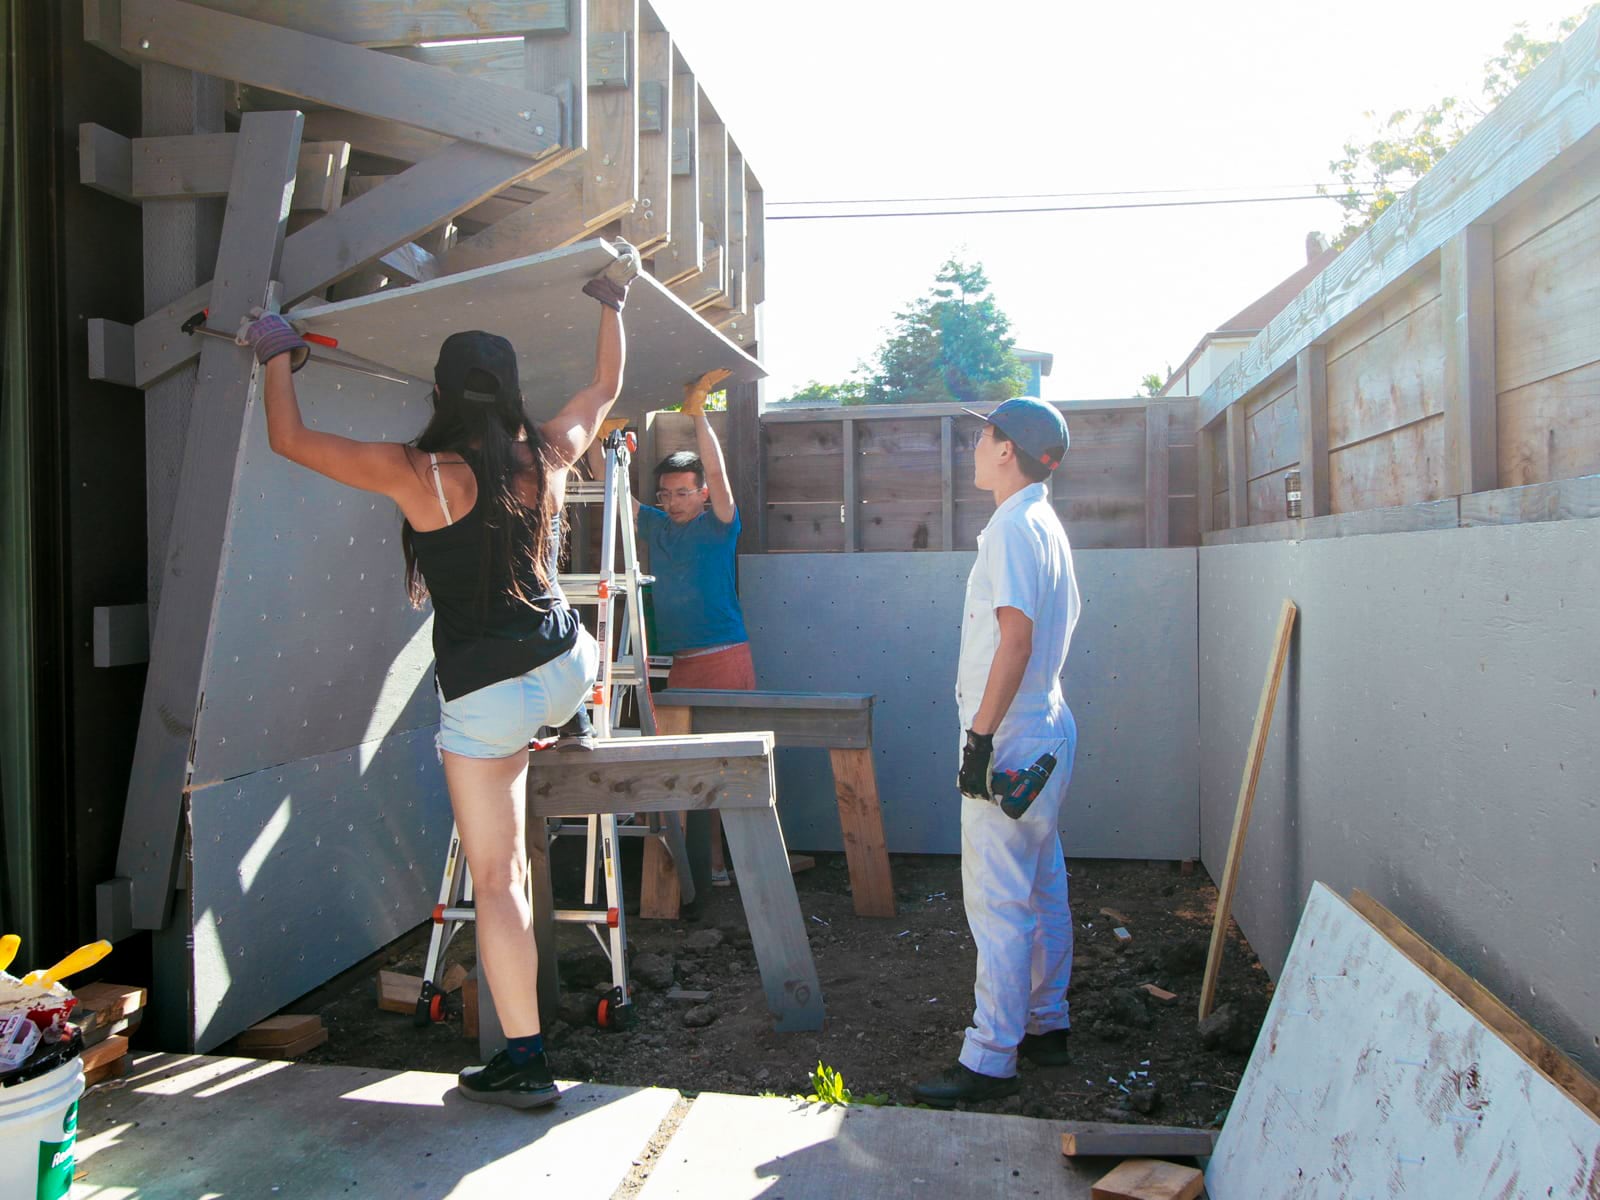
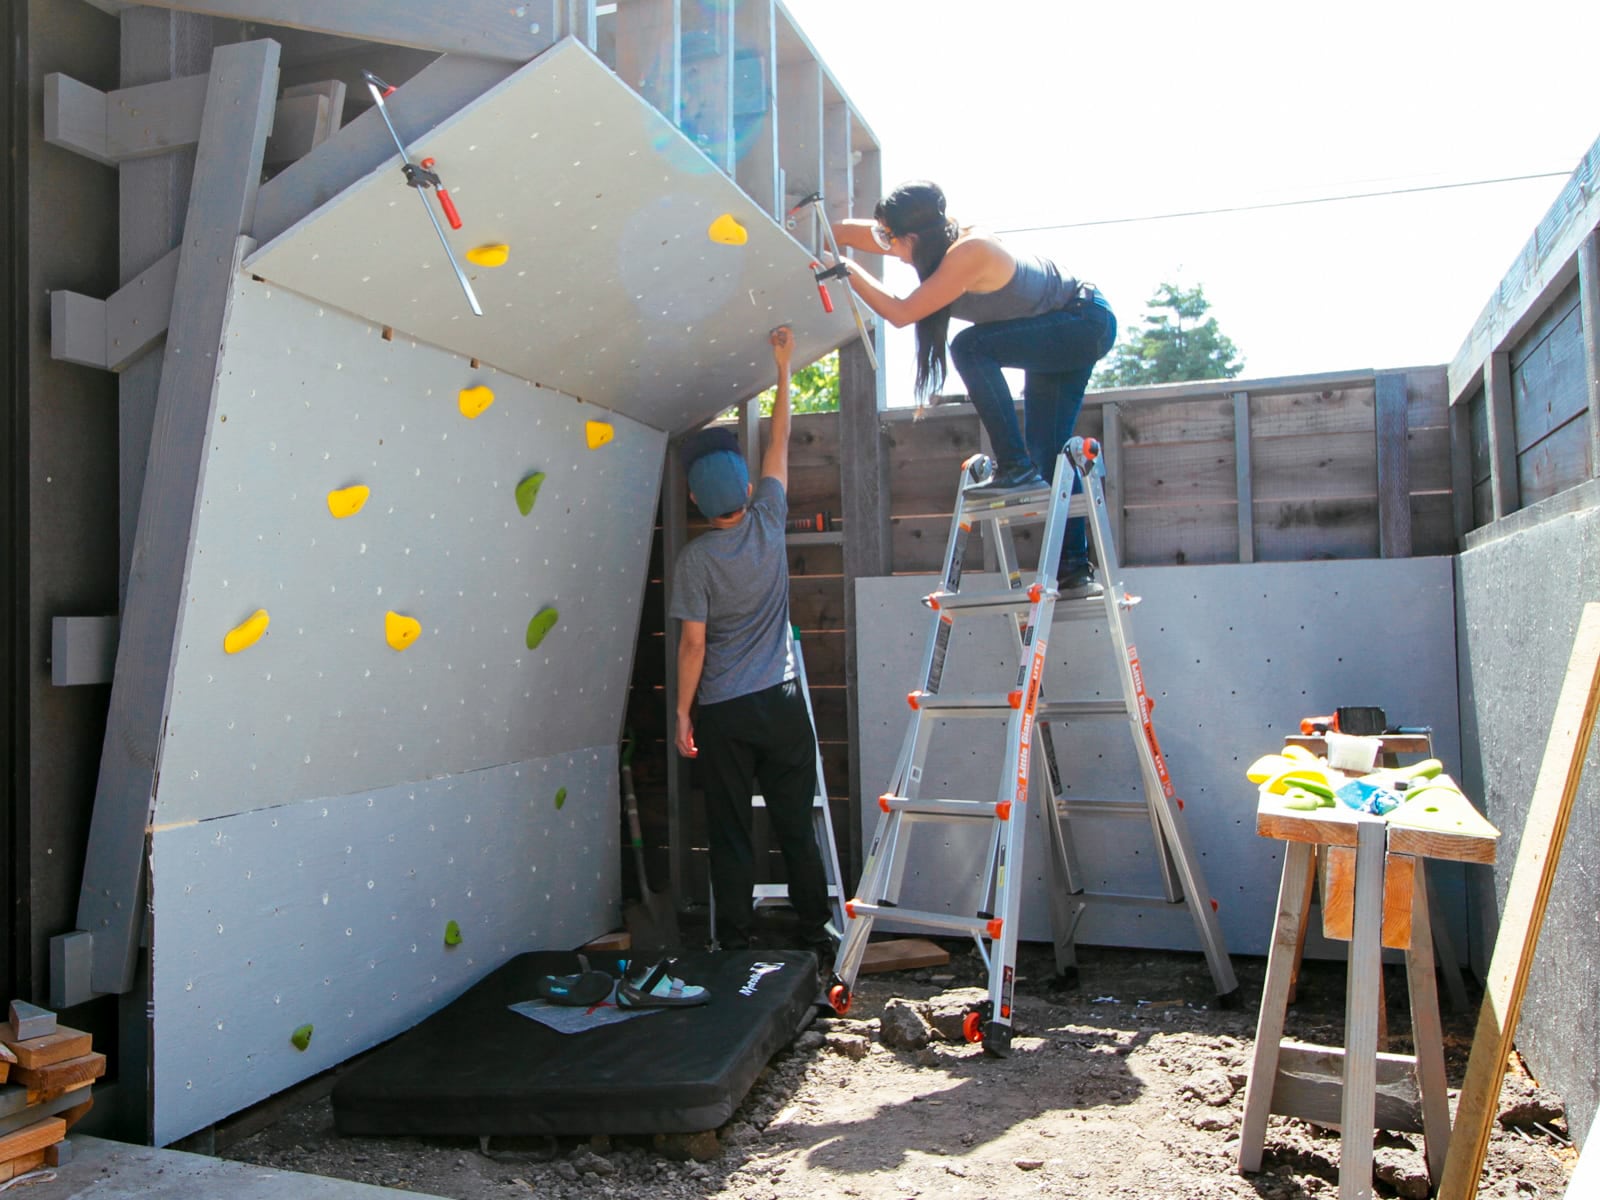
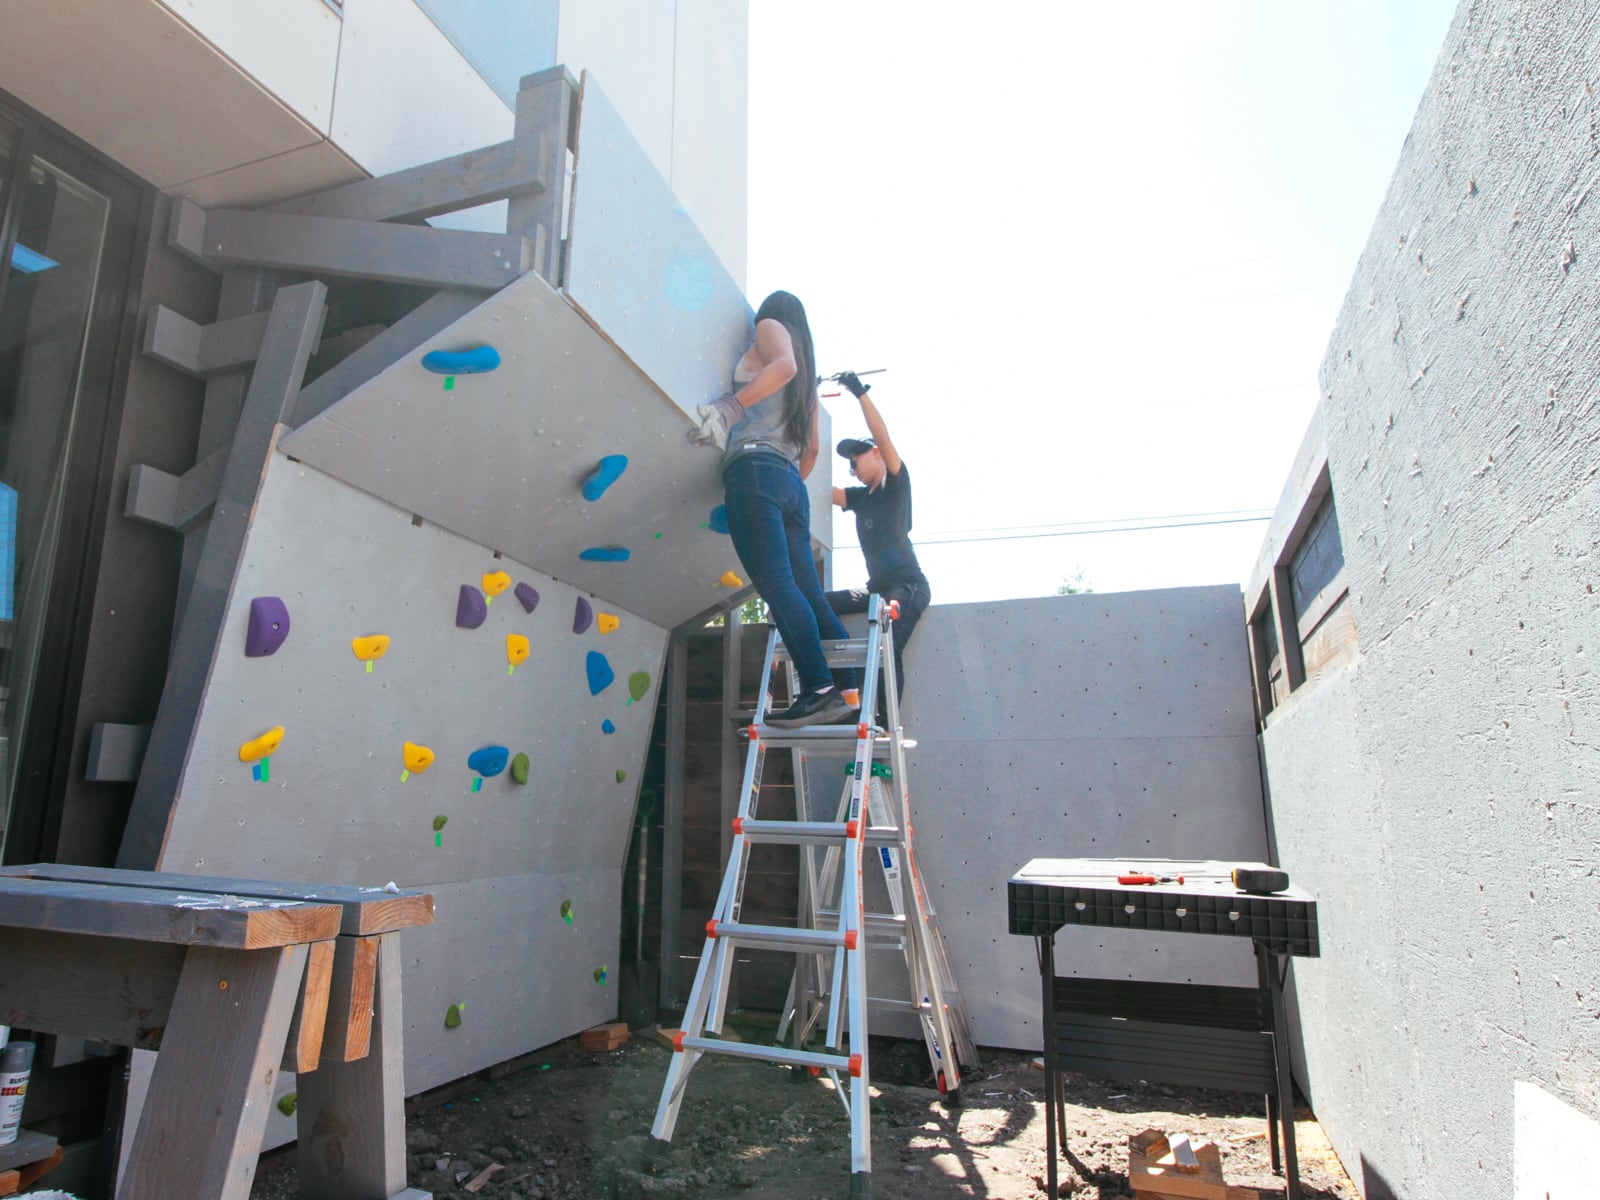
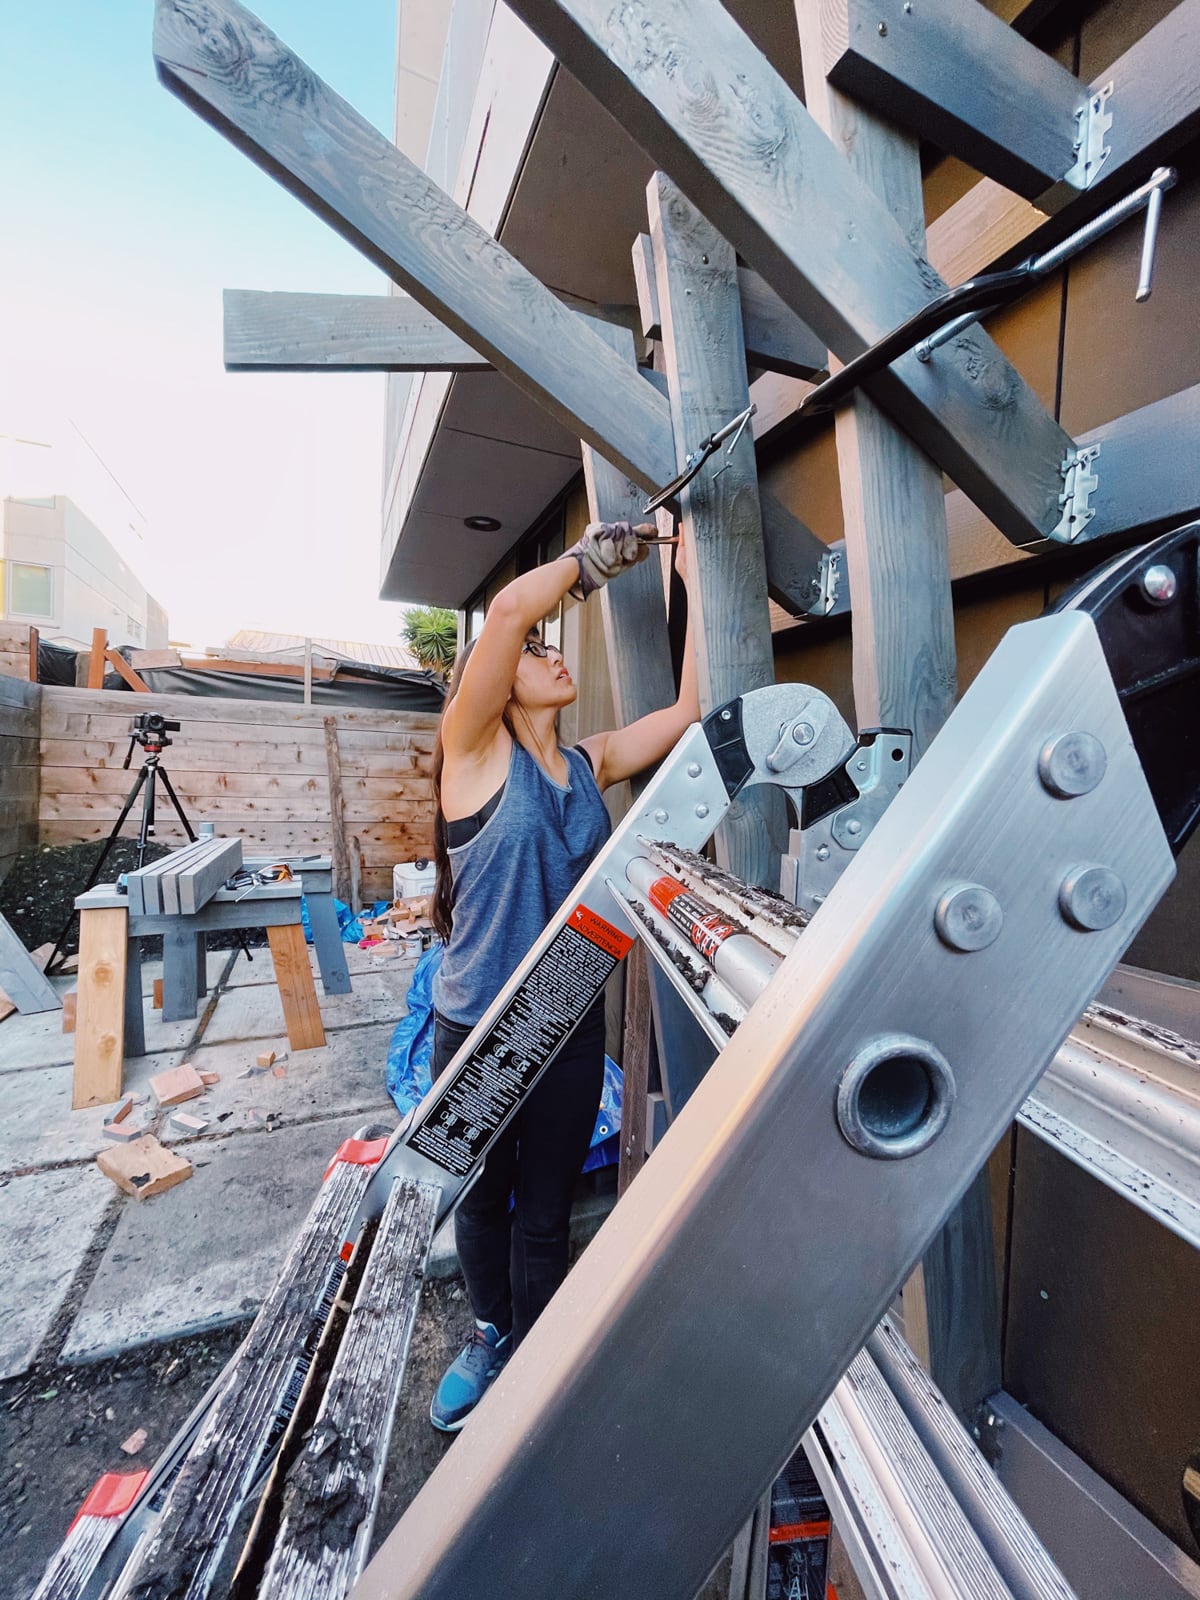
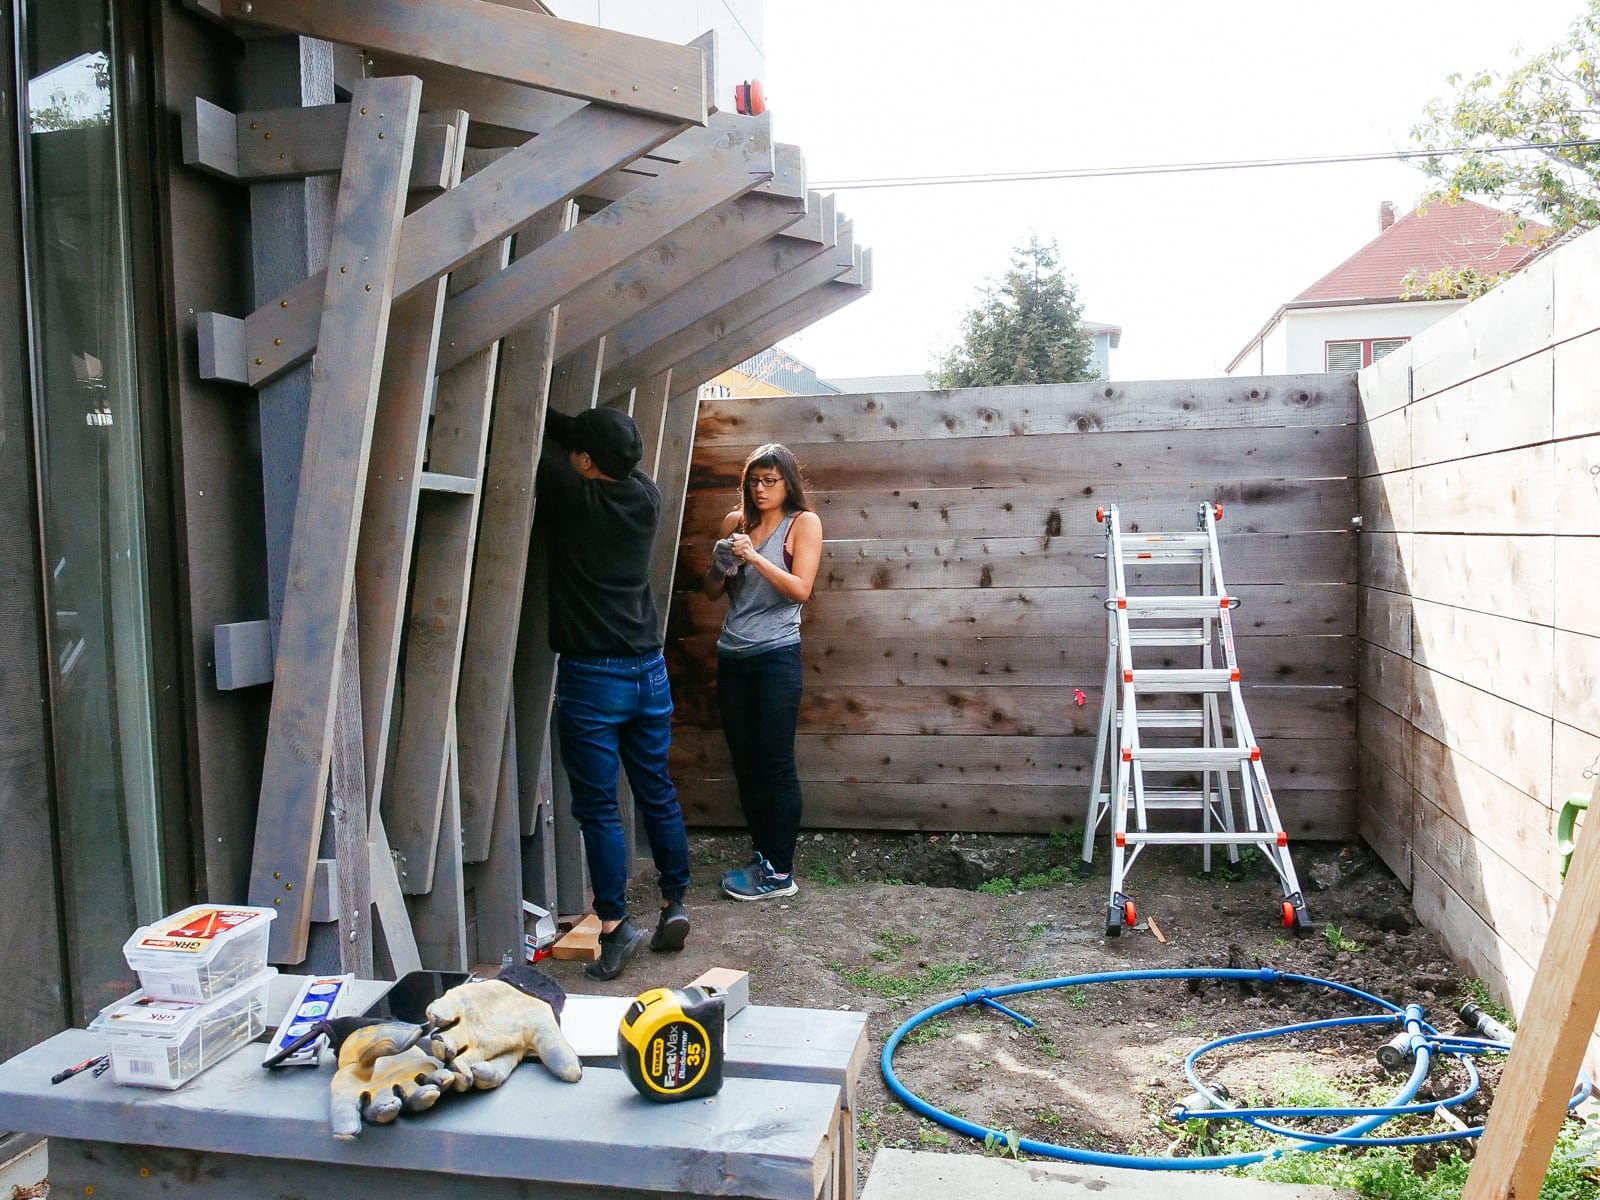
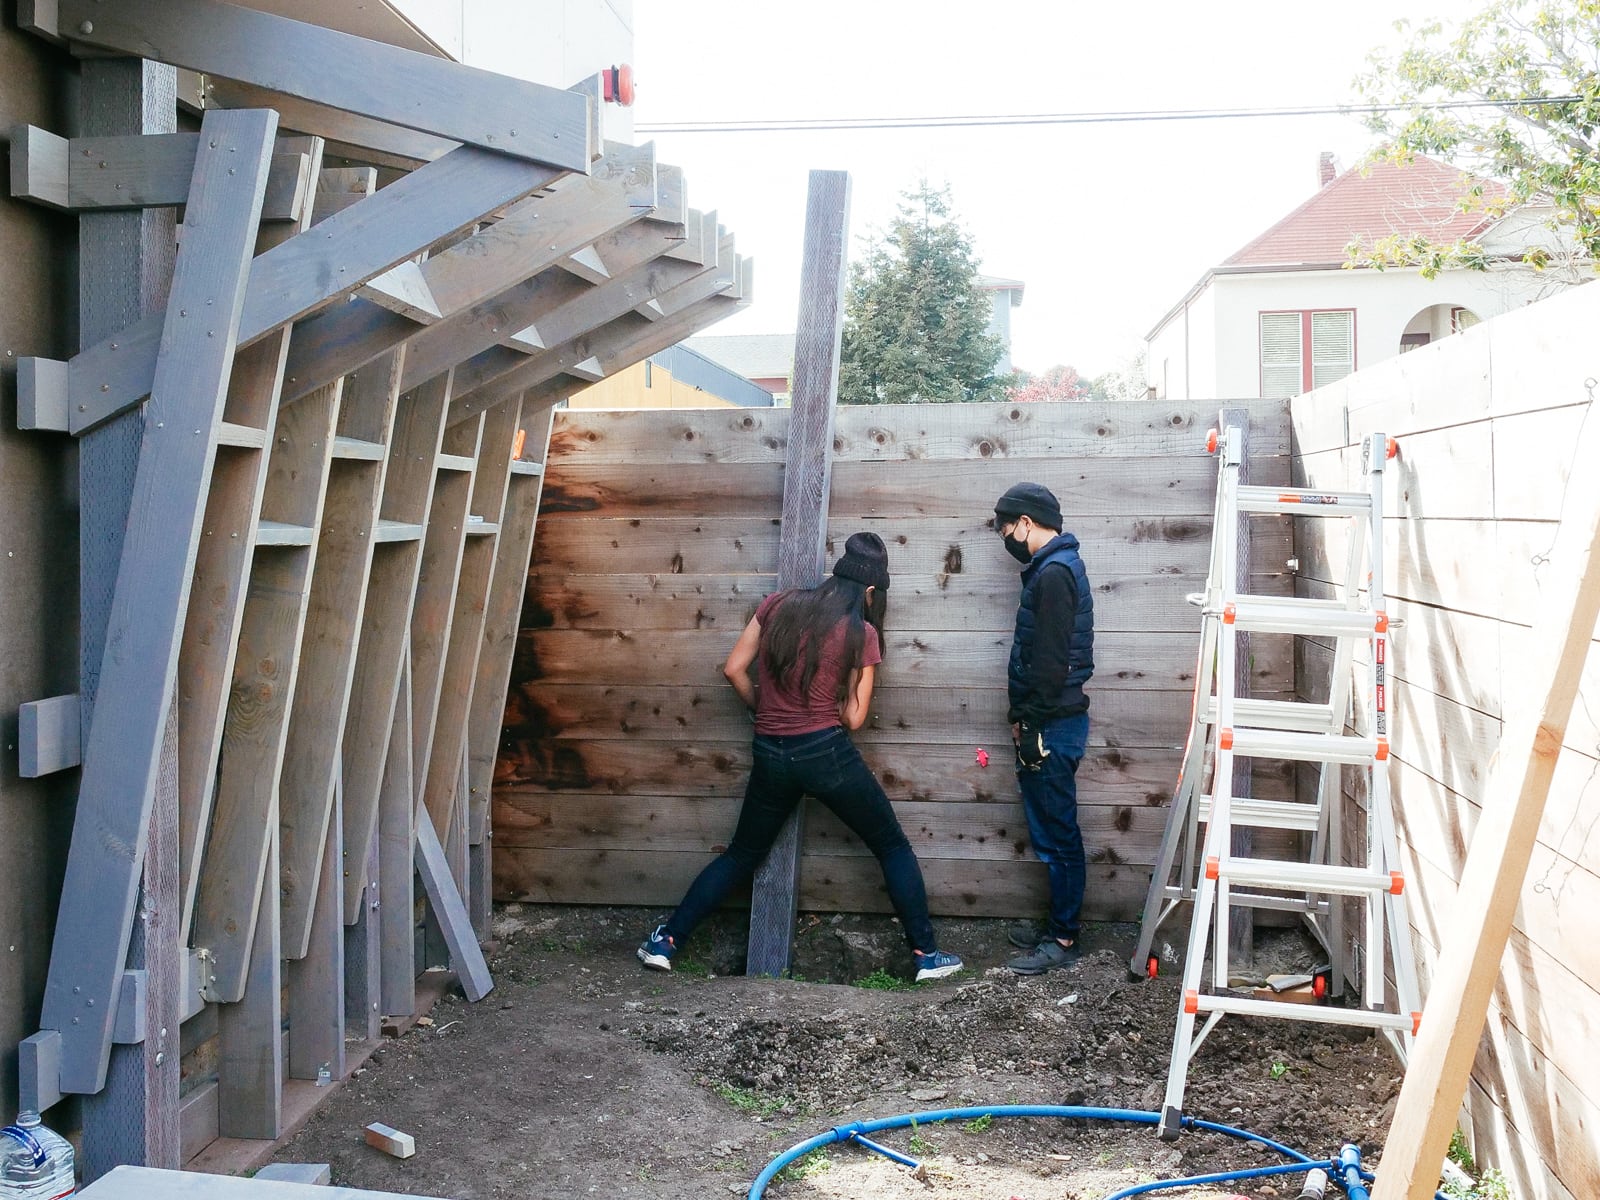
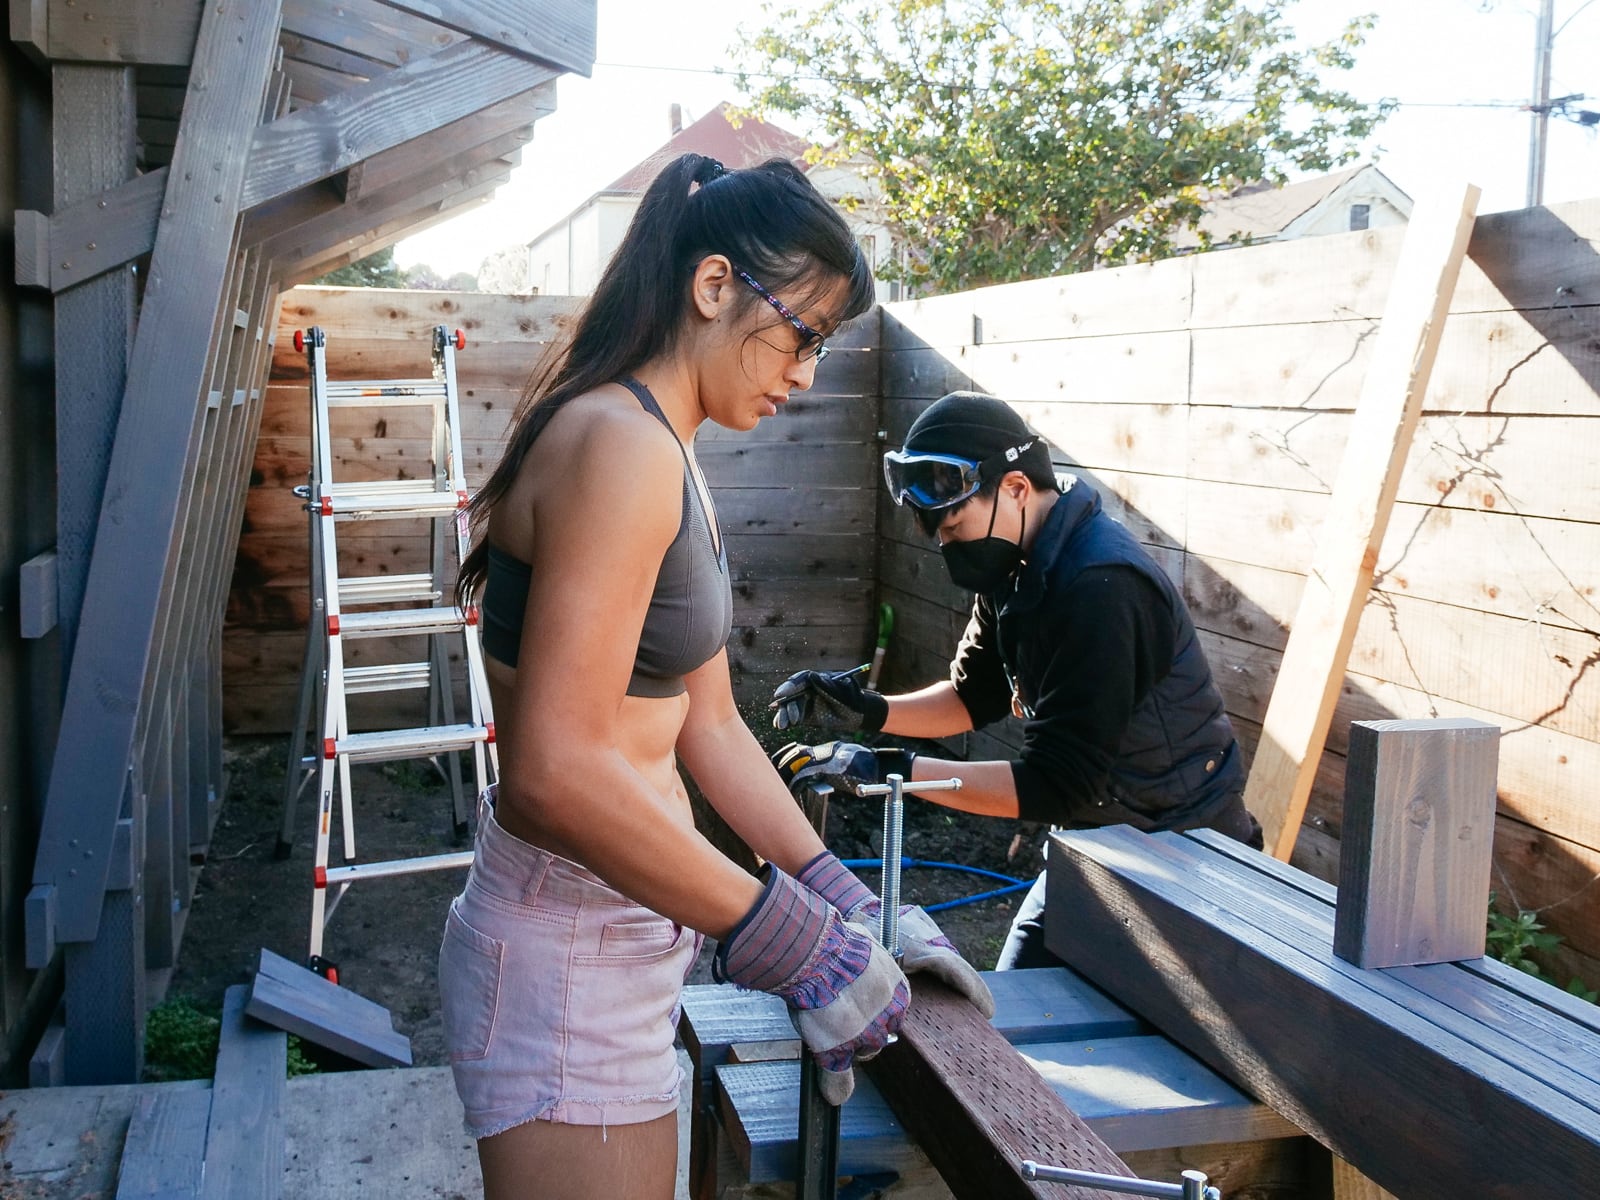
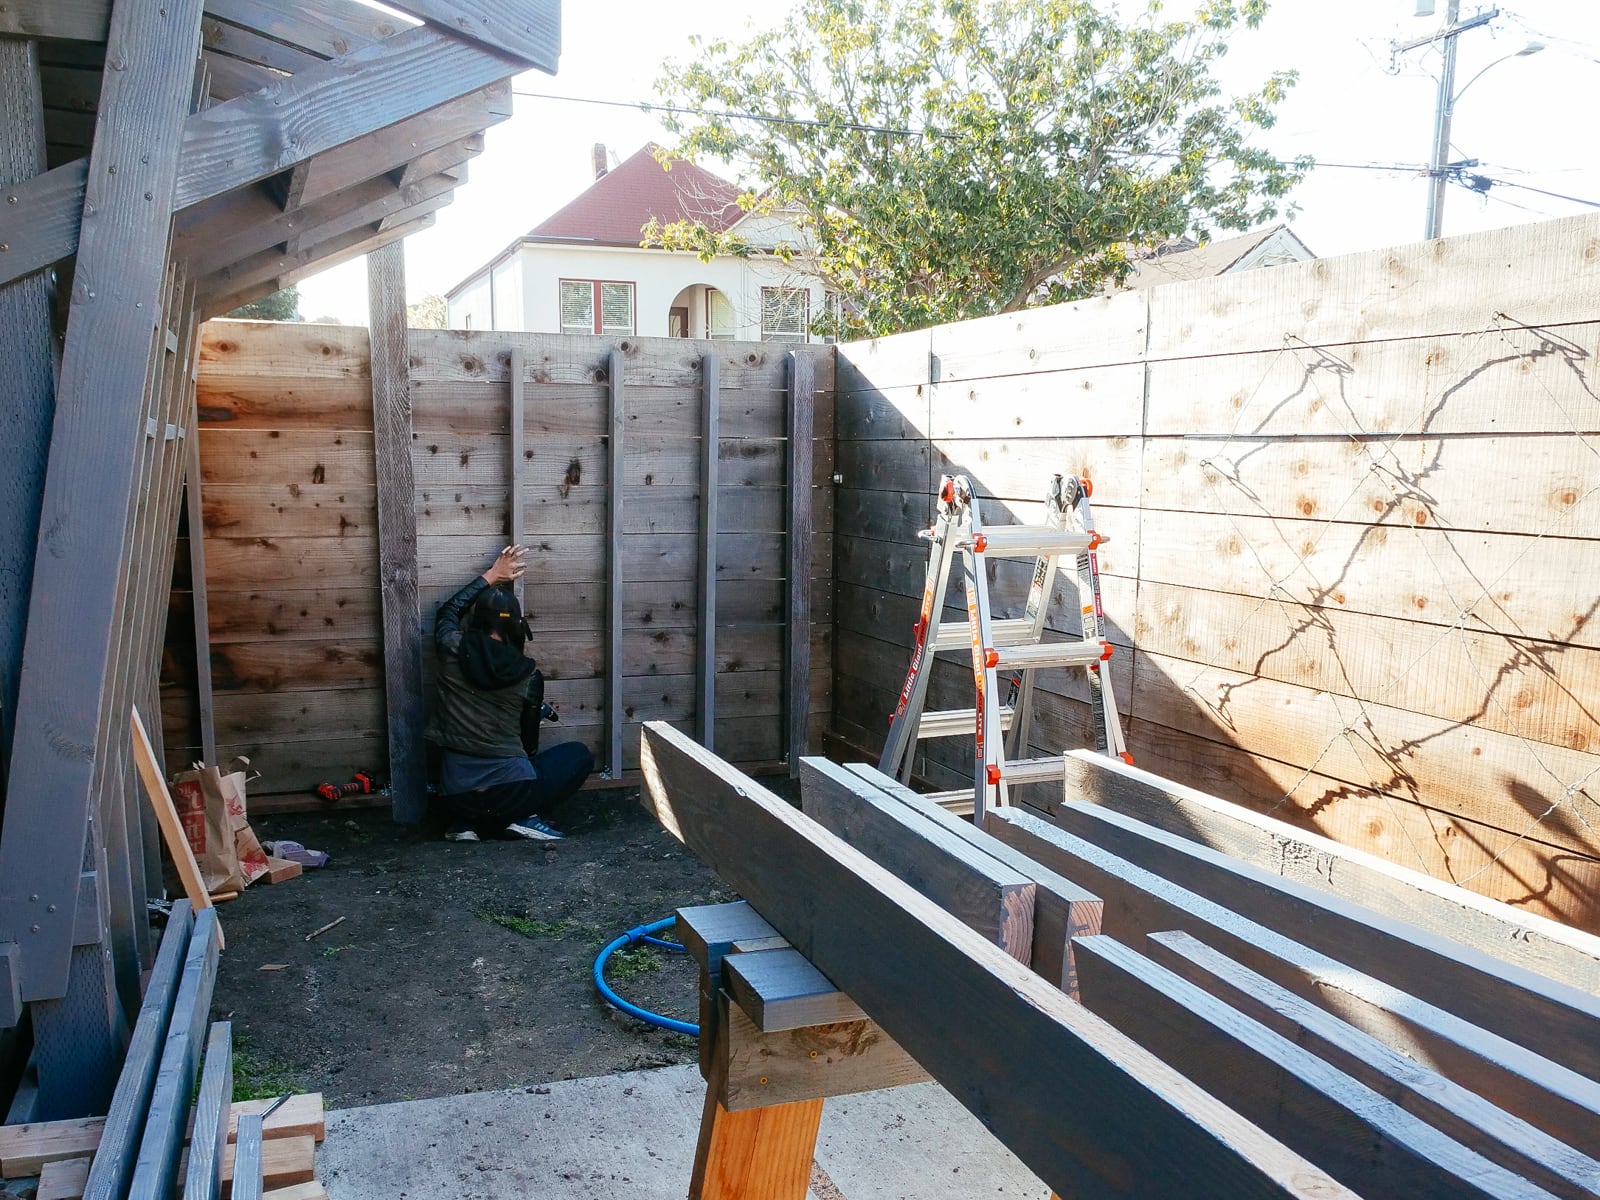
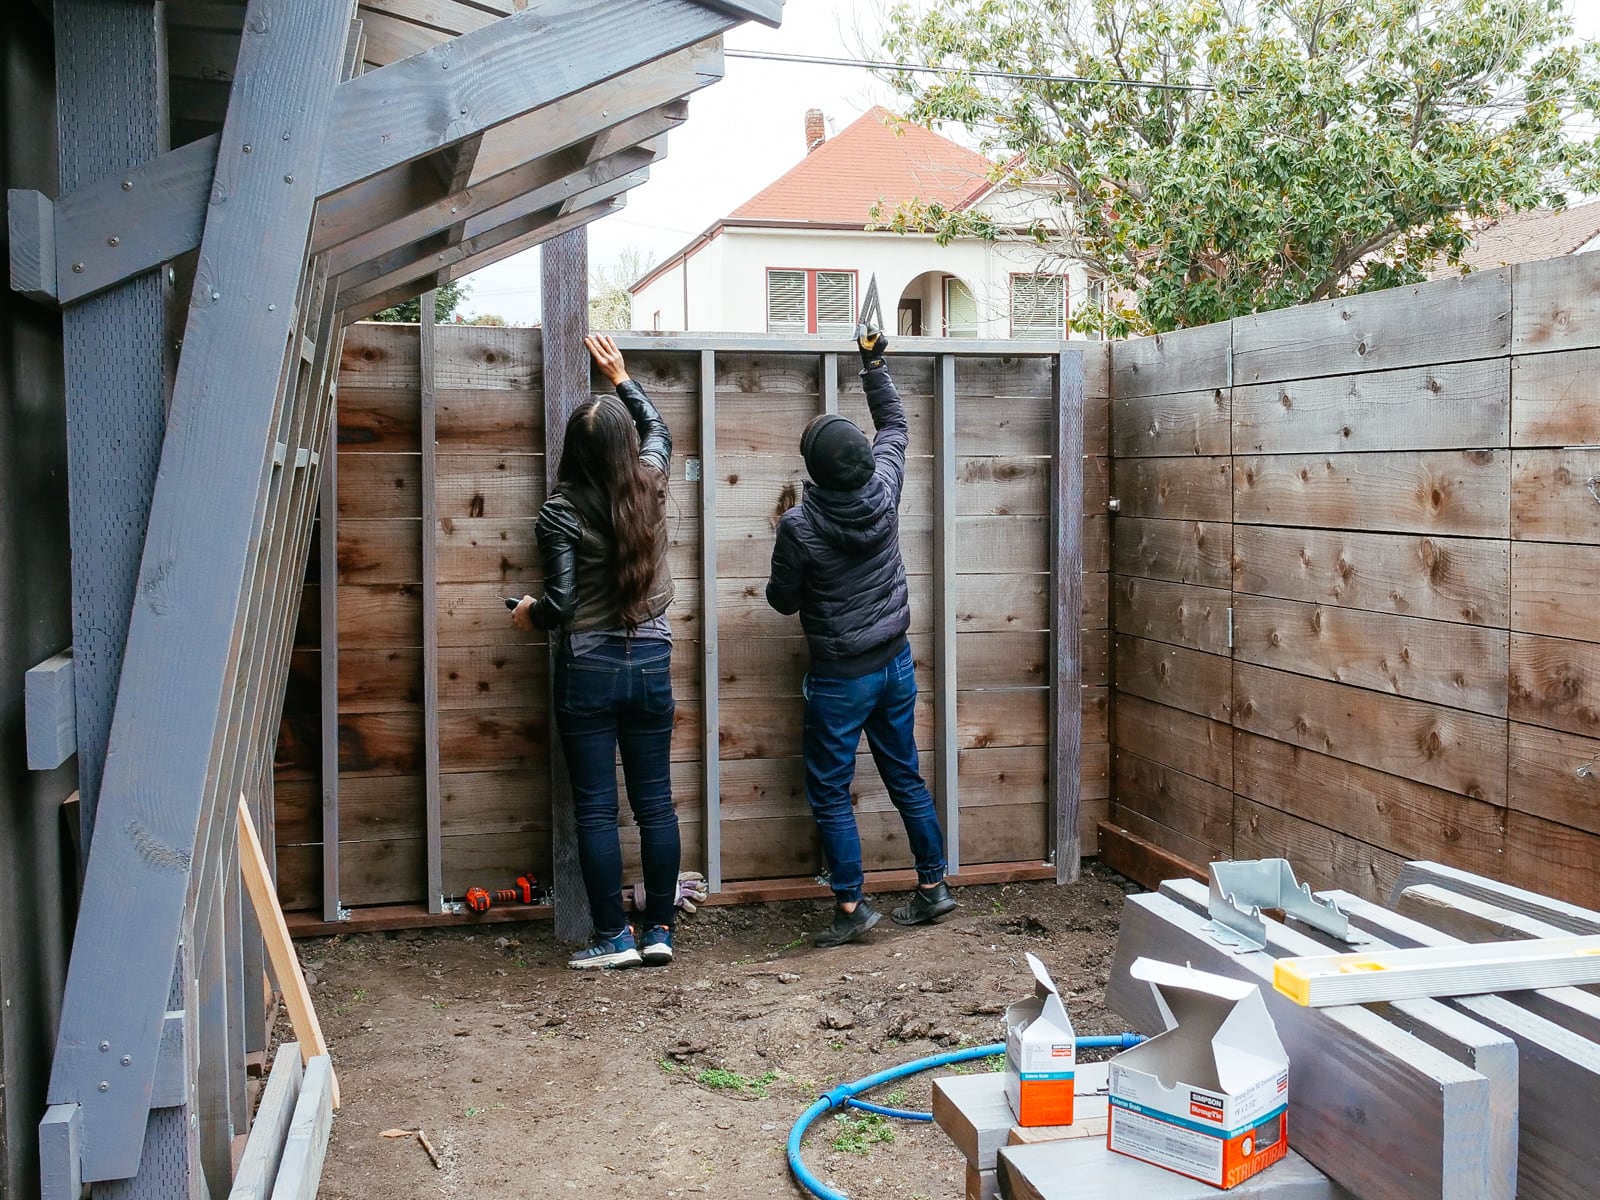
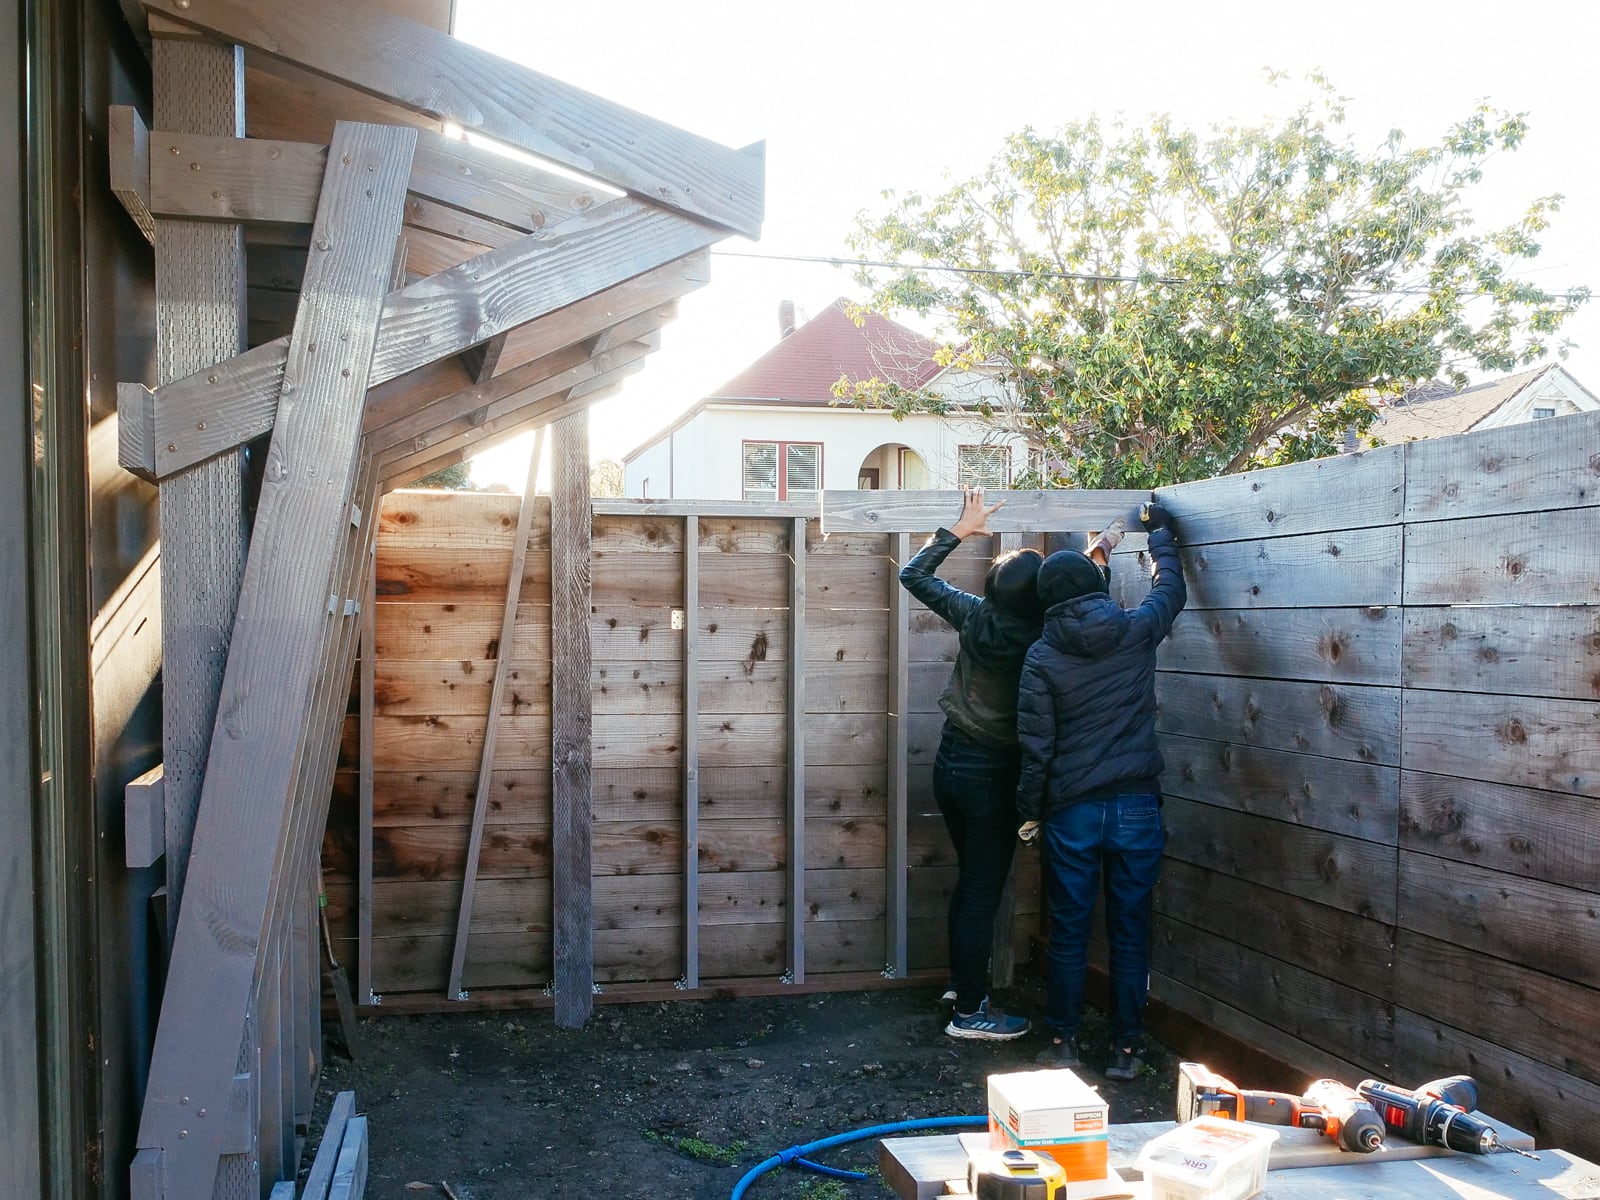
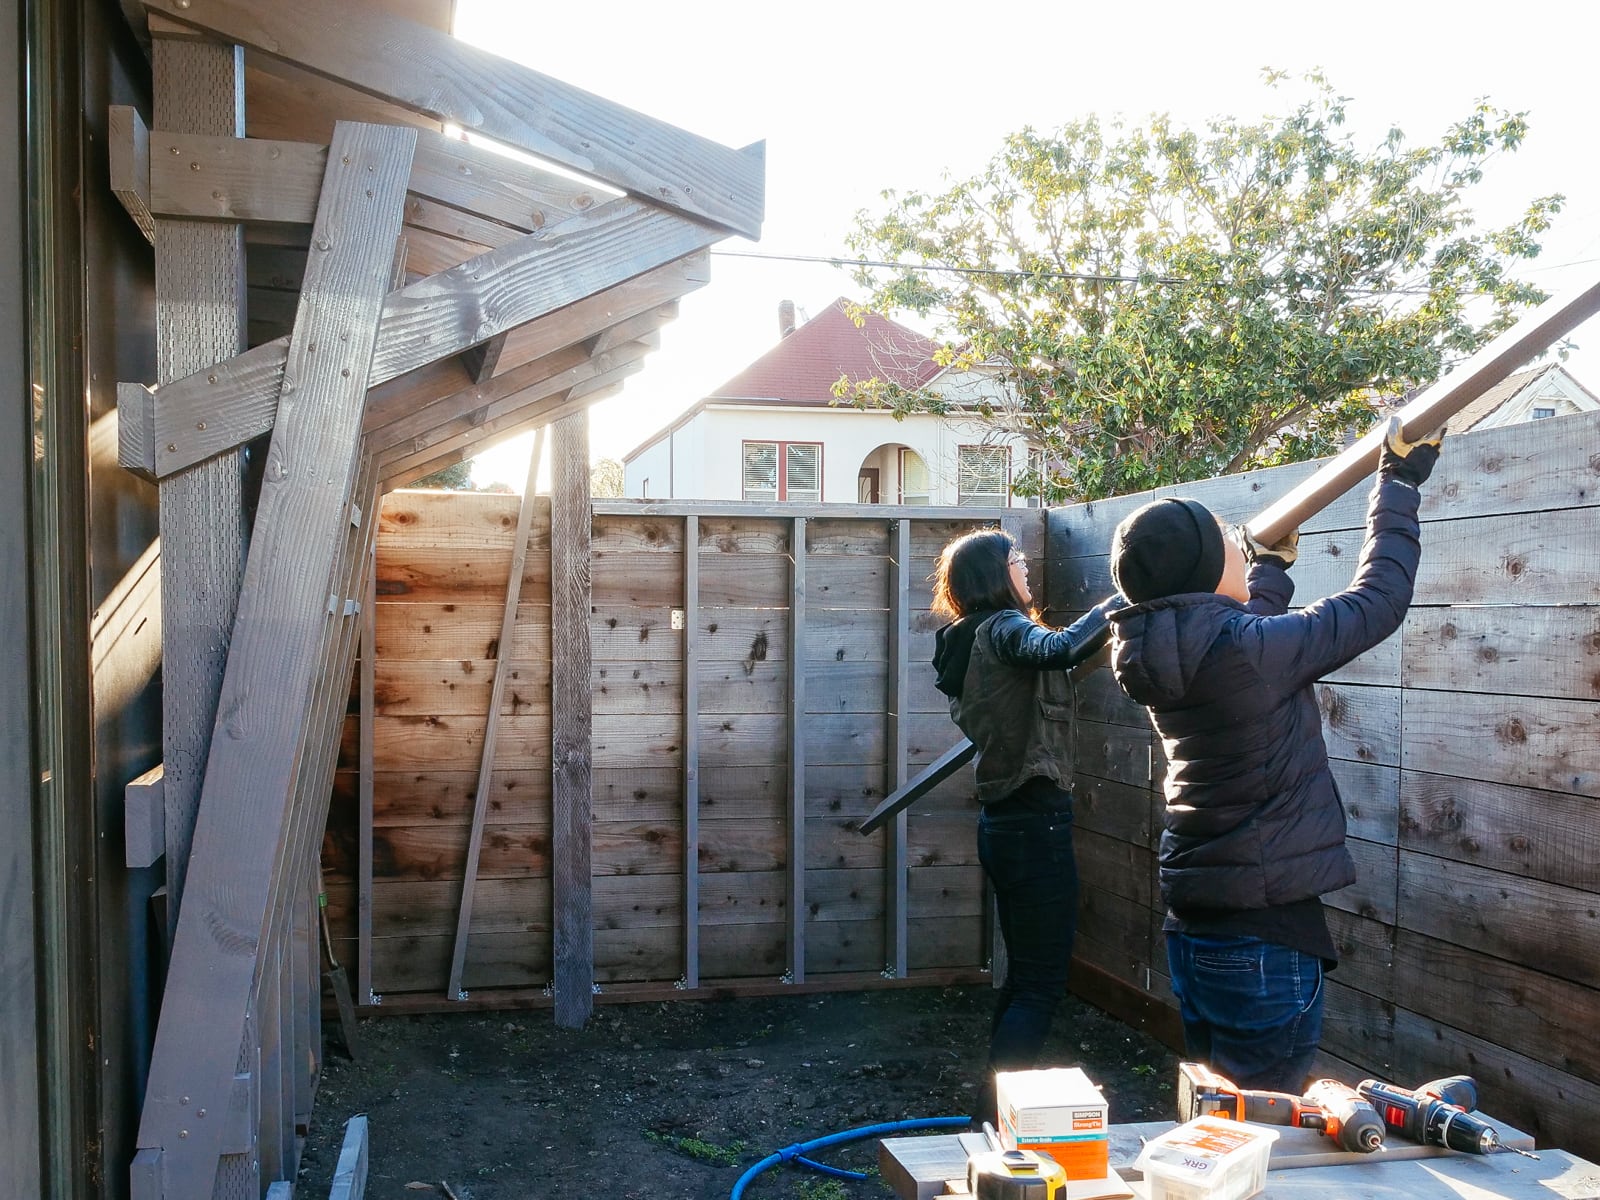
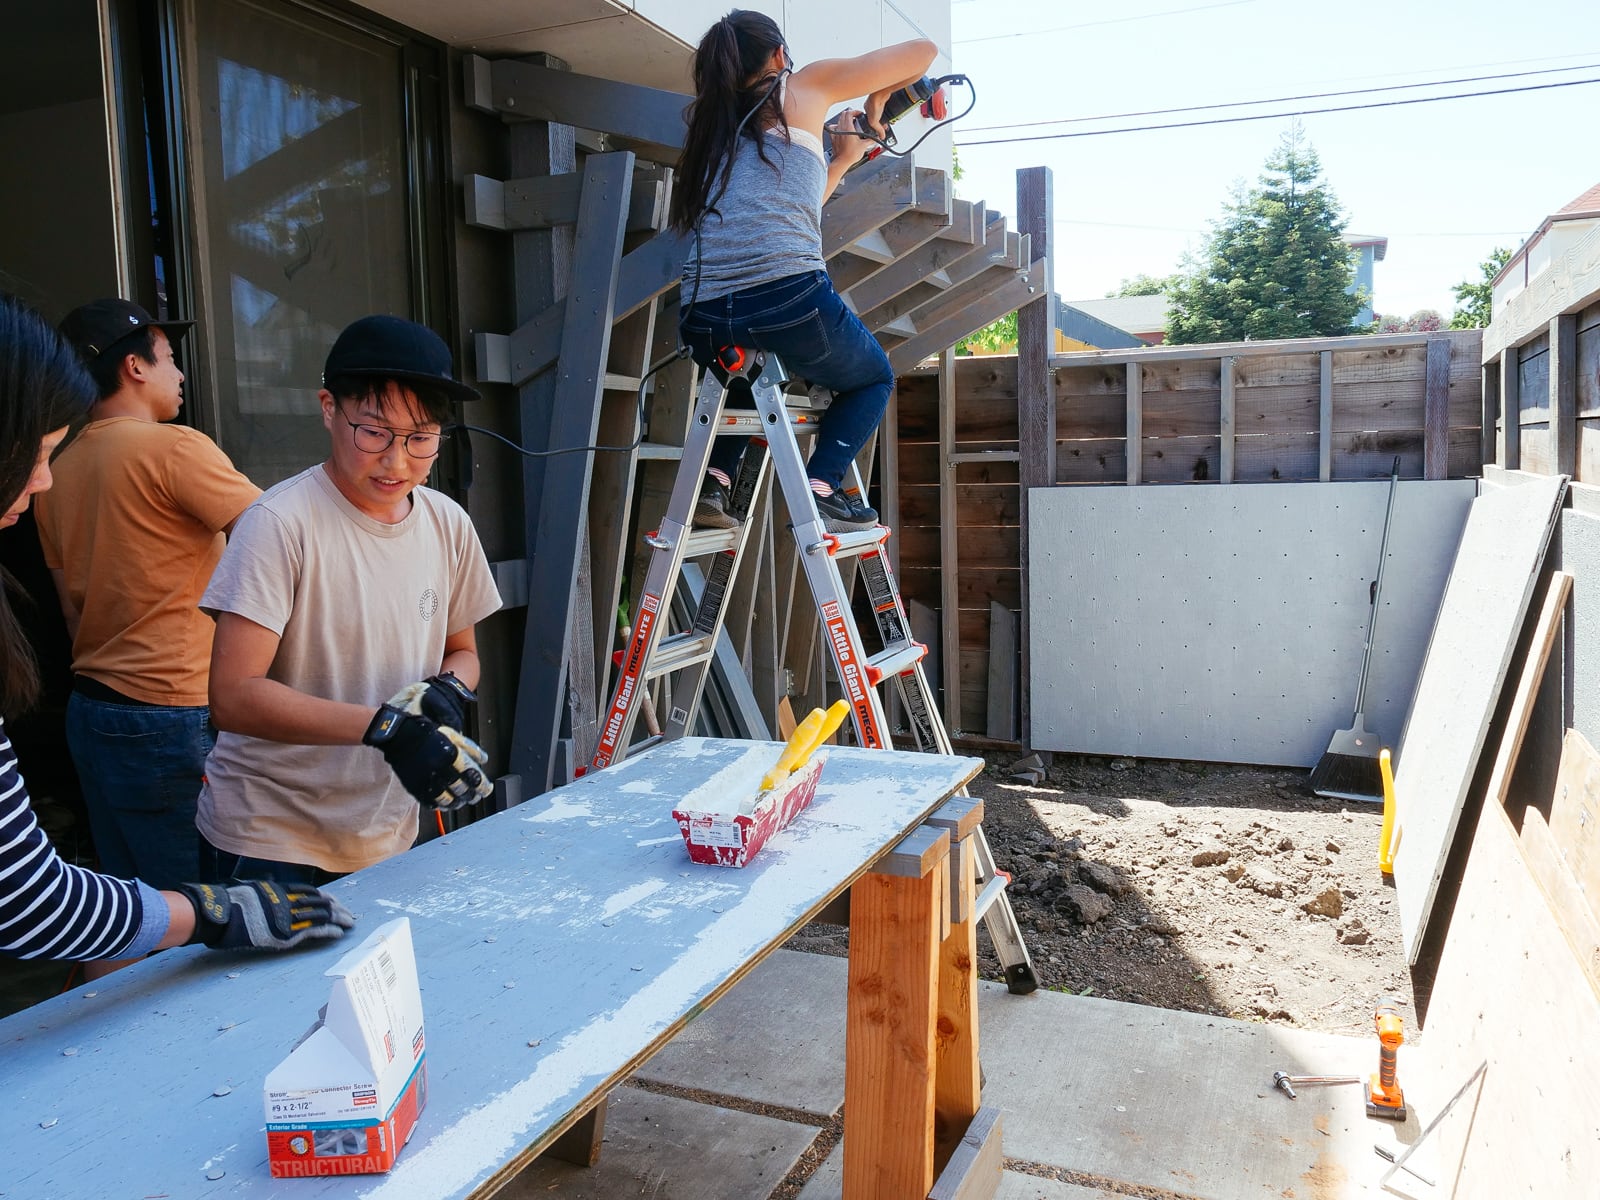
13. Mounting the WALL·E plywood to FRAME·E
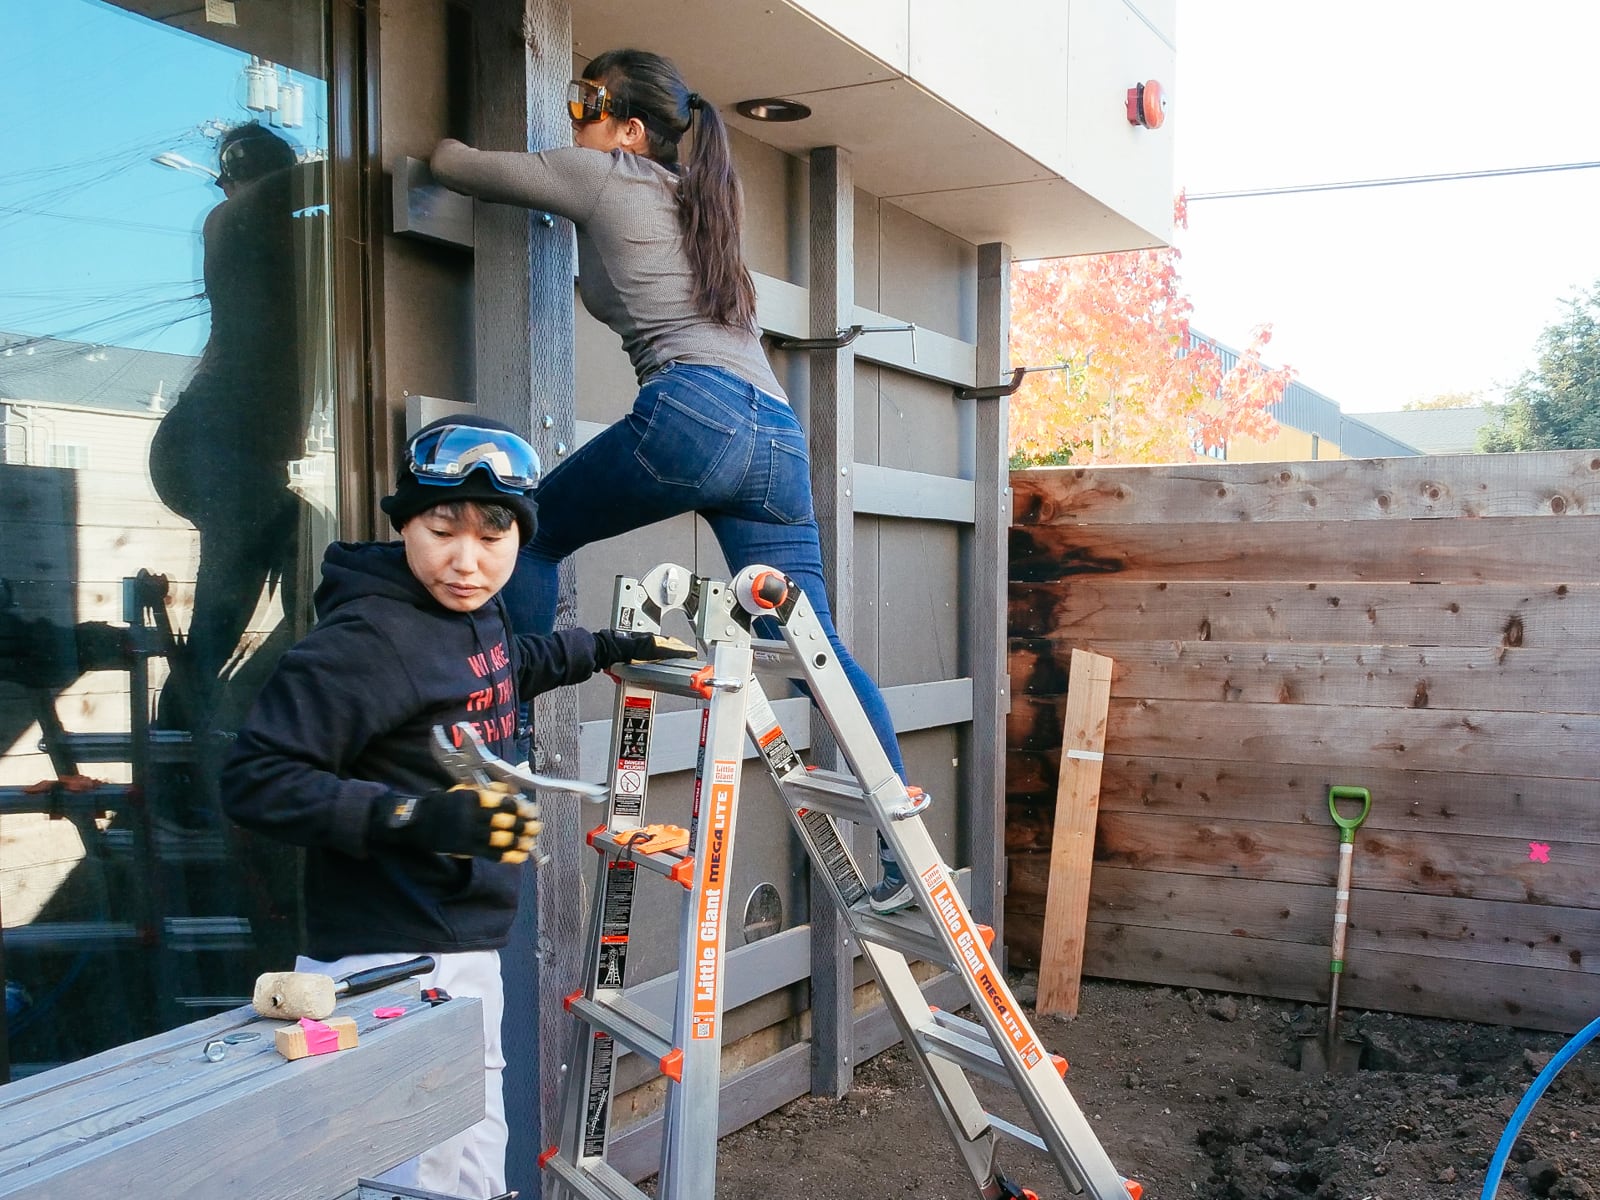
For the cave wall (WALL·E) (and the corner of wall F above), we again begged for help from our friend S, who agreed to help us make this work.
This was trickier than the other walls for a few reasons:
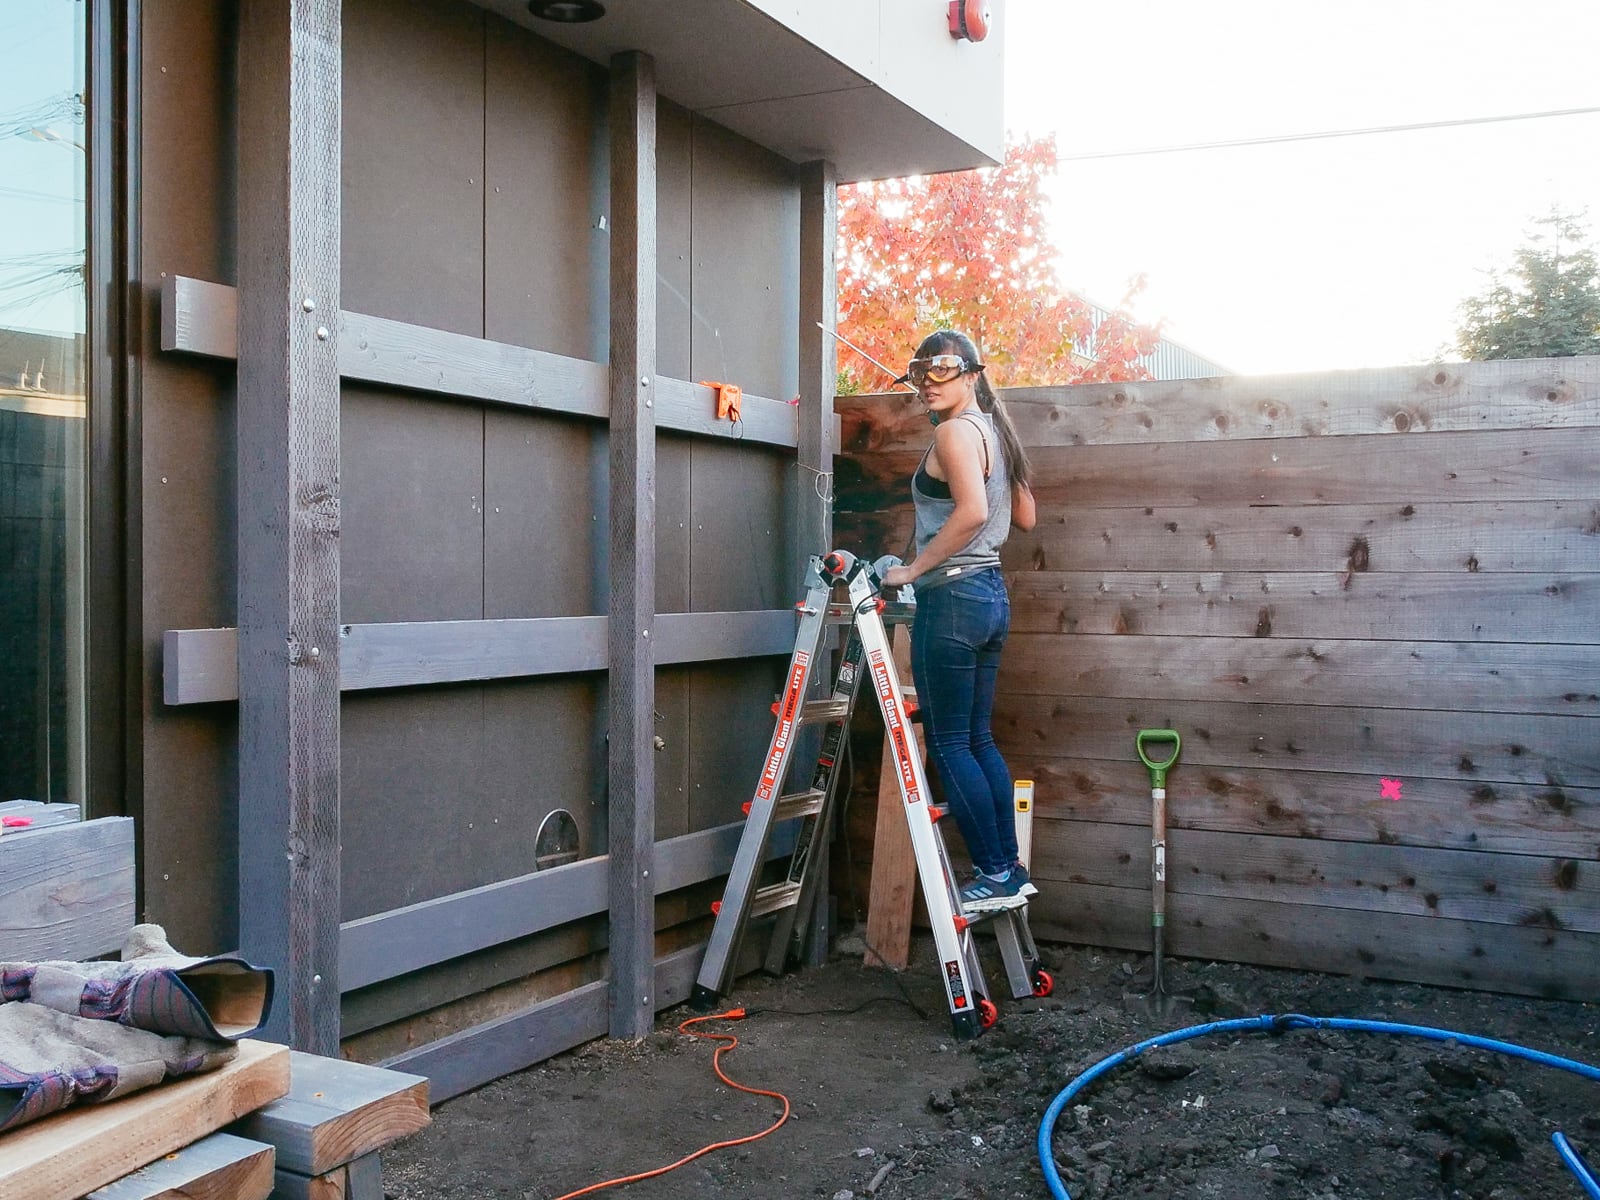
the sections were overhung at different angles, so we couldn’t rest them on each other while drilling, and attaching the plywood sheets while holding them in place was physically taxing;
the wall was taller, so we needed to do this work on a ladder;
I had dug an asymmetric and partial hole in the ground to get started on the flooring, so using the ladder was a fun and dangerous activity; and
senioritis.
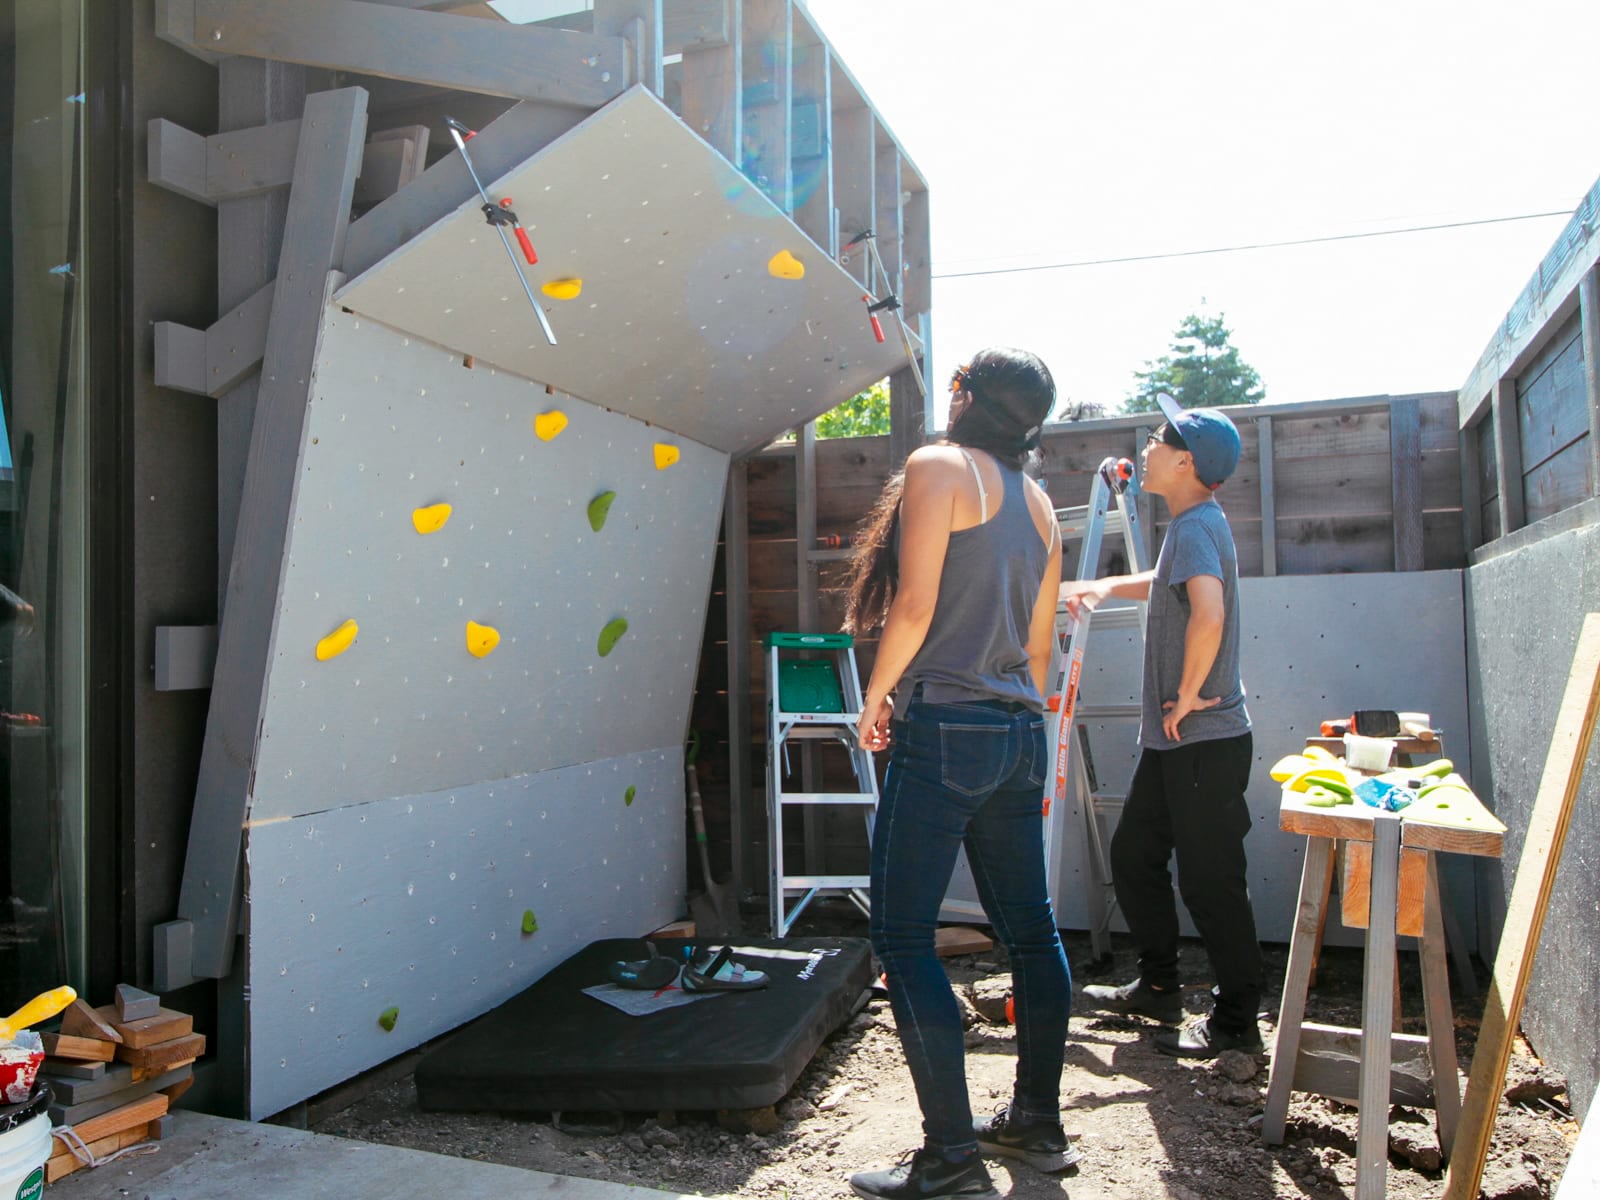
Eventually, with the help of S’s reciprocating saw, we got this up.
13a. Attaching the kicker board
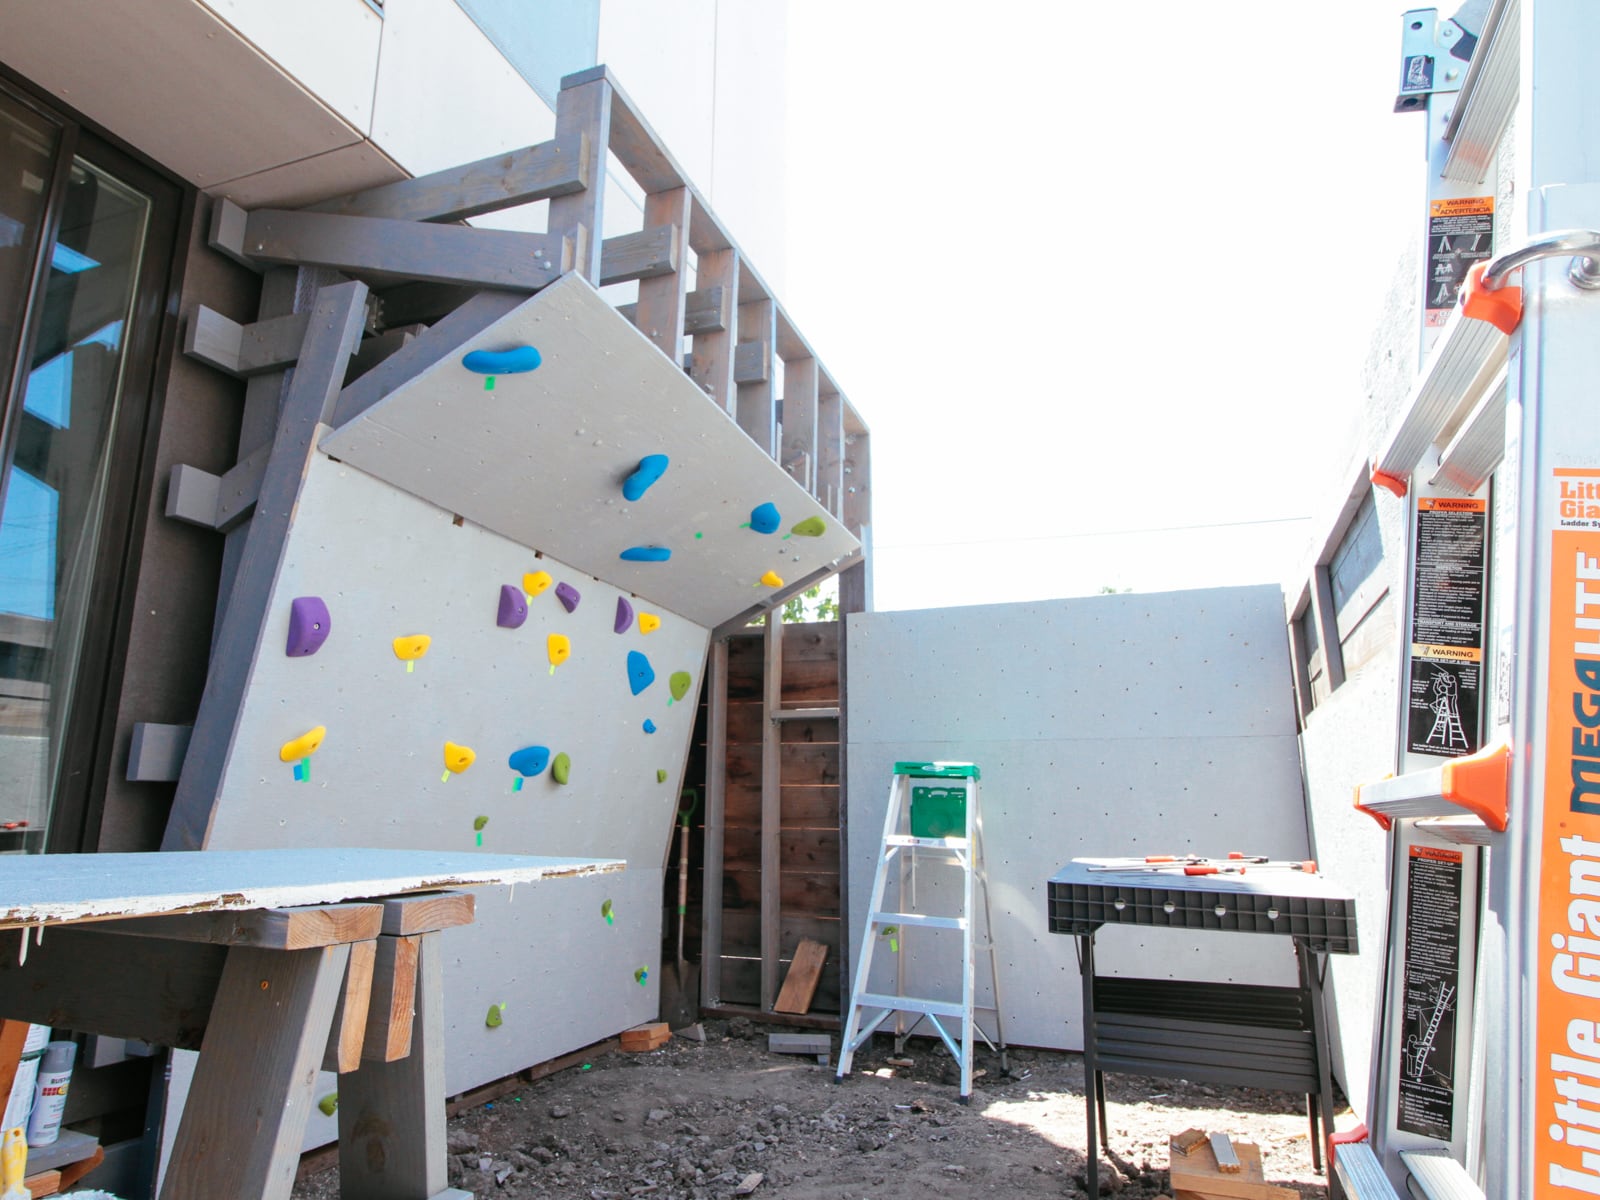
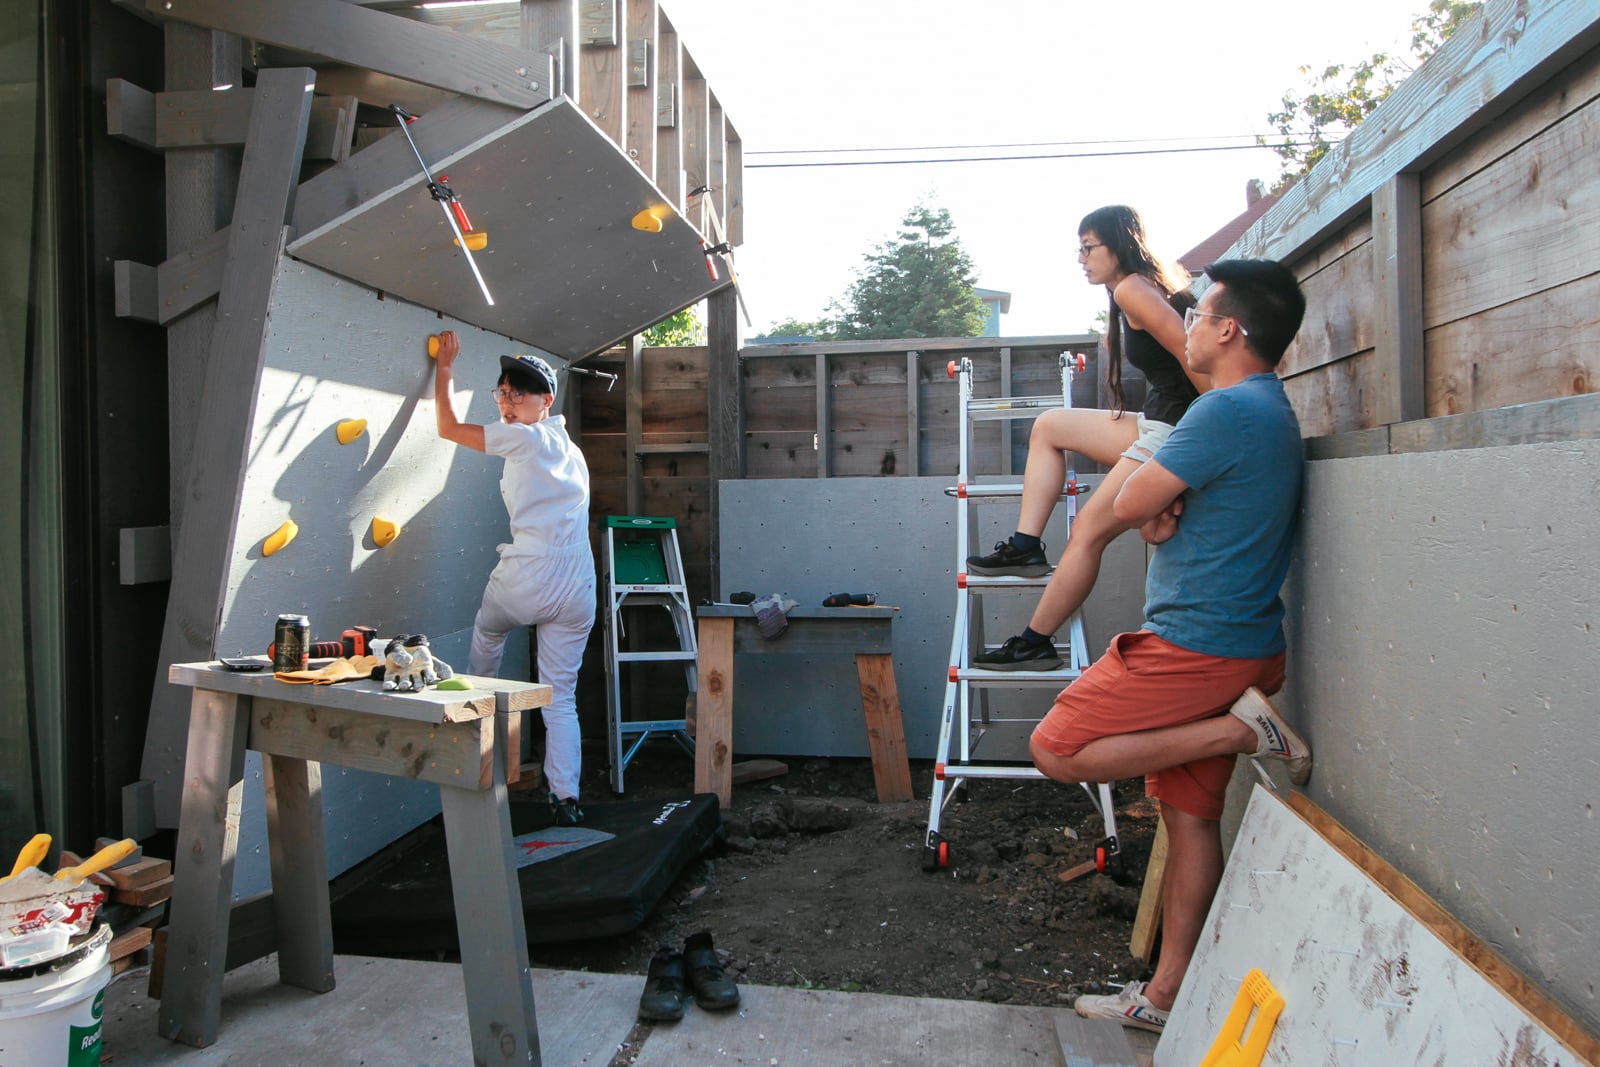
13b. Notching and putting up the 10° section surface
13c. Putting up the 65° section surface
13d. Putting up the top 0° section surface
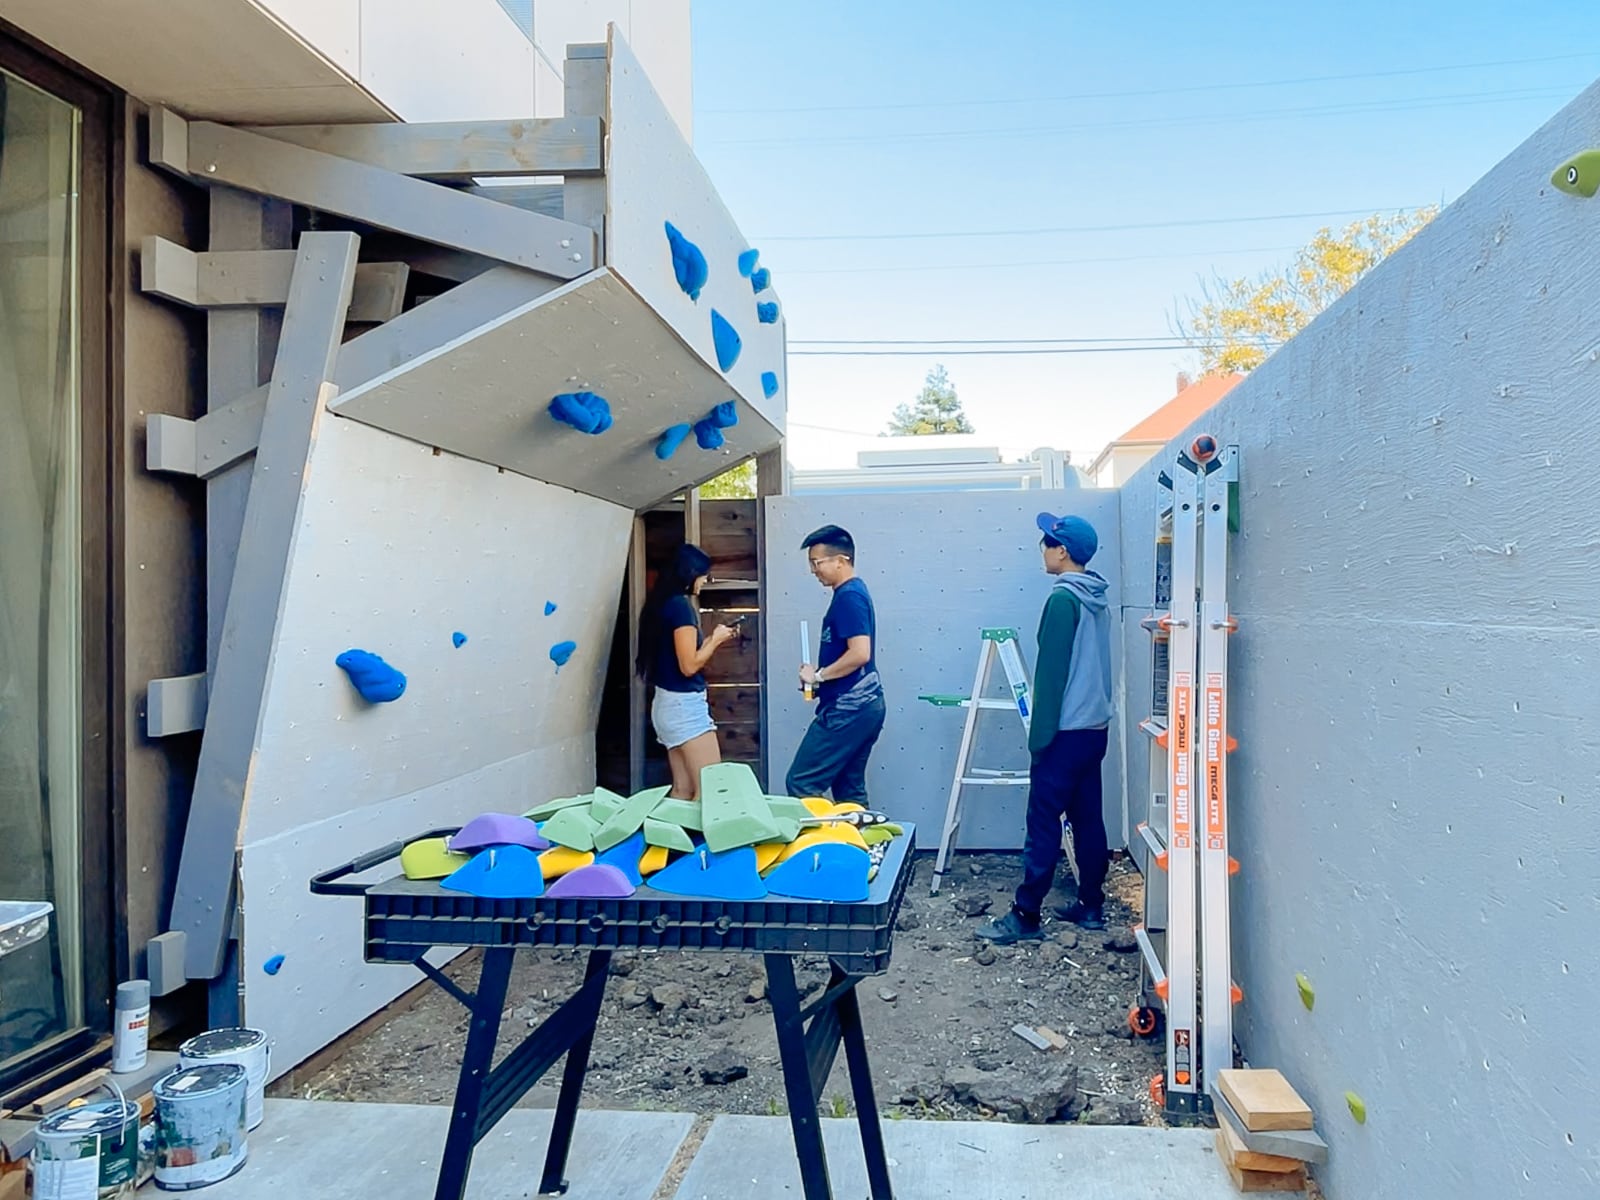
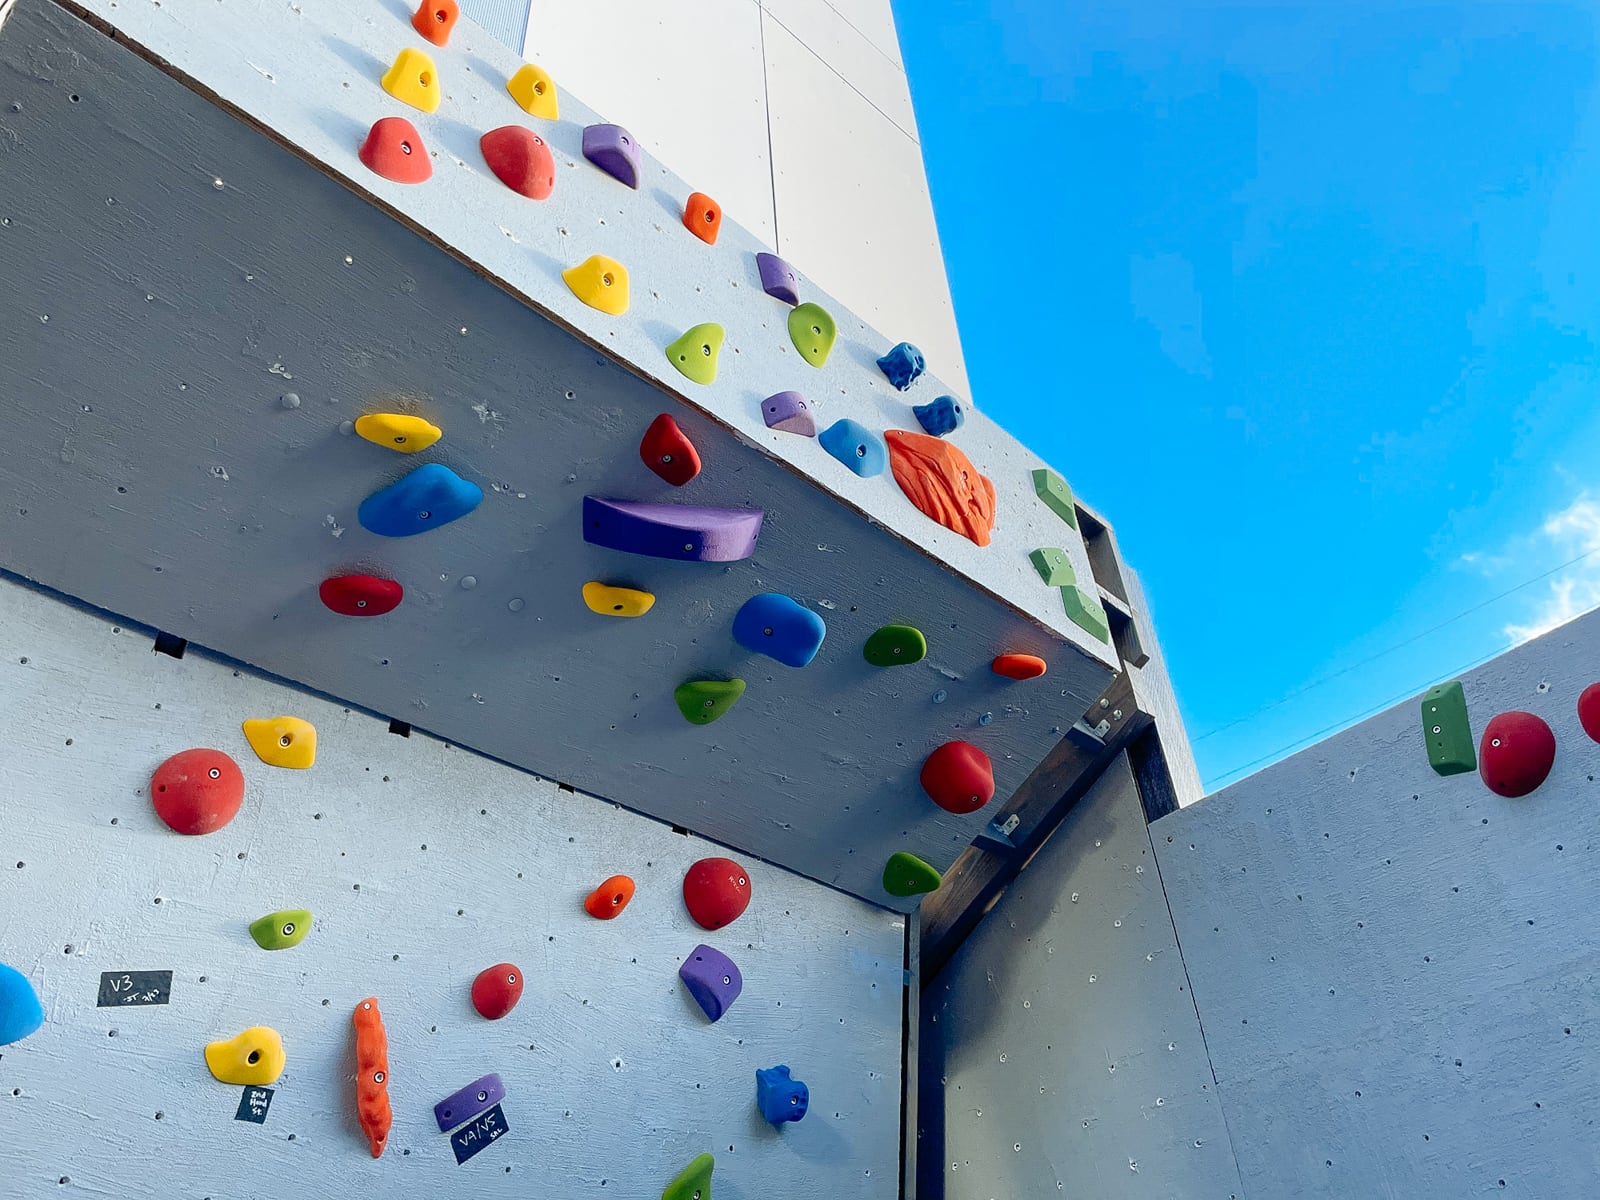
14. Finishing: covering fastener holes and filling in cracks and edges
We wanted the sheets to feel like one continuous surface (and for climbers not to be hurt by protruding edges), so we filled the holes and the sub-millimeter gaps between plywood sheets with wood putty, drywall mud, and paint.
Now we have a cube! Can we resist climbing on it until we have proper safety matting in place?
P.S.: references
Thanks to the Vancouver Carpenter for being very handsome and teaching us about drywall.
Simpson Strong-Tie 12 A21, 26 A23Z, 22 A34Z, 4 A35Z angles, 4 H2.5Z hurricane ties, and 1 TP15 tie plate
600 Simpson Strong-Tie #9 x 1.5" SD connector screws
300 Simpson Strong-Tie #9 x 2.5" SD connector screws
12 GRK 5/16" x 4" RSS structural screws
12 GRK 1/4" x 2.5" RSS structural screws
20 GRK #9 x 2.5" R4 screws
a handful of nails
Rustoleum gray paint
Why
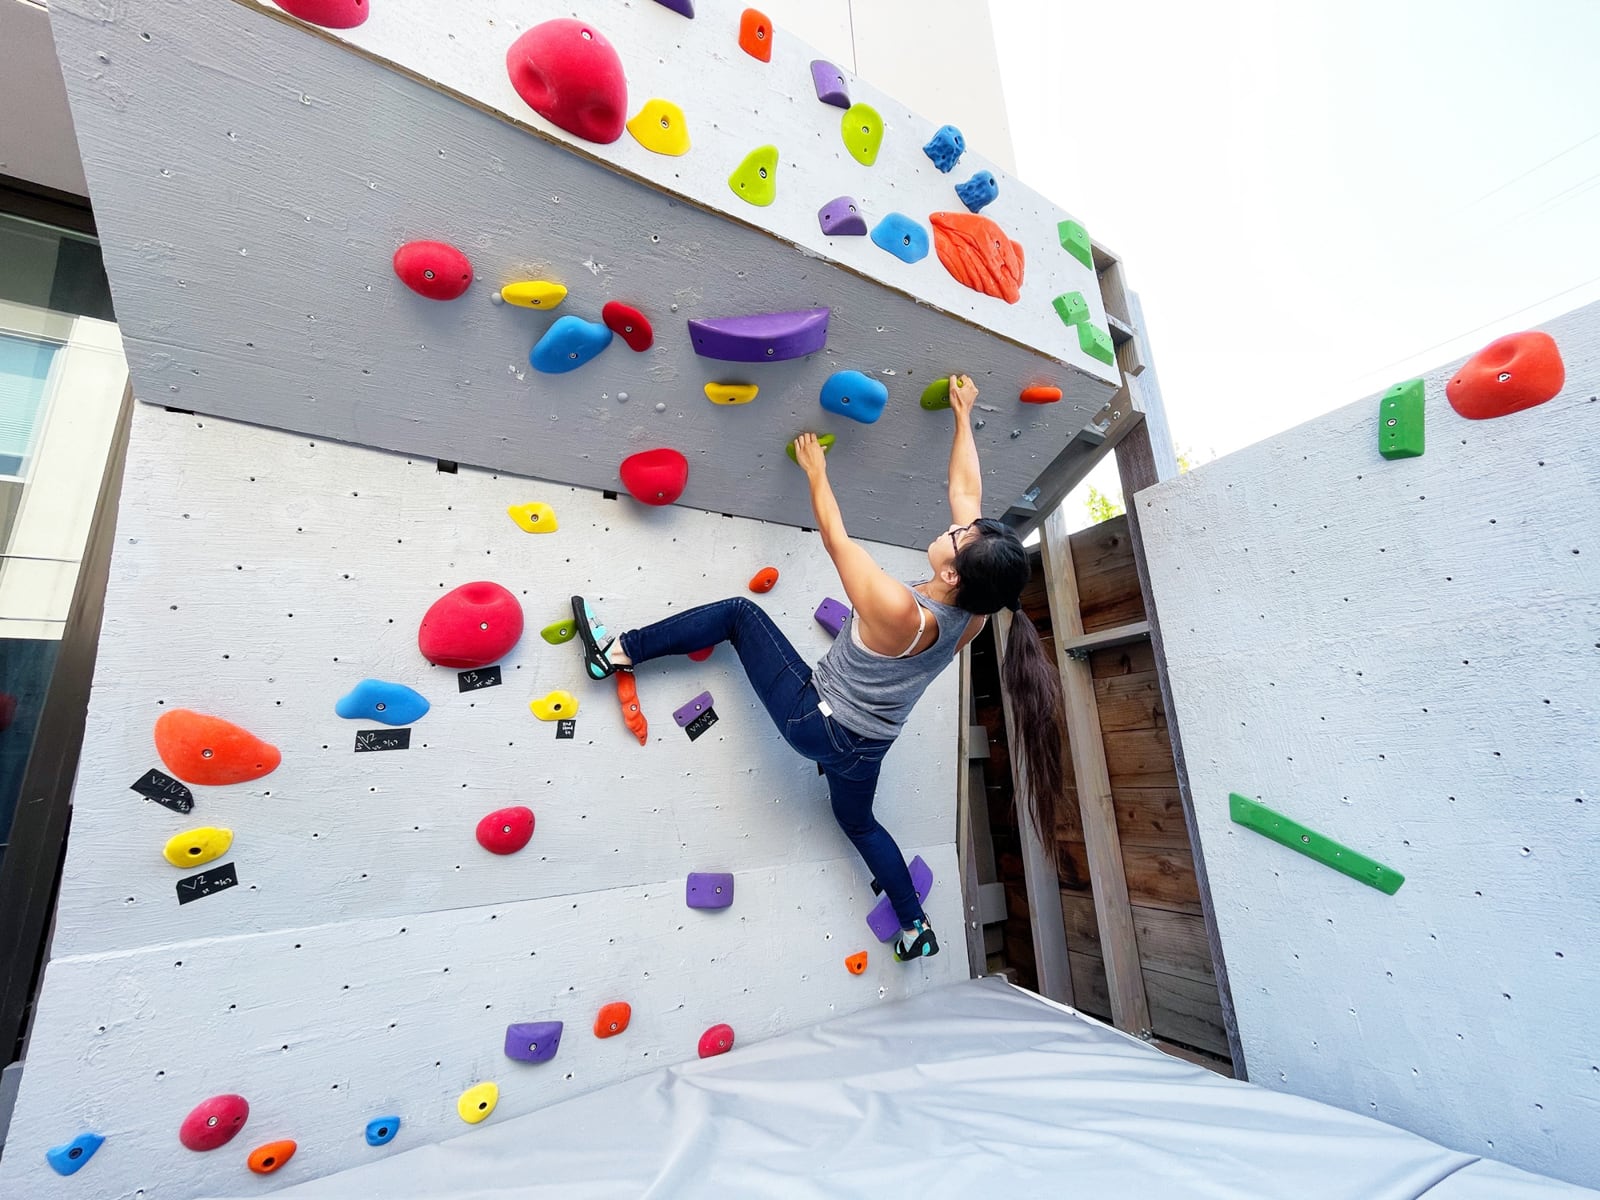
We saw Stacey’s, and it created a sense of wonder in our hearts.
The dream: of a place of refuge a few steps away from one’s usual cares; a place where the outlines of the self could be more distinct.
A place that would let us dream in peace; to try on alternate futures and feel how they fit.
Something uncomplicated and fun.
Design
1. Exploration, goals, and constraints
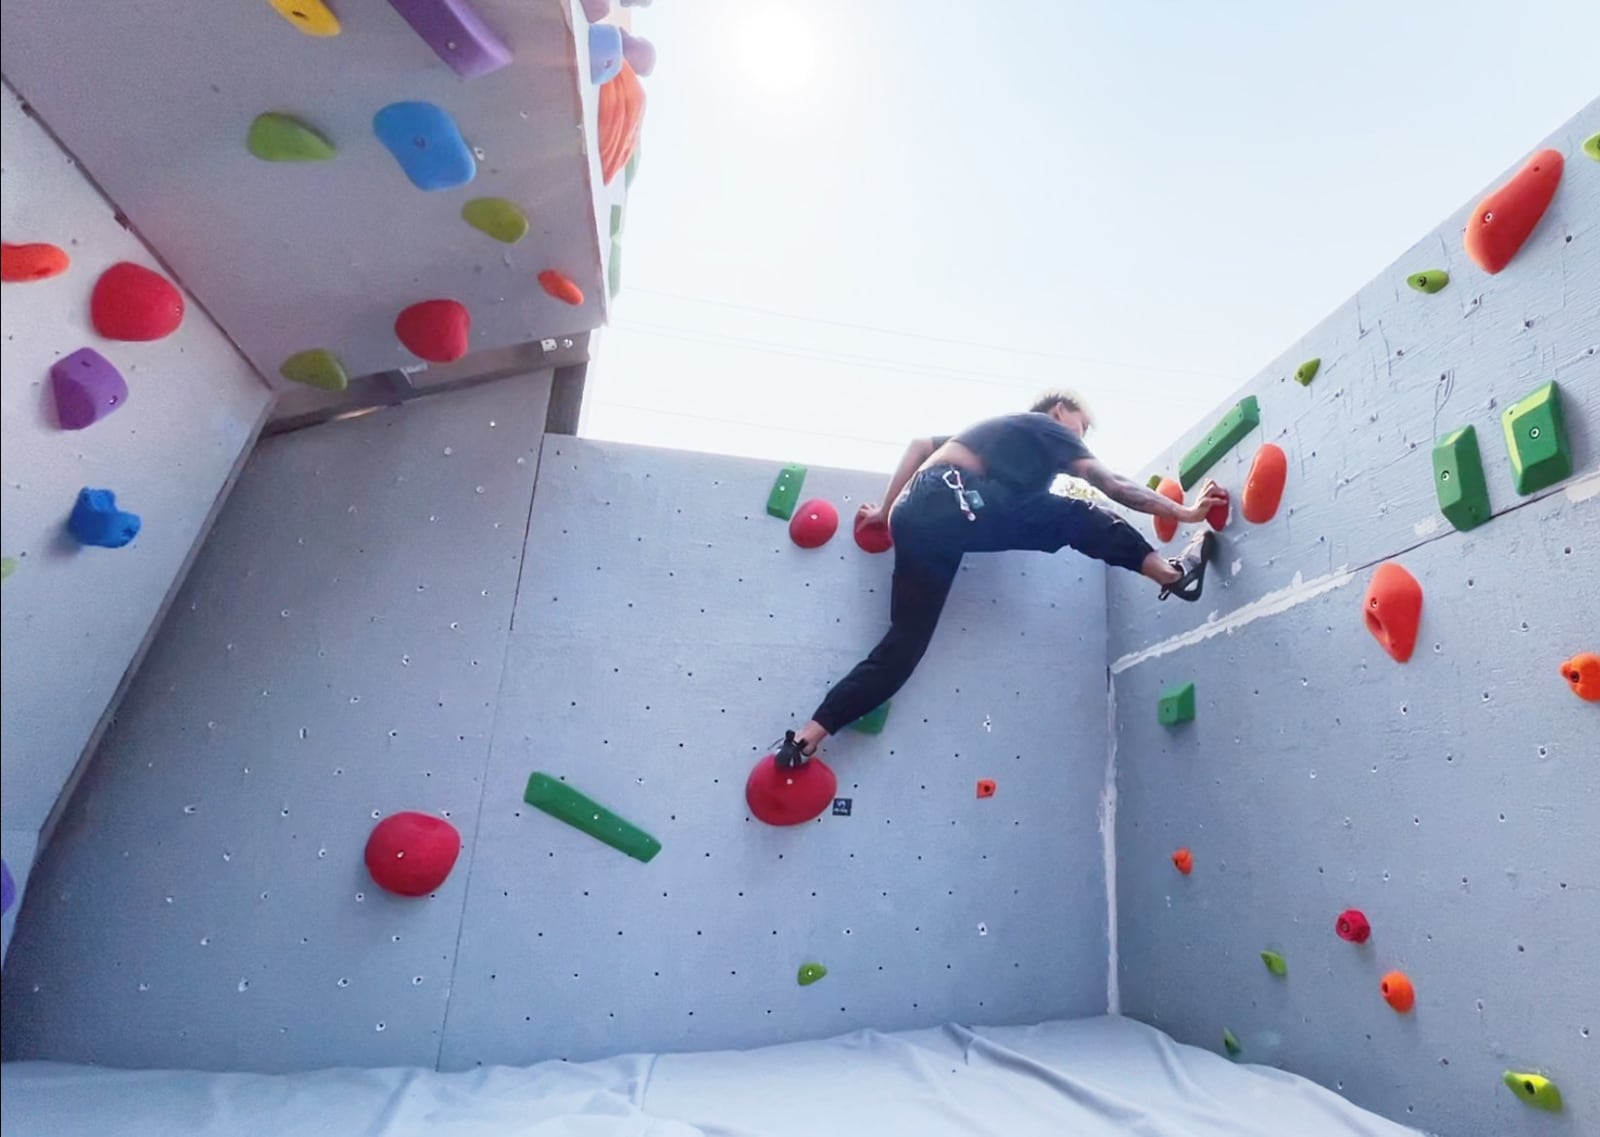
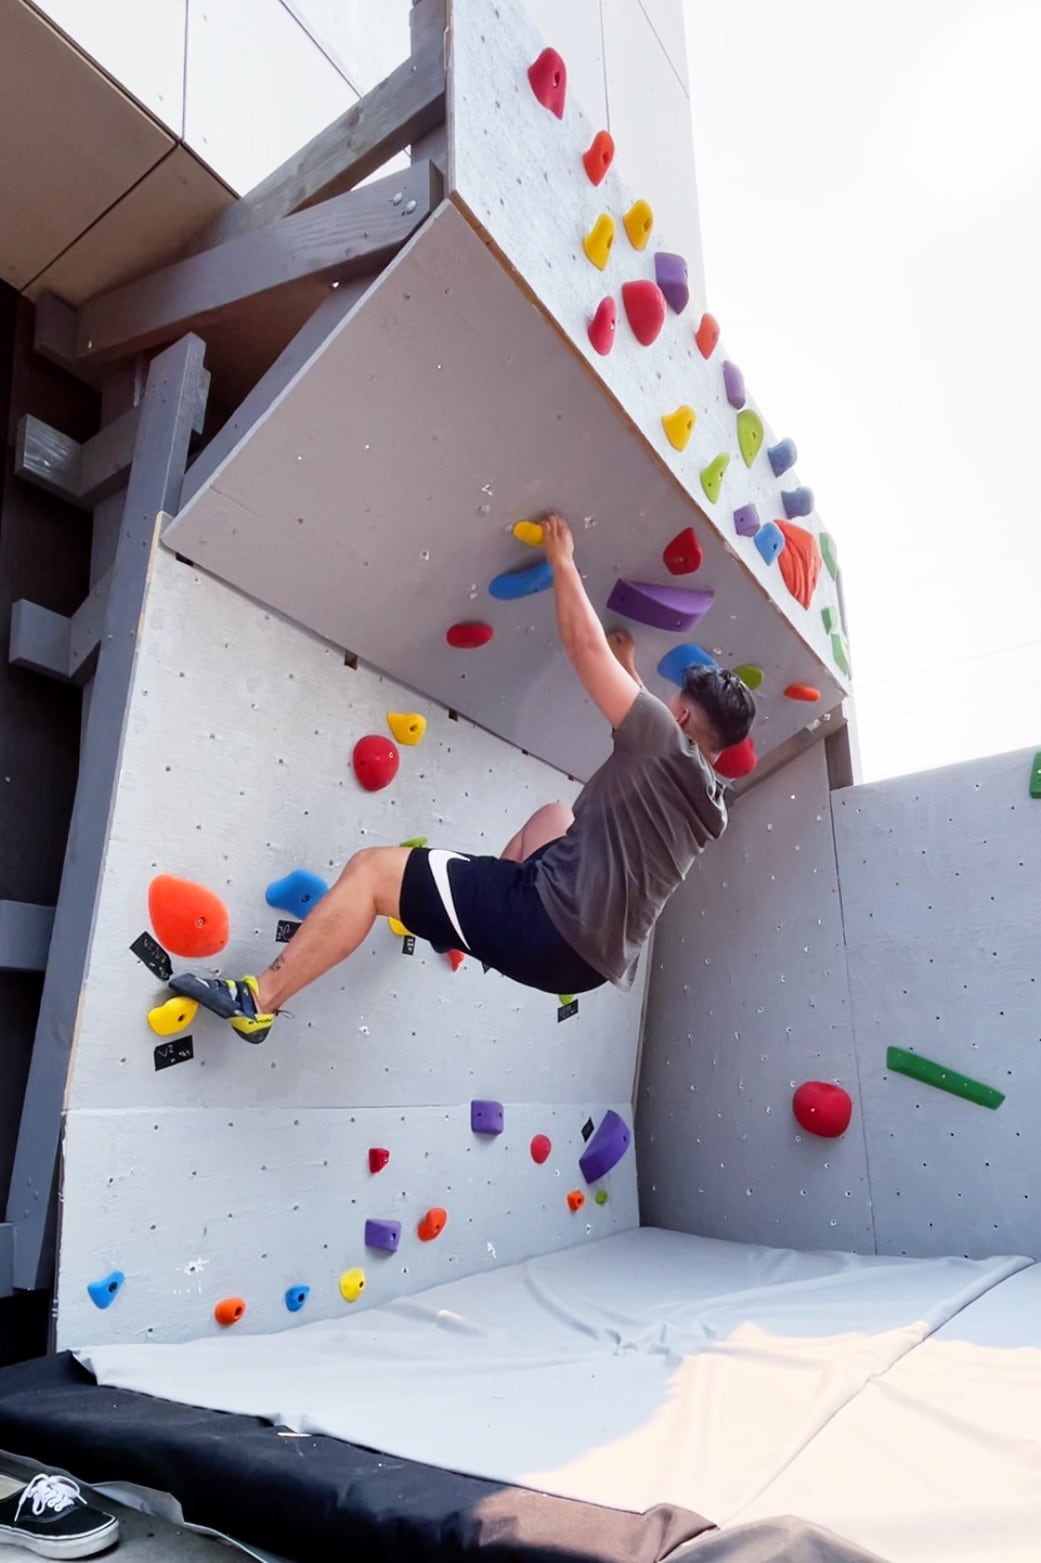
Our goals were (1) to have a climbing area where people can recreate, (2) with a cave, (3) and a few corners for stemmy climbs; (4) without being annoying to the neighbors.
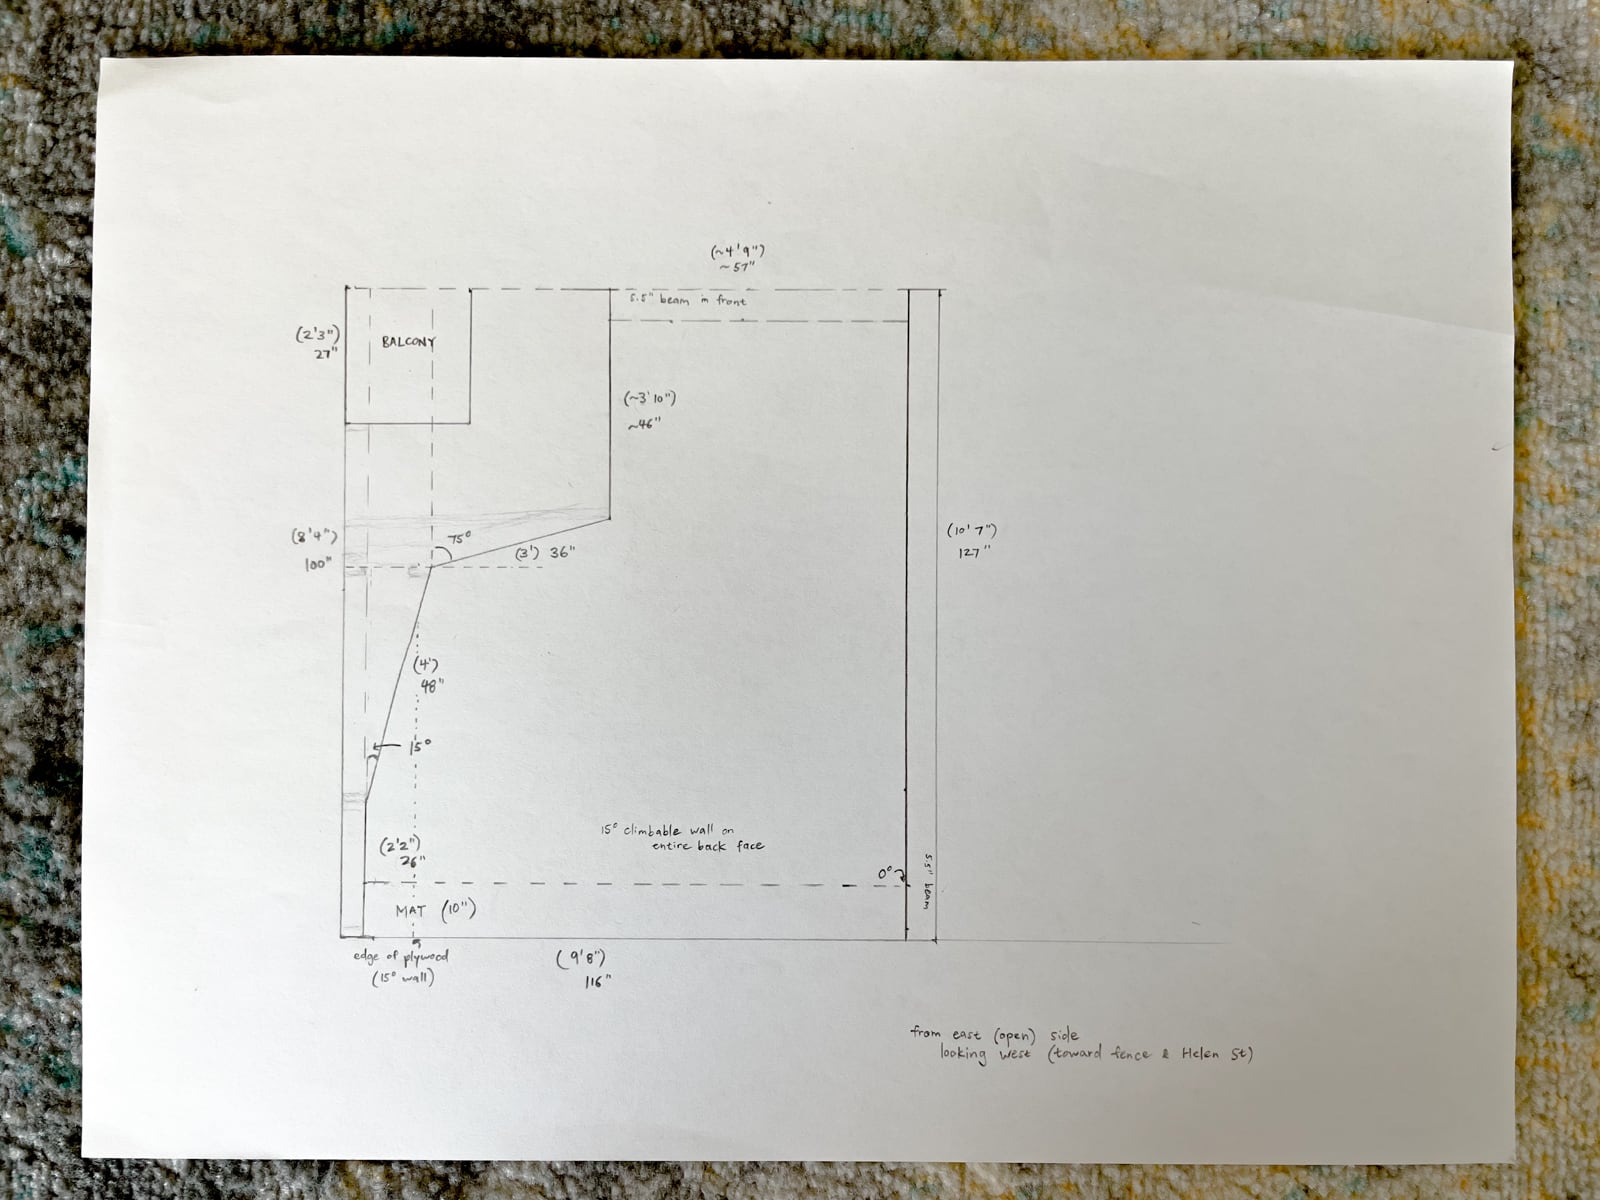
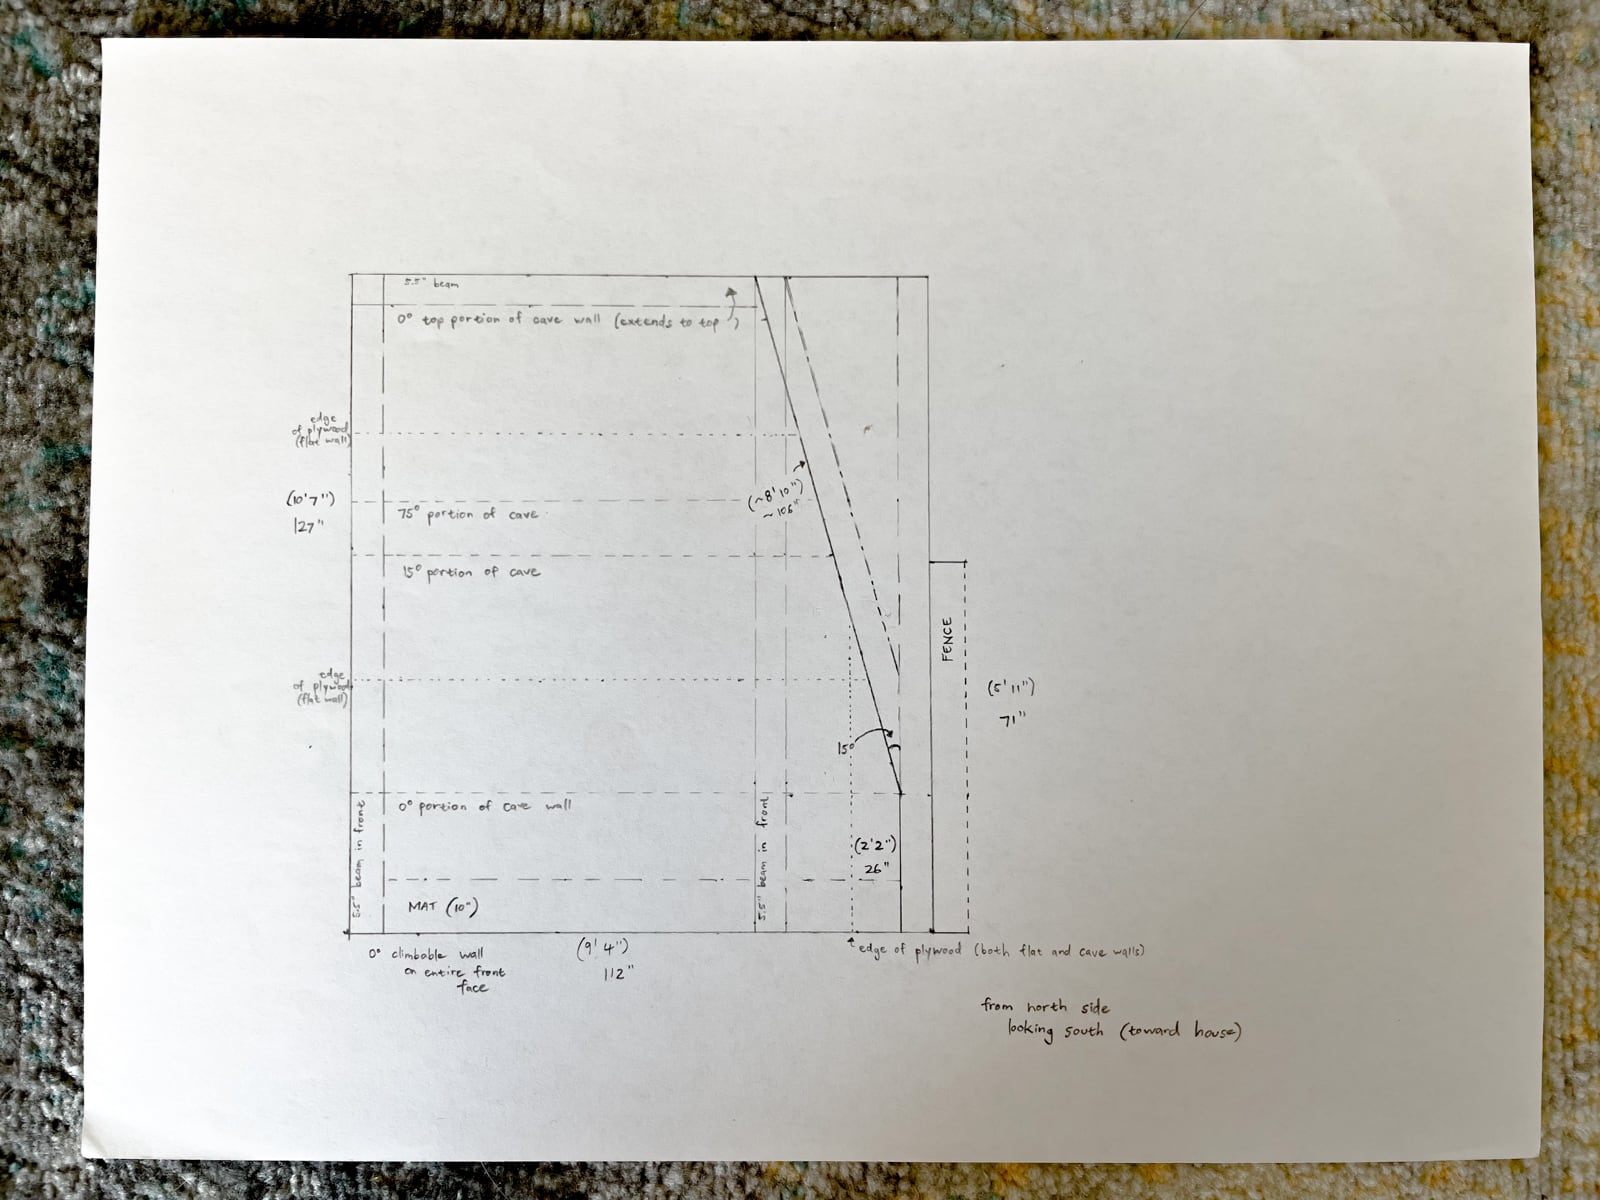
Constraints: it all had to fit in a 110" x 110" footprint, without anchoring to the existing building. Figuring out how to preserve the existing sunlight was also important — building the walls too high would block too much light, but too-short walls aren’t climbable.
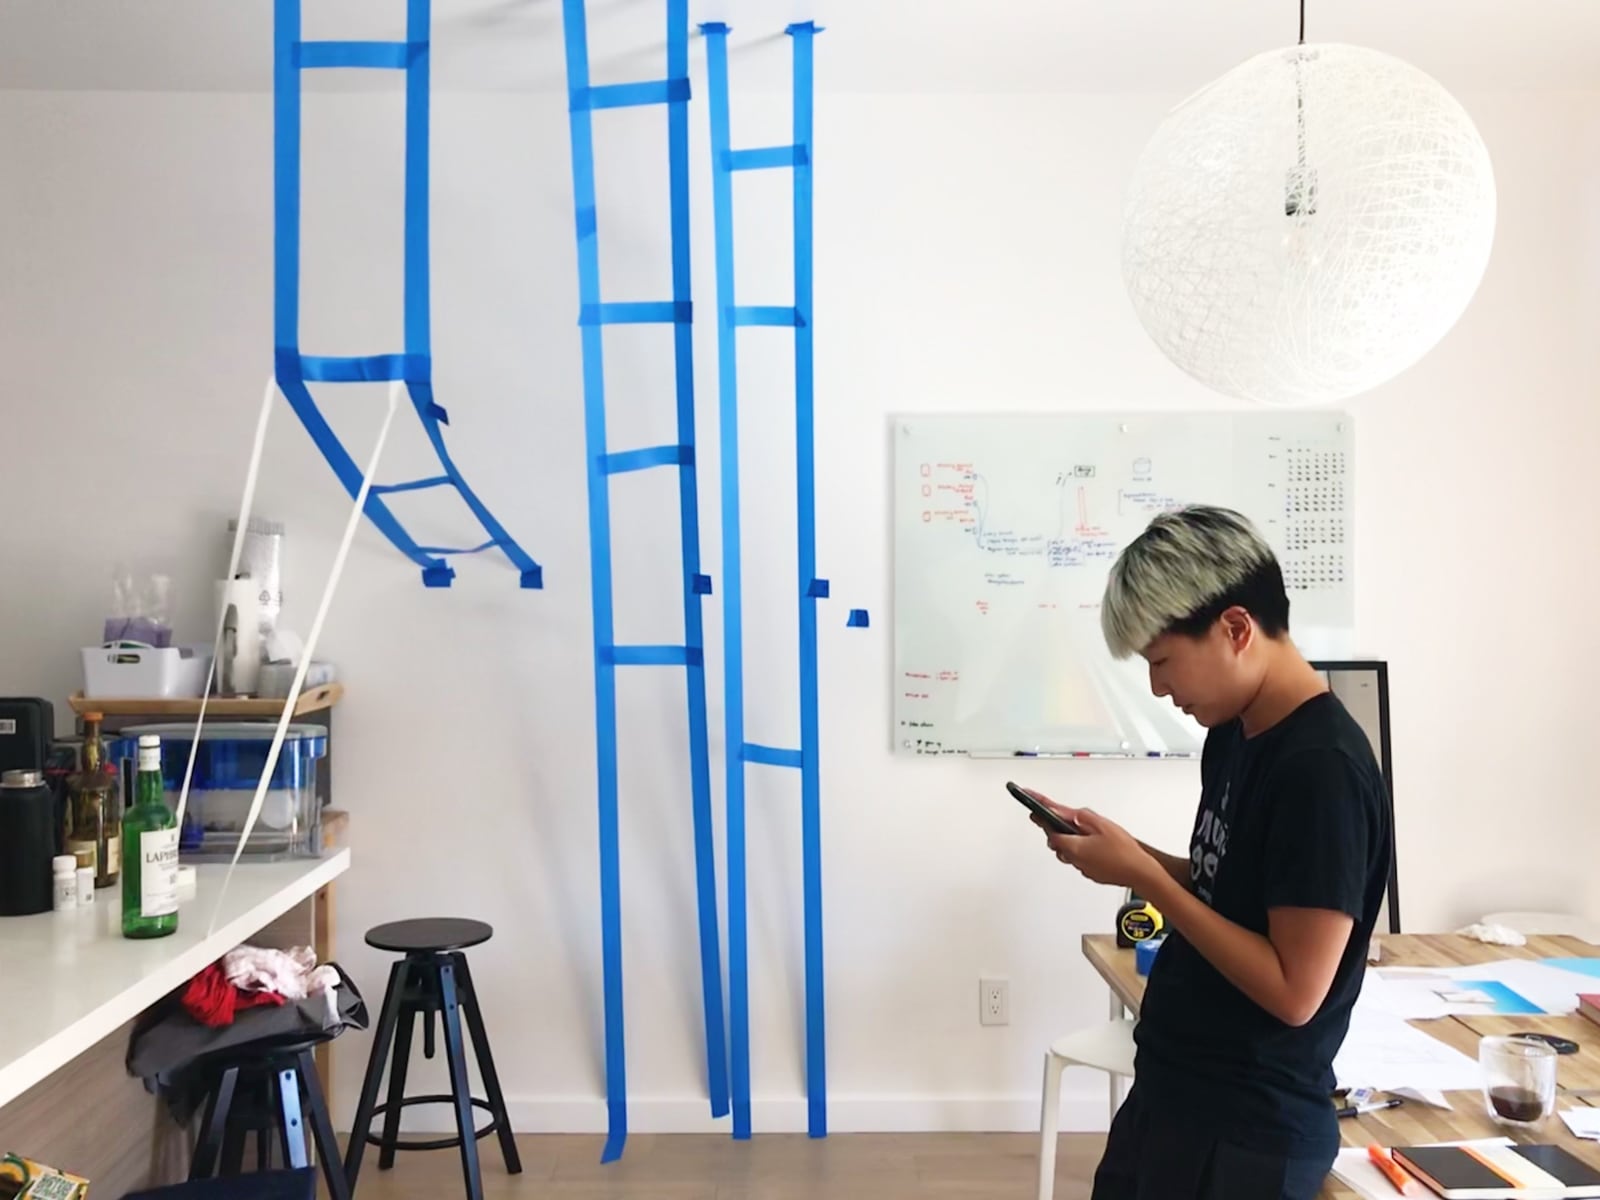
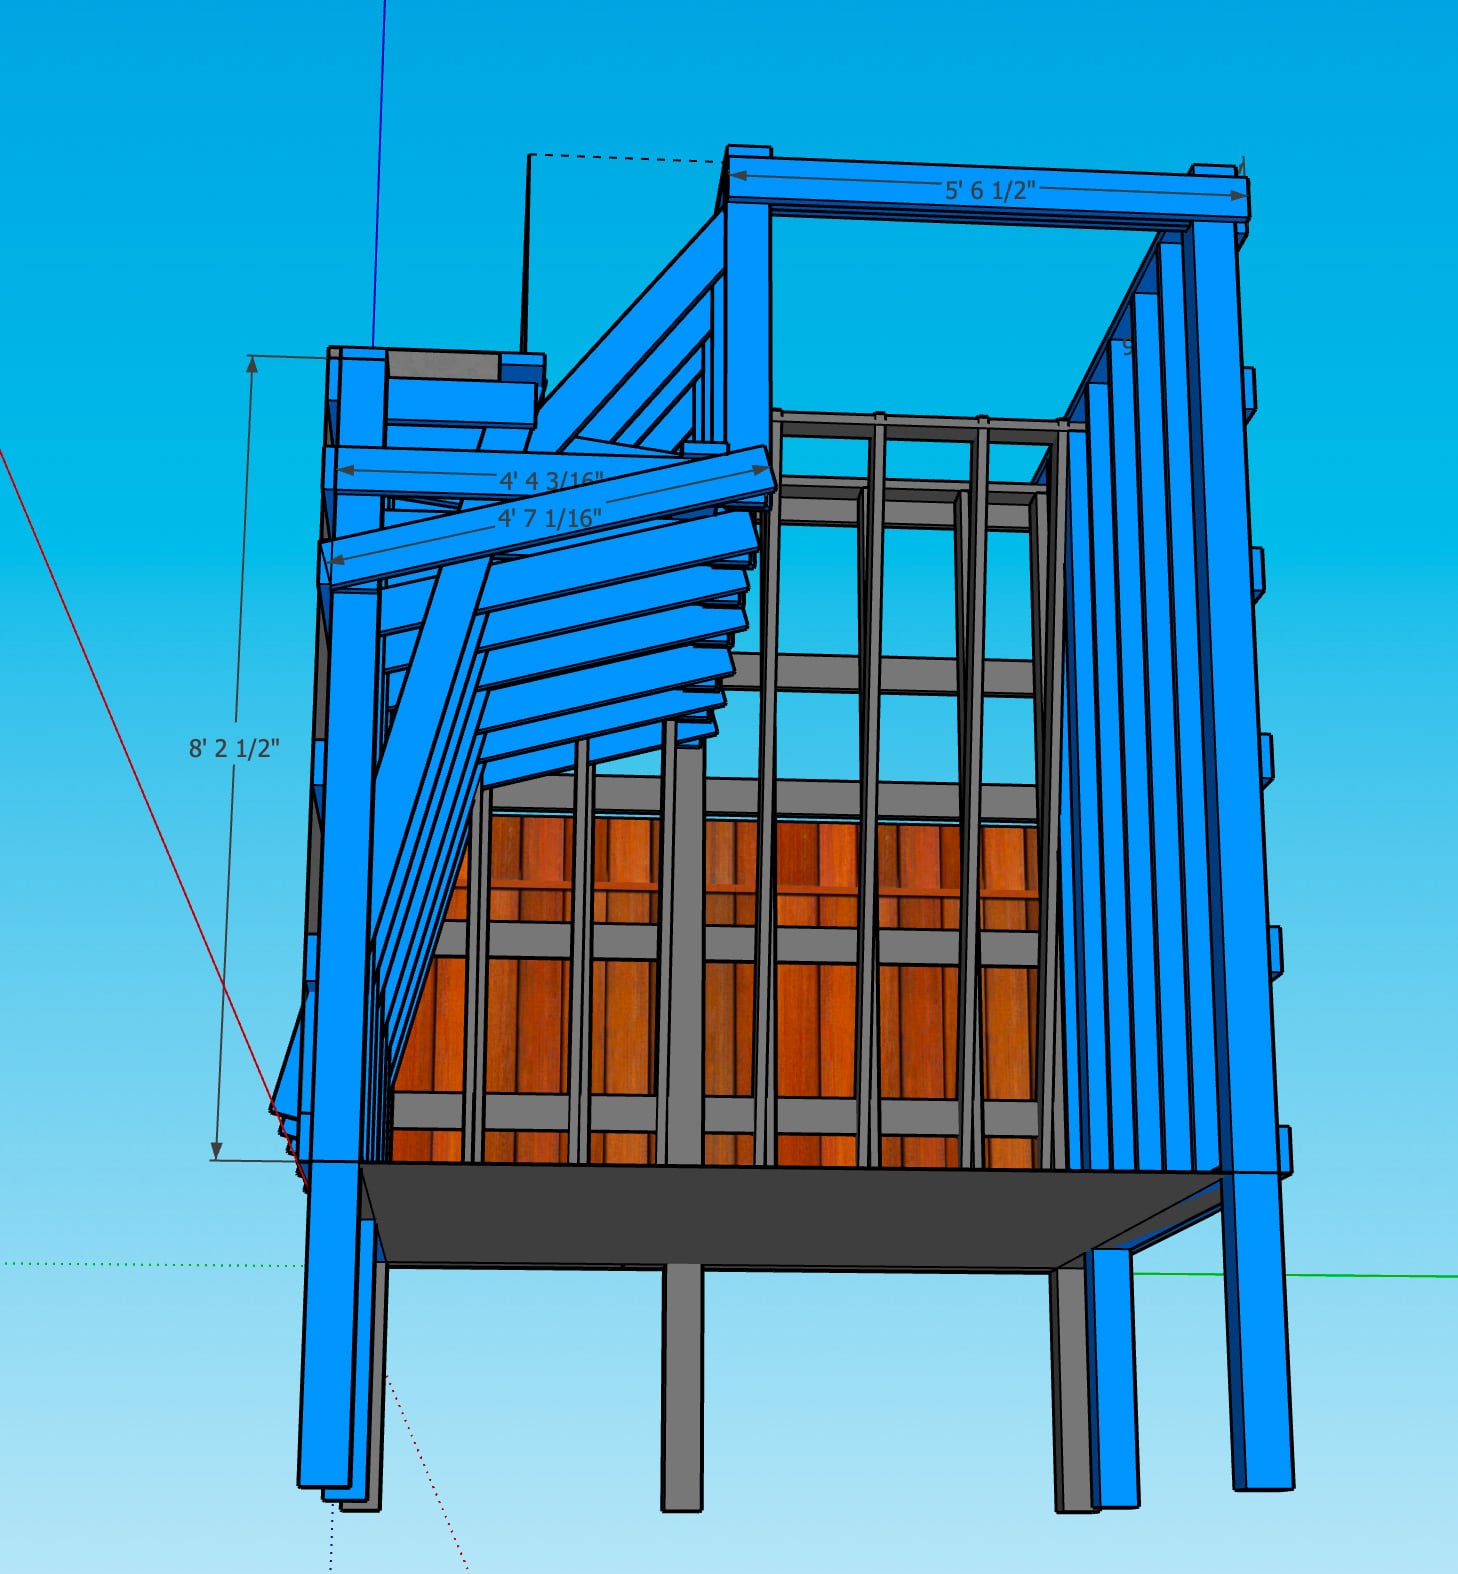
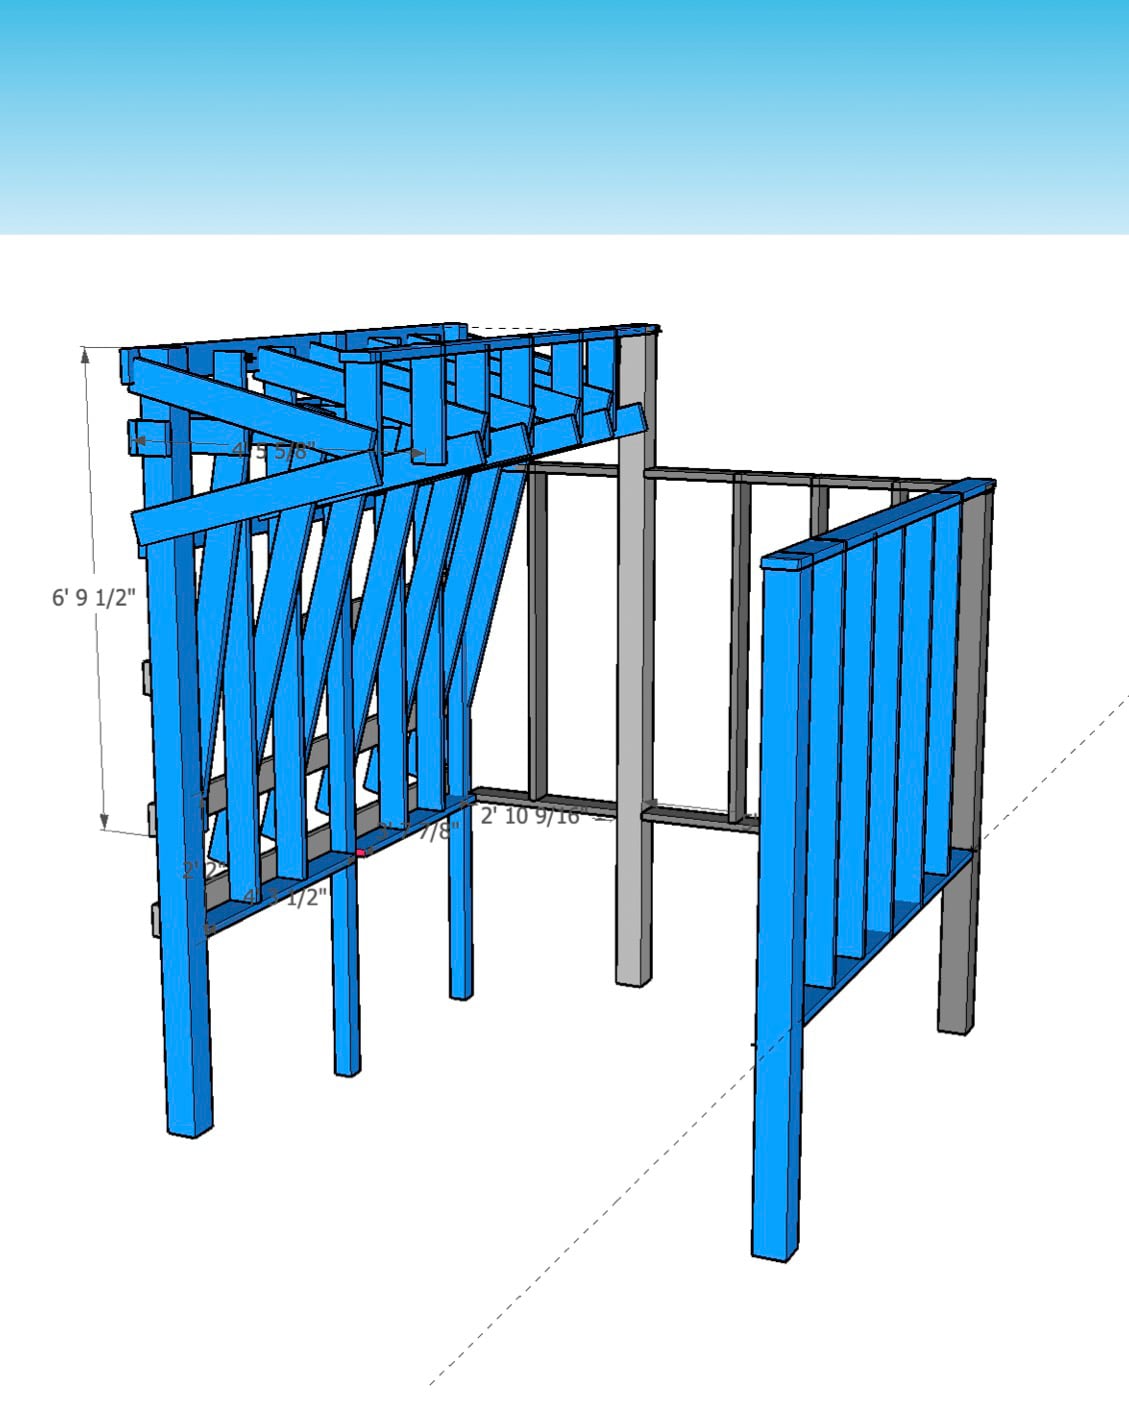
After a few experiments, we decided on a three-sided configuration with one taller (but still short) wall with 10° and 65° overhangs, close to the existing building (marked as WALL·E), and two shorter vertical walls on the other two sides (walls F and G). WALL·E would be about 10’ high, while walls F and G would be about 6’ high.
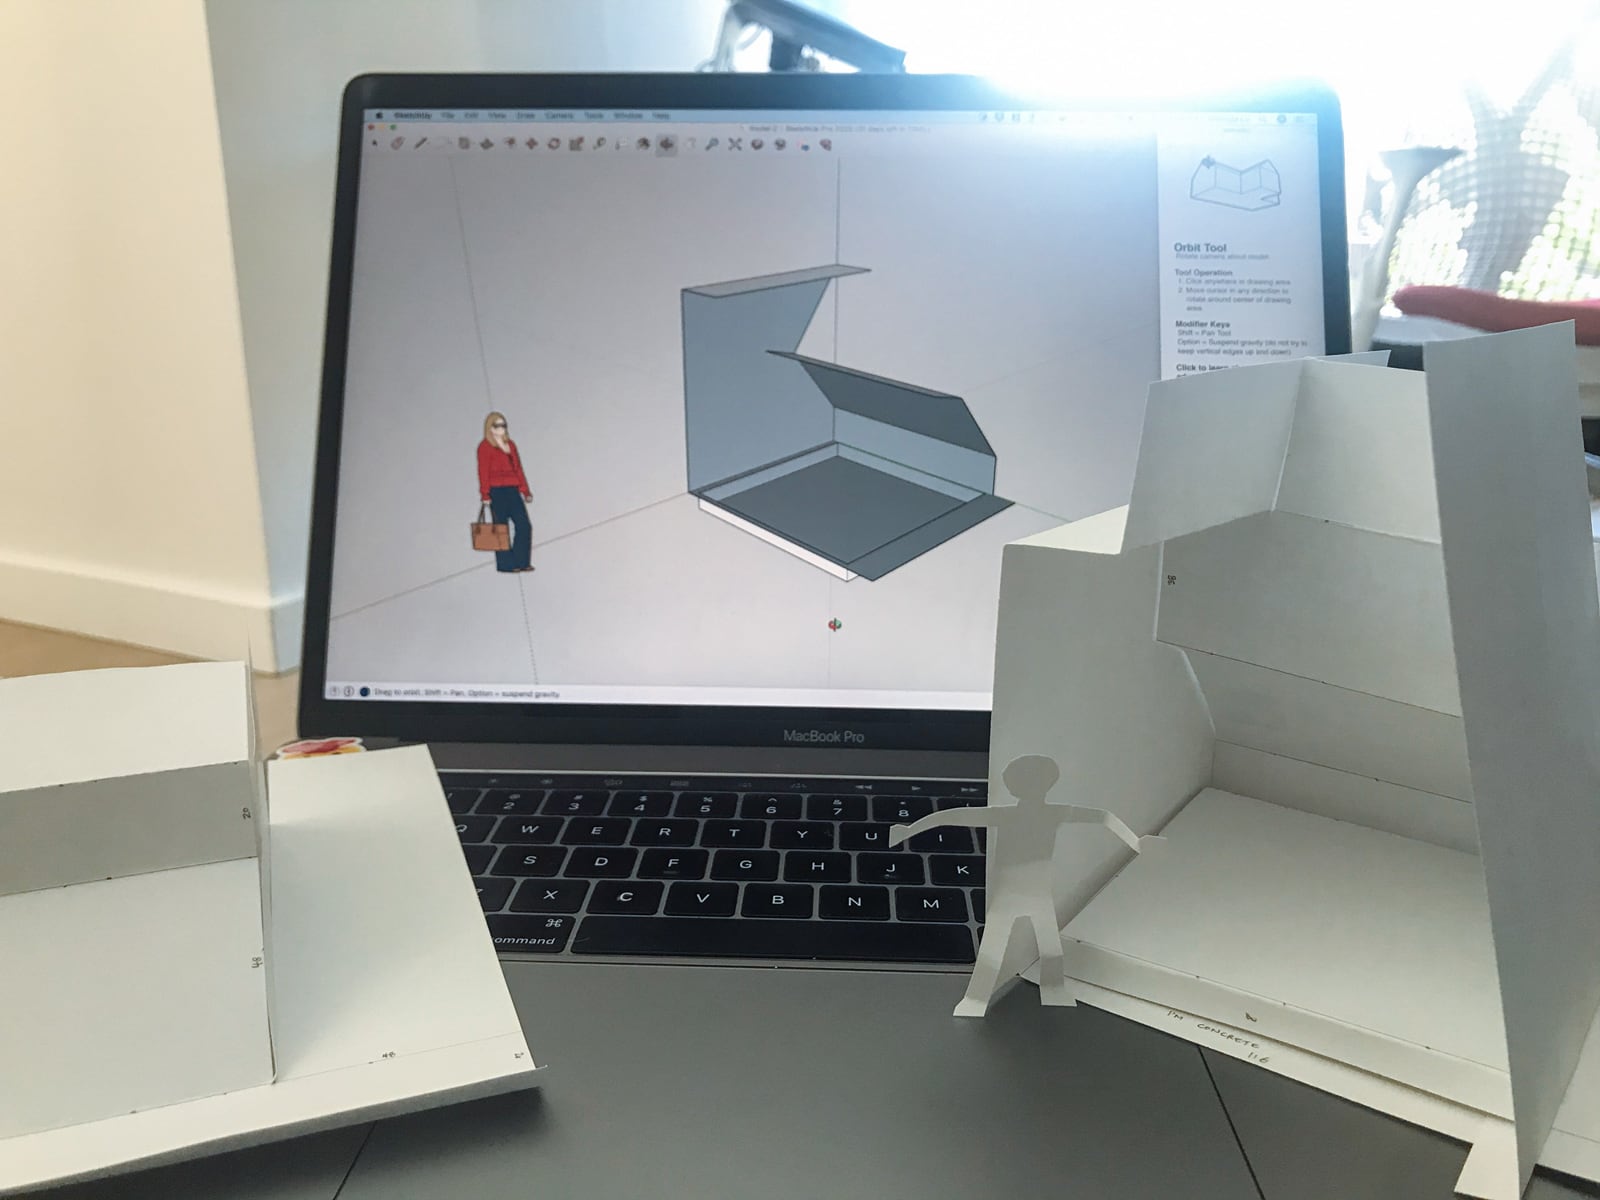
Concept sketches in mixed media: M1 MacBook Air, index cards, painters tape, skelly tape
Design
2. Engineering design
After we had a rough idea of what we wanted to build, it was time to engineer it. This was fun: I got to revisit beam theory, read about/measure West Oakland soil densities, read and reread the Oakland building code; and a bunch of other desk work.
After we finished all the load calculations (love a cantilever), we chose our materials and drew it up in SketchUp:
A few iterations of SketchUp design: two high walls, three tall walls (“Maus Haus”), final-ish layout
Design
3. Getting ready for fabrication
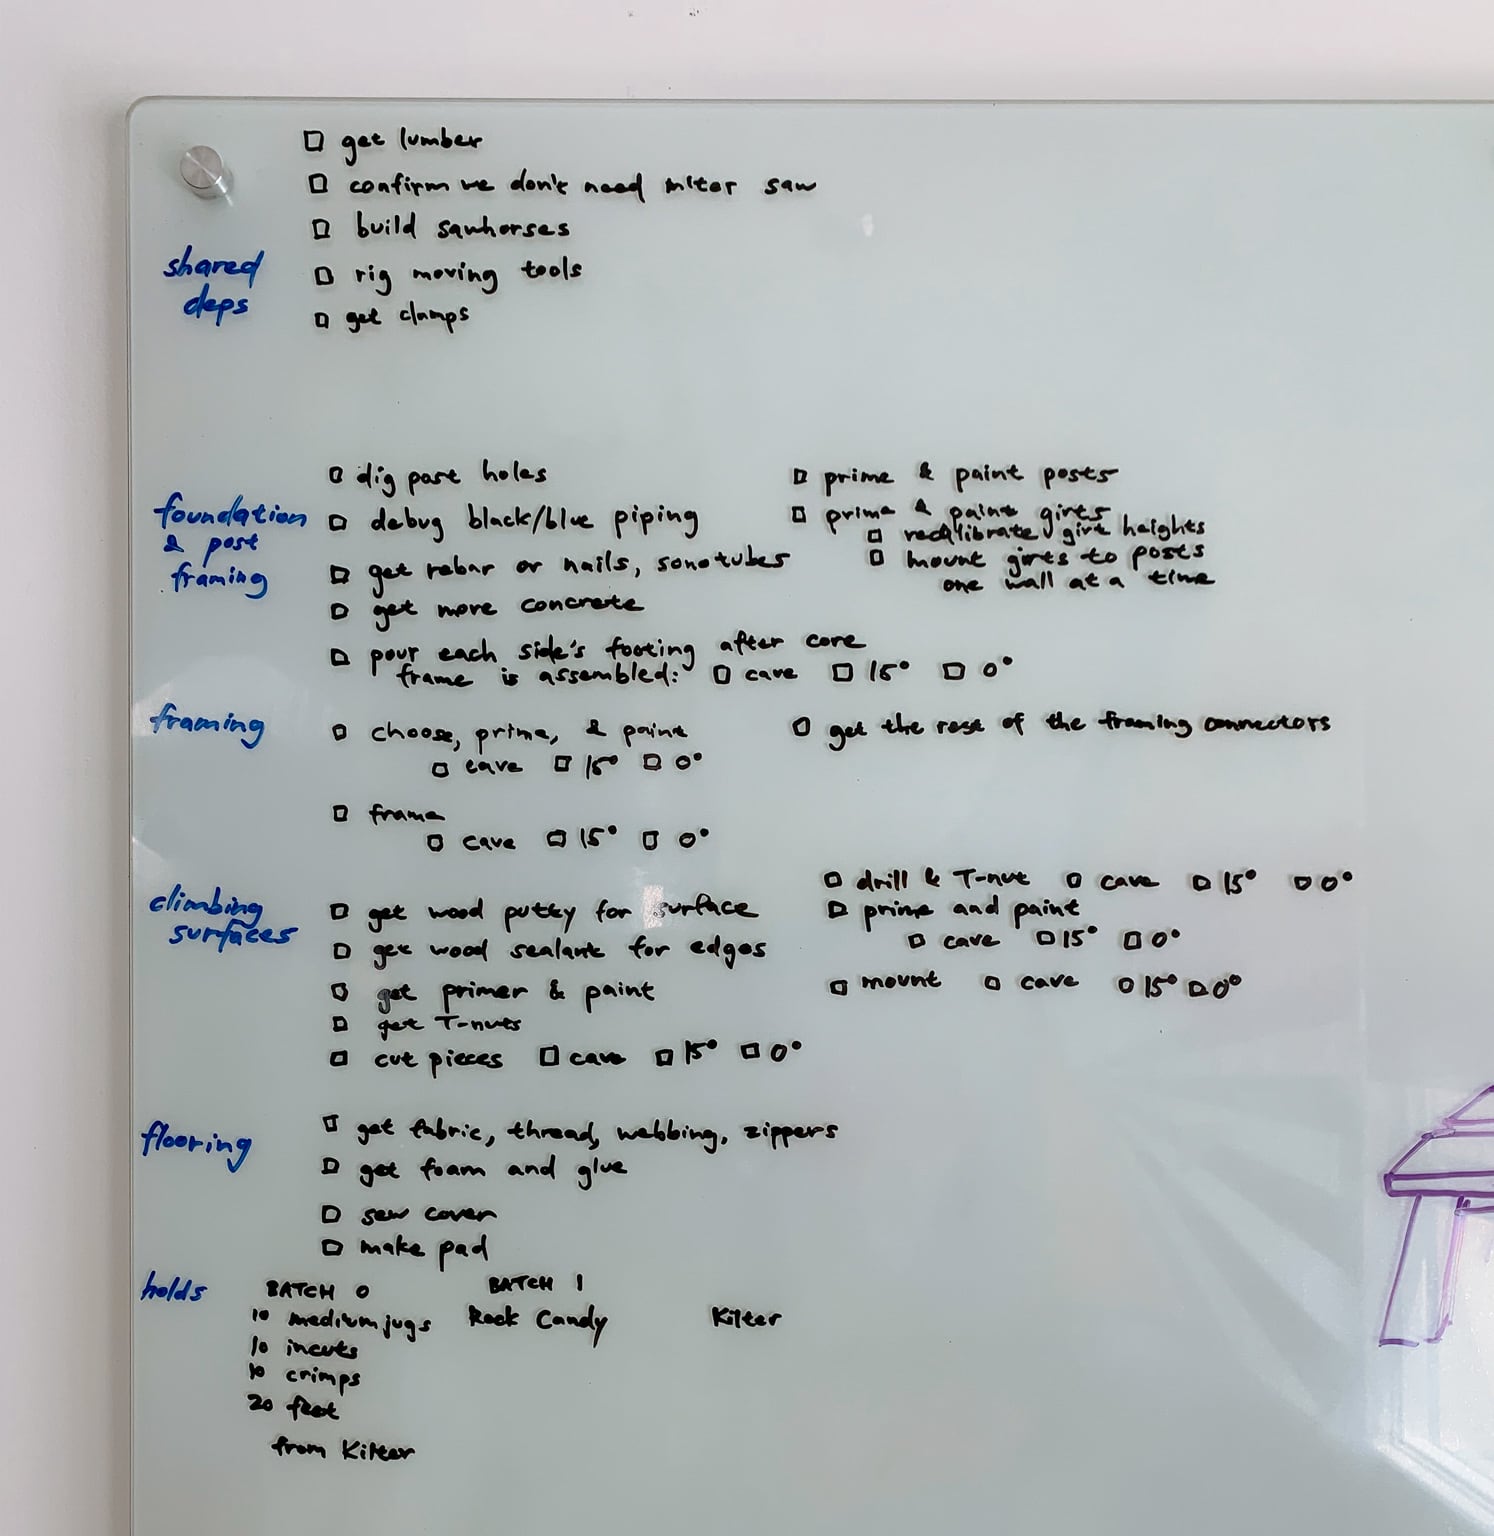
Fabrication seemed straightforward: we just needed to sink the footings, build the structure, then clad it with a climbing surface.
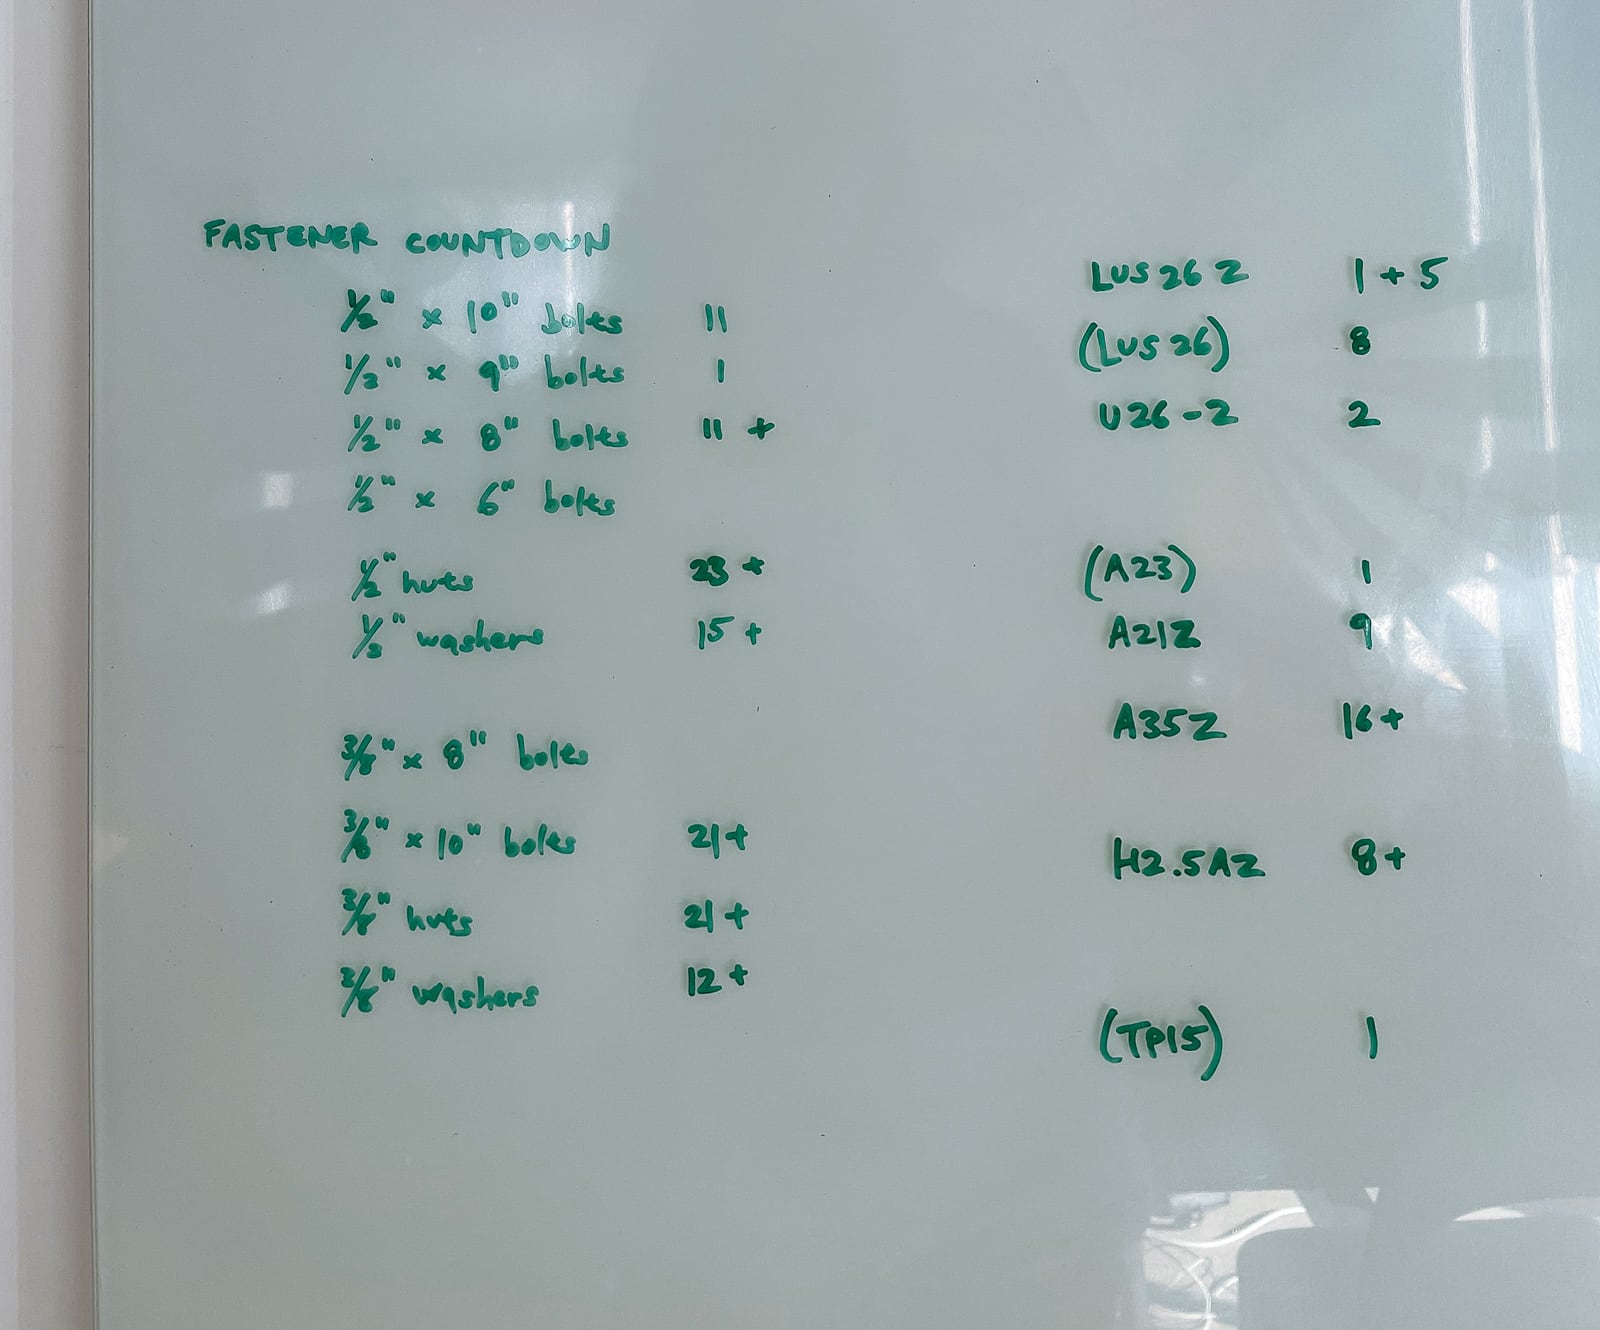
Everything is doable if you write it on the board
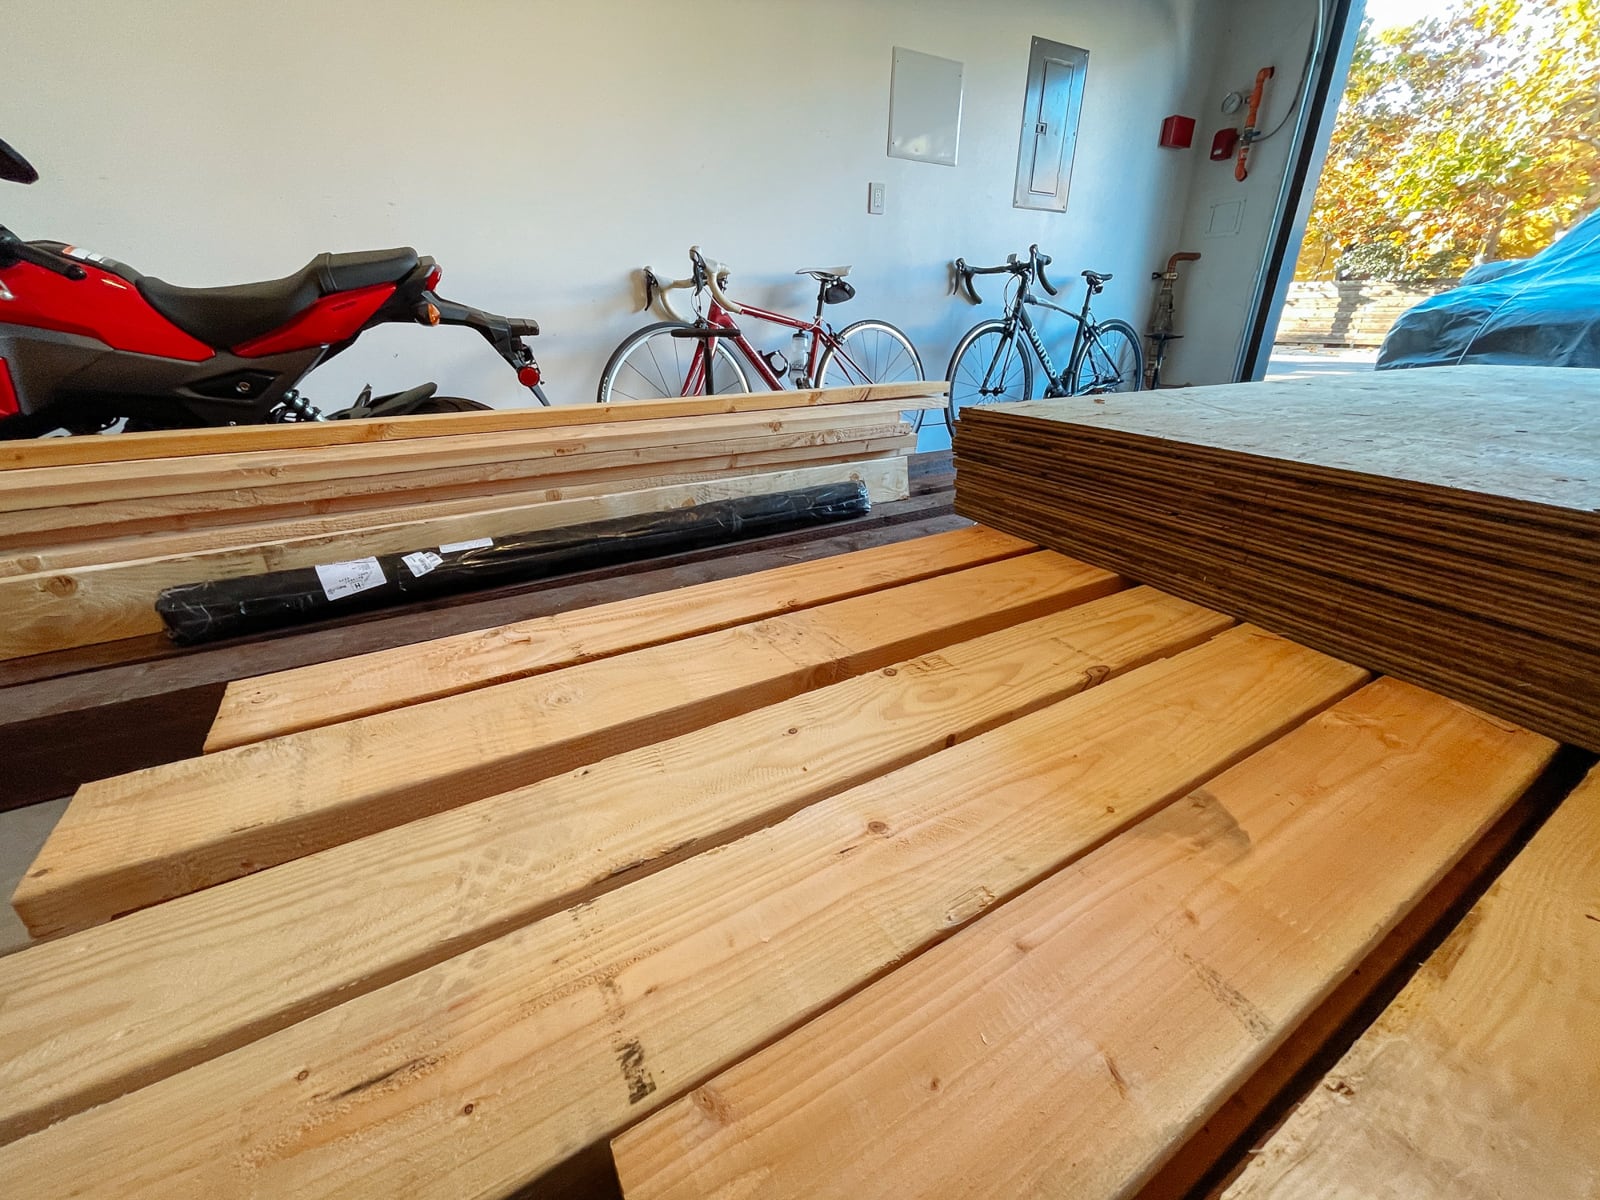
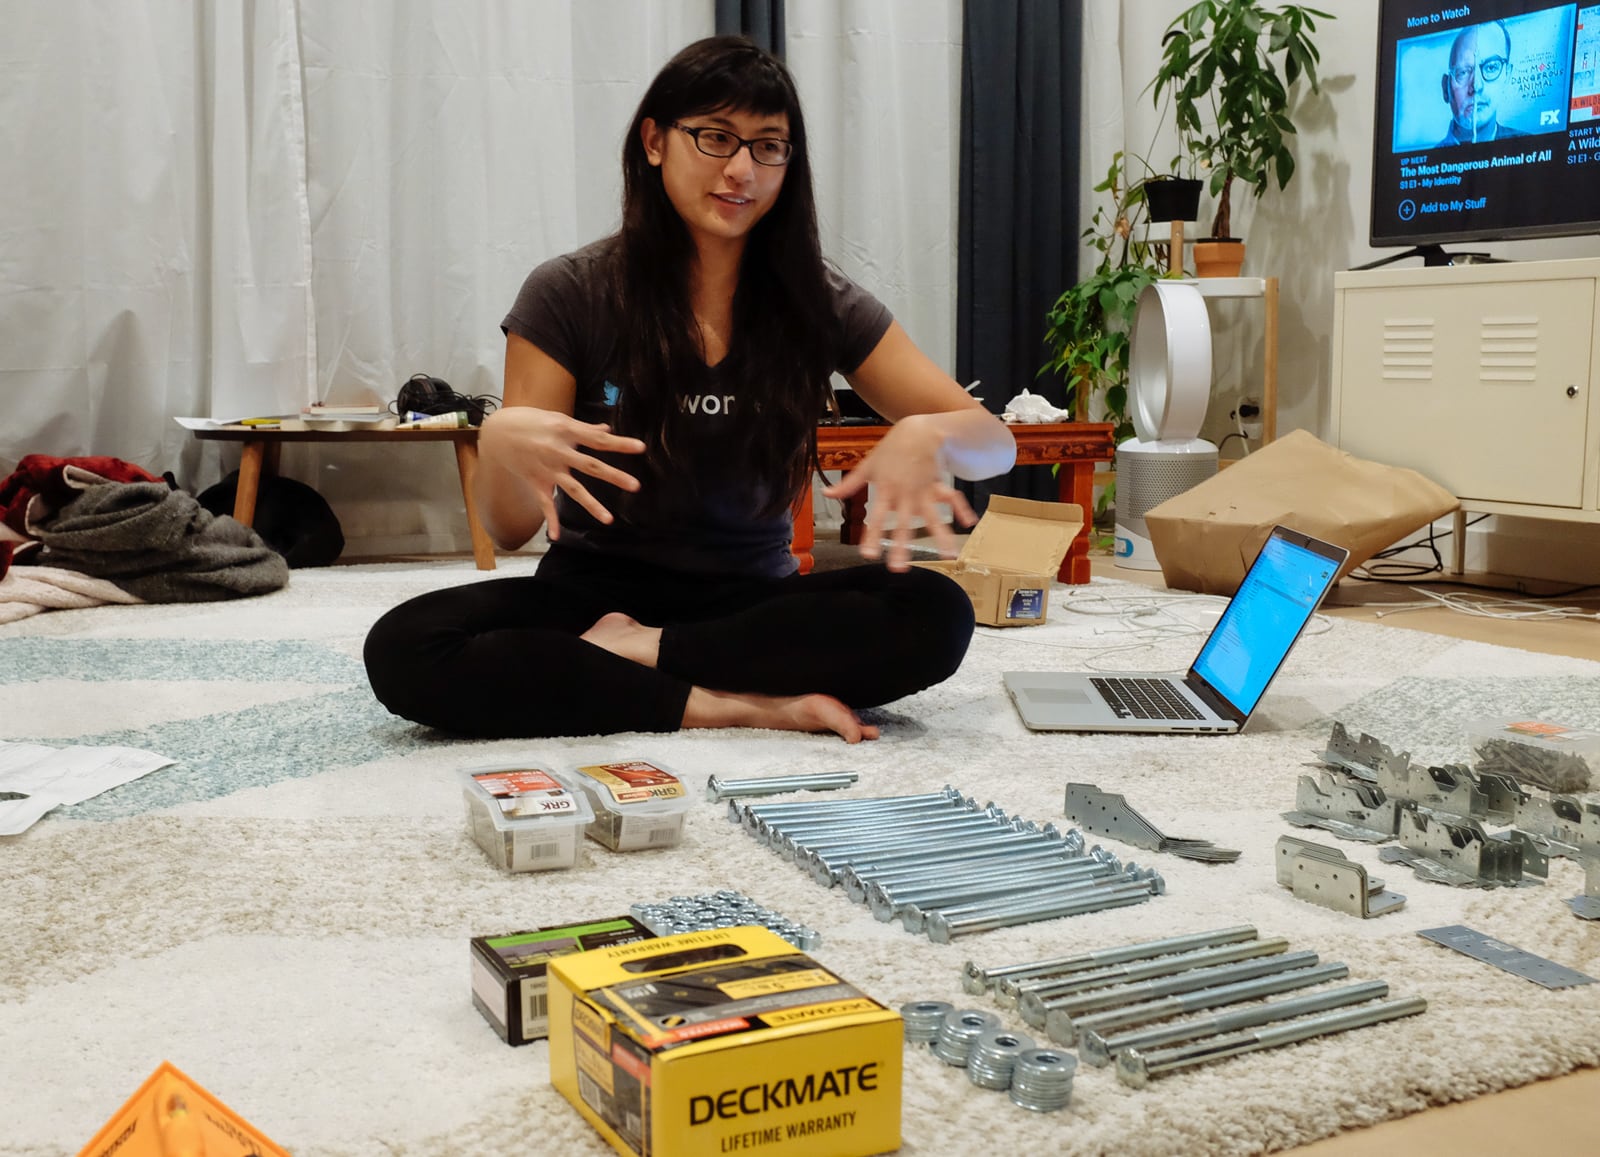
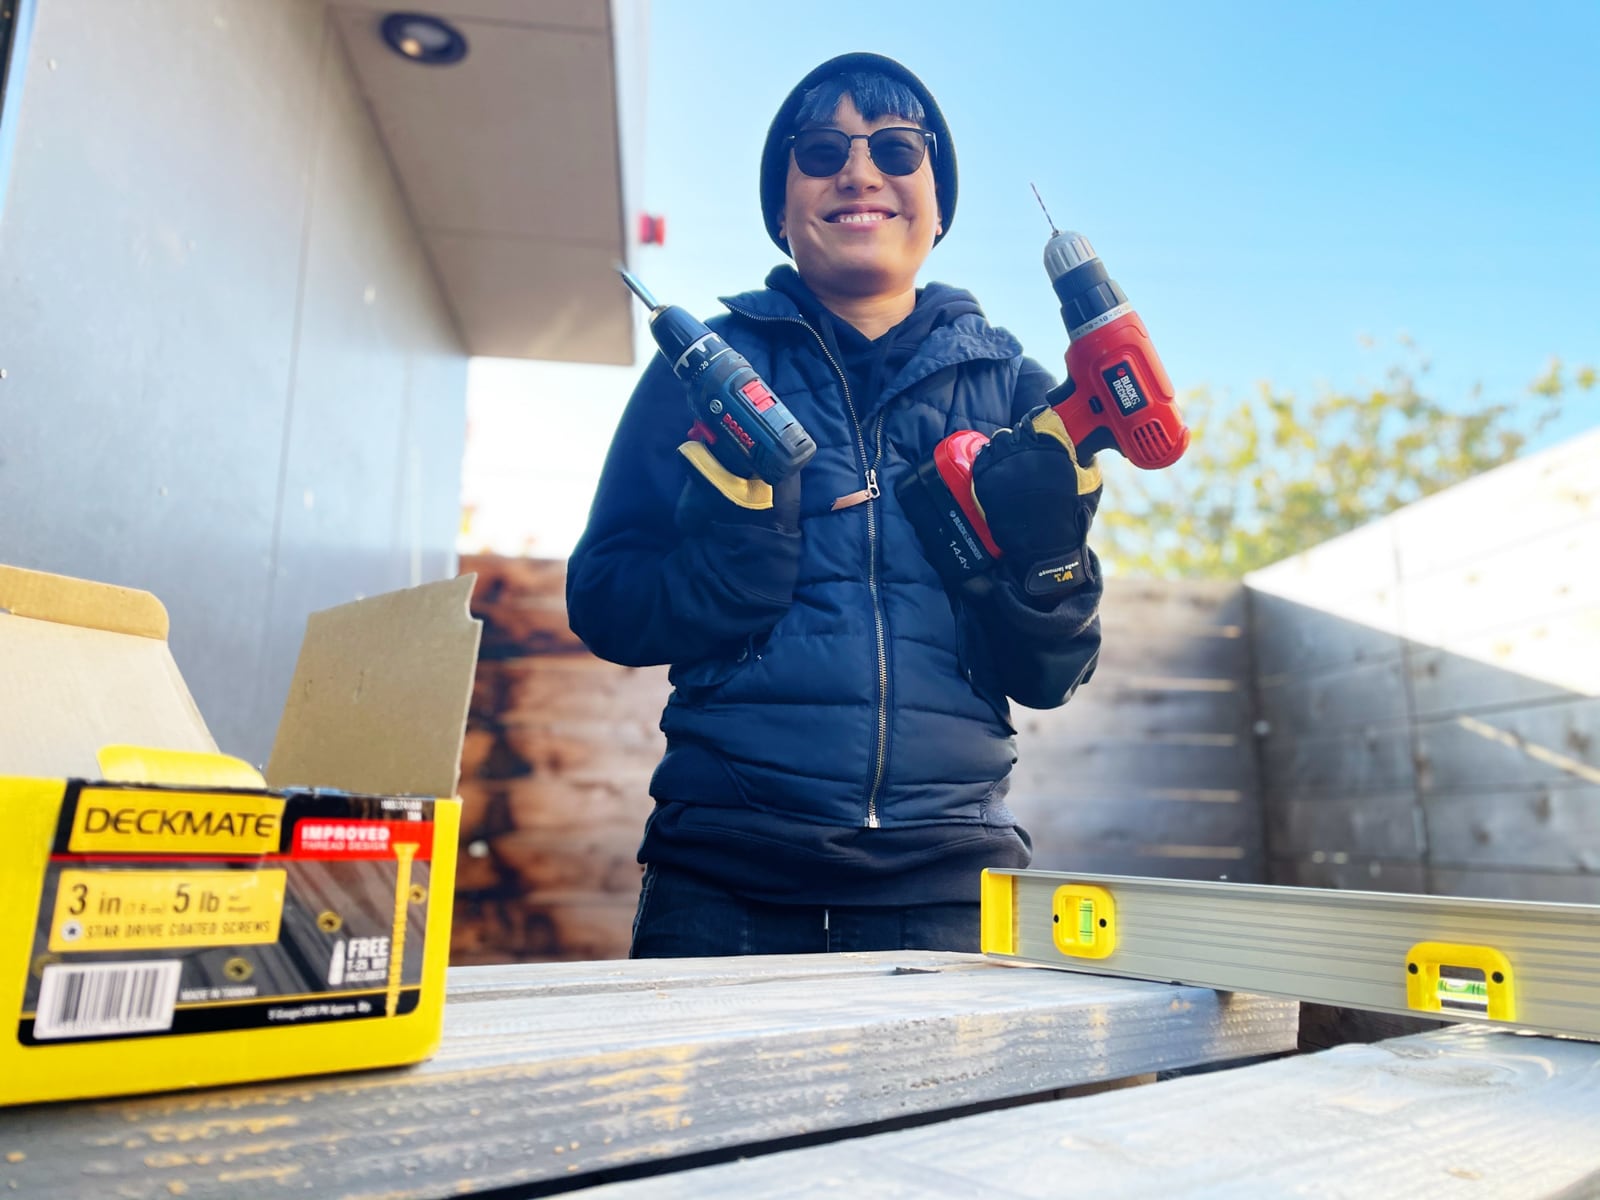
We assembled the materials:
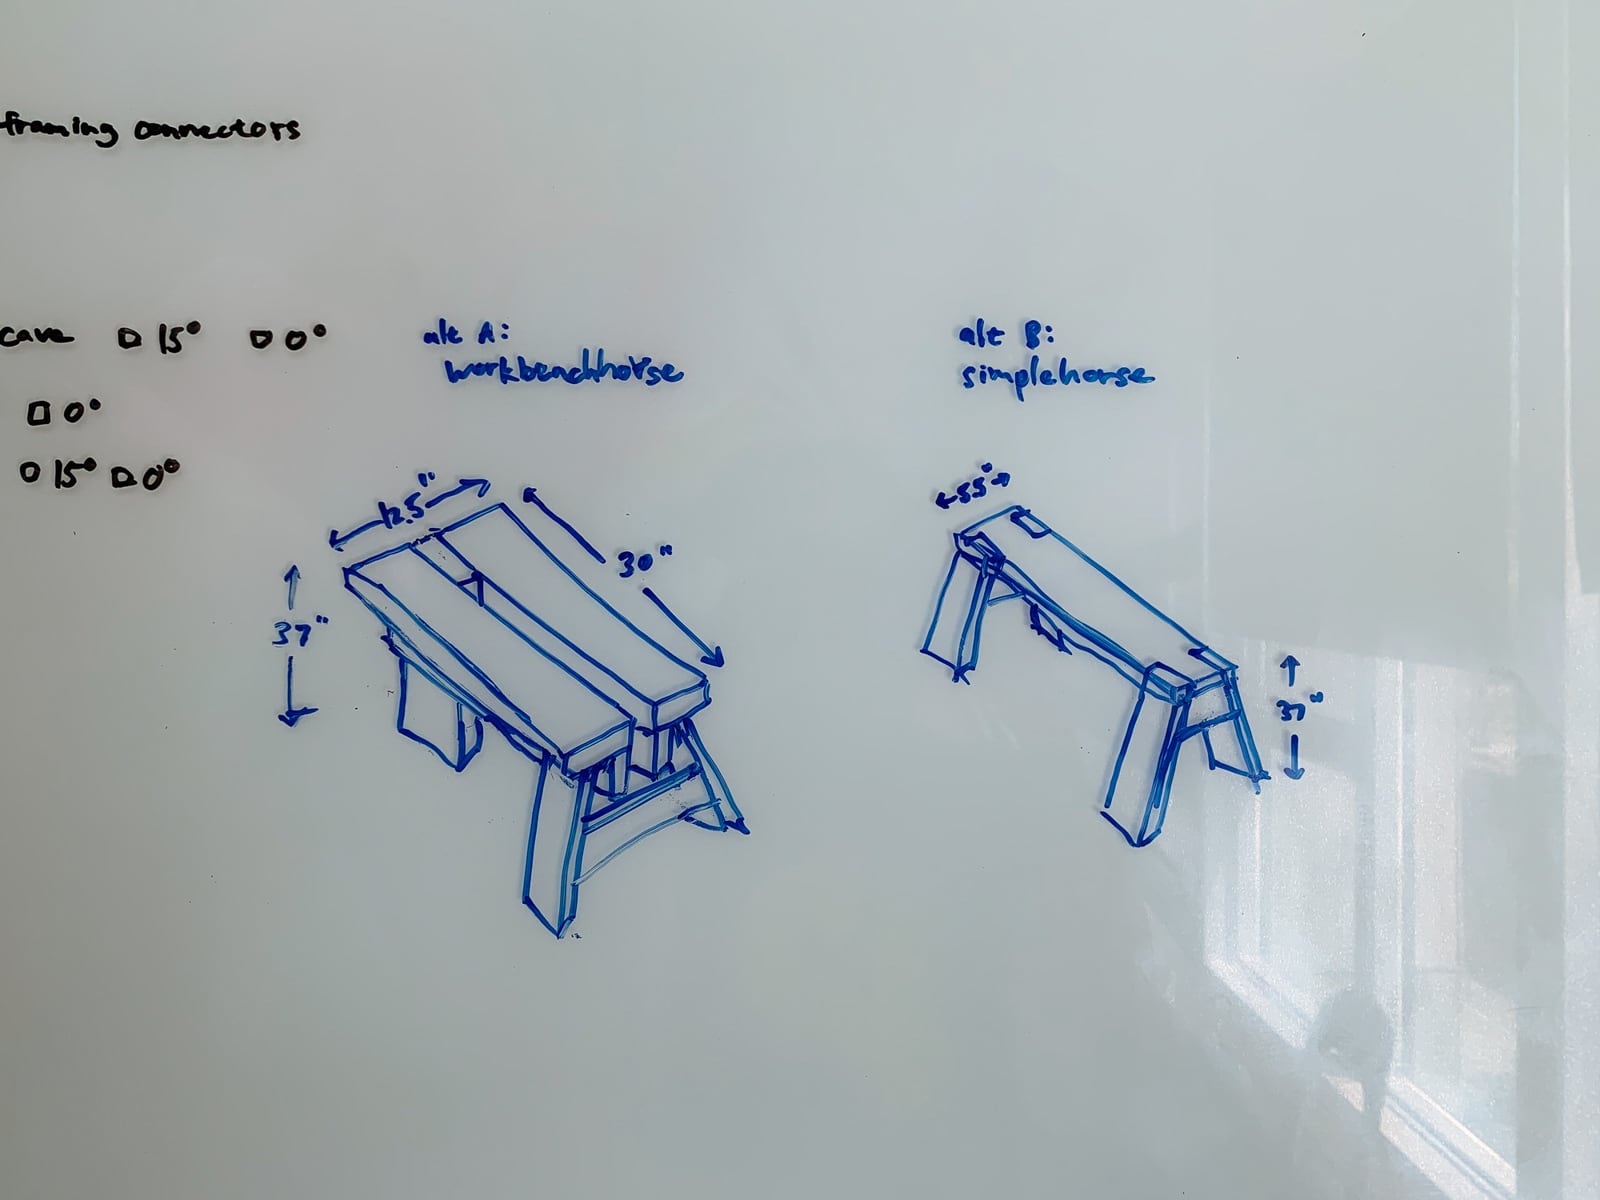
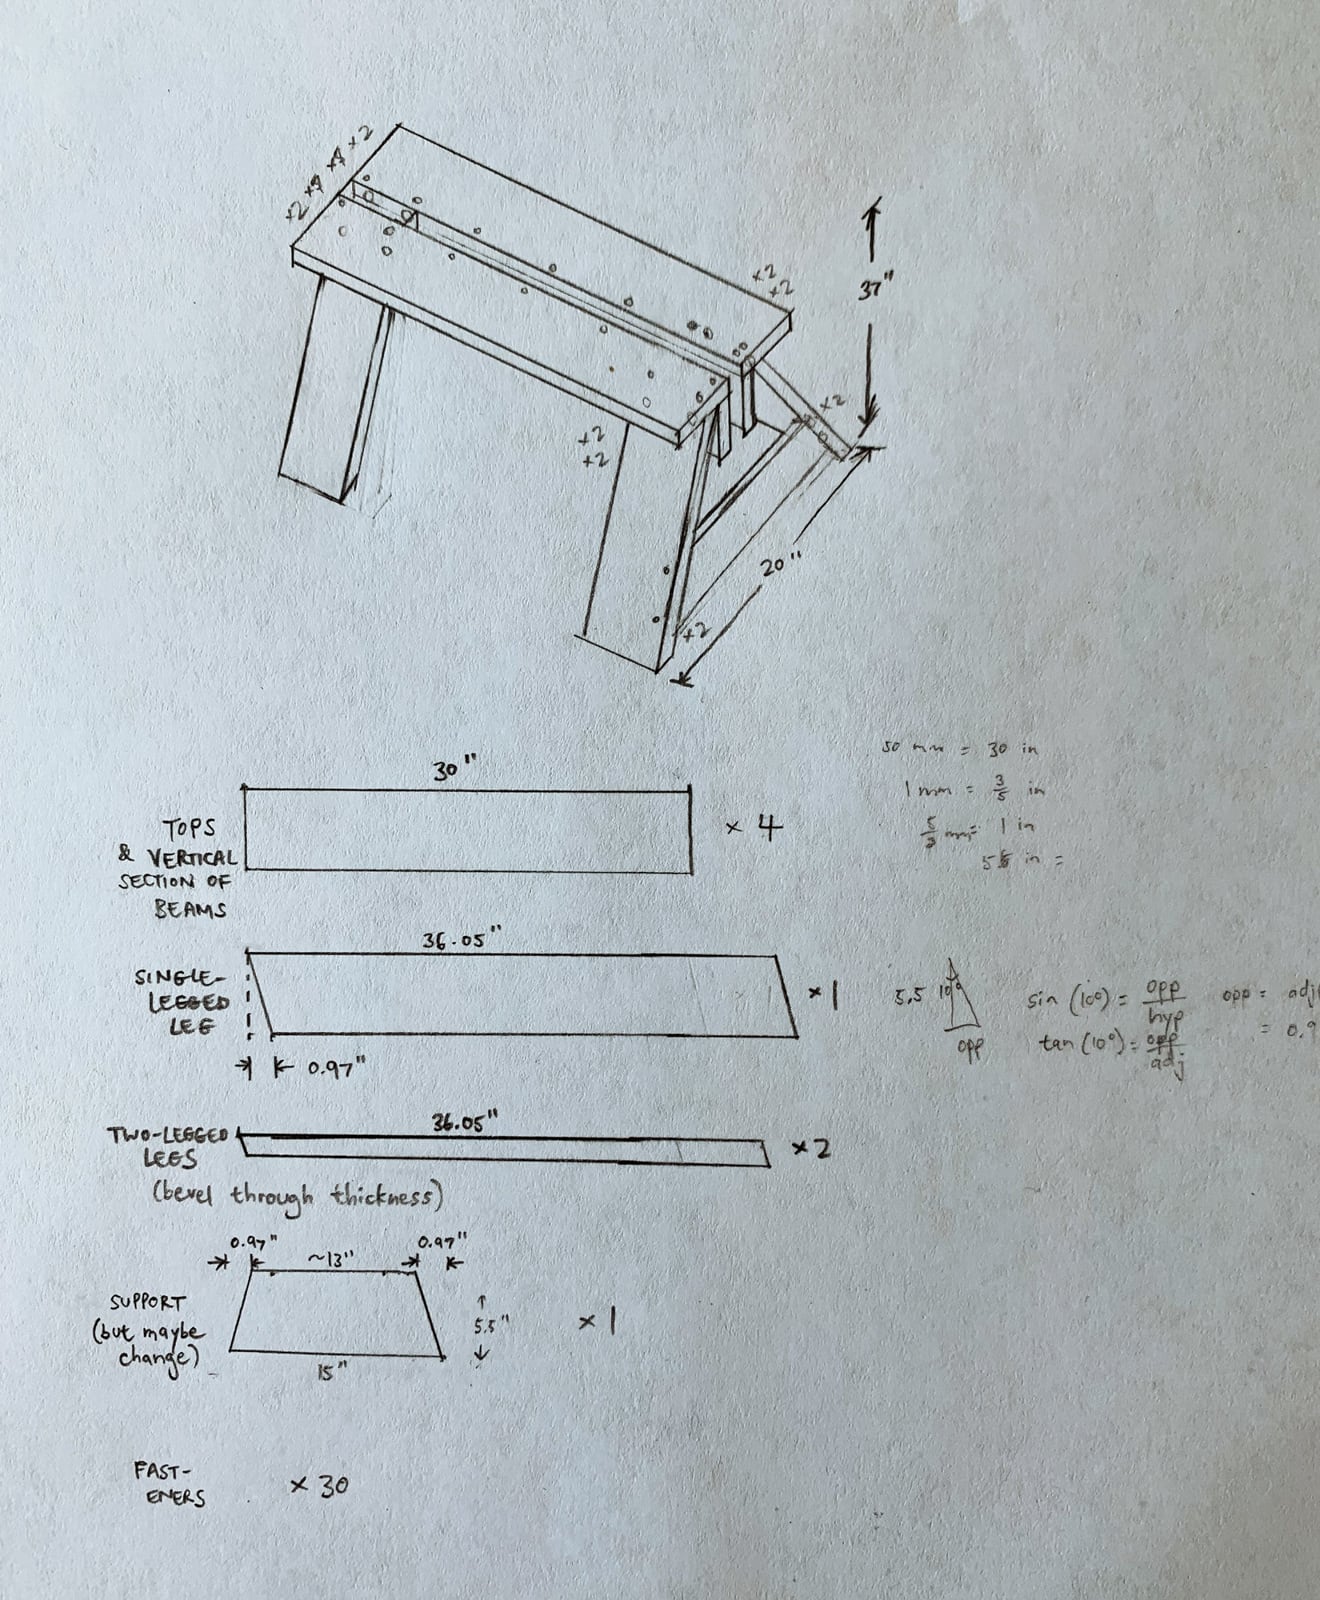
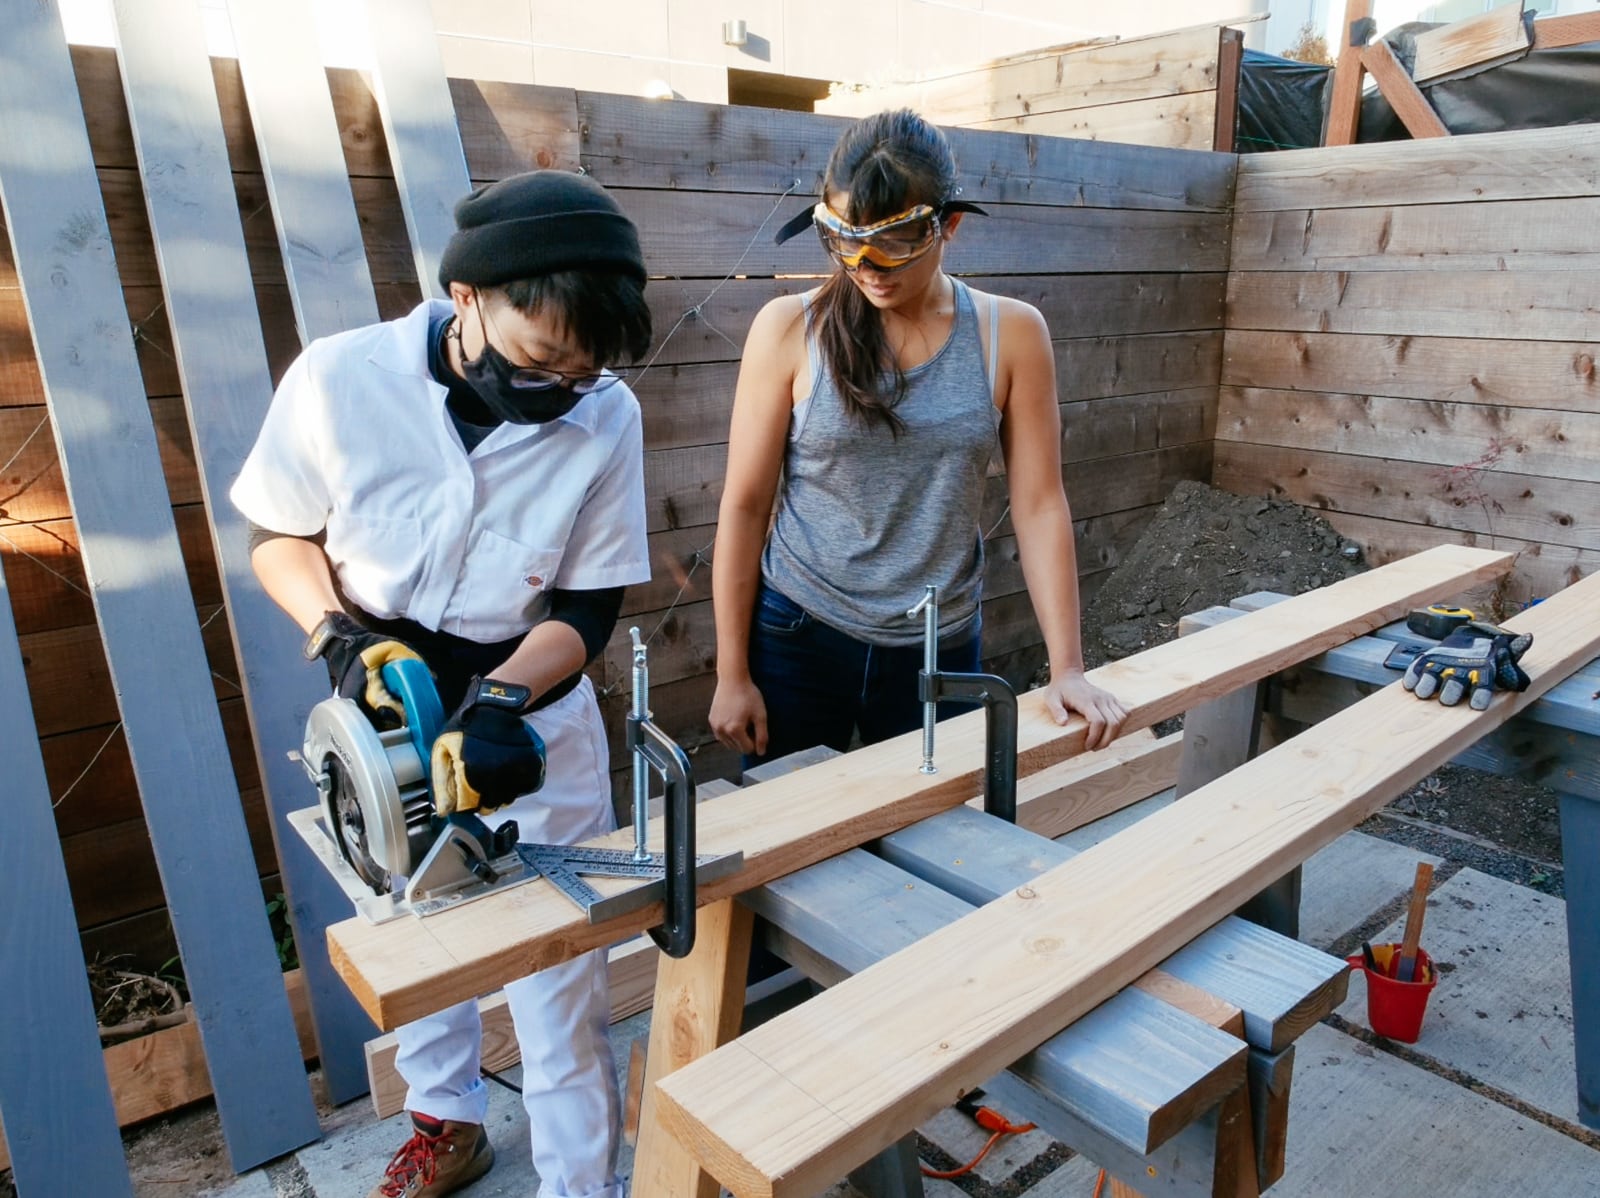
Then warmed up and tested our tools by building some watching V build some sawhorses.
I was the one who thought a three-legged sawhorse idea was clever (it's not)
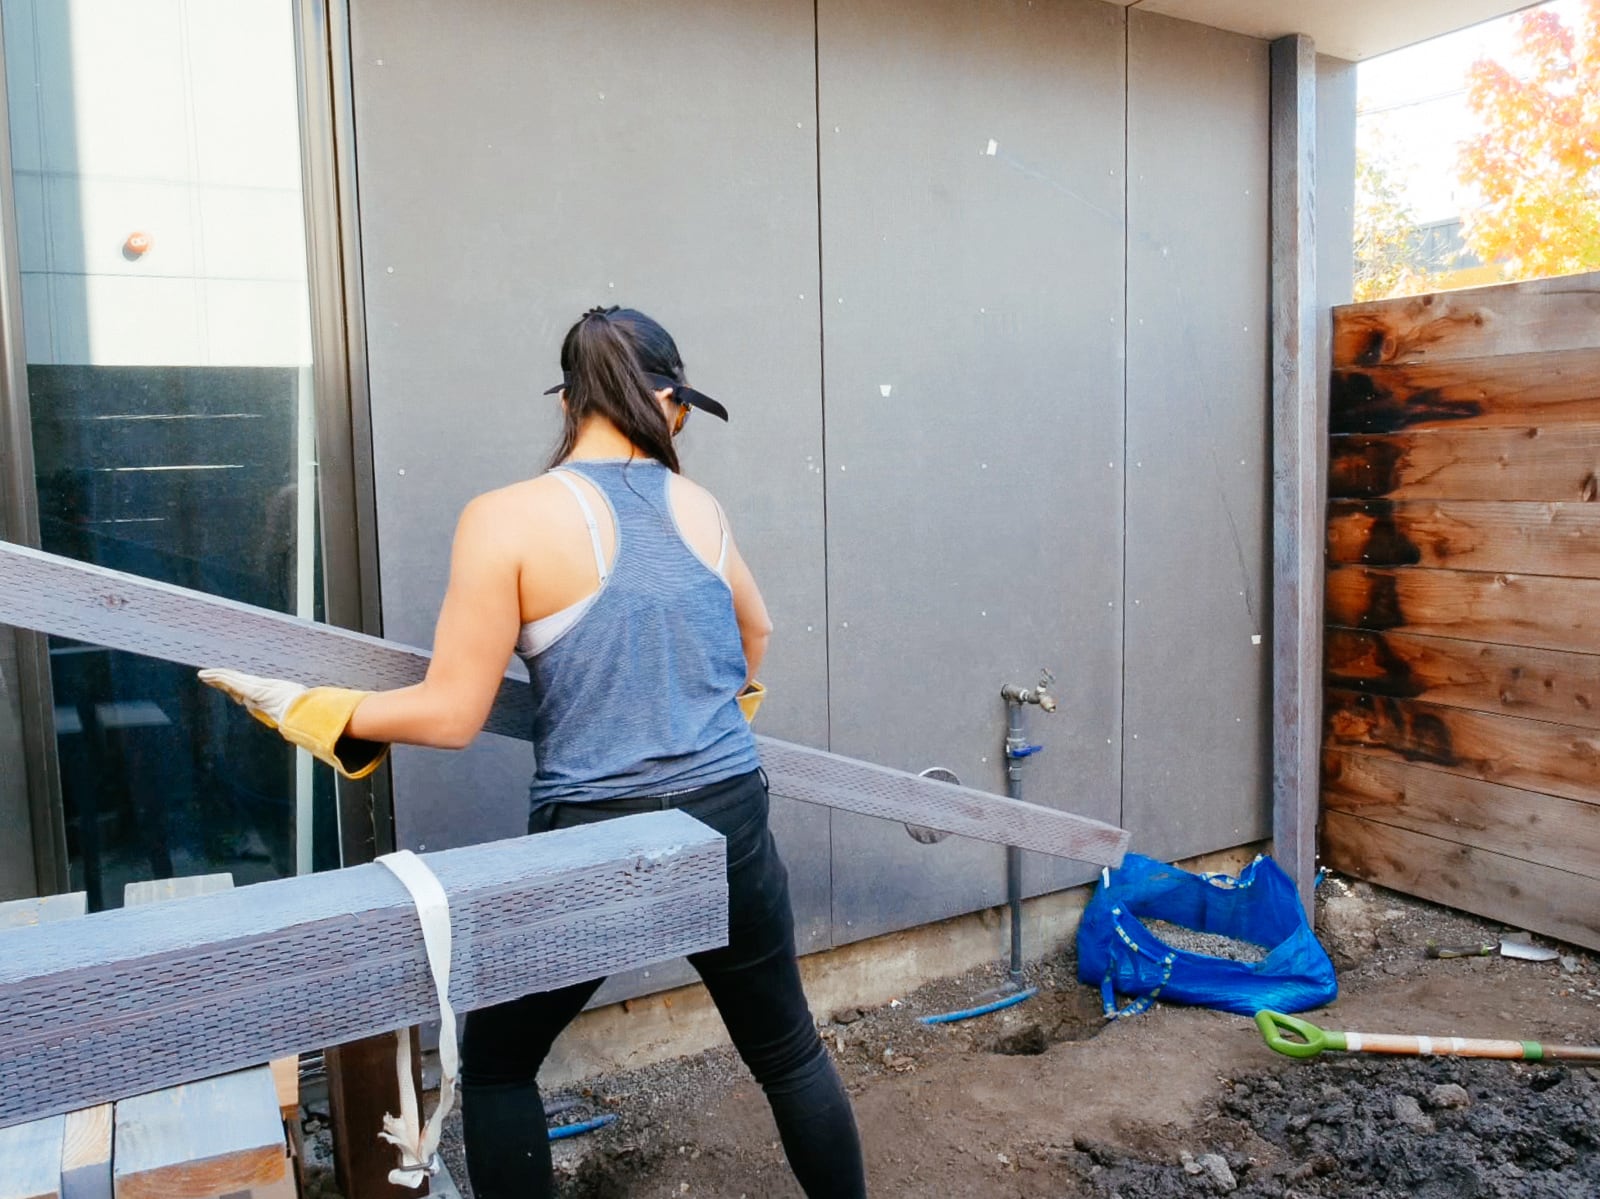
Next we had to kill all the plants that were previously growing in that space (RIP wisteria), and take a few inches of surface soil off to maximize available height.
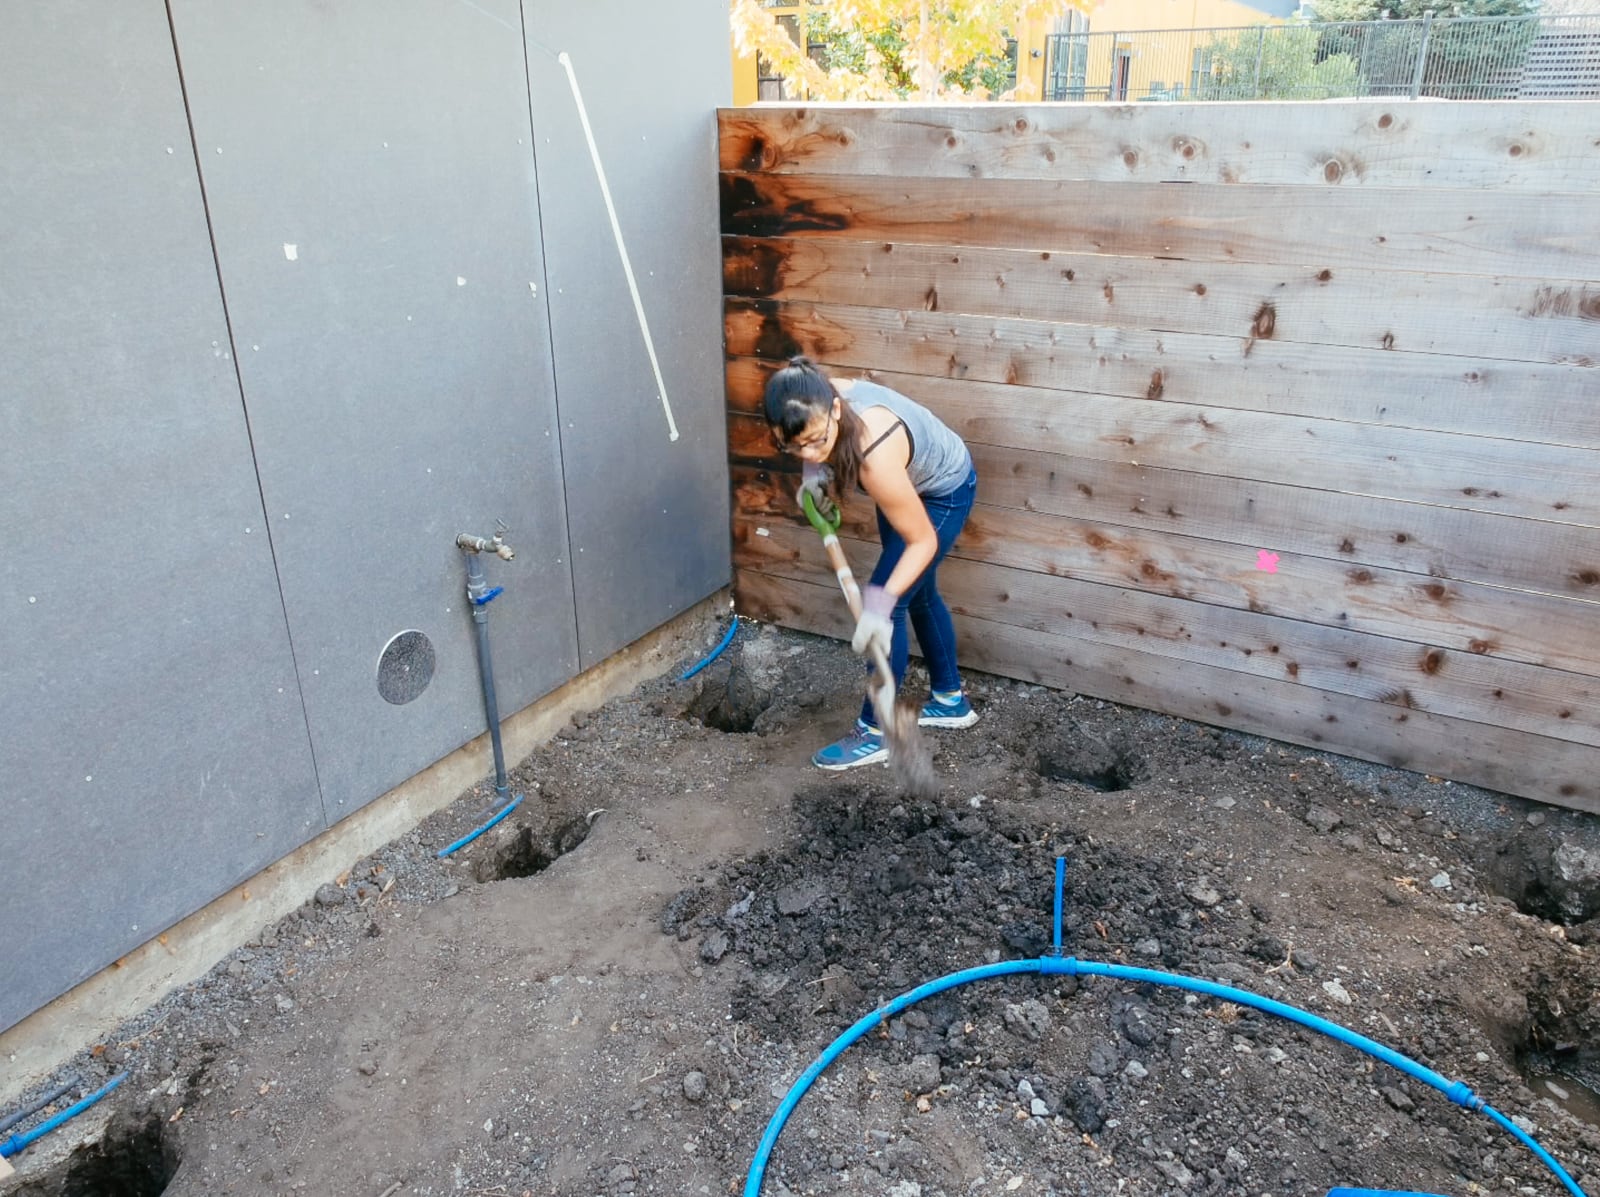
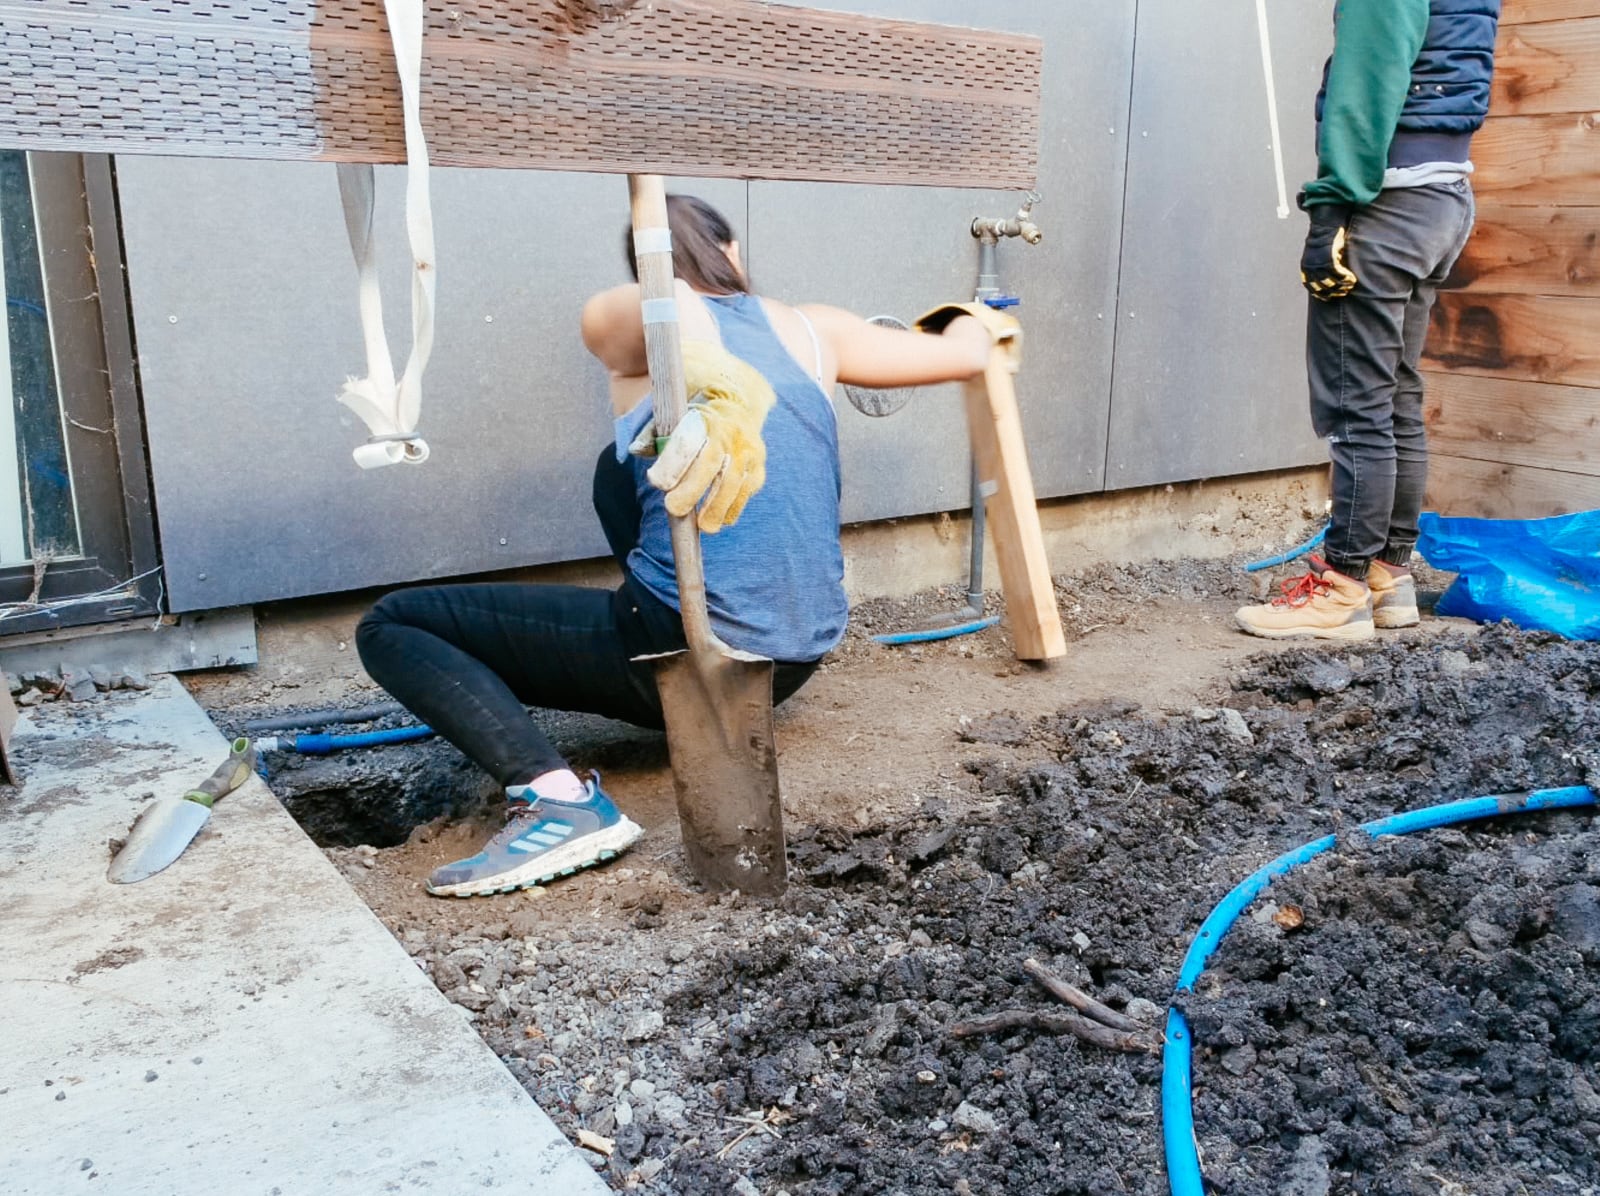
Then, in an excruciatingly tedious process, we dug our post holes 42" deep (note to diggers: please don’t be stubborn, just borrow/rent/buy a post hole digger).
Not pictured: digging hands numb for days
Foundation
5. Setting posts for WALL·E
We used pressure-treated lumber from Economy Lumber Oakland for our posts. For WALL·E proper, we used one 6x6 for the leftmost post, and two 4x4s for the center and right posts.
Because the posts would be holding up about 1,500 lbs of dead weight and potentially several times that in (dynamic) live loads, we needed to make sure the foundation was sound.
To set each one, we filled the bottom 4" of each post hole with gravel, put a few nails in the post to get extra grip for the concrete, poured concrete for the remaining 3+’ to ground level, then smoothed the top of the concrete away from the post to try to direct any rainwater runoff away from the post.
Covid masks also good for concrete dust
Framing
6. Doing the rest of the framing for WALL·E
There were two parts to our framing: horizontal girts to tie the posts together and serve as the main load-bearing structure, and a standard-ish balloon frame to carry load from the climbing surfaces back to the posts. We used pressure-treated 2x6s for the parts of the frame that would touch the ground, and standard 2x6 douglas fir, painted with RUST-OLEUM silver gray, for the rest.
We framed everything using 2x6s at about 16" on-center, with slight deviances depending on hole placement for the climbing-hold holes (more on that in the next post).
One wall's worth of girts; pressure-treated one at left
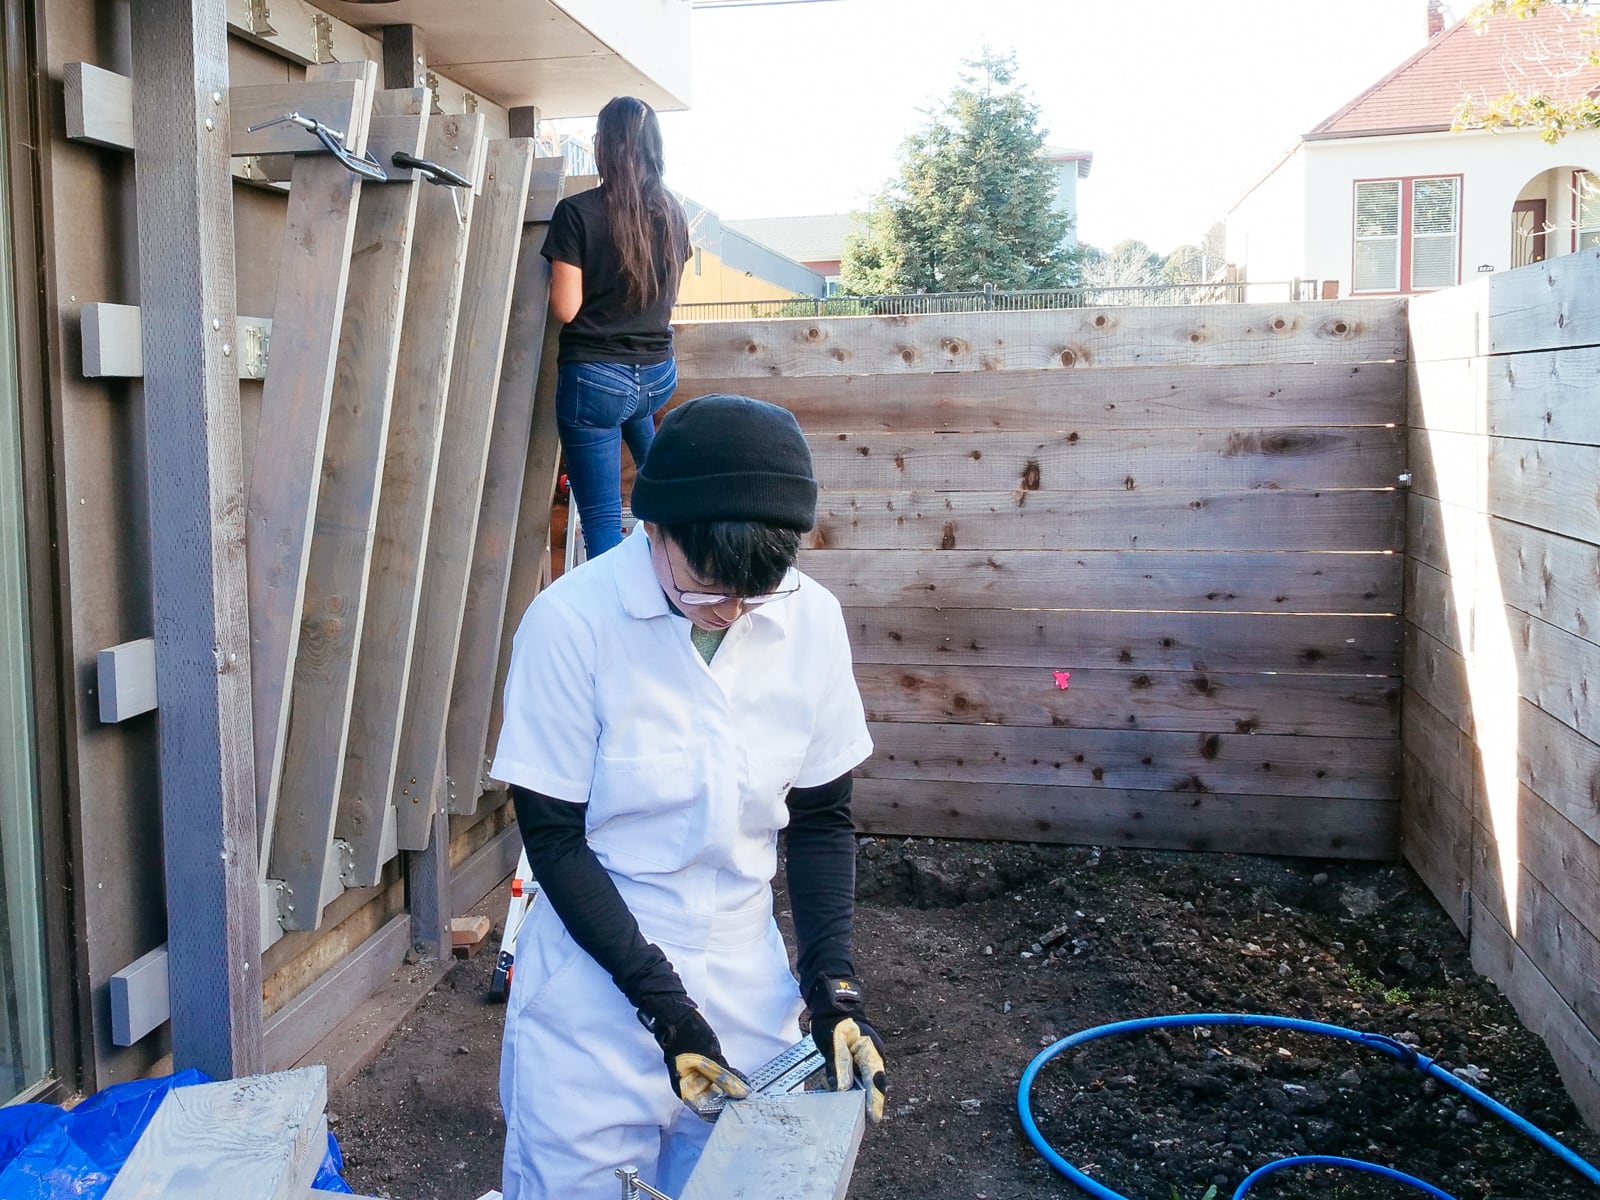
First, we put up WALL·E’s horizontal girts. We attached these to the posts with 1/2" and 3/8" carriage bolts because the girts would be part of the critical load path from our climbers to the ground, and these would be critical joints. (This meant that we got to use these absurdly-longdrill bits.)
Mounting WALL·E girts 2, 4, 5, and 6
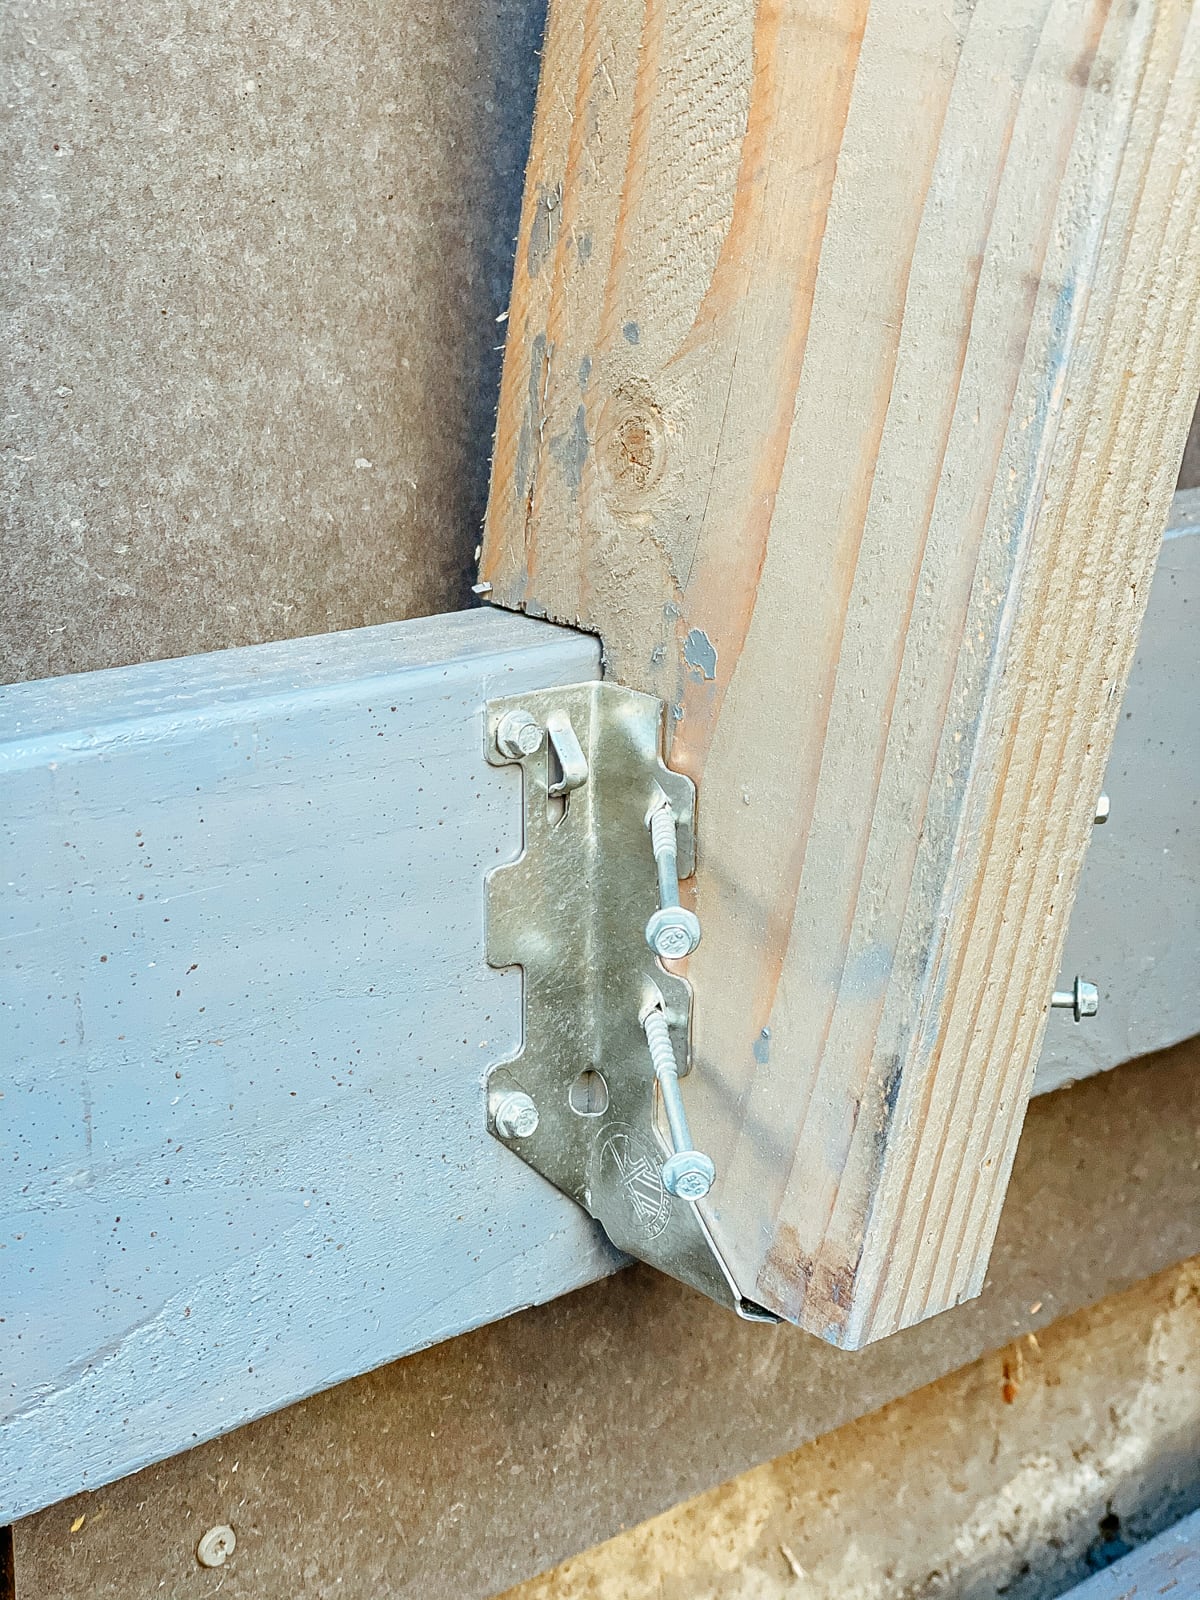
For the 10° and 65° overhanging walls, we used joist hangers to carry load from the framing members to the post/girt structure. Joist hangers are the fasteners used to attach floor/ceiling boards to the vertical frames in a standard wood-framed house. In our climbing cube, the overhanging walls carry load more like a ceiling/floor than like a vertical wall in a house.
WALL·E 10° and 65° sections: joist hanger layout and fasteners used
The first section of wall framing we put up was the 10° section. We cut, painted, and beveled the wood stringers, then attached them to the girts, posts, and themselves with joist hangers, 1/2" bolts, various other Simpson Strong-Ties, and structural and wood screws:
After that, we put up the framing for the 65° section. This was basically the same as for the 10° section, except that the forces here would be larger, so we sized up the structural elements and fasteners commensurately:
WALL·E 65° section: putting up stringers, cross-braces, and blocking; V tests it out
We put up a minimal vertical frame at the bottom of WALL·E for mounting the kicker board:
WALL·E bottom vertical kicker frame: just a few fasteners
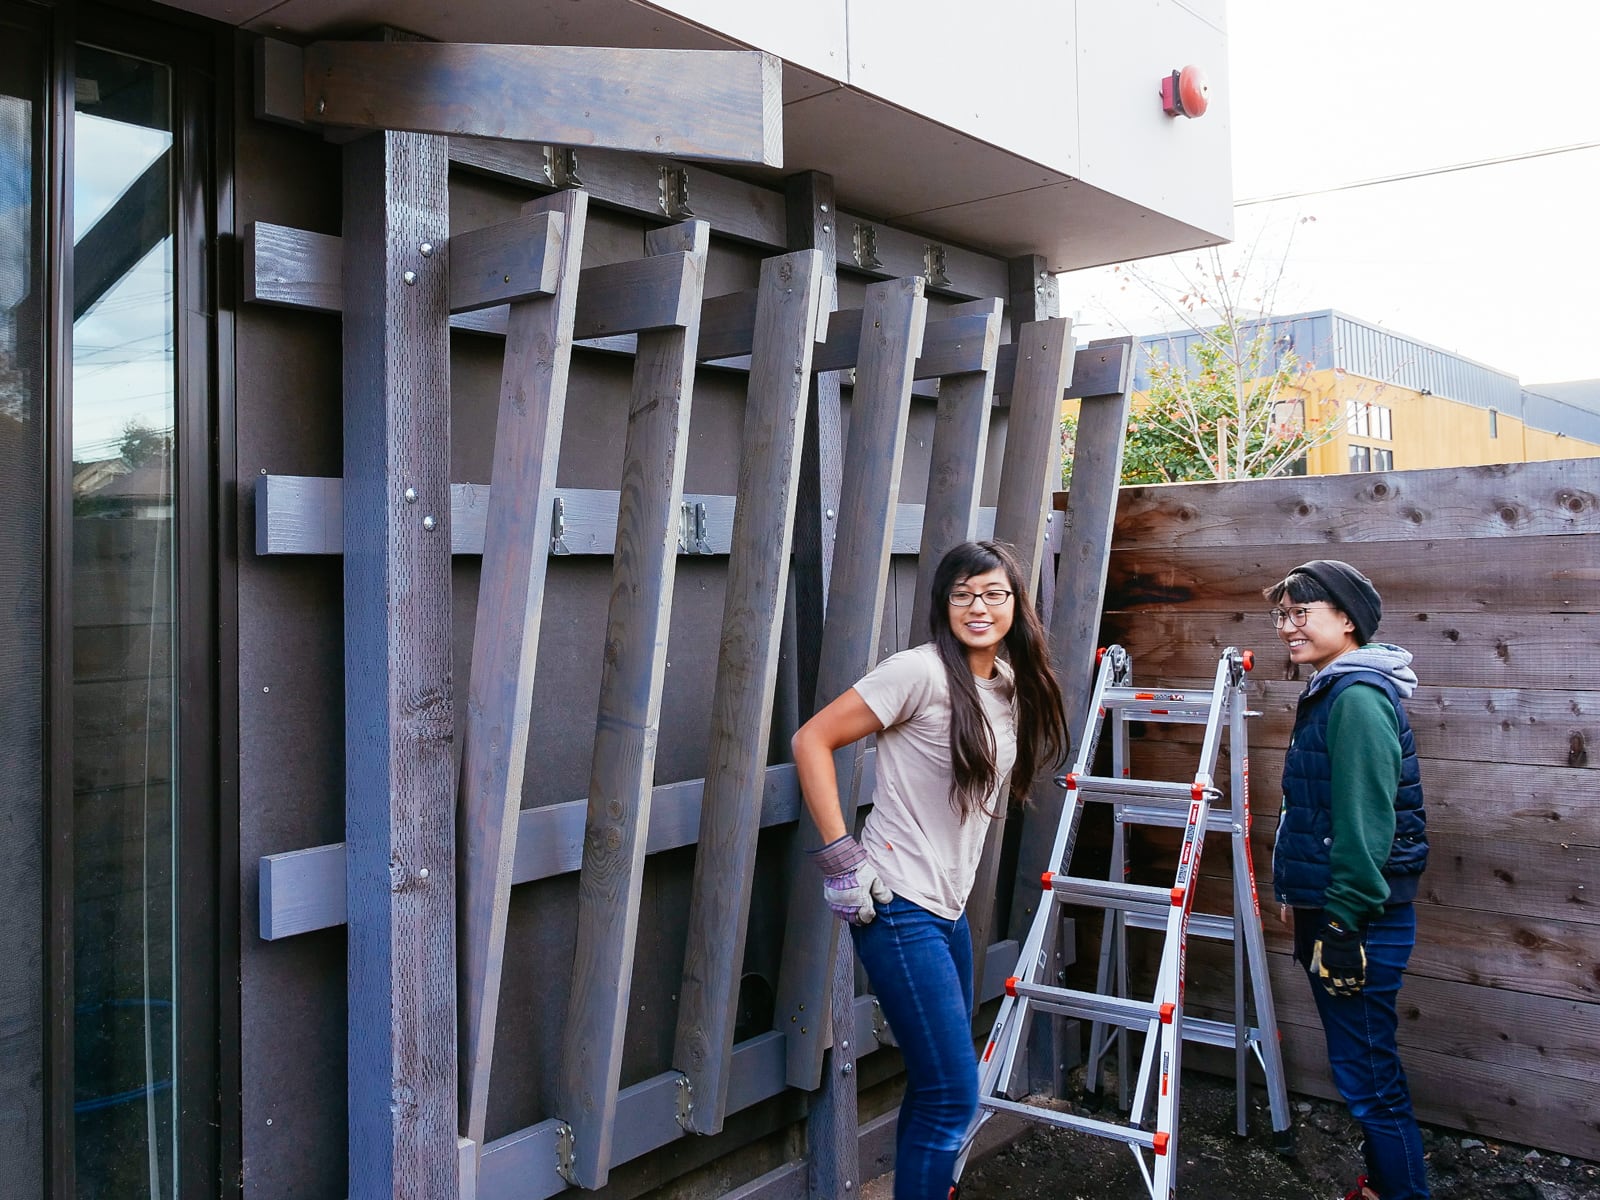
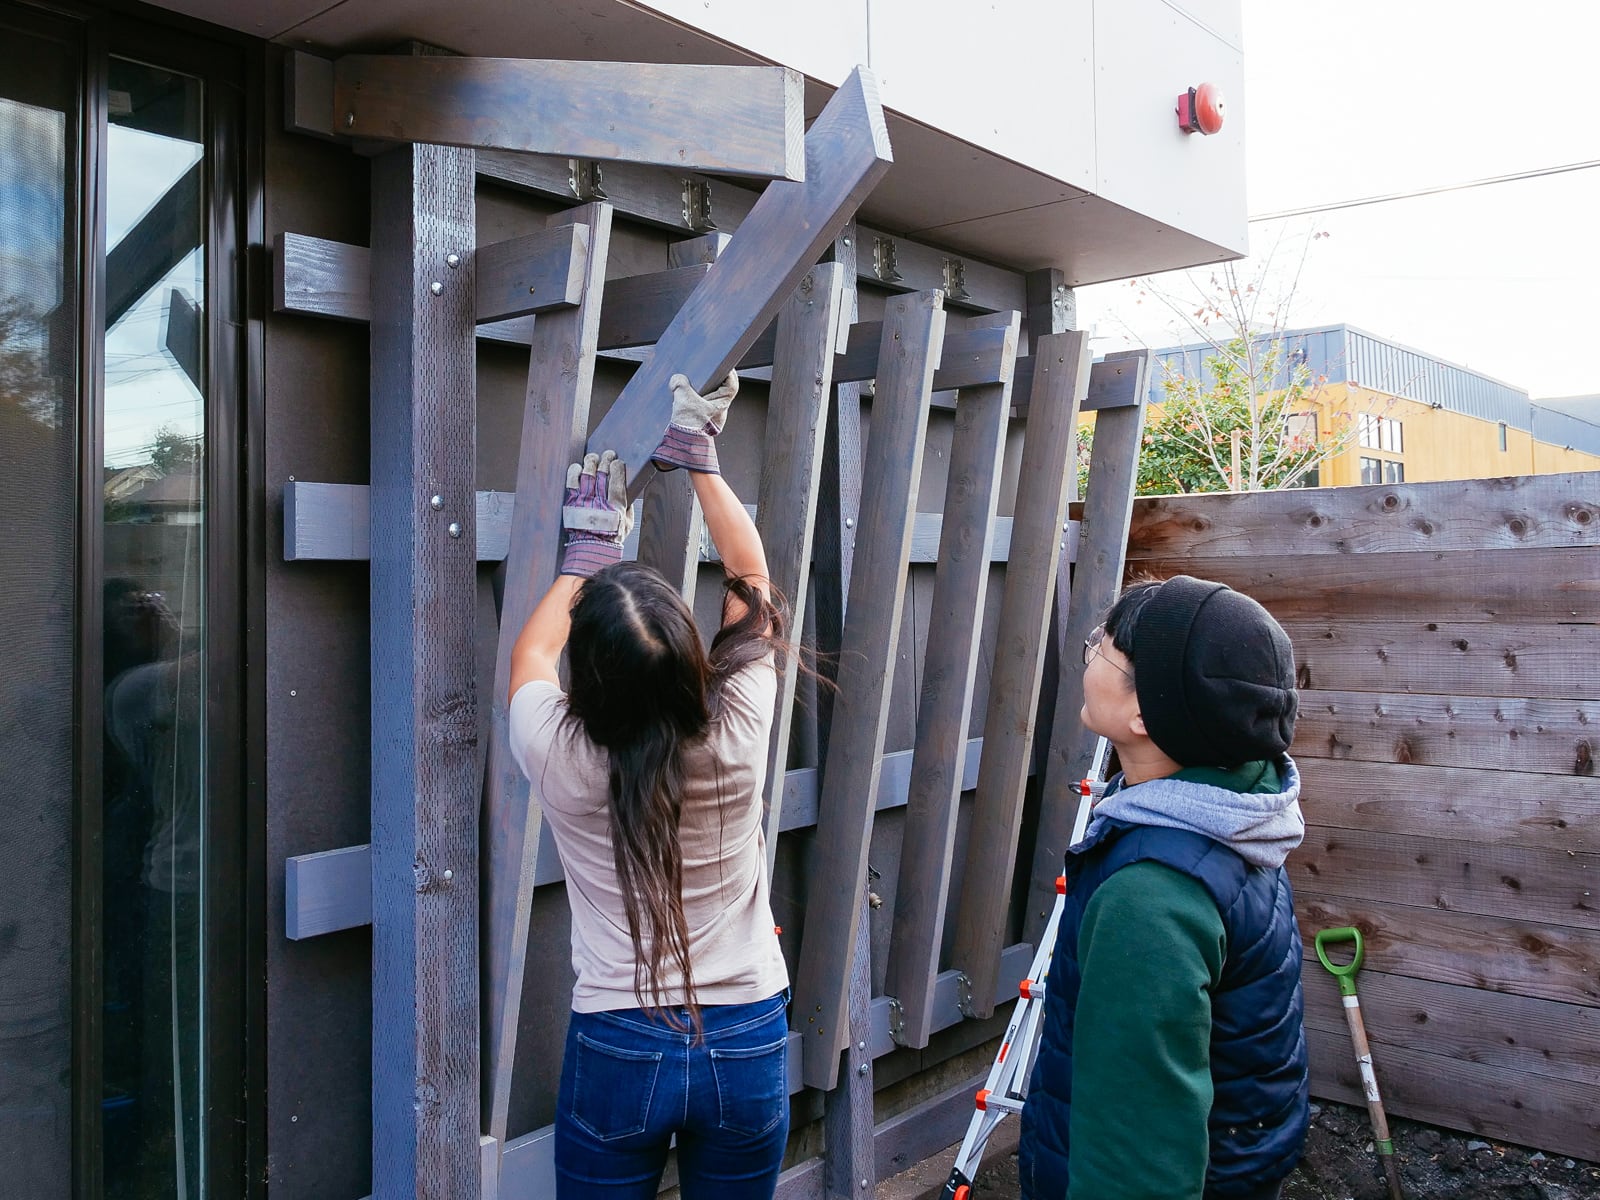
That was as far as we wanted to get with framing before putting in our last two support posts.
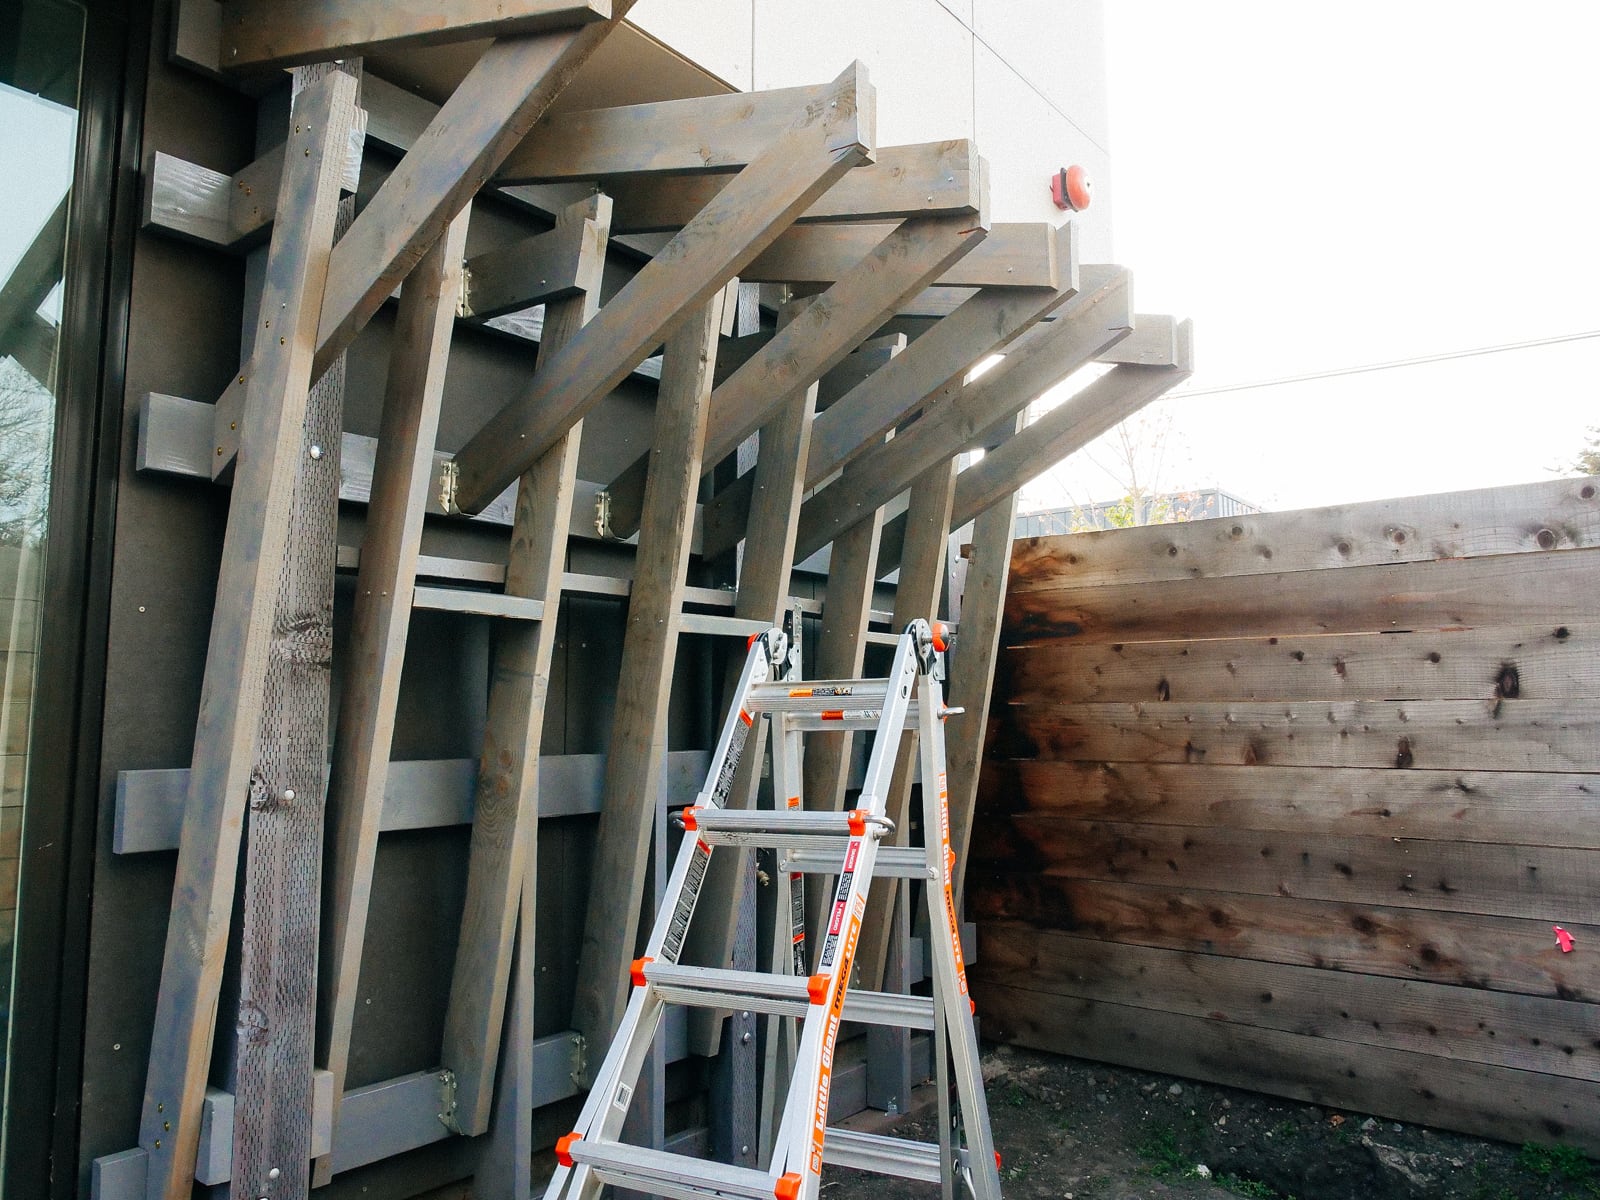
WALL·E after putting up 10° section frame, 65° section frame, and bottom vertical frame. Are we done yet?
Foundation
7. Setting the last two posts (in wall F)
The last two posts were one pressure-treated 6x6 (our longest post: 112" above ground, 42" below ground) to support WALL·E from the top and wall F, and one pressure-treated 4x4 for the right side of wall F. We used the same process as for the earlier three posts, but this time with some video:
Placing the fourth post, cutting the fifth post. Not pictured: an infinity of digging
Framing
8. Doing the framing for walls F and G
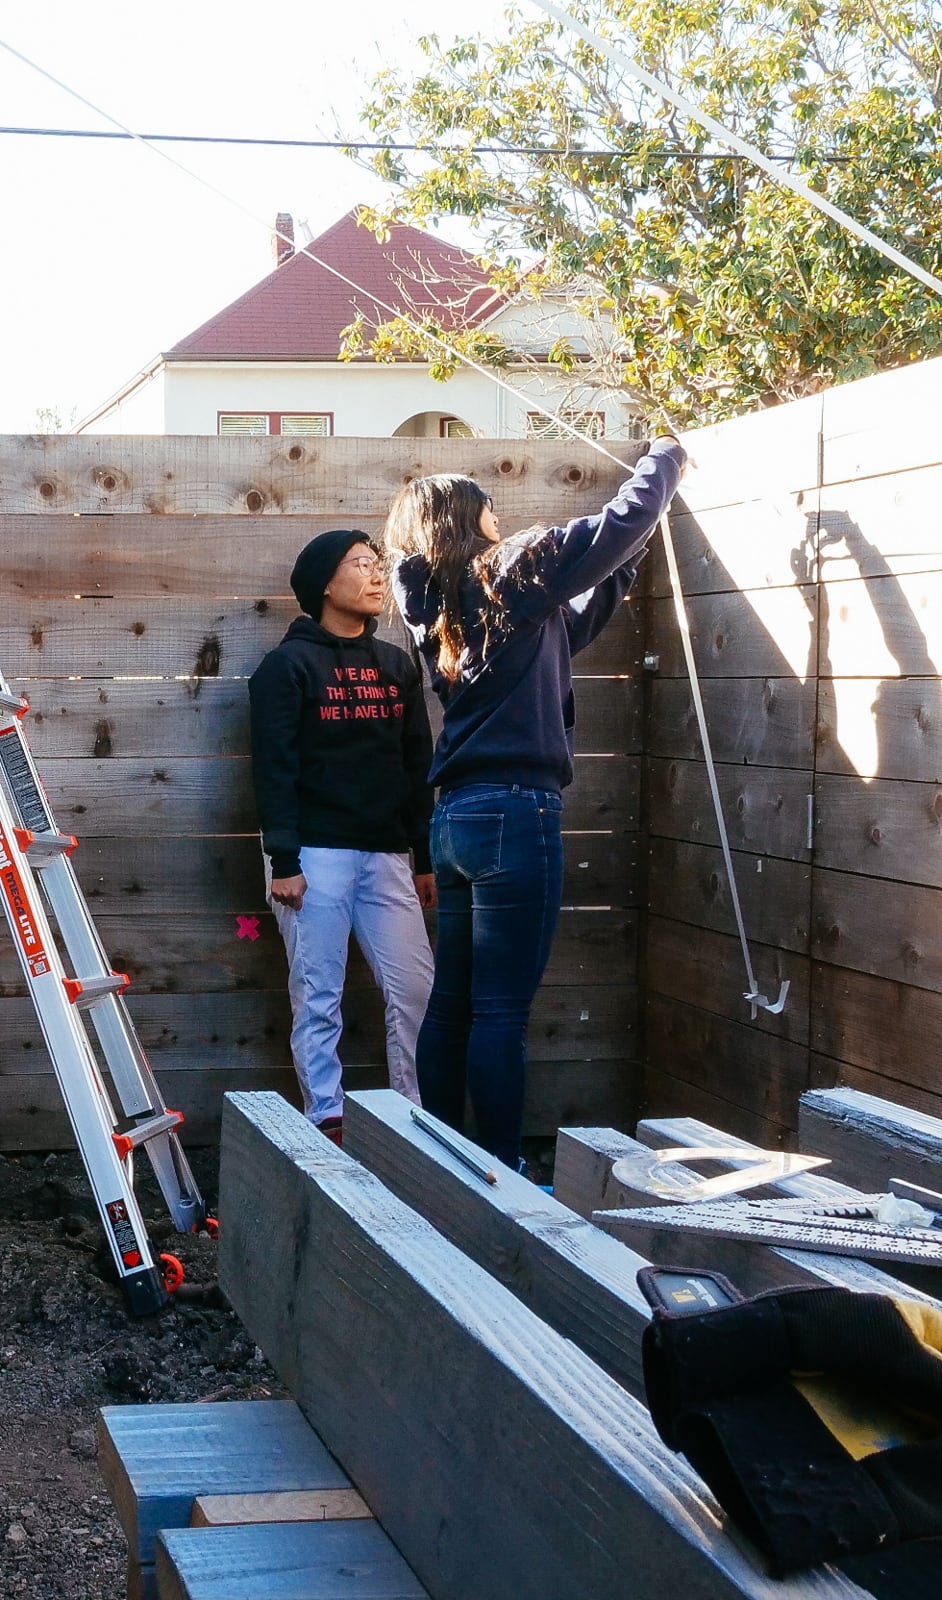
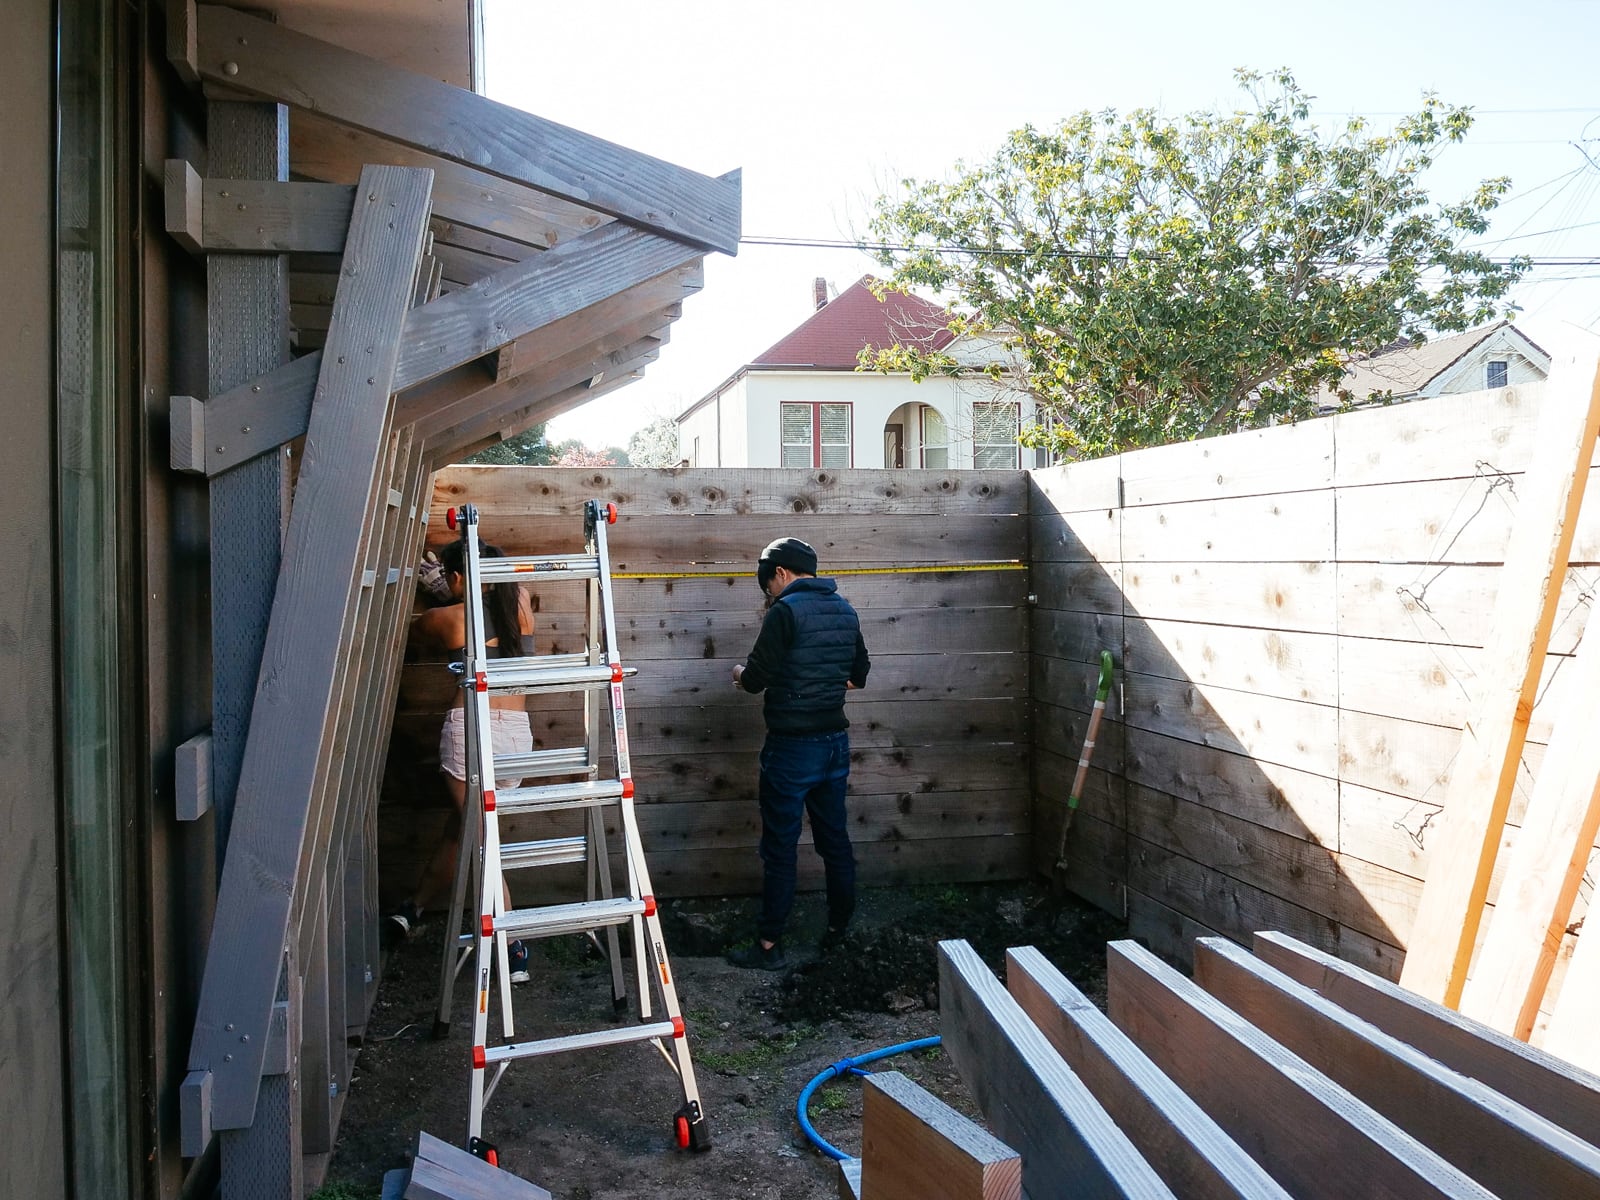
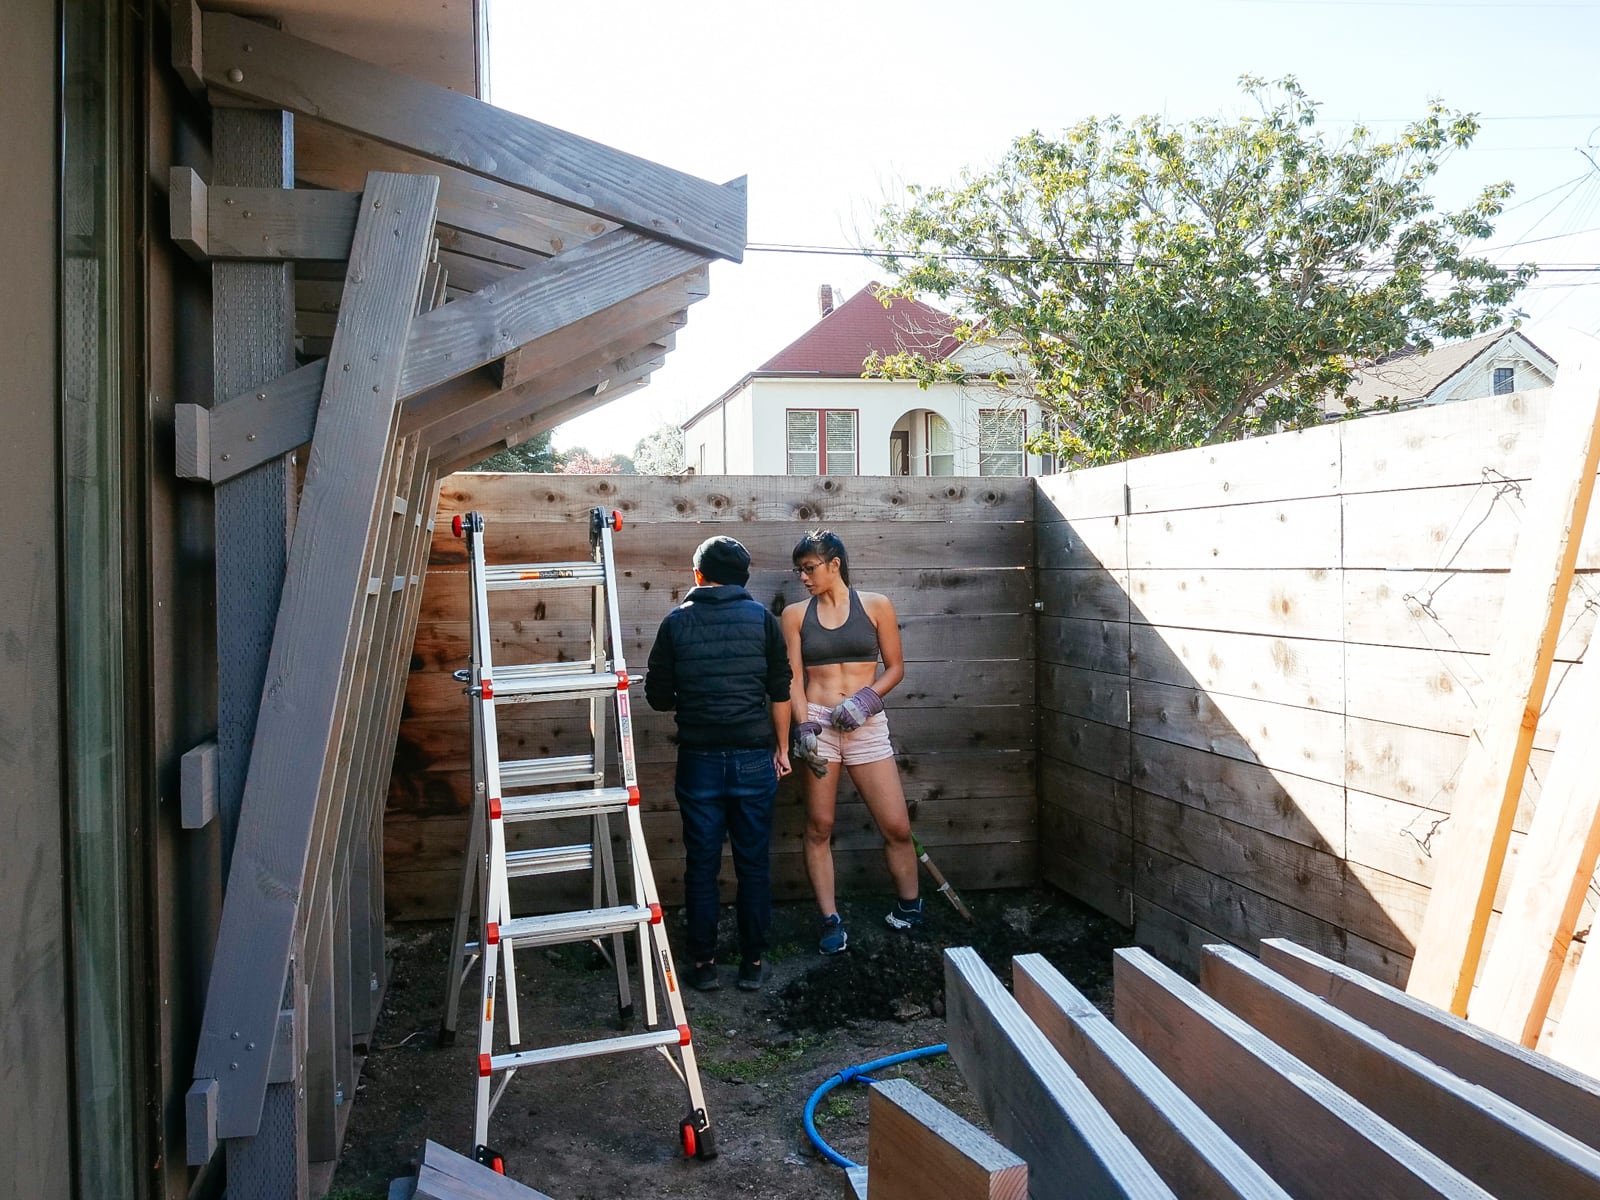
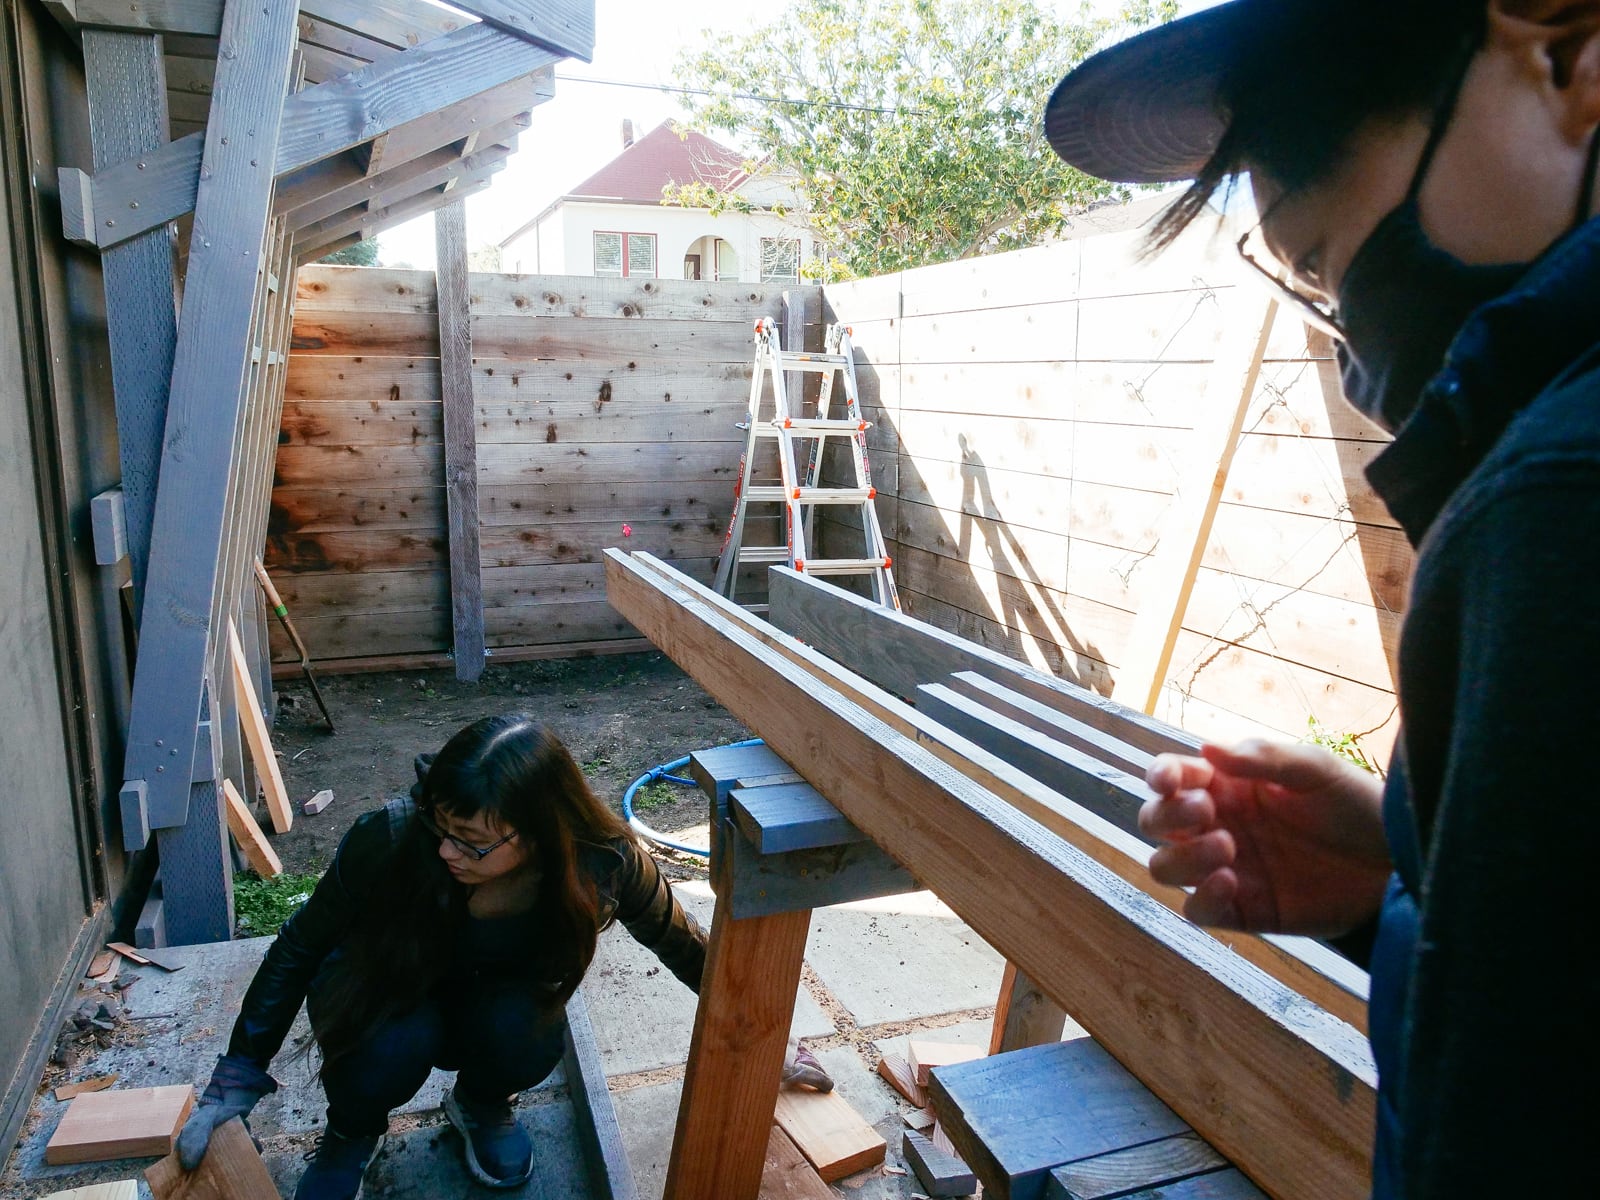
Framing up walls F and G was much more straightforward than WALL·E — these would be vertical walls, going up only to our fence line (about 6’). For wall G, we planned to use our existing fence posts (which were already concreted down 16") as our posts, adding only horizontal girts for bracing and mounting the climbing surface to.
First we had to remeasure and replan, to see if our original plan still made sense. On a second pass, we decided to cut the height of these two walls, to (1) block less sunlight, (2) not be such an eyesore for the neighbors, and (3) avoid digging any more post holes.
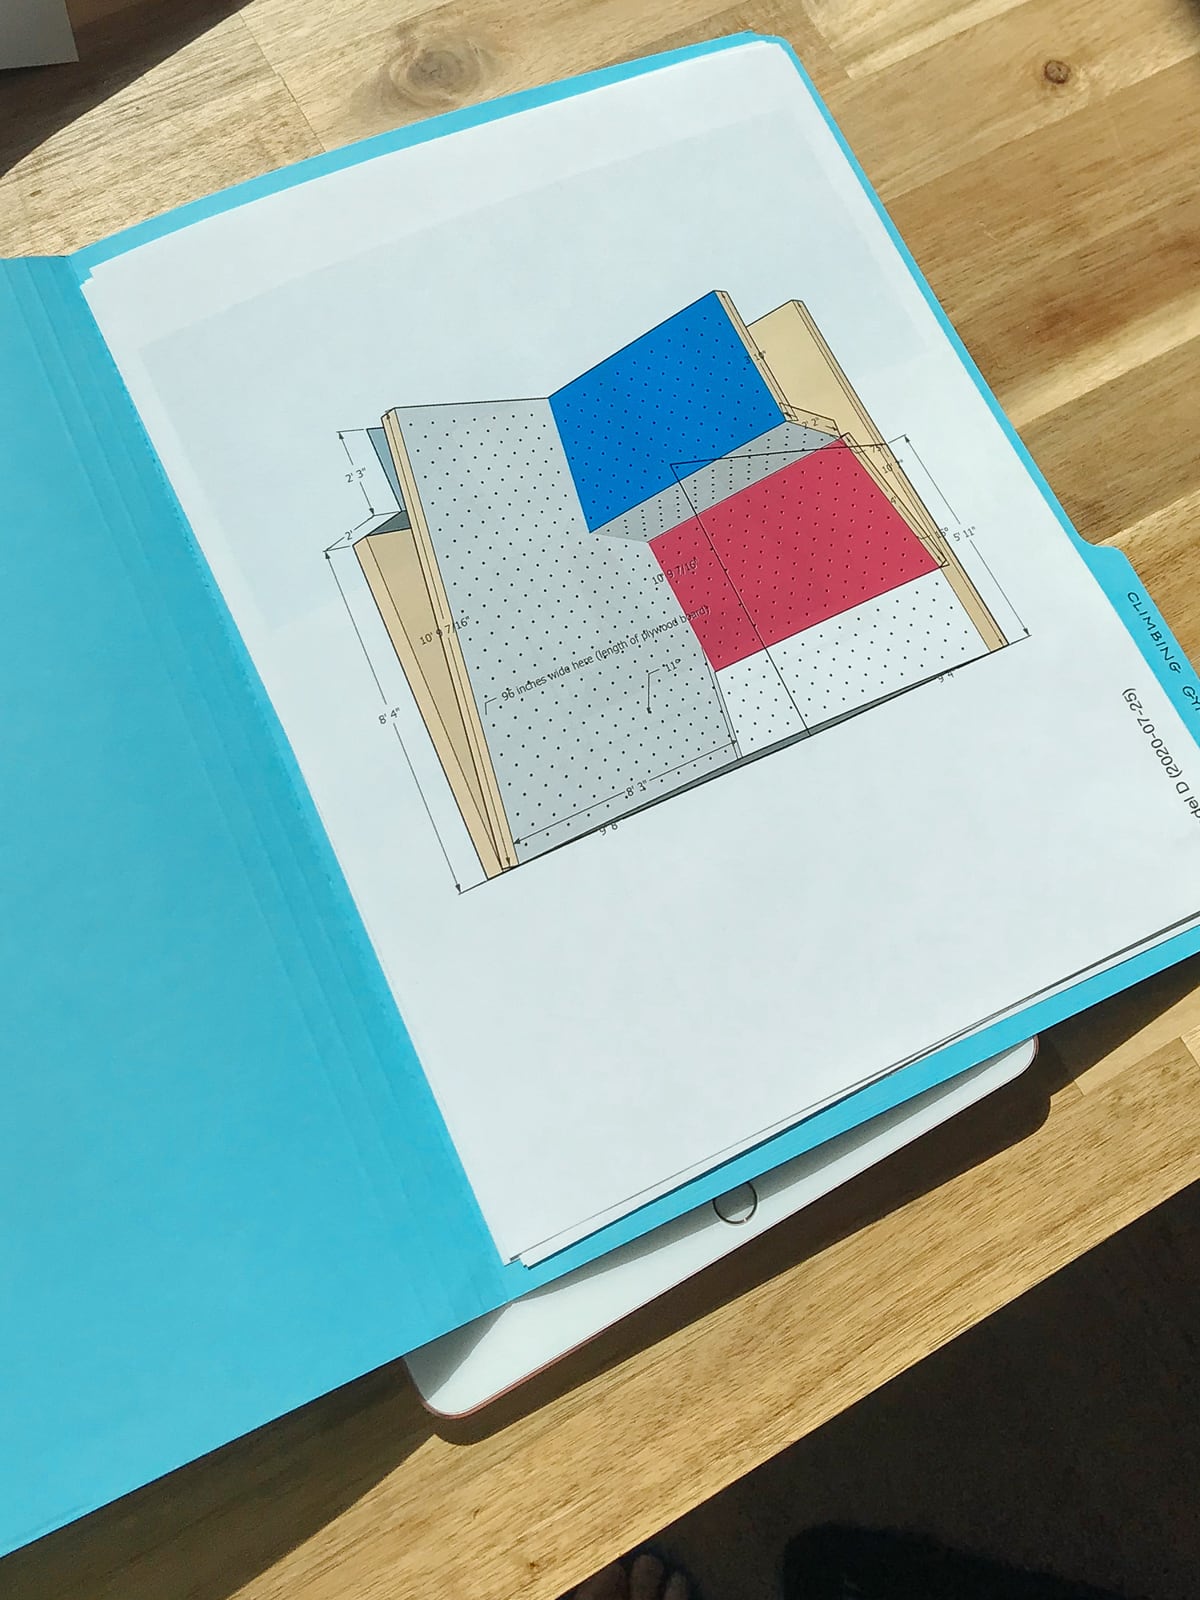
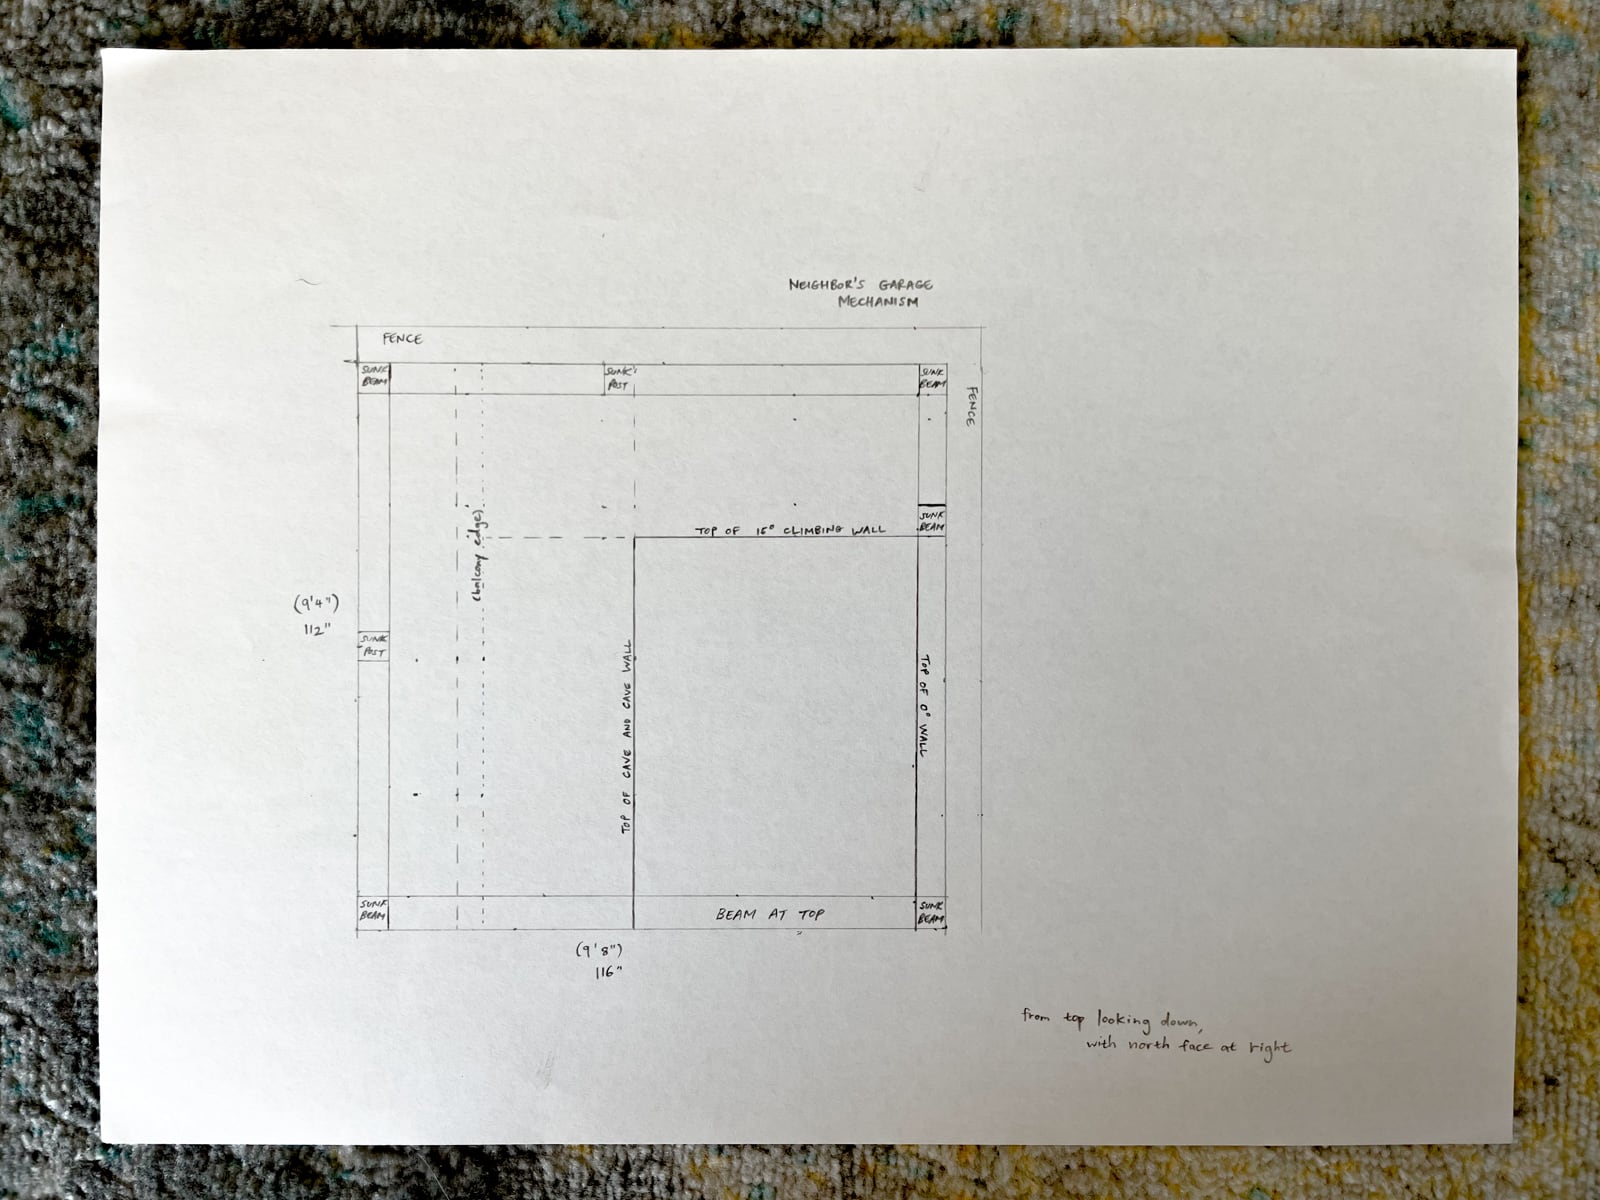
Walls F and G: original plans
Walls F and G: remeasuring and deciding to cut the tall side walls
For wall F (the vertical wall adjoining the cave wall), we put up a straightforward balloon frame in place using 2x6s, Simpson Strong-Ties, and some screws — a relief after WALL·E.
Wall F framing: painting and mounting
For wall G (a totally-vertical 16’-wide traverse wall), we cross-braced our 4x4 fenceposts with horizontal 2x6 girts attached with structural screws.
Wall G framing: just girts
9. Back to WALL·E: framing the topmost section
To put up the framing for the 0° vertical section at the top of WALL·E, we procrastinated for two weeks, decided we might never complete the project, then called in help from pro contractor team S and C. With them on the team it was a breeze and a joy.
WALL·E is finally framed?!
Phew. Framing complete. Next post: okay but what about the climbing part? (===, what’s the fastest way to mount 800 T-nuts?)
Ready for inspection
P.S.: references
Special thanks to jennsends and MattBangsWood for information, dispelling our distrust of YouTube (a little), and inspiration.
I’ve been trying to pick up the violin again, after 13 years of being pissed off about not being able to play. Sometimes joy is just defiance, a refusal to let the ghosts of loss or failure be the ones to tell the story. There’s only time moving inexorably on, carrying everything away, and all we can do is refuse, shove forward, stab on.
Things practiced:writing, being fallible and weak and vulnerable and embarrassing, trusting anything at all
Sometimes you get a run of days or even of weeks or months in which what you anticipate and what comes true live up to one another, delicious and impossibly expansive and taken for granted. I say often that I’m lucky and what I mean is that it’s terrifying.
Life is always despair juxtaposed with the purest possible light. All we have is what we will inevitably lose, and all we can do is refuse the dark outside together, for a while. No more dying okay let’s just agree.
Things practiced: dumb solipsism, self-indulgence, big ball of regret
My first memories of death were of my mother’s mother, then my father’s mother.
In Chinese culture there are strictly-defined rites around death and mourning:
the son breaks a vessel into a thousand pieces to proclaim his grief, the children compete to see who can weep most deeply.
Though juvenile and emotionally untutored I recognized the benefit then: it gives the bereft something to do.
I learned grief as a teenager, when a dear friend killed himself —
except I learned it improperly,
kept my thoughts to myself,
and placated my restless brain by letting it systematically dismantle all the relationships I’d had.
I convinced myself I was back to normal while growing gradually more mad;
time passed, and I left as soon as I could.
Which is to say: I’ve mostly dealt with grim things by placing them in a box and running away at full speed.
This has gotten me good at inconsequential things like brain dissection and numerical analysis but bad at handling emotional complexity.
So maybe I can start by writing something down.
Aimee was the one who taught me that even though our earliest experiences teach us who we are, the determined can transcend.
I was raped by three men pre-adulthood, people I knew: a cousin, a friend, a housemate.
Aimee was raped many more times than that, by a man who was closer and less escapable.
She fought back where I did not; she talked about it but I did not, not even to her — not because it was painful but because my experiences seemed pretty normal and I didn’t want to cheapen her experience, which had been abnormally brutal and cruel, by diluting it with mine.
When I was raped I discarded certain assumptions I had held about how the world worked and about how safe I was.
But Aimee saw her trauma as a tiny obstacle to be cleared, and once cleared an affirmation of her strength.
She always had a sense of the possible, which was admirable, and incredible.
What’s always seemed problematic is that the brave die, and yet we cowardly ones are still here.
Driving through Los Angeles, the landmarks I know best are still the ones from Aimee’s convalescence: hospital, hospital, pharmacy, cancer clinic; the readiest memories still those of sitting in freezing waiting rooms producing the insurance cards, putting them away, filling out paper forms, ad infinitum, uselessly, helplessly.
Maybe it shouldn’t have been a surprise that she was able to handle imminent expectation of death with grace and love and courage and personal sacrifice – but I was always surprised: at the equanimity with which she lost her long hair which she’d so prized, at her tolerance for pain, at her unflinching will to face hard truths.
Had there been a moment when she was afraid to die? I wasn’t willing to ask.
The problem is, as much as you’d like to, you can’t actually take someone else’s weakness or pain or fear.
There’s a time when you expect your life to always be full of new and shiny things, and there’s a day you realize that’s not how it’ll be at all. That what life really becomes is a thing made of losses, of prized things that were there and aren’t any more.
Grief is so uninteresting, I know; I can look at myself and scoff. I want people around me, I dread the moments of solitude; then I bore everyone until they leave, or talk nonsense about the fungibility of time, tradeoffs, undoing. The madness is fading somewhat but clarity doesn’t take its place.
I promised to protect her, she told me I could not. In the end she was right.
For whatever we lose(like a you or a me)
it's always ourselves we find in the sea
(from an e.e. cummings poem that autoplays in my head every time I picture the ocean, i.e. ~10,000× while coding this)
Despite being terrible at it, I find graphics programming pretty fun.
Building realistic 3D environments in real time blends physics and computer science—graphics programmers have to satisfy two conflicting objectives:
to simulate reality as accurately as possible,
while using fewer than 16 or 33 milliseconds to process each frame.
Modeling the ocean is a good example of a situation where tradeoffs are required.
Fluid dynamics is based around the Navier-Stokes equations, which are a set of nonlinear partial differential equations that describe the flow of viscous fluids.
Fully solving these equations numerically provides an exact model of the ocean,
but is computationally infeasible.
Instead, I tried to simulate an ocean scene using this approach:
1. Generate realistic water surface height fields to model waves, using empirical knowledge of ocean phenomena.
2. Account for optical processes acting on ocean water: reflection and refraction from a water surface, the color filtering behavior of ocean water, and maybe more-complex effects like caustics and godrays.
3. Render a realistic sky gradient using known properties of atmospheric scattering.
4. Think about computational-resource cost versus quality gained and simplify where possible.
Results so far (underwhelming but workable) (click):
Jamie xx’s new album In Colour is finally out, and it’s good.
Do you ever get that feeling,
when you’re up at 2 am and almost alone,
of being enveloped in something with maybe someone,
of melancholy becoming euphoric?
This album feels like that.
It’s dense and fleshed out, not downbeat and cryptic like the xx past — but still lonely, and lovely. Listen with good headphones.
And
Because I loved this album and its cover so much, I built an album-themed beat-detecting visualizer here:
(If the presets are unsatisfactory, drag and drop your own audio file onto the page.)
Thing practiced: documenting neat buildings so I don’t forget
I’ve always loved beautiful buildings, and New York as their apotheotic urban motherland. Cities (and humans) have to perpetually reinvent themselves to stay alive, and New York is the best example of this I know. There’s vast beauty in the uniformly-timeworn structures of Renaissance Florence or the Campidoglio, true — but a modern city needs more.
Architecture, as Vincent Scully says, is a conversation between generations.
What New York’s architecture shows us is that we can both safeguard the past and believe that today can be just-as-good or better.
I love the idea of capturing time, of places where time is a visible dimension. (Seems so démodé that we can live in space and videostream from Japanese mountaintops but still can’t travel in time.)
Lower Manhattan from Riverside Park, Hoboken (32 shots/34 minutes)
Downtown LA from Elysian Park (13 shots/19 minutes)
I’ve always felt appropriative making sushi, being neither Japanese nor highbrow; but I do love fish, the sea, and the idea of paying obeisance to fish and the sea. Notes:
Tools and things
Rolled sushi is forgiving: the ingredients are on the inside, so the pieces don’t need to be as visually perfect as in nigiri. This means you can get away with a non-fish-specific knife, as long as it’s sharp. Also helpful: a colander for rinsing rice, a sushi rolling mat, a rice spatula, and an automatic rice cooker.
Making the rice
Sushi rice is supposed to be a little chewier than plain white rice, so it needs to be cooked with less water than usual. For four sushi rolls, try 2 cups of rice and 2 1⁄3 cups of water.
Meanwhile, mix the vinegar: combine 3 T rice vinegar, 3 T sugar, and 1 T salt in a non-metallic bowl, then heat and stir until the sugar dissolves.
To make the rice shiny and chewy, you need to cool it as quickly as possible while mixing in the vinegar. Traditionally, this is done in a wide, shallow tub made of Japanese cypress, which absorbs excess moisture and speeds cooling. If you don’t have one (they’re pricey), you can use any wide, shallow, non-metal container. Try to use something that lets you spread the rice over the largest possible surface area to cool. As you spread out the rice, move the spatula horizontally through the grains to separate them while pouring in the vinegar mixture.
Prepping the other parts
Toast the seaweed over a hot surface for a few seconds, just until crisp.
To stop the rice from sticking to your hands later, mix up a bowl of “hand vinegar” to keep your fingers moist: 3 T water plus 1 T rice vinegar. If you like, mix up some spicy mayo: 3 parts Kewpie to 1 part Sriracha.
Cut up whatever ingredients you want to roll up (here: tuna, salmon, yellowtail, mango, papaya, cucumber, and avocado).
Normal rolling: Outside-out
Lay your rolling mat down on a clean, flat surface.
Lay the sheet of seaweed with its prettier side facing down.
Dip your fingers in the hand vinegar to keep the rice from sticking to you.
Spread the rice out evenly, leaving an empty strip at the far end.
Lay your ingredients across the rice, about a third of the way in.
Roll up the sushi, starting from the side closest to you. (I find it easiest to hold the ingredients with my fingertips while rolling upward with my thumbs.) Hold the mat around the formed roll for a few seconds to shape it.
Place the sushi on a cutting board with the seam at the bottom, and using a wet knife blade cut the roll in half and each half into fourths.
Alternative rolling: Inside-out
Wrap the mat in plastic wrap before you start, so that the rice doesn’t stick. Use half a sheet of seaweed instead of a full sheet.
Spread the rice out the same way, but don’t leave any empty strip.
Flip the rice-and-seaweed sheet over, then place your filling on top.
Roll the sheet up, add some white or black sesame seeds if desired, and cut into eighths.
Scheming humans have always faced a basic problem: how can we communicate securely in the presence of adversaries?
Since ancient times, the art of secret communication, or cryptography, has been crucial for governments and the military.
But today cryptography affects us all.
As messages are increasingly transmitted through public channels, cryptography prevents malicious interceptors from using our information against us.
The evolution of cryptography can be split into two eras by the invention of asymmetric ciphers in the 1970s.
Historically, encrypting and decrypting a message had been symmetric processes — that is, unscrambling the message required knowing the key that had been used to scramble it.
This begat the problem of key distribution: before sending a secret message, the sender would have to take great precautions to transport her encryption key safely to the recipient.
In asymmetric cryptography, the keys used to encrypt and to decrypt a message are different.
This means that the recipient can make his encryption key public, as long as he keeps his decryption key private.
What we need for an asymmetric-cryptography protocol to work is a trapdoor one-way function.
This is the mathematical equivalent of a physical lock: easy to process in one direction (snapping the lock closed), but hard to undo (opening the lock), unless we have a special secret (the key).
In RSA – the first public-key cryptosystem, and still the most popular – the trapdoor function exploits mathematical features of modular exponentiation, prime numbers, and integer factorization.
Let’s throw together a toy implementation in Scala.
Helpful math functions
A number is prime if it has exactly two divisors: 1 and itself. Sometimes it’s useful to have a list of small primes, so we need a Sieve of Eratosthenes:
// Sieves a stream of Ints
defsieve(s:Stream[Int]):Stream[Int]=s.head#::sieve(s.tail.filter(_%s.head!=0))// All primes as a lazy sequence
valprimes=sieve(Stream.from(2))
What we really want, though, is large primes – ones higher than 2500.
To get a prime that large, we can’t sieve up from 1; instead, we find a prime by taking a random number, checking if it’s probably prime, and repeating if necessary.
The primality test of choice in real systems is Miller-Rabin, but we’ll use Solovay-Strassen to keep things simple:
// Ints won't fit these
importmath.BigInt// Euclid's GCD algorithm
defgcd(a:BigInt,b:BigInt):BigInt=if(b==0)aelsegcd(b,a%b)// Computes the Jacobi symbol (needed for our test)
defjacobi(a:BigInt,n:BigInt):BigInt={if(a==1)1elseif(n==1)1elseif(gcd(a,n)!=1)0elseif(a==2&&(n%8==1||n%8==7))1elseif(a==2&&(n%8==3||n%8==5))-1elseif(a>n)jacobi(a%n,n)elseif(a%2==0)jacobi(a/2,n)*jacobi(2,n)elseif(n%2==0)jacobi(a,n/2)*jacobi(a,2)elseif((((a-1)*(n-1))/4)%2==0)jacobi(n,a)elsejacobi(n,a)*-1}// Runs the Solovay-Strassen test for i iterations
defisPrime(n:BigInt,i:Int):Boolean={if(i<=0)trueelseif(n%2==0&&n!=2)falseelse{vala=(random(n.bitLength)%(n-1))+1valj=jacobi(a,n)valexp=a.modPow((n-1)/2,n)if(j==0||j%n!=exp)falseelseisPrime(n,i-1)}}
Finally, the main reason we’re interested in primes is so we can do calculations modulo our prime. To do this, we need the Extended Euclidean algorithm:
// Returns (x, y) such that a*x + b*y = gcd(a, b)
defextendedGcd(a:BigInt,b:BigInt):(BigInt,BigInt)={if(a%b==0)(0,1)else{val(x,y)=extendedGcd(b,a%b)(y,x-y*(a/b))}}
The RSA system
An asymmetric encryption system has two parts: a public key and a private key.
In theory, encrypting a message with the public key can only be reversed by decrypting with the private key.
In RSA, we encrypt a message by computing msge mod n, using the publicly-known information n and e.
This is the crux of RSA’s security: modular exponentiation is easy to do, but exceedingly hard to undo.
To make it possible to retrieve the message from the ciphertext, we build a trapdoor into our encryption routine by making n the product of two large primes p and q (which we keep private).
We can then reconstruct the message using a calculated decryption exponent d.
To choose the right decryption exponent, we first need a value φ based on n’s factorization such that xφ(p, q) = 1. Luckily, Euler’s totient function gives us just this:
// Euler's totient phi, where p and q are n's prime factors
defphi(p:BigInt,q:BigInt):BigInt=(p-1)*(q-1)
As long as we choose our public exponent e so that it doesn’t share a common factor with the totient φ, we can decrypt using the inverse of e mod φ:
// A legal (public) exponent has to
// (1) be between 1 and the totient
// (2) have no non-1 factors in common with the totient
defisLegalExponent(e:BigInt,p:BigInt,q:BigInt):Boolean=e>1&&e<phi(p,q)&&gcd(e,phi(p,q))==1// Returns b such that a*b = 1 mod n
defmodularInverse(a:BigInt,n:BigInt):BigInt={val(x,_)=extendedGcd(a,n)x%n}// Our decryption exponent: the inverse of e mod phi
defd(e:BigInt,p:BigInt,q:BigInt)=modularInverse(e,phi(p,q))
Encryption and decryption are now trivial:
// Takes a message m and public information e and n
defencrypt(m:BigInt,e:BigInt,n:BigInt):BigInt=m.modPow(e,n)// Takes a ciphertext c, private exponent d, and public information n
defdecrypt(c:BigInt,d:BigInt,n:BigInt):BigInt=c.modPow(d,n)
(In reality, RSA is never used to encrypt messages — for n to be large enough to encode any reasonable length of message, the computing resources required for even the “easy” process of encryption are prohibitively high. Instead, RSA is used to safely deliver symmetric keys, which can then be used with block or stream ciphers to encrypt and decrypt large messages.)


")
")
")
")
")
")
")
")
")
")

 )
)

 knife")


")
")
")
")
")